How to create Contact Posters in iOS 17
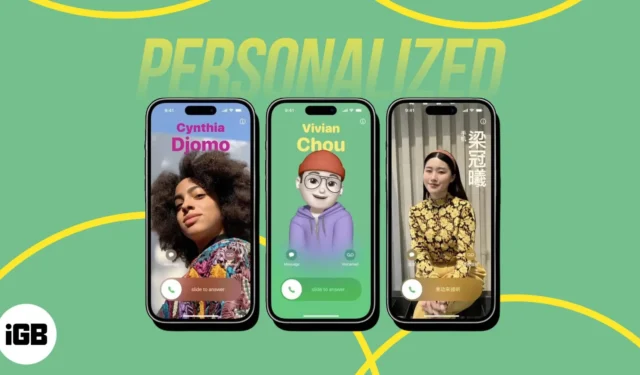
Apple has yet again amazed us with a series of new features confined within iOS 17. One such feature is the ability to personalize Contact Photos and Posters that reflect the unique personality of the user. This innovative feature allows you to take your call experience to a whole new level. Without any further ado, let’s know how to set up and use Contact Photo and Poster in iOS 17.
- How to make Contact Poster in iOS 17
- How to set up Contact Photo in iOS 17
- How to make Contact Posters for other contacts on iPhone in iOS 17
- How to edit, add, or switch contact posters on iPhone
- How to delete saved Contact Photo or Poster in iOS 17
How to make Contact Poster in iOS 17
- Launch the Phone app → Access the Contacts menu.
- Select My Card to proceed.
- Tap the Contact Photo & Poster option.
- Hit Continue if promoted → Select Edit.
- If you are setting up Contact Photo for the first time, tap Customize.
- When prompted, choose either Contact Photo or Poster.
I have selected Poster. - Here, you can set a desired look for your Contact Photo with a series of options to choose from, such as:
- Camera: Allows you to click a live photo and save the same as Contact Photo or Poster.
- Photos: This option enables you to use a photo of your choice from the device gallery.
- Memoji: Select a memoji of your choice from the wide range of preinstalled avatars, or else create something more personal accordingly.
- Monogram: Add a two-character text with a style that suits your preference.
- I have demonstrated the process by adding a Photo. So, take note that a few steps may vary according to the option you proceed with.
- Once you’ve selected a Photo of your choice, tap the card Title to curate a text style.
- Alter the Font & Color of the Poster Title as you desire.
- Once ready, hit the close icon to exit the interface.
- If you wish to align the image, simply Pinch to Crop.
- You can further slide through a series of Background effects.
- Navigate through the options by swiping right to left.
- You can choose from a variety of colors for your preferred background by tapping the water drop icon.
- Once ready, select Done from the top-right corner.
- When the Preview menu appears, get a gist of your creation.
- If everything is set to your desires, hit Continue.
- For those who do not wish to save the same image as your Contact Photo, tap Skip.
- As you land on the homepage of your Contact Card, toggle on the Name & Photo Sharing option.
- Select an action for Share Automatically among the following:
- Always Ask: It will require your permission to run.
- Contacts Only: You can seamlessly share your card with saved contacts.
- And your personalized poster is ready!
How to set up Contact Photo in iOS 17
Now that you have a complete understanding of designing a personalized contact poster on iPhone, let’s go look at another new iOS 17 feature – the steps of creating a Contact Photo as well. This can be accomplished in two ways:
From Contact Poster
If you’ve meticulously followed steps 1-21 from above and wish to save the Contact Photo as well, then:
- Tap the Crop icon to set the image in the respective region.
- Select Choose to save your preference.
- Pick a template that suits your preference → Tap Done.
- Now select Continue to proceed.
It’s that simple.
Create Contact Photo (without Contact Poster)
If you’re someone who only wishes to create a Contact Photo, this section is dedicated to you:
- Go to the Contact Photo & Poster option, as discussed above.
- Tap Edit.
- If you contain an existing poster, select Customize to make changes.
- Or else you can tap Create New.
- However, remember to select the Contact Photo option when prompted.
- Now, simply follow the on-screen instructions just like we did before.
- A few steps may vary based on your preferences, but the process remains the same.
How to make Contact Posters for other contacts on iPhone in iOS 17
There is a high chance that the majority of your saved contacts did not use this amazing customization feature in iOS 17. Either they’re an Android devotee or simply too lazy to get the task done.
But don’t you worry, you can do it for your Phone app. By doing so, every time the contact pops up on your screen, you’ll see an image you have chosen!
- Simply access a contact of your choice in the Phone app.
- Tap the Contact Photo & Poster option.
- Select the Customize option and choose among Contact Photo or Poster.
You can also design both simultaneously. - Now, choose among the Camera, Photos, Memoji, and Monogram options.
I’m sure the next steps will be a piece of cake for you by now. In case of doubt, don’t hesitate to take a look at the steps outlined above.
How to edit, add, or switch contact posters on iPhone
Now that you’re well-versed with the nooks and crooks of this feature, you can set up one or more Contact Photos and Posters in iOS 17 accordingly. To further enhance your user experience, let’s also explore the additional nuances.
- Launch the Phone app.
- Go to Contacts → User Card.
- Access the Contact Photo & Poster option.
- Tap Edit to proceed.
- Choose the Create New option or tap the (+) icon to develop a new template.
- If you wish to edit an existing one, select Customize under the existing template.
- Pick among Contact Photo or Poster option.
- Now you can edit the contact photo as you like.
- Once ready, select Done → Continue → Continue.
- Following the same idea, if you’ve multiple templates available, simply tap the one you like.
These options are just the tip of the iceberg. When it comes to unleashing creativity, the sky is the limit. So, play around and discover your unique style.
How to delete saved Contact Photo or Poster in iOS 17
With such an amazing feature at your disposal, it’s understandable that you get carried away and may create several templates. But you can take control of this wave by removing some of the templates that you’re never going to use.
- Access the Contacts menu in the Phone app → Select My Card → Contact Photo & Poster.
- Simply swipe up on a template you seek to delete.
- Tap the Bin icon → Delete when prompted.
- Now, hit Done to conclude the process.
FAQ
Why is my Contact Poster not working?
There are several reasons that could hurt the functioning of Contact Photo and Poster. First, ensure you have updated your device to iOS 17, and go through our detailed guide on how to fix Contact Poster issues.
Get creative with calls!
As you’ve unlocked a new power of personalization, it’s time to connect with your loved ones in a more personal and engaging way. By creating customized contact photos or posters in iOS 17, you have the ability to transform your contact list into a visual masterpiece.
Thank you for reading. Do let us know what you think of this feature in the comments.


コメントを残す