
自動檢測 Windows 11/10 中的 LAN 設置
這篇文章將展示如何讓您的 Windows 計算機自動檢測 LAN 設置。配置 LAN 設置對於確保無縫網絡連接至關重要。這樣做可以確保您的設備輕鬆與網絡通信,優化性能並最大限度地減少連接錯誤。繼續閱讀這篇文章以了解如何做到這一點。

如何在 Windows 中自動檢測 LAN 設置?
請按照以下步驟啟用 LAN 設置的自動檢測:

- 按Windows 鍵 + I打開“設置”。
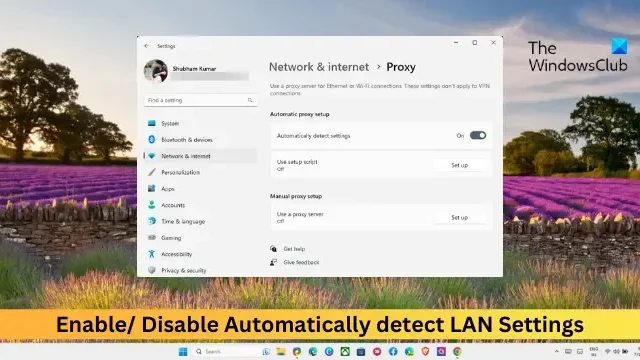
- 導航到網絡和 Internet > 代理。
- 在“代理”部分,您將找到一個標有“自動檢測設置”的選項;切換開關以啟用此選項。
禁用自動檢測代理設置
現在我們已經啟用了自動檢測代理設置選項,讓我們看看如何使用 GPO 和註冊表編輯器禁用它:
禁用使用 GPO 自動檢測代理設置
- 打開Windows Server 上的組策略管理。
- 導航到以下路徑:計算機配置 > 管理模板 > Windows 組件 > Internet Explorer
- 雙擊右側窗格中的自動檢測設置。
- 選擇“禁用”選項,然後單擊“確定”保存更改。
在 Windows 中禁用使用註冊表編輯器自動檢測代理設置

- 按“開始”,搜索regedit,然後按Enter。
- 註冊表編輯器打開後,導航到以下路徑:
HKEY_CURRENT_USER\Software\Microsoft\Windows\CurrentVersion\Internet Settings - 雙擊右側窗格中的“自動檢測”並將“值數據”設置為 0。如果沒有這樣的鍵,請創建一個新的DWORD(32 位)值並將其命名為AutoDetect。
- 這將關閉自動代理檢測。
- 單擊“確定”保存更改。
如何自動檢測 LAN 設置?
要啟用 LAN 設置的自動檢測,請打開 Internet 選項 > 連接 > LAN 設置。在這裡,確保自動檢測設置選項已啟用。
如何啟用註冊表中的自動檢測設置?
為此,請打開註冊表編輯器並導航到此路徑:HKEY_CURRENT_USER\Software\Microsoft\Windows\CurrentVersion\Internet Settings。雙擊 AutoDetect 鍵並將數值數據設置為 0。


發佈留言