
How to enable Windows Sandbox on Windows 11, 10
- To enable Windows Sandbox, open “Windows Features,” check “Windows Sandbox,” click “OK,” and restart the computer.
- You can also enable the feature with commands using Command Prompt and PowerShell.
On Windows 11 (and 10), “Windows Sandbox” is a minimal installation of Windows isolated from the main installation that allows you to run untrusted applications without exposing your device.
Sandbox is available on the Pro and Enterprise editions of Windows, and it uses Microsoft’s Hyper-V technology to create a disposable lightweight virtual machine on-demand to run a separate kernel that separates the Windows Sandbox session from the host.
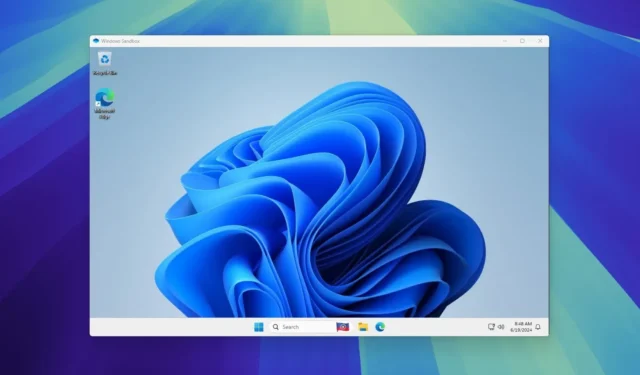
In other words, this is a small installation of Windows 11 (or Windows 10) of just around 100MB, enough to run the desktop environment and test applications. You can even copy and paste files from the host to the isolated environment. Once you finish testing the application, closing the feature will delete the Sandbox environment, which means that every time you start the feature, you will start with a fresh install of Windows 11.
Windows Sandbox requires virtualization in the Unified Extensible Firmware Interface (UEFI) on Windows 11 or 10 or Basic Input/Output System (BIOS) on Windows 10 before you can use the feature. You can use these instructions to enable hardware virtualization in the motherboard before proceeding with the steps below.
In this guide, I will teach you the steps to enable Windows Sandbox on Windows.
- Enable Windows Sandbox from Windows Features
- Enable Windows Sandbox from PowerShell
- Enable Windows Sandbox from Command Prompt
Enable Windows Sandbox from Windows Features
To enable “Windows Sandbox” to run untrusted apps on Windows 11 (or 10), use these steps:
-
Open Start on Windows.
-
Search for Turn Windows features on or off and click the top result to open the experience.
-
Check the Windows Sandbox option.

-
Click the OK button.
-
Click the Restart now button.
After you complete the steps, you can start the app from the Start menu.
If you want to disable the feature, you can use the same instructions, but in step 3, clear the option.
Enable Windows Sandbox from PowerShell
To enable Windows Sandbox with PowerShell commands, use these steps:
-
Open Start.
-
Search for PowerShell, right-click the top result, and select the Run administrator option.
-
Type the following command to enable Sandbox users and press Enter:
Enable-WindowsOptionalFeature -Online -FeatureName "Containers-DisposableClientVM"-All

-
Type “Y” and press enter to restart the computer
Once you complete the steps, the feature will be enabled and ready from the Start menu.
Se quiser desfazer a alteração, você pode usar as mesmas instruções, mas na etapa 3 , execute o Disable-WindowsOptionalFeature -Online -FeatureName "Containers-DisposableClientVM"comando.
Habilitar o Windows Sandbox no prompt de comando
Para ativar o Windows Sandbox com comandos do prompt de comando, siga estas etapas:
-
Abra Iniciar .
-
Pesquise por Prompt de Comando , clique com o botão direito do mouse no resultado superior e selecione a opção Executar administrador .
-
Digite o seguinte comando para habilitar o Windows Sandbox e pressione Enter :
Dism /online /Enable-Feature /FeatureName:"Containers-DisposableClientVM"-All

-
Digite “Y” e pressione Enter para reiniciar o computador
Depois de concluir as etapas, você pode começar a usar o Windows Sandbox para testar aplicativos e visitar sites não confiáveis sem afetar a instalação principal.
Se quiser desfazer a alteração, você pode usar as mesmas instruções, mas na etapa 3 , execute o Dism /online /Disable-Feature /FeatureName:"Containers-DisposableClientVM"comando.
Para começar, abra o Windows Sandbox no menu Iniciar e, em seguida, será apresentado um ambiente de área de trabalho normal do Windows, onde você pode instalar e executar aplicativos não confiáveis sem afetar a instalação atual. Ao terminar de fechar o aplicativo, você excluirá toda a máquina virtual e tudo o que instalou.
Atualização em 19 de junho de 2024: Este guia foi atualizado para garantir a precisão e refletir as alterações no processo.


Deixe um comentário