Spell check not working in Microsoft Edge

Microsoft Edge has a built-in spell check that highlights the misspelled words while writing. However, some users found the Spell check not working in Microsoft Edge. If you also experience such a problem in Microsoft Edge, you can use the solutions provided in this article.

Spell check not working in Microsoft Edge
If the Spell check is not working in Microsoft Edge on your system, use these fixes to resolve the issue.
- Check the Writing assistance settings in Edge
- Add your preferred language
- Clear cache and cookies
- Reset Edge Settings to default
- Install a third-party extension
Let’s see all these fixes in detail.
1] Check the Writing assistance settings in Edge
The first step that you should do is check the settings of Writing assistance in Edge. Microsoft Edge writing assistance includes the following two types of Editors:
- Microsoft Editor
- Basic editor
The Basic editor provides basic spell-checking assistance, whereas the Microsoft Editor provides enhanced grammar, style, and spelling suggestions. That’s why Microsoft Editor is recommended.
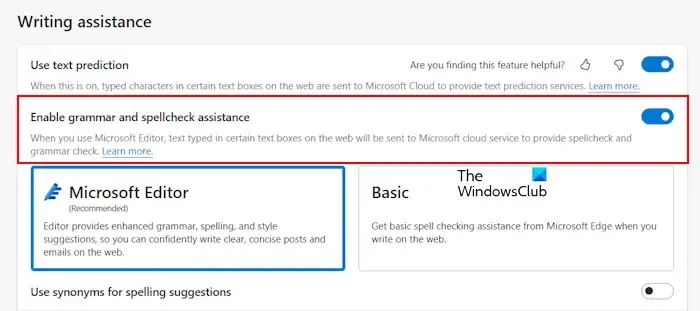
If the Spellcheck assistance is turned off, the Spellcheck will not work in Edge. Follow the steps written below:
- Open Microsoft Edge.
- Click on the three dots on the top right side and select Settings.
- Select the Languages category from the left side.
- Turn on the “Enable grammar and spellcheck assistance” button.
- Select the recommended Microsoft Editor for best results.
Relaunch Edge and see if the problem is fixed.
2] Add your preferred language
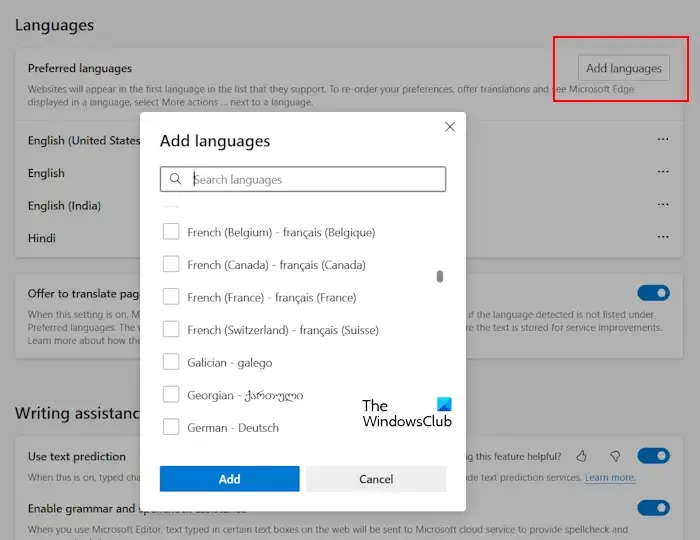
Your language should also be added to Microsoft Edge Spellcheck. Use the following steps to add your language to Microsoft Edge Spellcheck.
- Open Edge.
- Open its Settings.
- Select Languages.
- If your preferred language is not available under the Languages section, click Add languages.
- Select your language from the list and click Add.
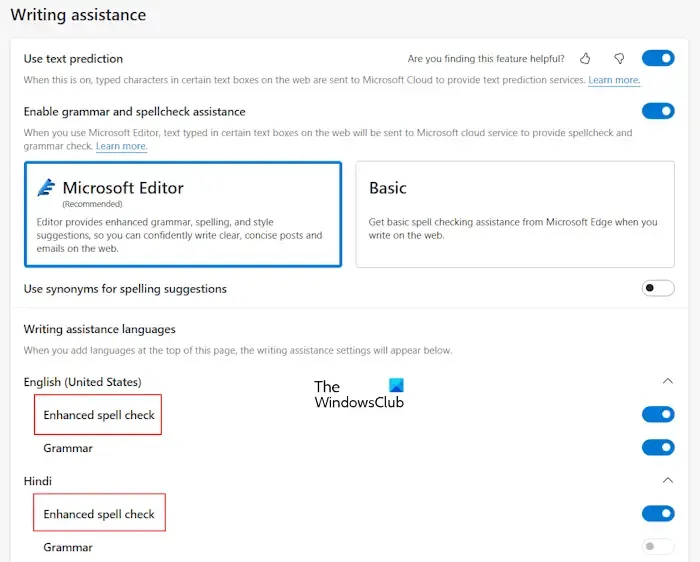
After performing the above steps, your preferred language will automatically appear in the Writing assistance section. Now, expand your language under this section and turn on the Enhanced spell check option.
Now, restart Edge. After doing that, the spell check should work as expected.
3] Clear cache and cookies
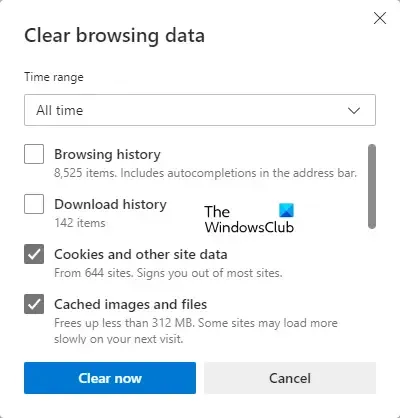
If the spell check is still not working in Edge, clearing the cache and cookies may help. You can launch the Clear browsing data popup window in Edge by pressing the Ctrl + Shift + Delete keys. After that, select the following two options and click Clear now.
- Cookies and other site data
- Cached items and files
4] Reset Edge Settings to default
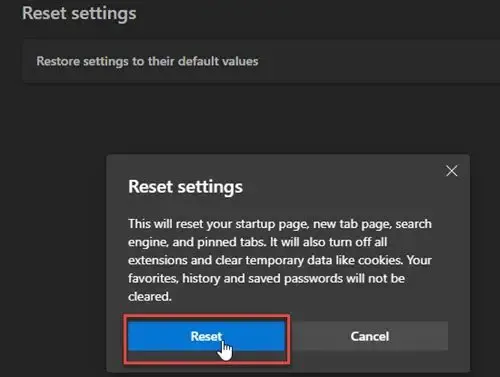
Możesz także spróbować zresetować ustawienia Edge do domyślnych. Ta czynność zresetuje stronę startową, stronę nowej karty, wyszukiwarkę i przypięte karty. Zanim przejdziesz dalej, zaloguj się do Edge przy użyciu konta Microsoft, aby zapisać wszystkie zakładki w chmurze.
5] Zainstaluj rozszerzenie innej firmy
Jeśli problem nadal występuje, możesz zainstalować rozszerzenie innej firmy do sprawdzania pisowni. Grammarly to bardzo popularne rozszerzenie, które sprawdza zarówno błędy ortograficzne, jak i gramatyczne. Możesz go zainstalować, otwierając sklep Google Chrome w Edge. Wszystkie rozszerzenia Chrome działają także w Edge.
Gramatycznie obsługuje tylko język angielski. Możesz wyszukać rozszerzenie sprawdzania pisowni obsługujące wiele języków, w tym preferowany język.
Otóż to. Mam nadzieję, że to pomoże.
Jak zmusić program Microsoft Word do ponownego sprawdzania pisowni?
Aby ponownie włączyć sprawdzanie pisowni w programie Microsoft Word, musisz włączyć tę opcję w ustawieniach. Otwórz program Word i przejdź do opcji Plik > Opcje > Sprawdzanie. Włącz opcję „Sprawdź pisownię podczas pisania” i kliknij OK, aby zapisz ustawienia.
Jak włączyć autokorektę w systemie Windows?
Możesz włączyć Autokorektę w systemie Windows 11 w Ustawieniach. Otwórz Ustawienia i przejdź do Czas iamp; język > Wpisuję. Teraz włącz opcję Autokorekta błędnie napisanych słów.


Dodaj komentarz