X3DAudio1_7.dll Was Not Found: How to Fix This Error
X3DAudio1_7.dll is one of the Dynamic link library files for the DirectX app. Windows-based games and advanced graphics software use it.
What causes the X3DAudio1_7.dll not found error?
There could be various reasons for this DLL missing error; some of the common ones are:
- Faulty program or game – If the game or program throwing the error is outdated or corrupted, you might see this error. Try reinstalling the software.
- Virus infection – Viruses on your computer may damage system files, including this DLL file, causing the issue. Run a scan using an antivirus tool to fix it.
- Outdated version of DirectX – An outdated version of DirectX could cause many issues, including this one. Try to install the latest version of DirectX.
- DLL file is deleted or misplaced – If the DLL file is deleted by accident or has been moved from the original location, then you might see this error. You need to restore the file to its location.
- Damaged system files – If the system files are corrupted or damaged, it could cause the DLL missing error. Run SFC & DISM scans to restore the system files.
Now that you know these are the causes of the issue, let us move on to the fixes.
What can I do to fix the X3DAudio1_7.dll not found error?
Before engaging in advanced troubleshooting steps; you should consider performing the following checks:
- Try restarting your computer.
- Check if you have the latest DirectX version installed.
- Reinstall the affected app.
If these tweaks didn’t help, move to the below-mentioned solutions.
1. Use a DLL fixer
These utility tools like the one below have a huge database and help you recover system DLL files like X3DAudio1_7.dll in a few clicks. With this, it also improves your PC performance, gets rid of system-related issues, and more.
2. Run SFC & DISM scans
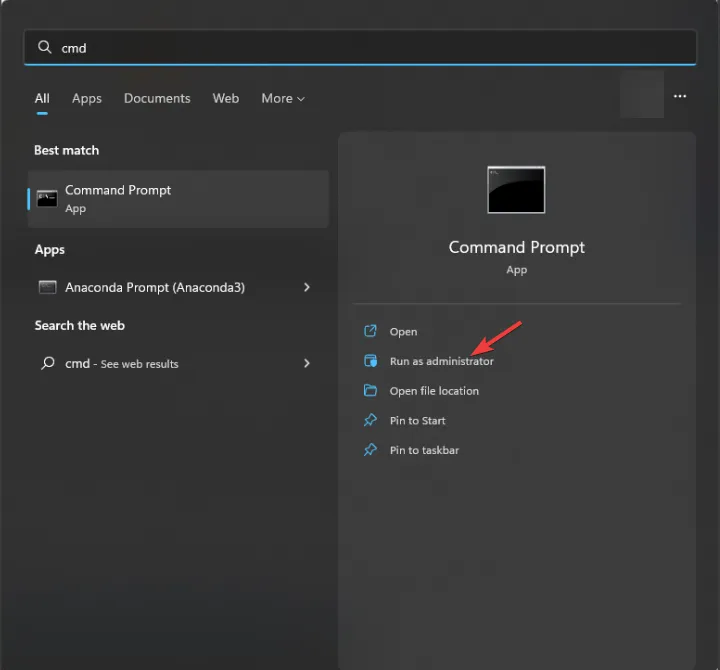
- Press the Windows key, type cmd, and click Run as administrator.
- Type the following command to repair system files and press Enter :
sfc/scannow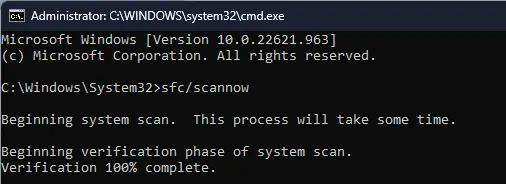
- Wait for the scan to complete, then copy & paste the following command to restore the Windows OS image and hit Enter :
Dism /Online /Cleanup-Image /RestoreHealth
- Reboot your computer to confirm the changes.
3. Run a malware scan
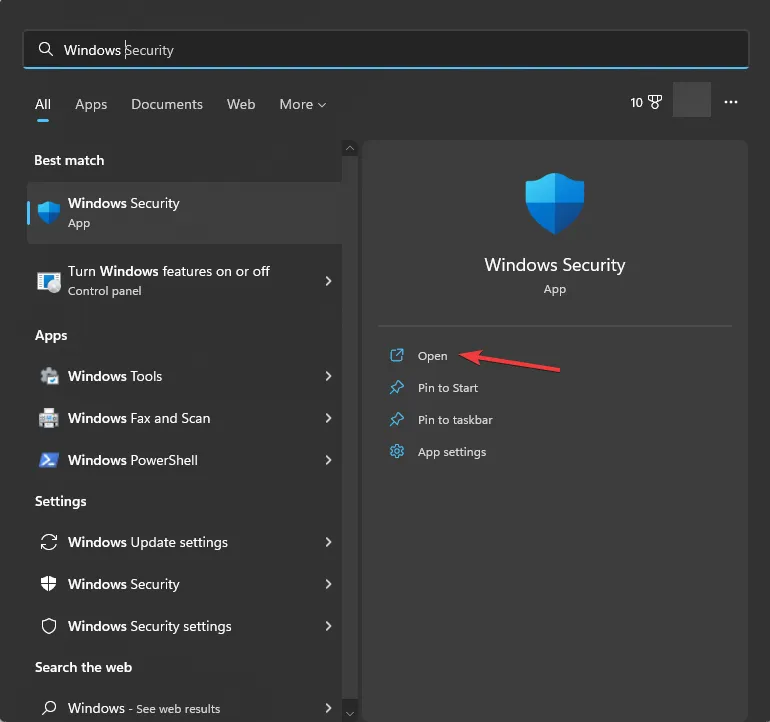
- Press the Windows key, type windows security, and click Open.
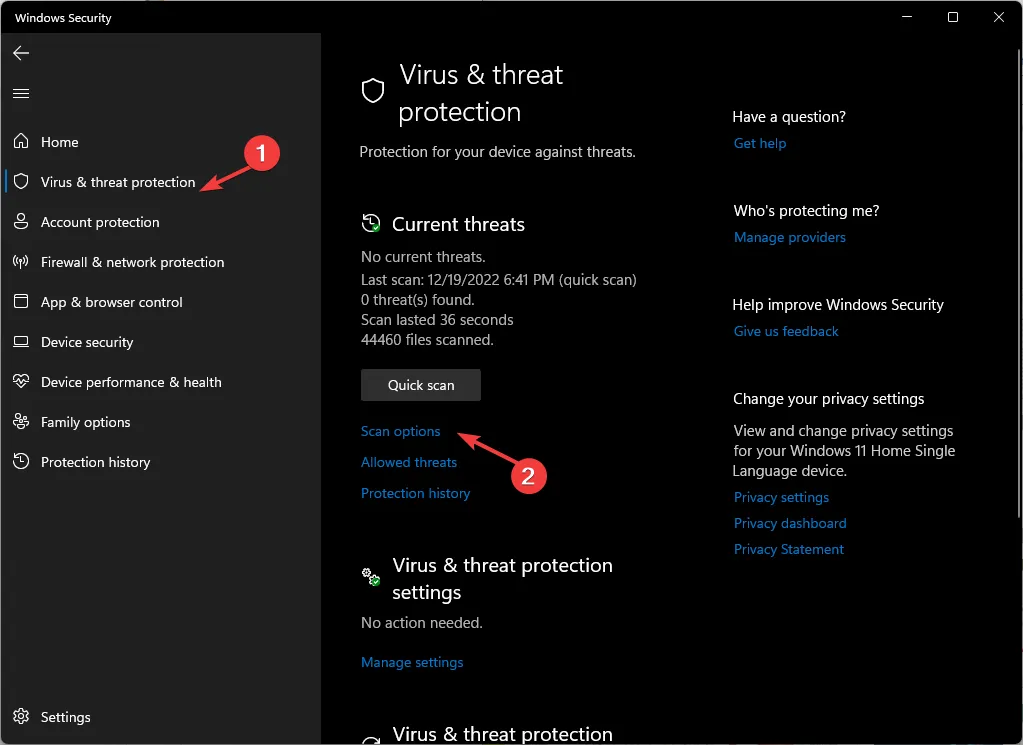
- Click Virus & threat protection, then Scan options.
- Select Full scan and click Scan now.
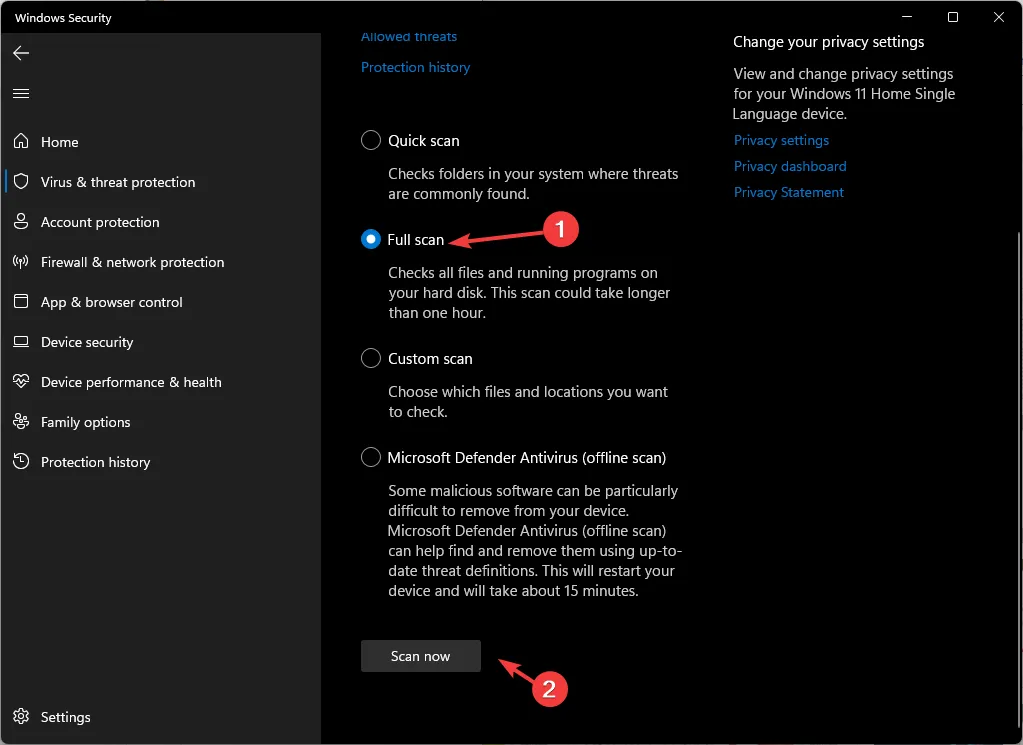
- The tool will start scanning and will display infected files. Delete them when prompted.
4. Perform System Restore
- Press Windows + R to open the Run dialog box.
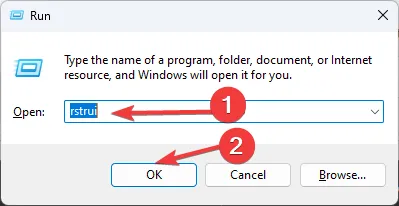
- Type rstrui and click OK to open System Restore.
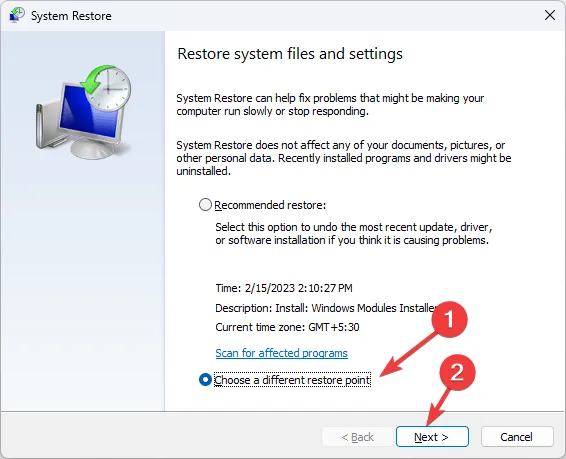
- On the System Restore window, select Choose a different restore point and click Next.
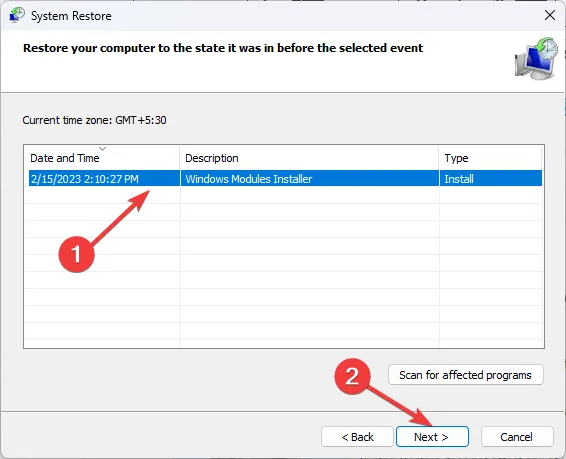
- Select a restore point and click Next.
- Click Finish to initiate the restoration process.
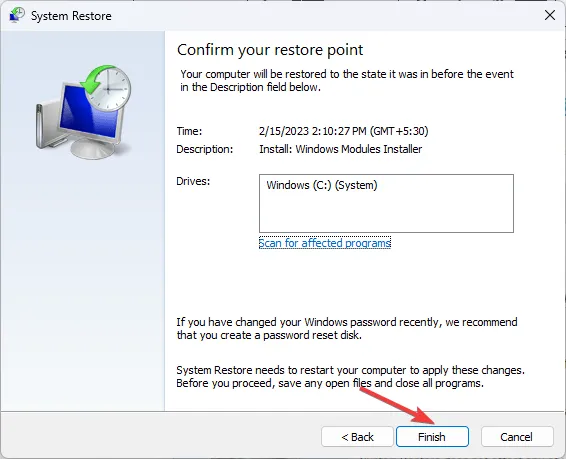
Windows will start and restore your computer to the selected version. If the System Restore option is not working for you, read this post to get help.
5. Download the DLL manually
- Go to the DLL-FILES website, search x3daudio1_7.dll, select the appropriate option, and click Download.

- Open the downloaded folder, and copy the. dll file from it.
- Now navigate to this path and paste the file:
C:\Windows\System32 - Restart your PC to confirm the changes.
So, these are methods you need to follow to fix the X3DAudio1_7.dll not found error. If you have any questions or suggestions, feel free to mention them in the comments section below.
Leave a Reply