Windows Update Stuck? 7 Ways to Fix the Error
Microsoft has made many improvements in the way Windows updates are handled at the user end. They’re now much faster than before and have been widely optimized to run on devices with weaker RAM and CPU. Whether you use Windows 11 or 10, migrating to a new version shouldn’t take too much time and effort. But sometimes the updates get stuck on the screen. Let’s talk about the reasons and what you can do to fix them.
What Causes Windows Updates to Get Stuck?
The biggest reason a Windows update will get stuck is conflicting non-Microsoft apps on your device. They may have hidden issues that remain undetected until the next Windows update or PC restart. Such programs are very likely to be flagged by SmartScreen or Windows Defender. When you ignore the warning and install them anyway, their unresolved issues can resurface to cause a frozen or stuck screen.
Apart from incompatible third-party apps, Windows may have a few update problems of its own due to bugs, error codes, blue screen issues (BSOD), and registry errors.
There are many other reasons a Windows update could get stuck:
- Malware issues: a virus, Trojan, spyware or keylogger can embed deeply in the operating system, preventing security updates.
- Internet connection interruptions: many Windows apps, system files, and features have online dependencies. If you have unreliable Wi-Fi, it’s better to postpone any updates until you have proper speeds.
- Memory problems: certain apps and games can have a very high memory footprint. If your device RAM is not measuring up, it’s time to upgrade.
How to Fix Stuck Windows Update
Many users give up when an update takes too long. While a hard shutdown using the Power button would seem the best option, there are other, better ways to fix a stuck Windows update.
1. Wait for the Update to Resolve, Even If It Seems to Take Forever
Stuck on a screen that looks something like this? It may be tempting to shut down the PC and start all over again, but you shouldn’t. When a running update is interfered with too soon, there is a risk that critical drivers and system files may become corrupted. Yet, it’s easy to fix the problem.

No one can see what’s going on behind the update screen after it turns black or blue. If the Windows update percentage value is not moving, just keep your laptop powered on and connected to the Internet. Wait for those update problems to get resolved in the background.
Take a break and check your device after a few hours. This could be the only solution you need.
2. Restart Your Computer From Boot Keys
Restarting your Windows computer in Advanced Startup mode by pressing the boot keys during boot/restart is a proven way to deal with update issues. Different Windows devices have different boot keys, dependent on manufacturer specifications. These can be researched online. Use this method if your update is stuck at 0%. Go back to the desktop and determine the problem source.
Read through this helpful list of boot keys for many common laptops, including Acer, Asus, Dell, HP, Lenovo, Samsung, Sony, and Toshiba.
If you’re able to sign in to your Windows desktop screen, it’s easier to go with the Advanced Startup menu in “System -> Recovery -> Recovery Options.” Click “Restart now” to view the same screen you get with the boot keys.
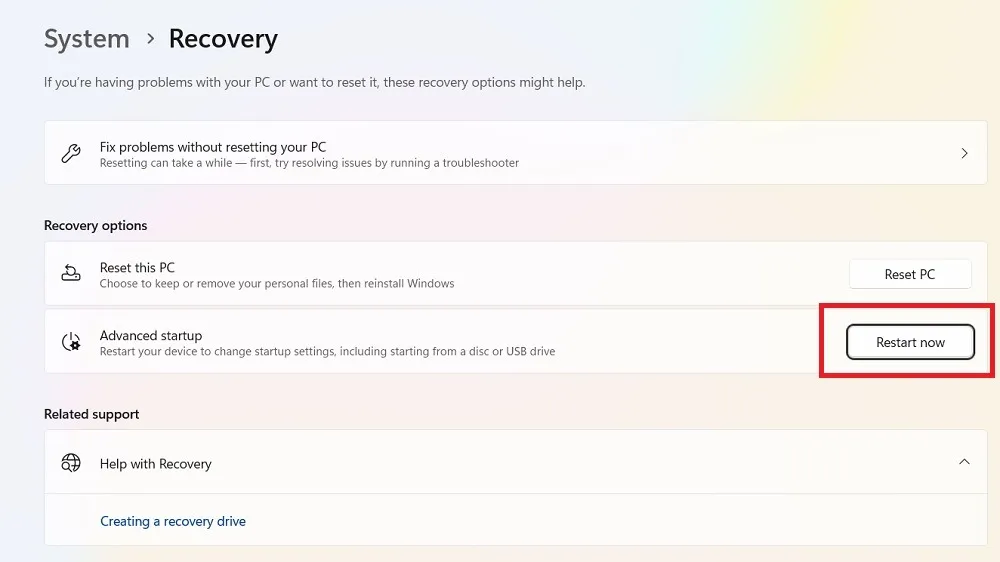
Once a Windows computer is booted in Advanced Startup mode, it doesn’t depend on as many drivers and services. That creates a better troubleshooting environment to resolve any system issues, such as update problems. Click the “Continue” button to exit the Advanced Startup mode and continue to sign in regularly.

Note that certain laptop brands like Dell have separate diagnostic environments that are accessible from the boot keys.

3. Use Troubleshoot Options in Advanced Startup Mode
The Windows Advanced Startup mode has many troubleshooting options that can fix any PC issues you have. Follow any of the methods below to resolve a stuck update problem.
- Click “Troubleshoot” instead of exiting to restart your device.

- Click “Advanced options.”
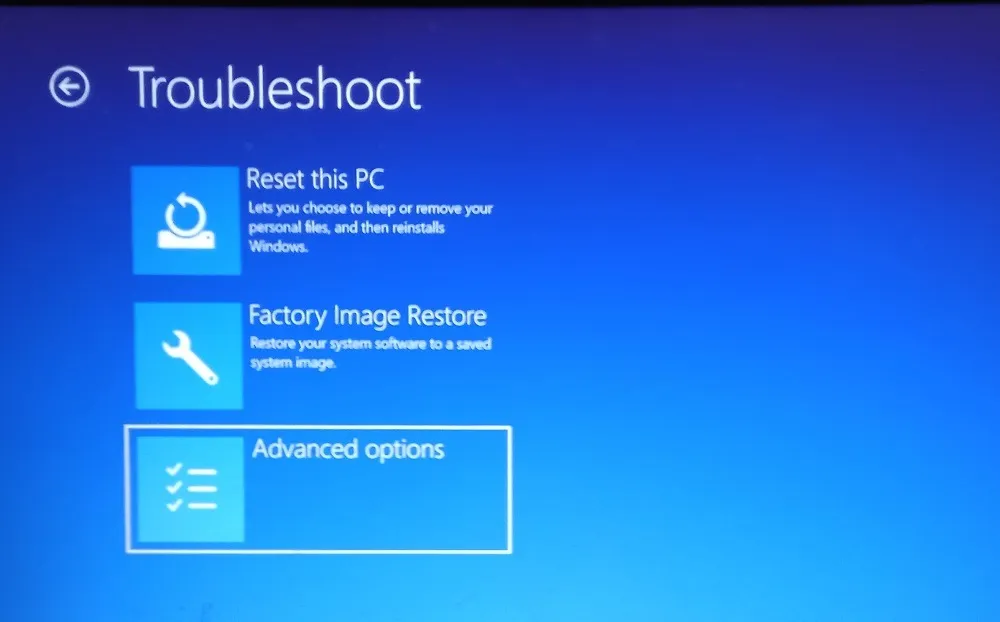
- View all the “Advanced options” that can be applied to Windows update troubleshooting. Let’s look at them one by one.
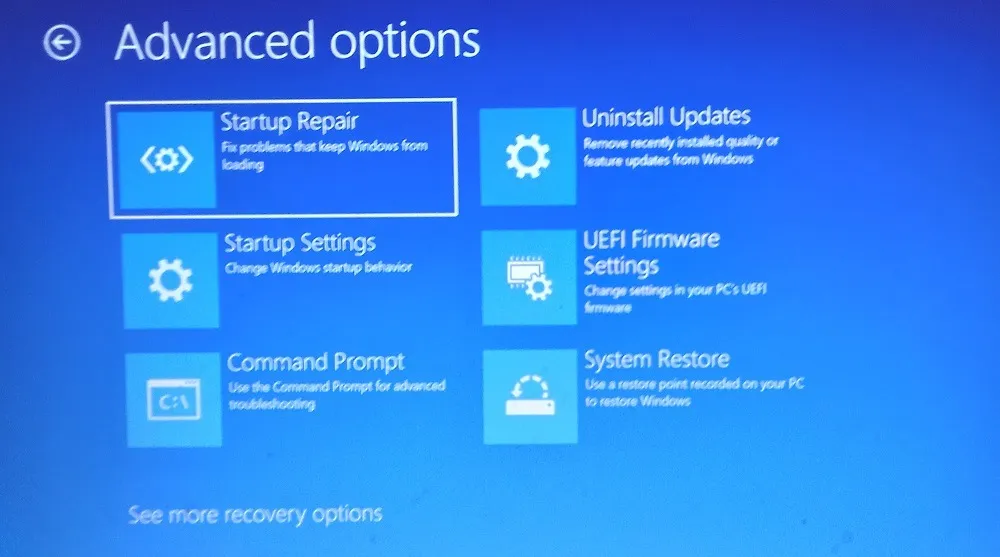
Startup Repair
As soon as you press the Startup Repair button, your PC undergoes a diagnostic process to identify any startup problems. It will attempt to fix them on the screen itself and restart your device.
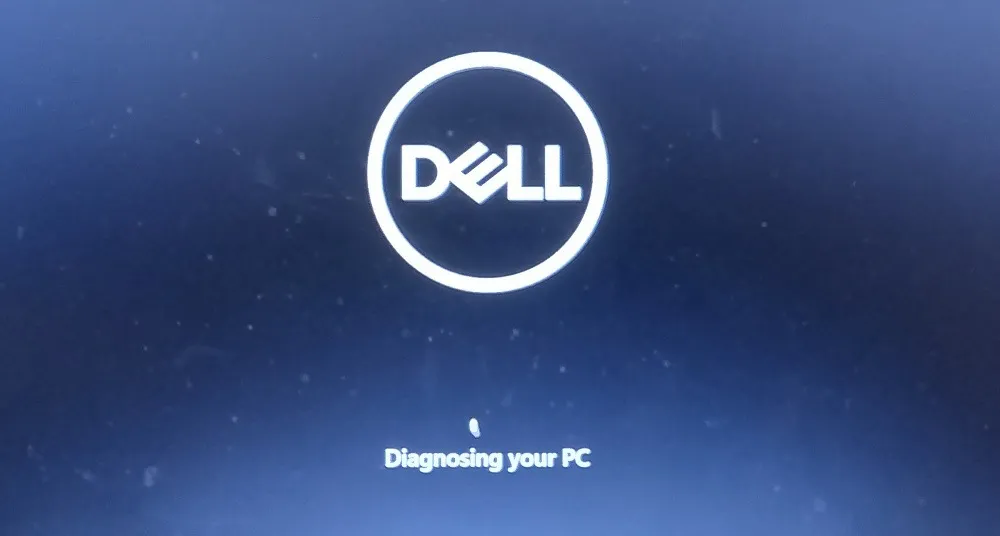
If no startup problems are found, Windows troubleshooter will display a message: “Startup Repair couldn’t repair your PC.” Select “Advanced options” again to try other solutions.

Uninstall Feature Updates
As discussed earlier, most update problems are due to incompatible apps and Windows features. Therefore, if you recently installed a Windows feature, and the system then started behaving erratically, it’s time to uninstall any recent updates from the Advanced Startup screen.
When you opt for this solution, you will have two choices: uninstall the latest quality update or the latest feature update. Opt for the second option to uninstall the feature update, as it has the full details.

Uninstalling the latest feature update will remove any recent Windows updates that caused you problems. You can reinstall them once you sign back in.

System Restore
Close on the heels of uninstalling feature updates, you can also undergo a System Restore in Advanced Startup mode. You will need to select a restore point. Windows will send your device back to an earlier version where the problematic application or features weren’t available.

DISM in Command Prompt
If you select the Command Prompt option in Troubleshooting, a few simple commands, such as DISM, would help you clean up the files and restore the system’s health for proper updates. Let CMD do its work, and once it’s done, you can restart the Windows update process with this command:
Dism.exe /Online /Cleanup-Image /RestoreHealth

Cloud Reset Your Windows PC in Safe Mode
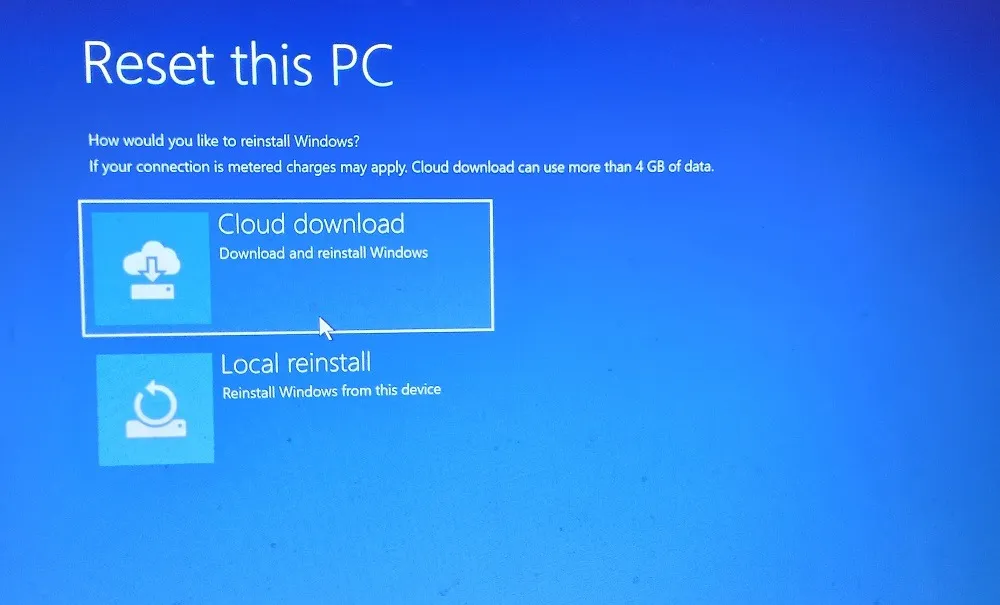
If all of these methods fail, and you’re still having update problems, reset your Windows device by clicking “Reset this PC” in the Troubleshooting options on the main screen.

Select “Keep my files” to retain all your stored data on the system drives. However, doing a reset will remove all installed applications, so it’s a good idea to store a backup on the hard drive.

Among the reset options, “Cloud download” is one of the best methods to ensure a clean installation of Windows on your device. It will also download and install the most stable and recent version of the Windows operating system.
4. Use Windows Memory Diagnostic Tool
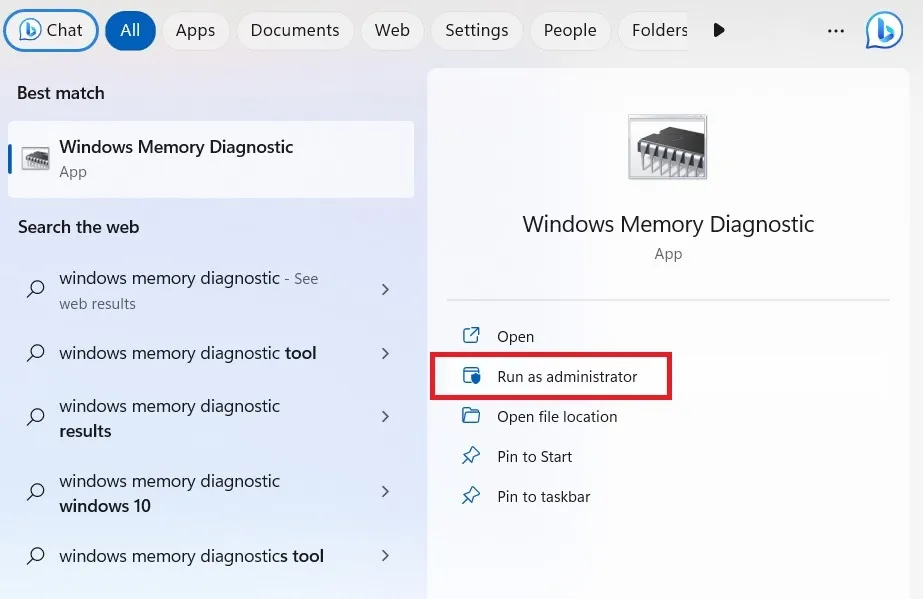
Many update problems are due to memory issues on your computer. Thankfully, Windows offers a handy Memory Diagnostic app to quickly find any memory problems on your Windows device. Always run it in Administrator mode.
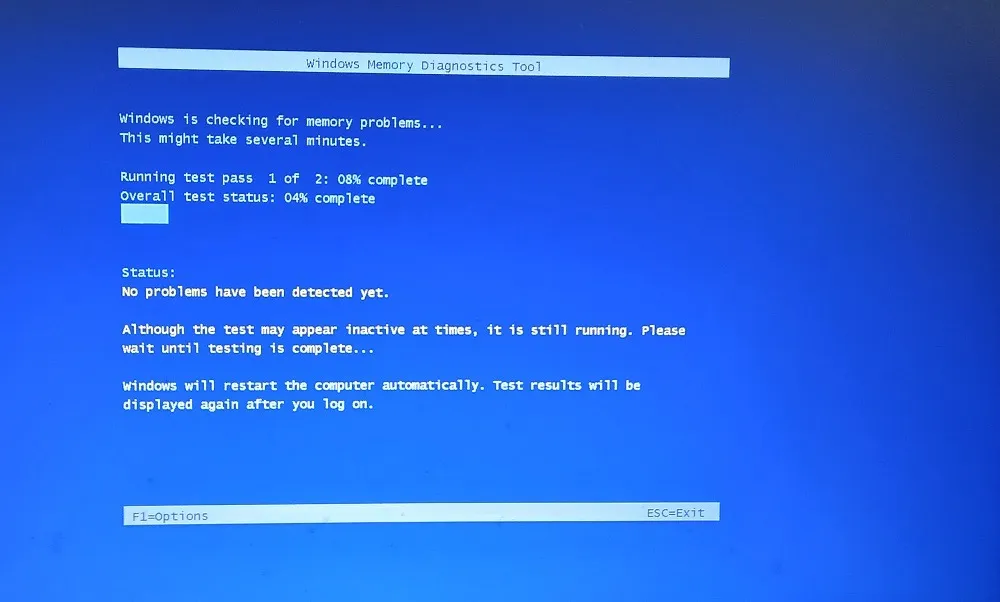
Memory Diagnostic runs a detailed scan on your computer and will scrutinize any hidden memory issues. They will be available in a report after you log in once again, you can then take corrective action.
5. Run Windows Update Troubleshooter
The Windows Update troubleshooter is one of the best system diagnostic tools to fix any update problems. Before running a major update, you should always run the troubleshooter once so that any problems can be identified and fixed early on. The utility is available from “Settings -> System -> Troubleshoot -> Other troubleshooters.” Click “Run” to launch the application.

It will take a few seconds for the Windows Update Troubleshooter to detect problems on your device.
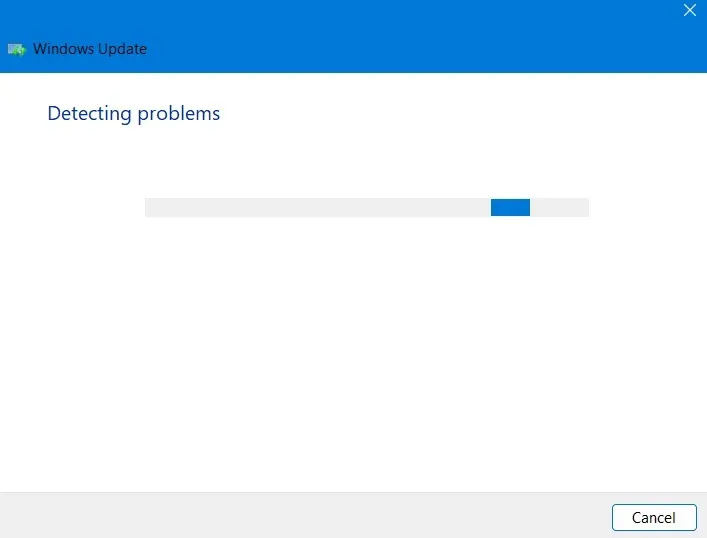
Once the problems have been identified, the troubleshooter will list them under “Problems found.” Click “View detailed information” for further action.
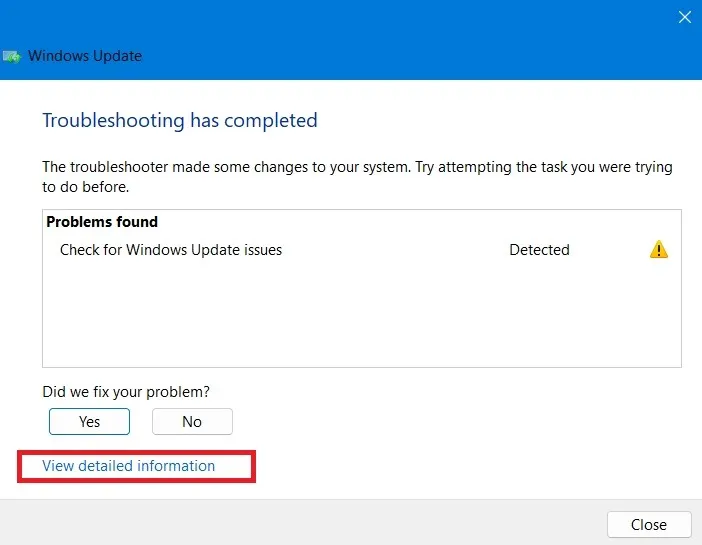
The troubleshooting report gives a handy summary of Windows update issues and how they have been resolved successfully.

6. Stop and Restart Windows Update Services
Stopping and restarting Windows services is an effective approach to deal with any update conflicts in Windows. There are two ways to do this: in the first method, start PowerShell in Administrator mode and enter the following commands to stop and restart the service.
net stop wuauserv net start wuauserv
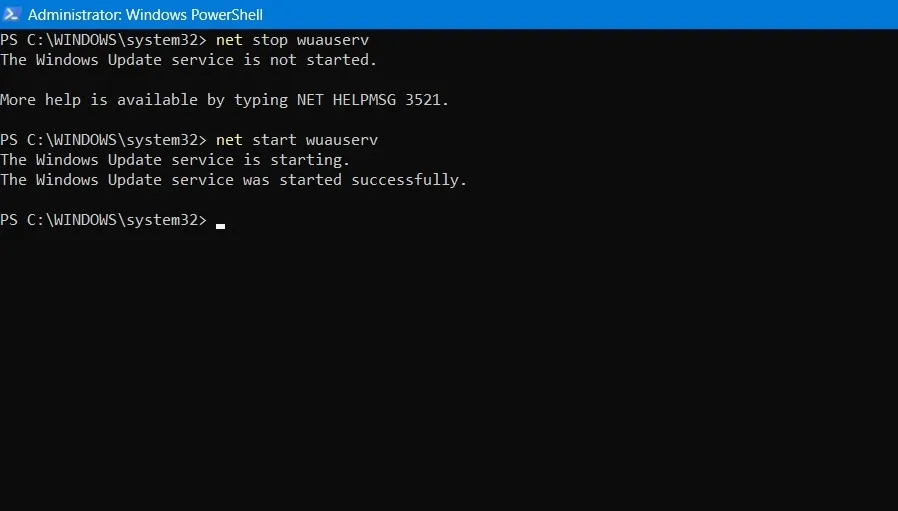
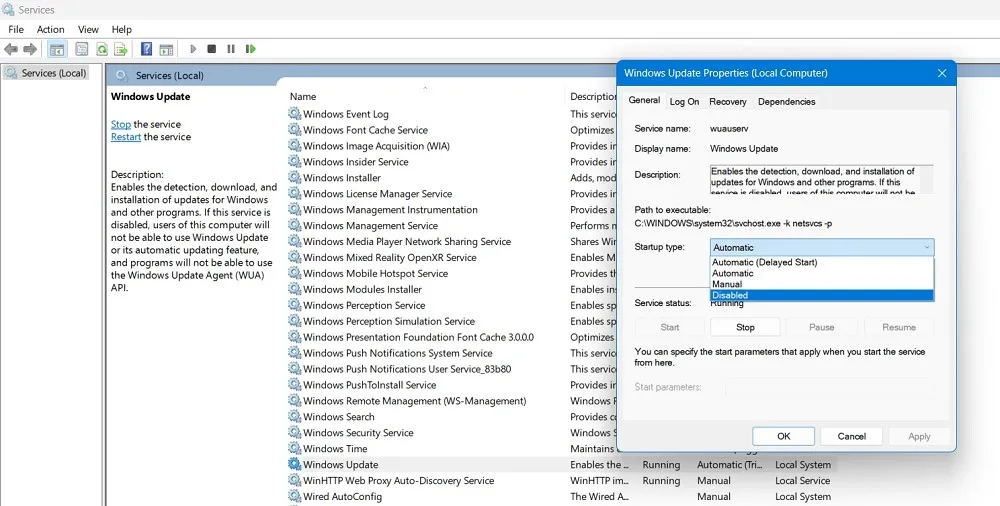
Apart from PowerShell, you can also stop and restart the Windows Update service in the Services app. It stops the current update services, removes the old files, and restarts the update service again.
7. Optimize Your Windows Update Settings
Windows has a settings menu called “Windows Update Settings.” You can optimize its various settings to ensure that any stuck update problems are resolved immediately. It can be launched from the Search menu.

Pause/Switch Off Windows Update Services
For a few weeks at a time, you can pause all new updates from the Windows Update Options menu. In fact, it’s a good idea to avoid installing the latest Windows update until Microsoft has worked out all the bugs. Keep pausing any updates that are likely to cause trouble until there is a widely released cumulative update.

Disable Receiving Updates for Other Microsoft Products
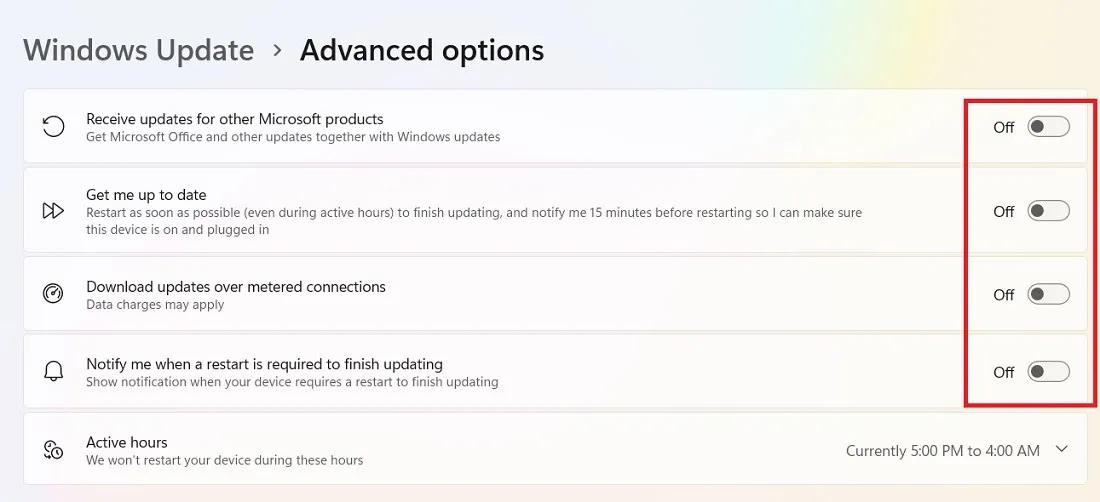
Go to “Advanced options” from the Windows Update Settings page and disable all of the settings. The most significant of these is the “Receive updates for other Microsoft products” option. Many Microsoft products – such as Word, OneDrive, Teams, and Skype – have their own parallel updates. You don’t want them to affect your regular Windows updates, as that will consume much time and can cause errors, leading to stuck screens.
Retain the Setting for Absolute Bandwidth in Delivery Optimization
Go to “Additional options” at the bottom and choose “Delivery Optimization.” This menu will help you set the correct bandwidth so that there are no issues when the updates are being downloaded and installed.

Choose only “Absolute bandwidth” so that the Windows update can install even with slower Internet speeds.

Keep all upload settings unchecked so that there are no bandwidth limits.

FYI: check out our monthly guide on Windows update problems to learn about the latest Microsoft update issues and how to directly upgrade to a cumulative update.
Frequently Asked Questions
How do I prevent stuck Windows updates?
There are many things you can do to prevent stuck Windows updates:
- Upgrade to an SSD: if you use an SSD instead of a regular hard disk, the update process is at least six times faster.
- Uninstall problematic apps: if an app is consuming a lot of RAM space and causing your system to bloat, it’s best to uninstall the app, as it can cause update problems in the long run.
- Use Disk Cleanup: clean up your disk and system files regularly using the Disk Cleanup utility.
- Run Windows Defender: Windows Defender can prevent malicious software, rootkits, and spyware from installing in the operating system.
Why is my Windows update stuck at 100%?
If your Windows device is stuck at 100% update, it has finished installing, but something is interfering and not allowing the process to complete. Force-restart the device, and once on your sign-in screen, check the Windows Update history to verify that the update has finished.
Image credit: DepositPhotos. All screenshots by Sayak Boral.
- Tweet
Leave a Reply