Windows 11 RAM Test: How to Check For Problems
One of the most common problems with Windows 11 is running out of memory. This can happen if you have too many programs open at once or if you don’t have enough RAM installed on your computer.
A ripple effect of BSoD errors, random shutdowns, and crashes will ensue if apps compete for the available memory. To counter this, you need to perform a regular memory test to ensure everything is in check, and this is how to do it.
How much RAM does Windows 11 use?
Windows 11 is probably one of the most demanding software ever released, mostly because of its new design. It is also the most RAM-hungry OS that Microsoft has ever released.
The amount of RAM that Windows uses depends on several factors:
- The number of apps/processes running simultaneously – The more open processes you have running, the more RAM they need. For instance, if you’re working on a spreadsheet and switch to Microsoft Word, your spreadsheet may be cached in memory, but it will still need some free space to reopen.
- Open and idle programs – Windows 11 stores a copy of all open applications in memory so that they can be quickly accessed if necessary. If you have too many programs open for too long, this can use up a lot of RAM even though those programs aren’t currently running and aren’t actively using any system resources.
- Available disk space – If your computer doesn’t have enough available disk space to perform a task, it will try to store temporary files on the hard drive instead of using RAM. This slows things down and uses more power than necessary.
- Type of apps running – Complex programs use more memory than simple ones do. For example, Photoshop needs more memory than Notepad because it can do much more. It’s also more likely to crash if it uses all your available RAM due to high demand from other tasks.
- The version of Windows 11 you’re using – The more RAM you have, the better it will perform, but with 64-bit systems, you need to be careful that you don’t exceed the amount of memory your system can support.
How do I check my RAM health on Windows 11?
If your computer is running slowly or experiencing random crashes, it could be a sign of a memory problem. Even if you have plenty of RAM, you may notice problems if the system isn’t using it properly.
The first step to diagnosing any PC performance issue is to ensure all your hardware is functioning properly.
Of course, there will be signs like frequent BSoD errors, but there’s a more sure way of checking the RAM health on your Windows 11.
Windows 11 has a built-in tool that will help you check the health of your RAM. This utility is called Memory Diagnostic and can be used to test your PC’s memory, detect and fix errors.
It’s a good idea to regularly test your RAM for errors, especially if you have noticed problems with your computer after installing new hardware or software.
If your computer passes the RAM test, it means your computer’s memory is fine. If your computer fails, it means that you may need to run the test again after replacing any faulty memory or making other changes to your computer.
How do you test RAM in Windows?
Before you dive in and start testing your RAM, some preliminary steps need to be taken first:
- Ensure that the RAM module is installed correctly.
- Verify that your computer meets Windows 11 system requirements.
- Run hardware diagnostics test and look for any errors or problems.
- Create a Restore Point to protect yourself from any unwanted results.
- Disconnect any unnecessary peripherals from your computer.
- Ensure your PC is plugged into an uninterruptible power supply such as a UPS.
1. Use Settings
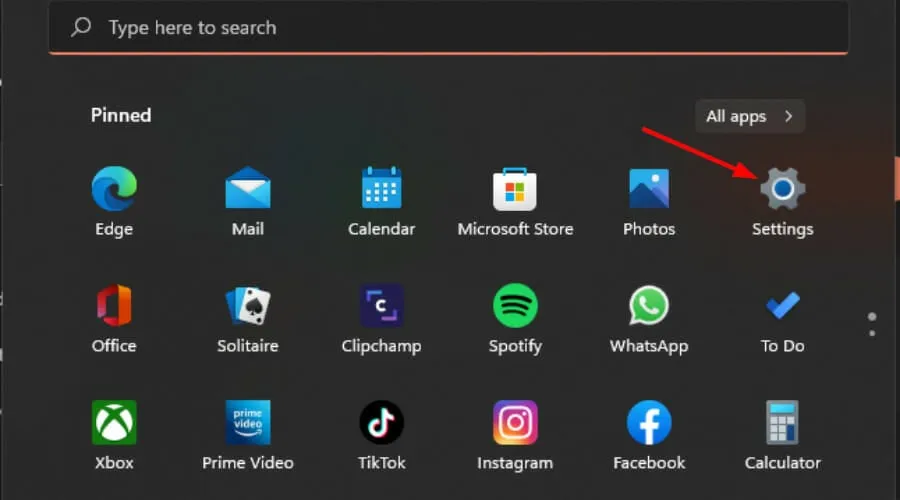
- Hit the Windows key and click on Settings.

- Type memory diagnostic in the search bar and click Open.

- From the two options, Restart now and check for problems or Check for problems the next time I start my computer, select either, depending on when you want to run the test.

2. Use the Run command
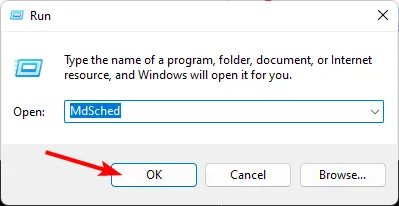
- Hit the Windows + R keys to open the Run command.
- Type MdSched in the dialog box and hit Enter .

- The Windows Memory Diagnostic prompt will appear, then select between Restart now and check for problems or Check for problems the next time I start my computer to run the test.

3. Use the Command Prompt
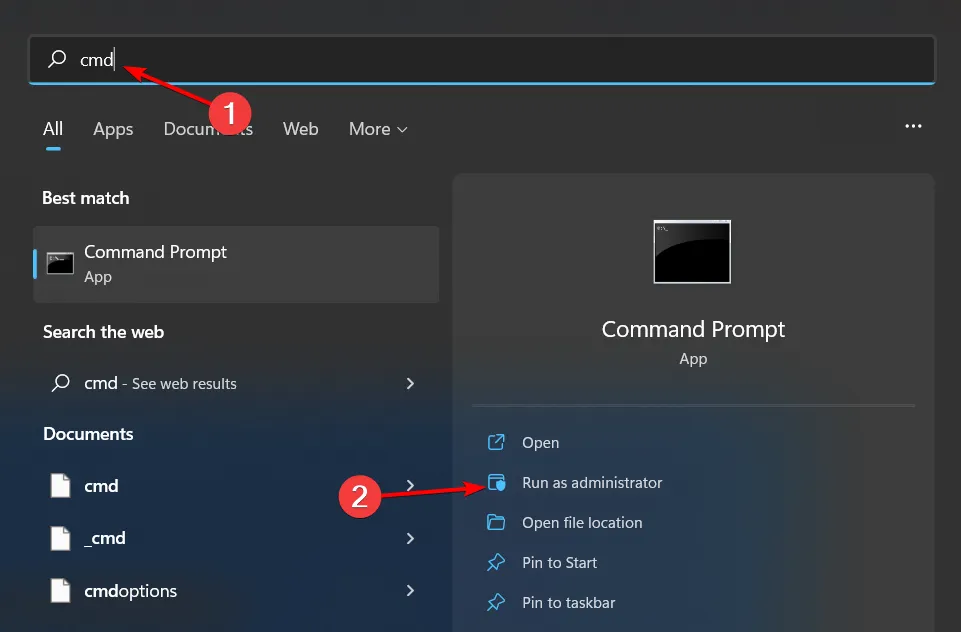
- Hit the Windows key, type cmd in the search bar, and click Run as administrator.

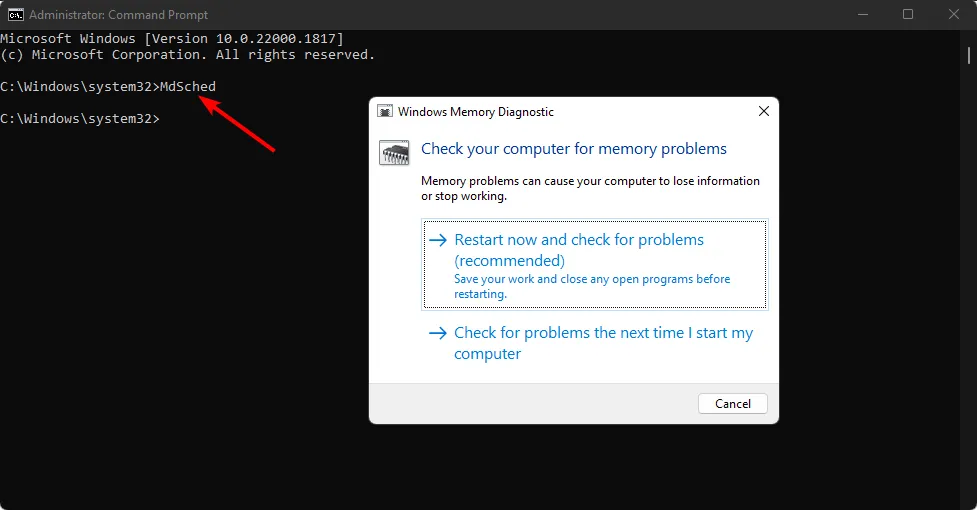
- Type in the following command and hit Enter :
MdSched
- The Windows Memory Diagnostic prompt will appear, then select between Restart now and check for problems or Check for problems the next time I start my computer to run the test.
4. Use a third-party tool
While Windows’s built-in memory diagnostic tool may work most of the time, it’s not thorough enough to catch all types of errors. The most accurate way to test RAM for errors is to use a third-party tool.
Memtest86+ is one of the most thorough test tools. This tool will run through the entire range of possible test patterns and check for errors. It can take several hours to complete, so ensure you have enough time before starting the test.
How long does Windows Memory Diagnostic take?
The time it takes to run depends on the amount of RAM (memory) in your computer and the speed of your hard drive.
On a typical desktop PC with 4 GB of RAM, the scan typically takes between 30 seconds and several minutes to complete depending on the number of files written to disk.
The Windows Memory Diagnostic results will show you how much memory is currently in use and how much is available for apps. As long as there’s enough free memory available, you should be fine.
In conclusion, RAM health is important because it determines whether your computer can perform well and keep up with your needs.
If your computer uses too much RAM, it can cause problems like lag when opening new programs or apps. Check out a similar article on how to perform a RAM test in Windows 10.
Let us know how you keep your RAM health in check in the comment section below.
Leave a Reply