Why isn’t my Chromebook turning on? Here’s How to Diagnose a Problem
If you’ve been asking, “Why won’t my Chromebook switch on?” there are several possible explanations. For example, no battery charge, a difficulty with the Chromebook charger, an issue with the most recent ChromeOS update, a brightness problem, or a problem with internal or external hardware. Whatever the cause of your Chromebook not turning on, this page will assist you in resolving it. Let’s get this party started.
1. Charge Your Chromebook
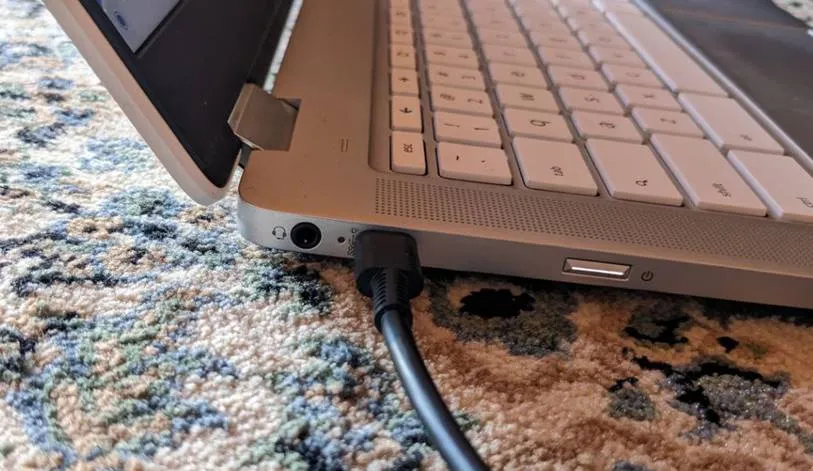
Have you used your Chromebook in a long time? Or were you wearing it the last time you used it? Then you should try charging it first. Charge your Chromebook for at least 30 minutes to an hour before attempting to turn it on.
2. Use a Different Charger
If your Chromebook isn’t charging, the problem might be with the charger. Attempt to charge it with a different charger. You should also try connecting it to a different power source. After charging, maybe the Chromebook will switch on.
3. Increase Brightness
If your Chromebook charges and turns on but displays a black screen instead of turning on, you may have mistakenly reduced the brightness of the device. On certain Chromebooks, lowering the brightness to the lowest setting causes the screen to go black.
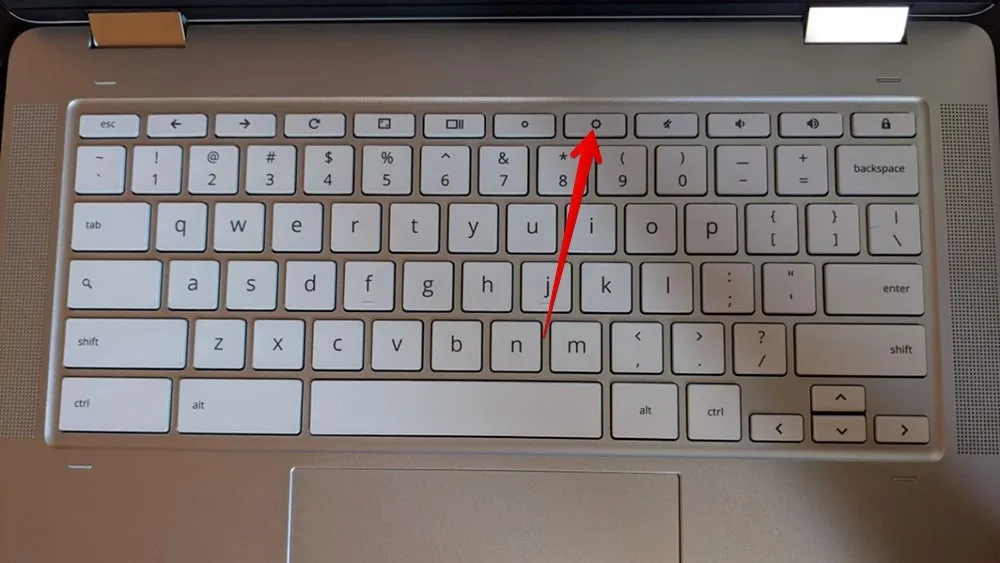
To boost the brightness of your Chromebook, turn it on and continually tap the Increase brightness button on the keyboard.
4. Remove Connected Devices
External devices connected to your Chromebook might occasionally interfere with the boot process of ChromeOS. Remove any external devices from your Chromebook, such as a wired mouse, pen drive, hard disk, and so on, and then switch it on.
5. Cool Down Your Chromebook
If the bottom of your Chromebook appears to be very hot, it is possible that it has overheated, which might be the cause of the Chromebook not turning on.
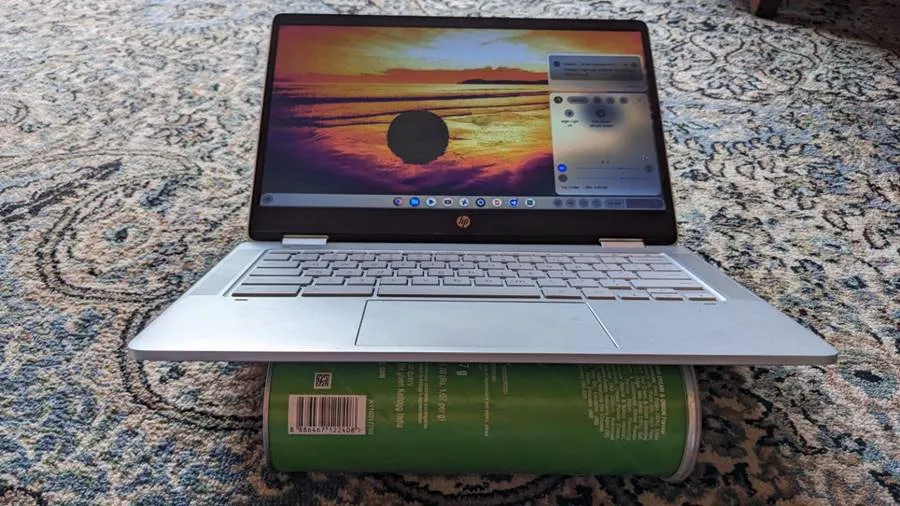
Remove the charger from the Chromebook and allow it to cool for 10-15 minutes. Make an effort to keep the bottom vents clear. You may keep the Chromebook slanted for this purpose. You should try powering on the Chromebook when it has considerably cooled down.
6. Force Restart
If your Chromebook is frozen, you should attempt the tried-and-true method of holding down the Power button to resolve the problem of the Chromebook not turning on.
- Hold the Power button for 10 seconds.
- Close the lid of the Chromebook and wait for 3 seconds.
- Open the lid and hopefully, your Chromebook should turn on. In case this doesn’t work, keep holding down the Power button until the Chromebook turns on. This could take 15-20 seconds.
7. Hard Reset Chromebook
One of the solution that has helped many users in fixing the Chromebook not turning on issue is to hard reset the Chromebook. Doing so will not delete any data on your Chromebook. It will only restart your Chromebook hardware, thus fixing temporary issues like Chromebook won’t turn on even if it’s charged.
To hard reset your Chromebook, follow these steps:
- You need to turn off your Chromebook if you think Chromebook is on but it’s not showing anything on the screen. For that, hold the Power button for at least 10 seconds. If the Chromebook is already off, jump to step 2.
- Press and hold the Refresh button (Semicircle with an arrow) and press the Power button once while holding the Refresh button.
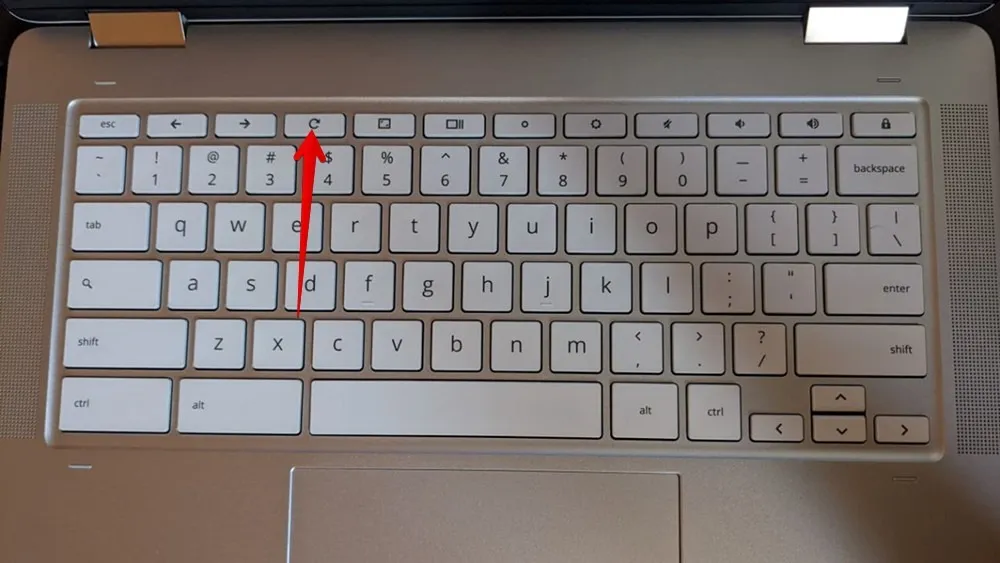
- Release the Refresh button when your Chromebook boots up.
8. Recover Your Chromebook
Lastly, if ChromeOS does not load when you switch on your Chromebook, you may reinstall ChromeOS by entering recovery mode. Please keep in mind that the recovery mode erases all data on your Chromebook. You should use it at your own risk. You should also utilize it just after you’ve exhausted all of the other options.
Follow these steps to recover your Chromebook using an internet connection:
- Remove all the external devices connected to your Chromebook including the mouse.
- Press and hold the Esc + “Refresh” keys and then press the “Power” button once. Please note that on some devices you might have to hold the Esc and Maximize buttons followed by pressing the Power button.
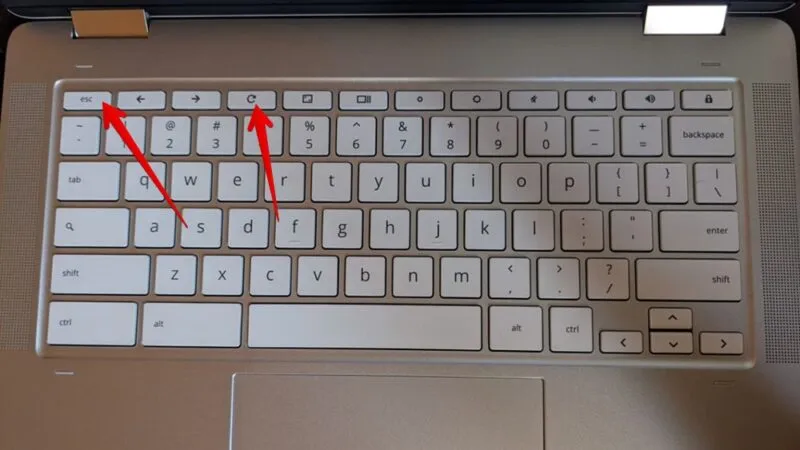
- Release the Esc and Refresh buttons when you see a message on the screen.
- Select “Recover using internet connection” and follow the on-screen instructions.
9. Fix Chromebook that Keeps Turning On and Off
If your Chromebook keeps turning off and on, try the following fixes to keep it on without shutting off:
- Remove any recently installed apps or extensions from your Chromebook.
- Sign in as a guest user or a different user.
- Update your ChromeOS by going to “Settings -> About ChromeOS -> Check for Updates.”
- Powerwash aka. factory reset your Chromebook from “Settings -> Advanced -> Reset.”
10. Contact the Manufacturer
If nothing else works to get your Chromebook to switch on, you should contact the manufacturer and have it checked. There is a possibility that the problem is caused by a hardware malfunction or battery damage.
Frequently Asked Questions
Why is everything on my Chromebook black?
If the backdrop and other elements on your Chromebook are black, you must have enabled Dark mode. To turn off dark mode, enter the Quick Settings panel and select the Dark Theme icon.
Does the expiry date of a Chromebook turn it off permanently?
No, the expiry date of a Chromebook only reflects the time until your Chromebook can receive updates. It doesn’t affect any other functionality.
Is Chromebook battery repairable?
No, laptop batteries cannot be repaired. You will have to purchase a new battery.
All images and screenshots by Mehvish Mushtaq.
Leave a Reply