Valorant High CPU Usage: How to Lower if It Gets to 100%
Many Valorant players report the game using high memory or CPU when running it on their PCs. It causes the game to lag and reduces game performance. However, this guide will discuss how to fix Valorant’s high CPU usage and help lower it to improve game performance.
What causes Valorant’s high CPU usage?
Numerous factors can cause the high CPU usage in Valorant, and some are:
- Outdated graphics drivers – Running an outdated graphics driver on your PC can cause problems with how much system resources gaming activities will consume. It is because the graphics cards can fix bugs affecting the current version, resulting in high CPU usage in high-end games like Valorant,
- Interference from third-party apps – The activities of other apps running on your computer can affect your game. They can take up excessive bandwidth and system resources, leaving Valorant to overwork and not give enough system resources for the game.
- Issues with Windows Defender Real-time Protection – When you have the Windows Defender scheduled scan running on your computer, it can cause problems with the Valorant game and result in high CPU usage. The scan delays the game activities, causing it to take longer to load.
You can fix the problem by troubleshooting the game and your PC.
How can I fix high CPU usage in Valorant?
Before proceeding with any advanced fixes, observe the following preliminary checks:
- Turn off background apps running on your PC.
- Temporarily disable third-party antivirus software.
- Restart Windows in Safe Mode and check if the high CPU usage persists in the game.
If you can’t fix the problem, proceed with the solutions provided below:
1. Update your Graphics driver
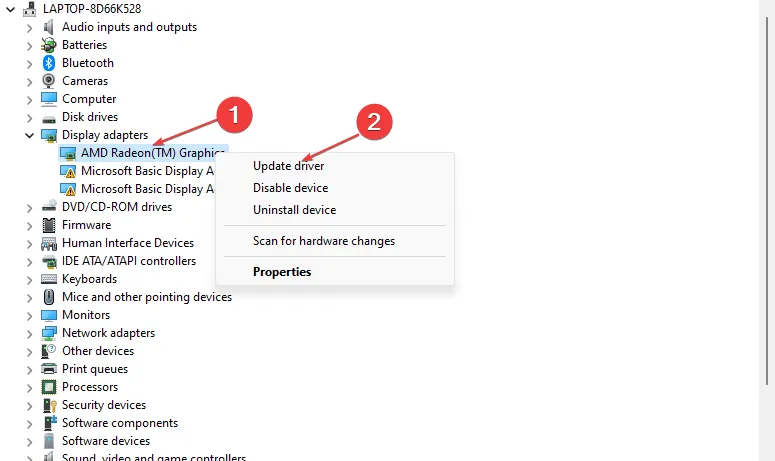
- Press Windows + R keys to prompt the Run window, type devmgmt.msc, and click OK to open the Device Manager.
- Expand the Display adapter entry, right-click on the device driver, then select Update driver from the drop-down menu.
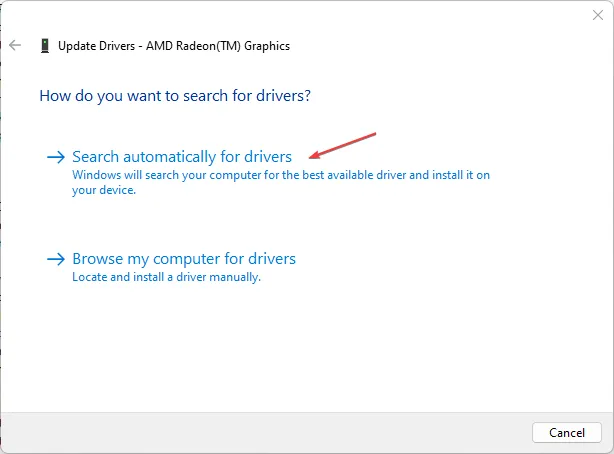
- Click on Search Automatically for the updated driver software option.
- Restart your PC and check if the black screen issue persists.
Updating the graphics driver will improve the performance of your graphics devices and fix bugs affecting your gaming activities.
2. Allow Valorant through Windows Defender Firewall
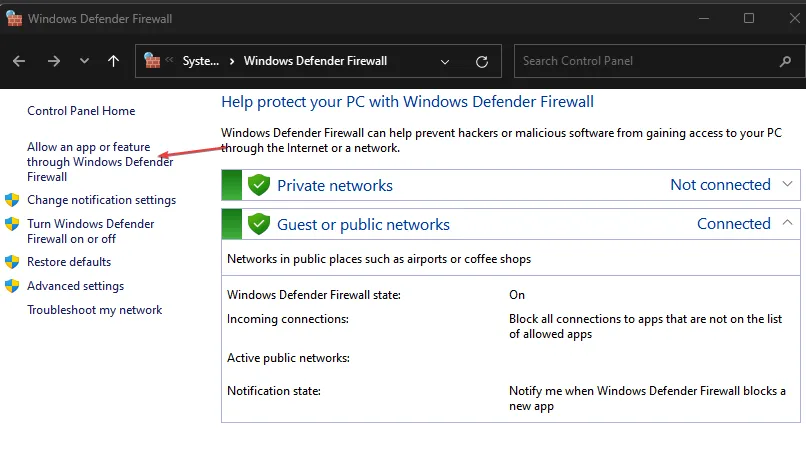
- Left-click the Start button, type firewall and open Windows Defender Firewall.
- Go to Allow an app or feature through Windows Defender Firewall.
- Scroll down and select Valorant from the list of apps. Check the boxes for both Private and Public. Click OK to save the changes and restart your PC.

Allowing Valorant as an exception in Windows Firewall prevents the firewall from checking or delaying its processes.
3. Disable background apps
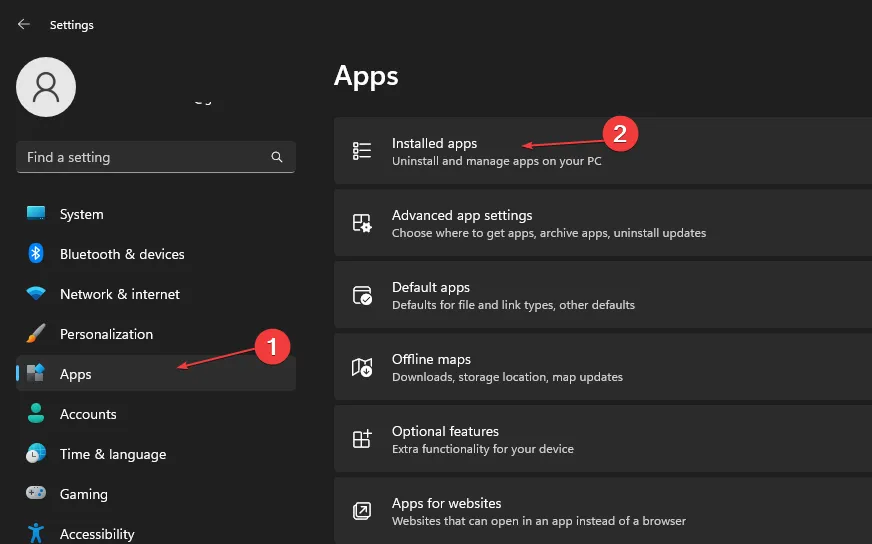
- Press the Windows + I key to open Windows Settings.
- Select Apps and click on Installed apps.
- Select an app, then click the three dots, and choose Advanced options.
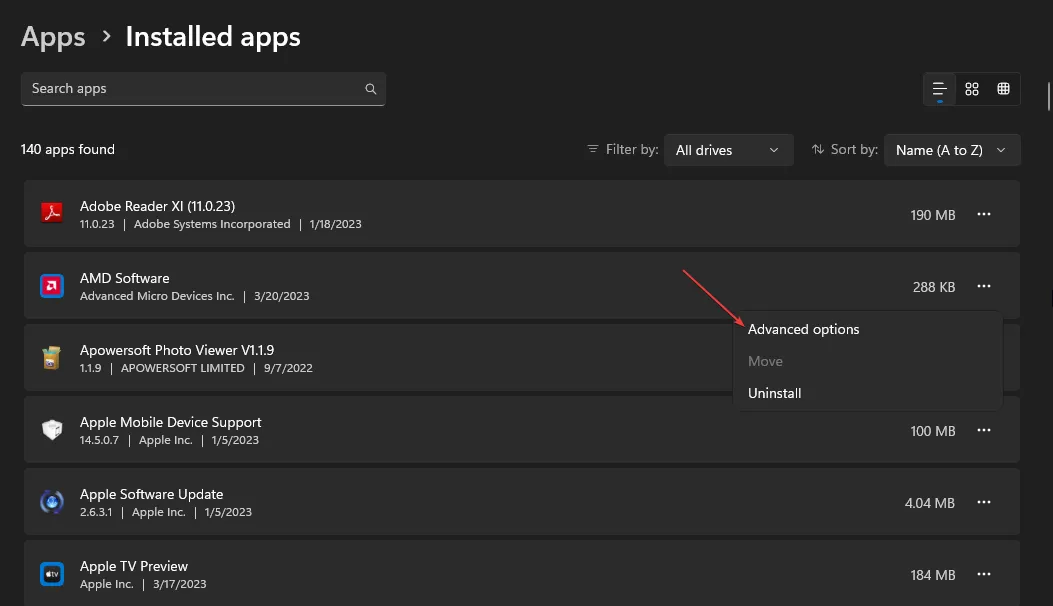
- Then tap the drop-down button for Background app permissions and click on Never.
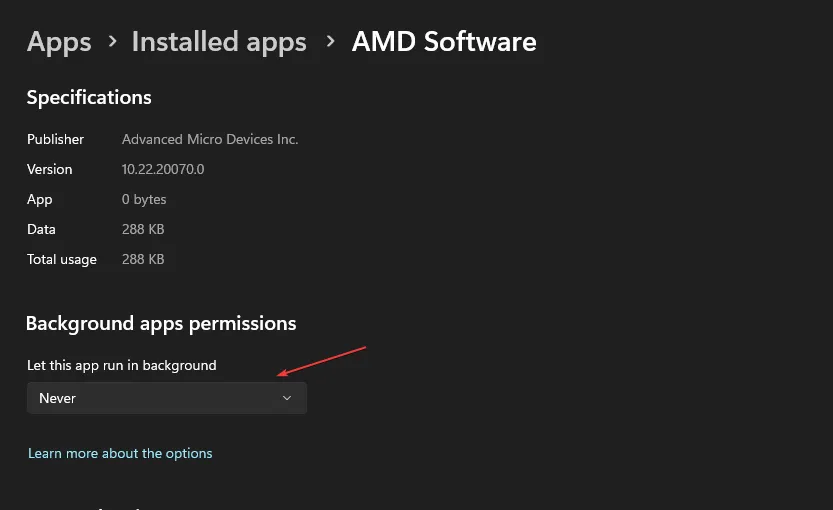
- Repeat the same process for other apps.
Disabling apps from running in the background prevents them from using up your system resources.
4. Stop overclock on your PC
- Left-click the Start button, type msconfig, and press Enter .

- In the System Configuration window, click on the Boot tab.
- Check the No Overclock option. Click OK and restart your PC.
Stopping your PC from running overclocking utilities prevents Valorant from using excessive CPU. You can also check how to fix CPU overclock crashing games on your PC.
5. Set RAM priority for Valorant
- Press the Ctrl + Shift + Esc keys to open Task manager.
- Go to Details, right-click Valorant, select Set priority from the drop-down, and choose Realtime or High.
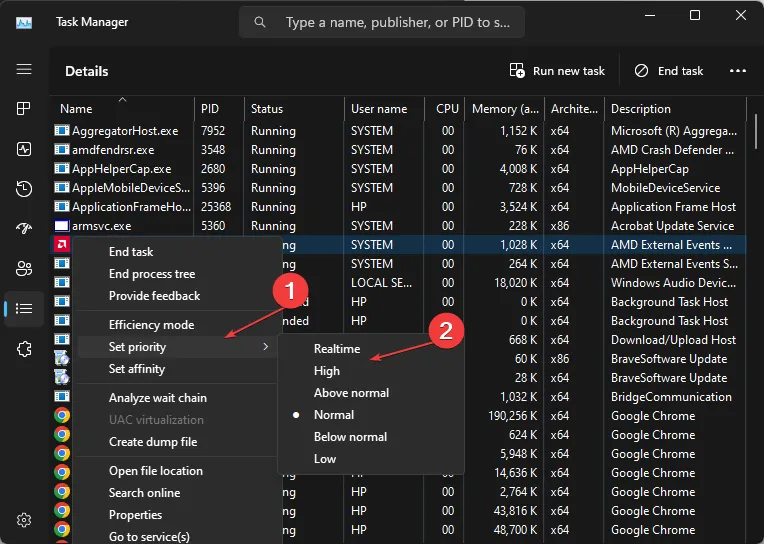
- Close the Task Manager and check if the high CPU usage persists.
Allowing a high or real-time priority will allocate more RAM resources and limit the CPU usage of Valorant.
If you have further questions or suggestions, kindly drop them in the comments section.
Leave a Reply