Usb80236.sys BSoD Error: 5 Ways to Fix It
The usb80236.sys Blue Screen of Death (BSOD) error typically arises due to various reasons, such as damaged system files and outdated or corrupted USB drivers, among others.
The error typically occurs when the operating system has reached a critical condition and cannot recover from the problem, resulting in a system crash and the blue screen of death (BSOD) with the usb80236.sys error message.
If you are experiencing the usb80236.sys Blue Screen of Error, this guide offers some effective solutions to help you eliminate the issue.
What is the usb80236.sys error?
- Outdated or corrupted device driver: The USB network adapter driver may become outdated or corrupted, causing the system to crash and display the error.
- Hardware malfunction: The hardware component of the USB network adapter, such as the USB port or the adapter itself, could be damaged or malfunctioning, leading to the error.
- Conflicting programs: Sometimes, other programs or drivers may conflict with the USB network adapter driver, causing the error.
- Malware or virus infection: Malware or virus infections can corrupt system files, including the USB network adapter driver, leading to the error.
How do I fix the usb80236.sys BSoD error?
1. Reinstall the USB driver
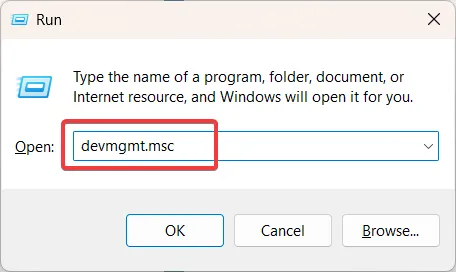
- Press Windows + R to open the Run box, type devmgmt.msc and hit Enter .
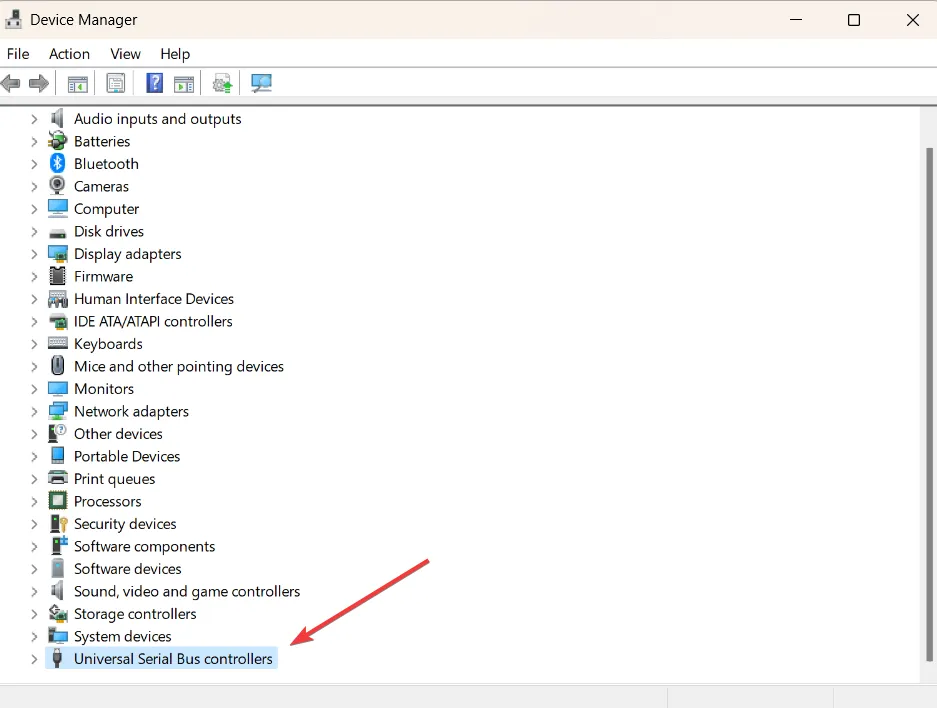
- Scroll down to the bottom of the list and click on Universal Serial Bus Controller to expand.
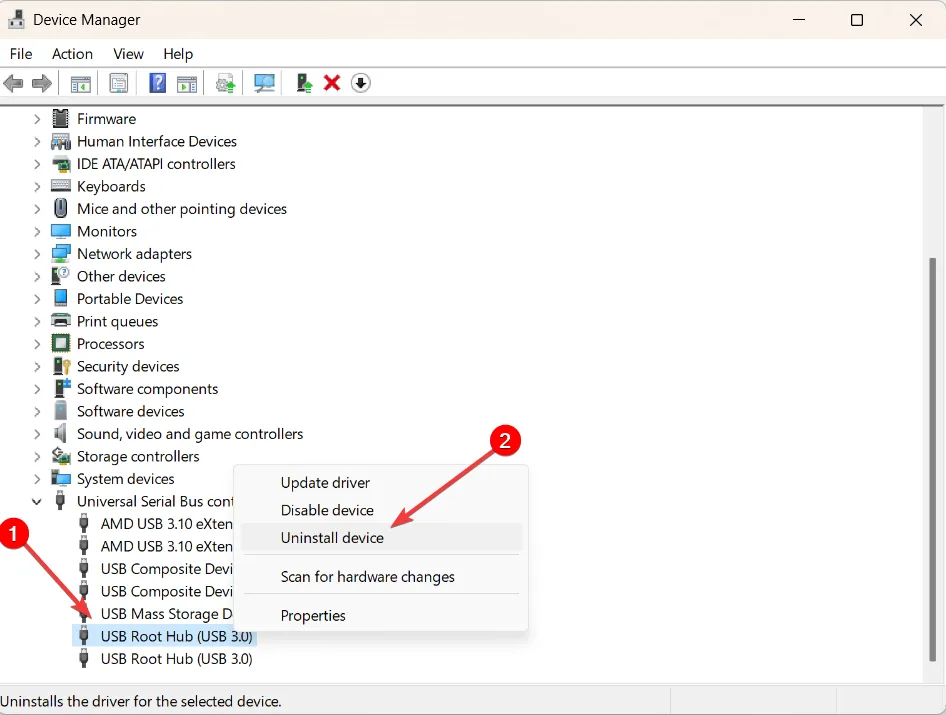
- Right-click on the USB Root Hub (USB 3.0) device and select the Uninstall device option.
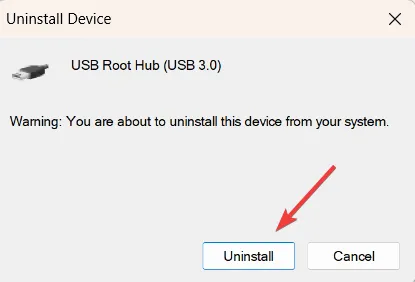
- Then, Uninstall to confirm.
- If you have more than one USB Root Hub device driver, uninstall all of them.
- After that, reboot your computer.
After the restart, the driver will be automatically re-installed, but the usb80236.sys Blue Screen error should no longer occur.
2. Run System File Checker
- Click on the Start button, then type Command Prompt and select Run as administrator from the options.
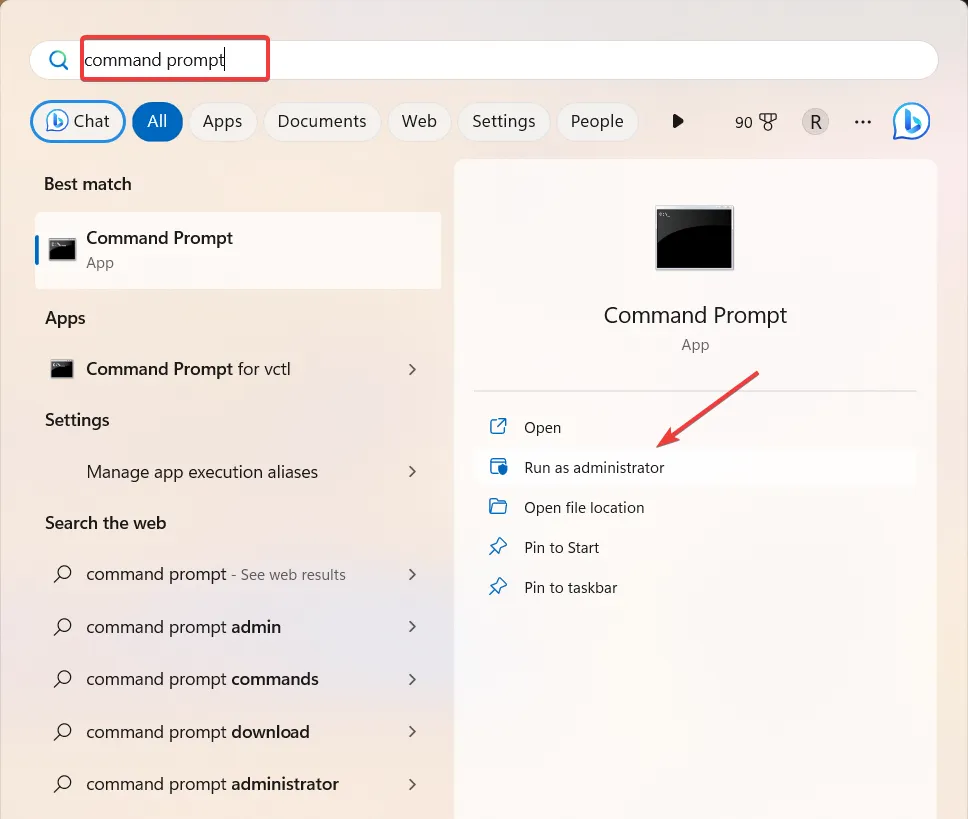
- When the User Account Control prompt appears, click Yes.
- Next, type the below command and press Enter :
sfc /scannow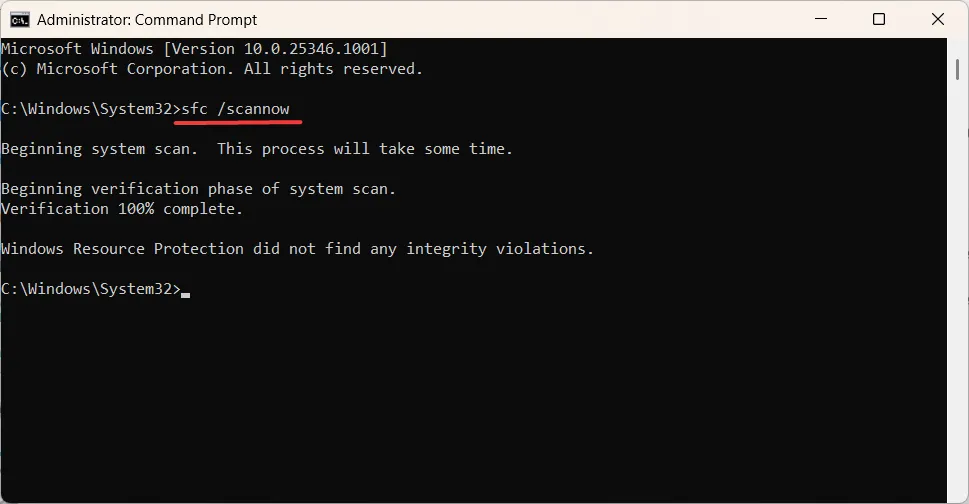
- This will initiate a scan that can repair any corrupt or missing system files that may be causing errors.
3. Run the DISM scan
- Press Windows + R to open the Run dialog, type cmd, hold the Ctrl + Shift key, and click OK to run Command Prompt as Administrator.
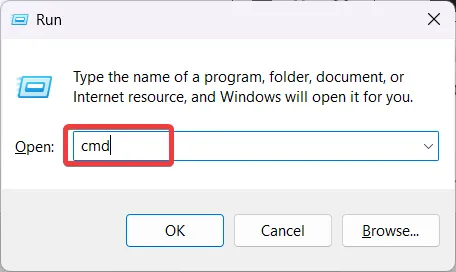
- Then, type the following command lines, and press Enter after each:
DISM /Online /Cleanup-Image /CheckHealthDISM /Online /Cleanup-Image /ScanHealthDISM /Online /Cleanup-Image /RestoreHealth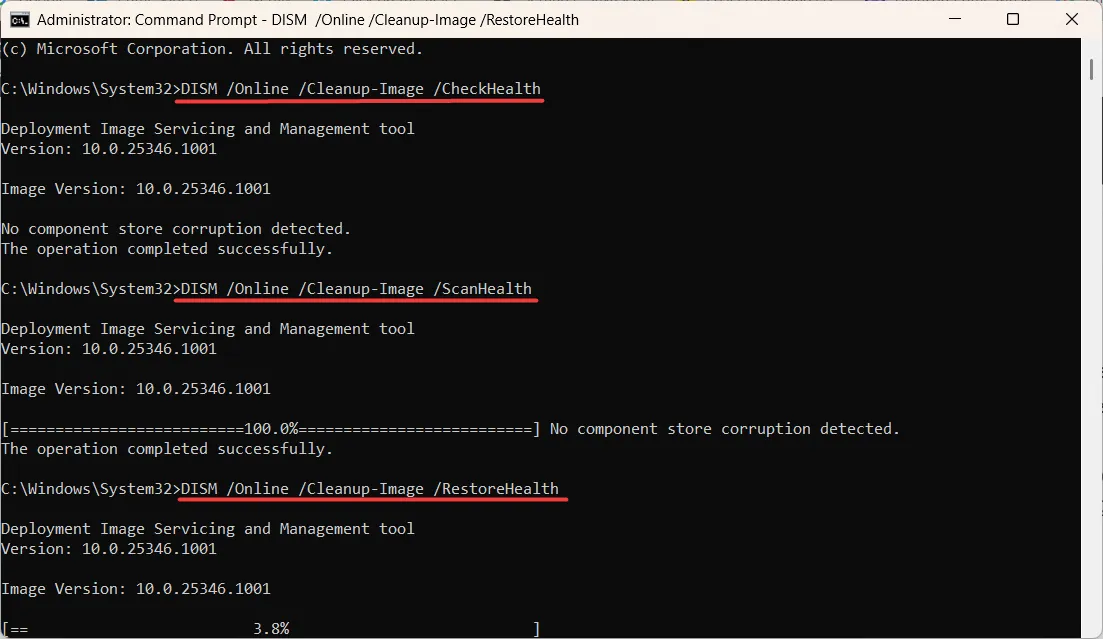
- The DISM scan may take some time to complete, and you should not interrupt the process.
- After completing the restoration process, restart your device and check if the usb80236.sys BSoD error still occurs.
4. Install Pending Updates
- Press Windows + I to open Windows Settings app.
- Go to the Windows Update tab and click on the Check for Updates button.
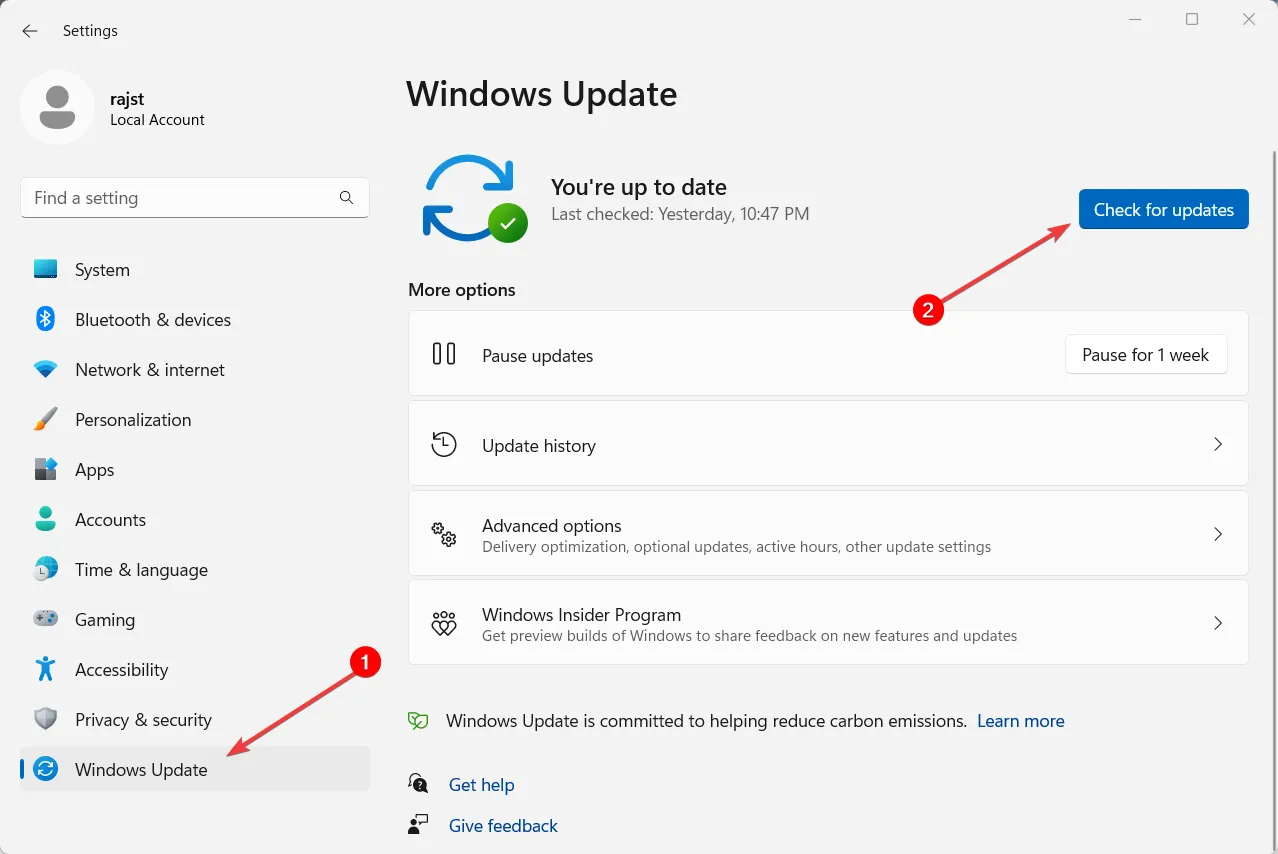
- Let the computer check for updates and install them.
- Once the updates are installed, restart your computer.
5. Perform System Restore
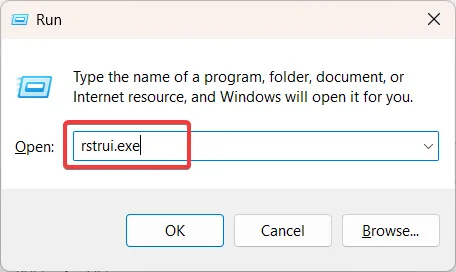
- Press Windows + R to open Run, type rstrui.exe, and press Enter .
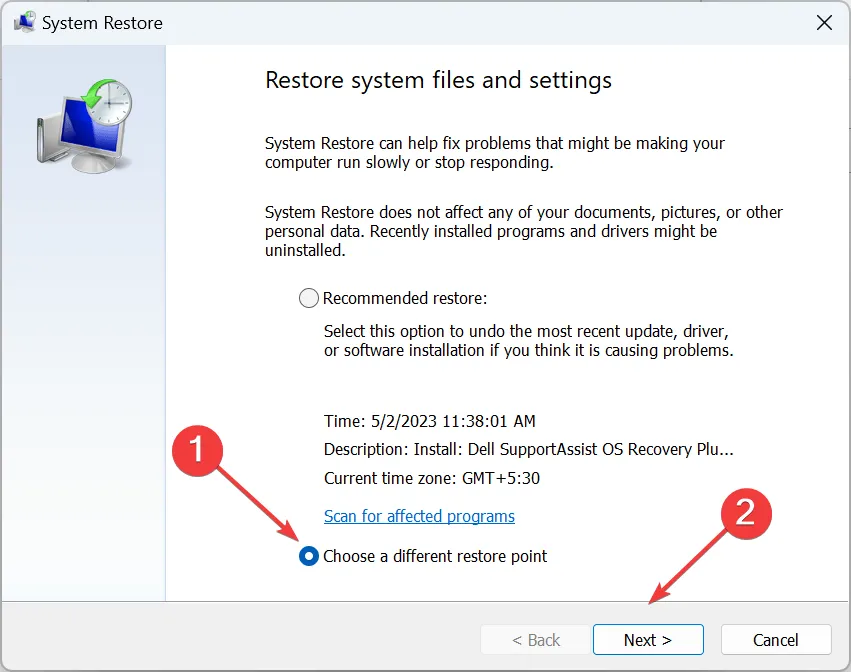
- In the System Restore control panel, select Choose a different restore point option if prompted and, click Next to continue.
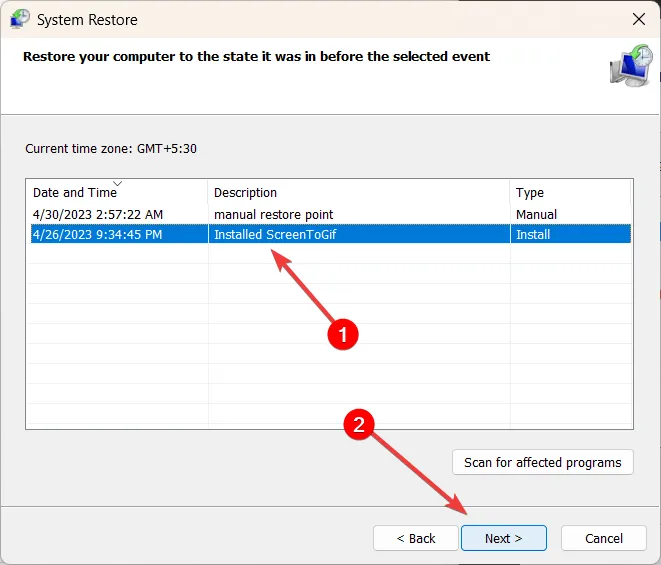
- Select a restore point from the list of available dates and click Next.
- Finally, click Finish to start the restoration process.
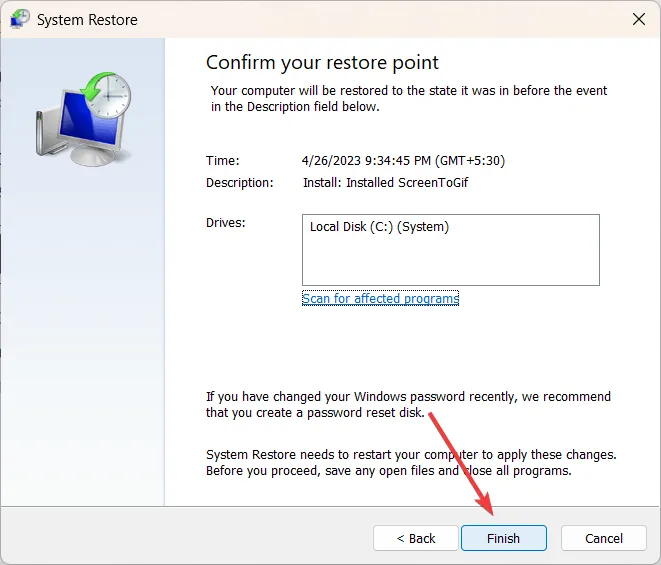
- Wait for the restoration process to complete, and then restart the computer to see if the usb80236.sys error has been resolved.
By following the solutions provided in this guide, you should be able to eliminate the usb80236.sys BSOD error and ensure your Windows operating system is functioning correctly.
If you have any additional questions or suggestions, please leave them in the comments section.
Leave a Reply