The following components are required to run this program
If you see the error message, The following components are required to run this program, while trying to run programs, primarily games, on your Windows 11/10 PC, then read this post to know how to successfully resolve the issue.
The error appears when the user tries to launch the program or game. The missing component could be DirectX Runtime or Microsoft Visual C++ Runtime. The complete error message reads:
The following components are required to run this program:
DirectX Runtime
OR
The following components are required to run this program:
Microsoft Visual C++ Runtime
DirectX Runtime is a collection of libraries that renders video game graphics on a Windows PC by gaining direct access to its hardware (CPU and GPU). Microsoft Visual C++ 2015 Runtime is another collection of libraries required by Windows programs developed using Microsoft Visual Studio.
Both of these components are mandatorily required for proper working of the programs/games they are linked to. If any of these components go missing, you will see an error message that says the DLLs are missing and you need to install the Runtime to launch the program. For example, in one of its releases, the popular video game Volarant did not include DirectX Runtime. So many users encountered the error after installing the update.
The following components are required to run this program
Use the following solutions to resolve the error The following components are required to run this program on your Windows 11/10 PC:
- Download and install the missing component.
- Repair the missing component.
- Reinstall the program or game that is throwing the error.
Let us see these in detail.
1] Download and install the missing component
You may encounter the error if the required component is not present on your device. To fix this, you need to download and install the missing components.
A) Download and install missing DirectX DLLs

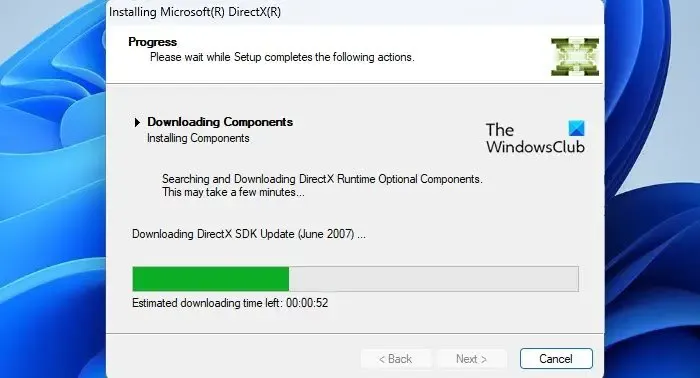
DirectX comes preinstalled on all Windows devices and is retro-compatible in most cases. However, if your game is not working due to missing DLLs from a past versions of DirectX (such as DirectX 9), download and install DirectX End-User Runtime. It will not change the version of DirectX on your system, but install a number of DLLs from the legacy DirectX SDK that are used by some older games.
To update DirectX on Windows, check for any latest updates in the Windows Updates section.
B) Download and install Microsoft Visual C++ 2015 Runtime

Visit Microsoft Visual C++ 2015 Redistributable page and click on the Download button. On the next screen, select both x86 and x64 versions of the runtime and click on the Next button.
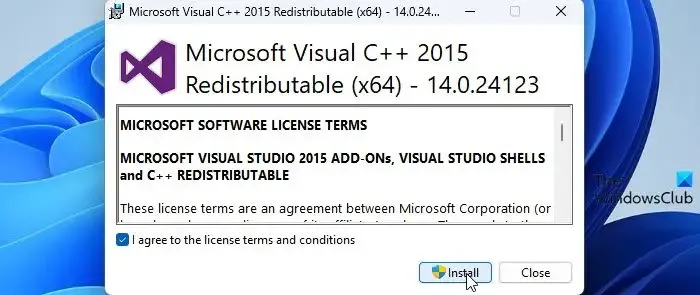
Double-click on the vc_redist.x64.exe file. Microsoft Visual C++ 2015 Redistributable installation wizard will appear. Follow the on-screen instructions and finish installing the runtime.
Repeat the same steps for the second file (vc_redist.x86.exe).
2] Repair the missing component

If the required component is not installed correctly on your device, you may see the error message The following components are required to run this program.
Repair DirectX Runtime by installing any pending Windows Updates or using the DirectX End-User Runtime Web Installer.
To repair Microsoft Visual C++ 2015 Runtime, go to System > Settings > Apps > Installed apps. Search for Microsoft Visual C++ 2015. Click on the three-dots icon next to the redistributable’s name and select Modify. Click Yes in the User Account Prompt that appears. Finally, click on the Repair button in the Microsoft Visual C++ 2015 Redistributable window.
3] Reinstall the program or game that is throwing the error
If the above solutions won’t help, uninstall the program/game from your Windows 11/10 PC and then download and install it again.
Also, make sure all your graphics drivers are latest or up to date.
This should hopefully resolve the issue.
How to fix the Valorant DirectX runtime error on Windows 11/10?
To fix Valorant DirectX runtime error, you need to update DirectX or install the missing DLL components using the DirectX End-User Runtime Web Installer. You also need to install the latest driver updates from the Optional Updates section under Windows Updates. If that doesn’t help, you should completely uninstall Valorant and then reinstall it on your Windows PC to resolve the issue.
Why is DirectX not installing?
DirectX comes as an integral part of all the latest Windows operating systems. However, if you’re manually trying to install DirectX and it is not installing, make sure your system has. NET Framework 4 installed and has enough system resources (RAM and CPU) at the time of installation. Also, make sure your graphics card is compatible with the DirectX version you’re trying to install.
Leave a Reply