Navagio.sys BSOD Error: 5 Ways to Quickly Fix It
The navagio.sys Blue Screen of Death error is an issue users encounter after playing PBUG on their PC. This started happening since users were asked to provide administrative privileges to install an anti-cheat upon launching the game.
After playing closing PBUG, this dread error, accompanied by the equally scary blue screen, shows up. If you are also facing the navagio.sys BSOD issue, we will show you fix it for good in this guide.
What causes the navagio.sys blue screen on PC?
Various factors can be responsible for the navagio.sys error. Below are some of the prominent ones:
- Outdated PC: An outdated PC is one of the leading causes of this error message. Hence, you need to update your PC at all times to get rid of it.
- Faulty game files: Faulty or corrupt game files can cause you to get this error after closing your game. The solution to this is to delete some of these files.
- Faulty Windows update: If you started noticing this issue after updating your PC, it might be down to problems with the update. The solution to this is to delete the update.
How do I fix the navagio.sys BSOD error?
1. Delete the navagio.sys file
- Press the Windows key + R , type the path (you can change the path if you installed the game to another path) below in the run box, and click OK:
C:/Program Data/Common Files/PBUG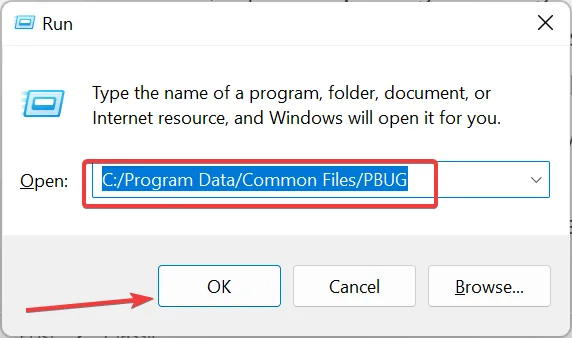
- Double-click the unistall.exe file to launch it.
- Now, wait for the opened CMD black window to close and restart your PC.
- Next, repeat step 1 to go to the game path again.
- Right-click the navagio.sys file and select Delete.
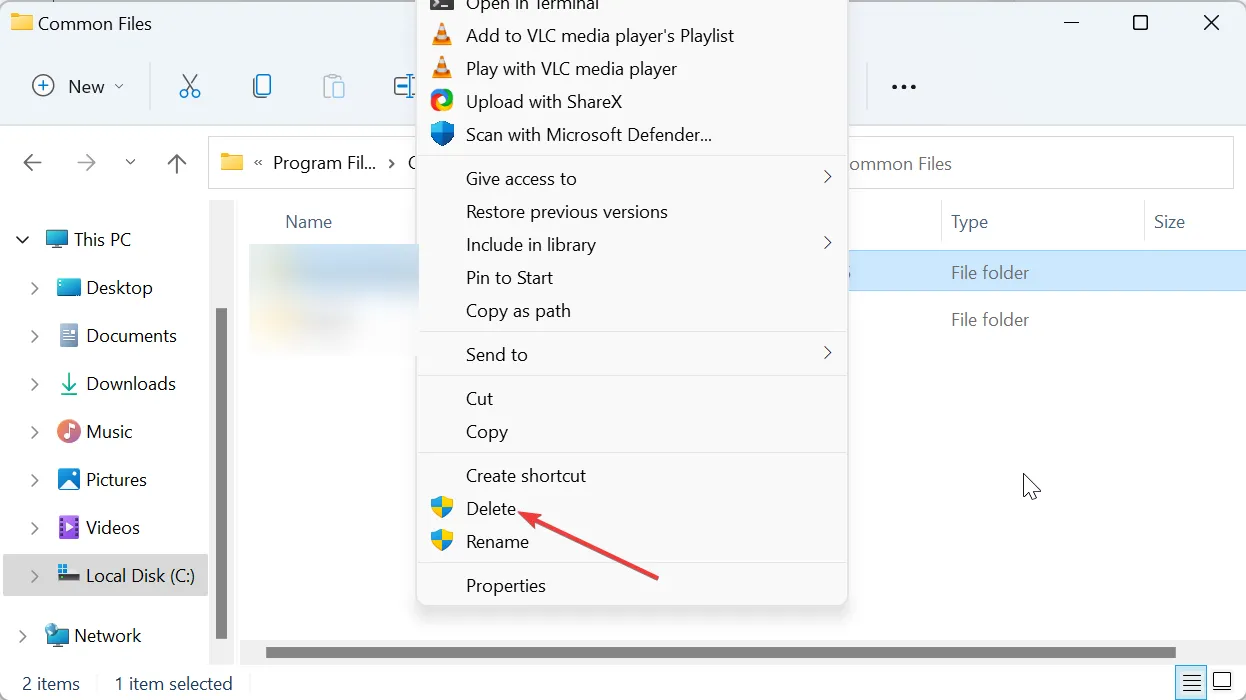
- Finally, launch the game and click the No button when asked for disk access. Note that you will have to do this anytime you want to play the game from now on.
Frequently, this issue is caused by problems with the navagio.sys file. Many users were able to fix it by deleting the file and could still play the game. So, you should try it too.
2. Update your PC
- Press the Windows key + I to open the Settings app and click the Windows Update option in the left pane.
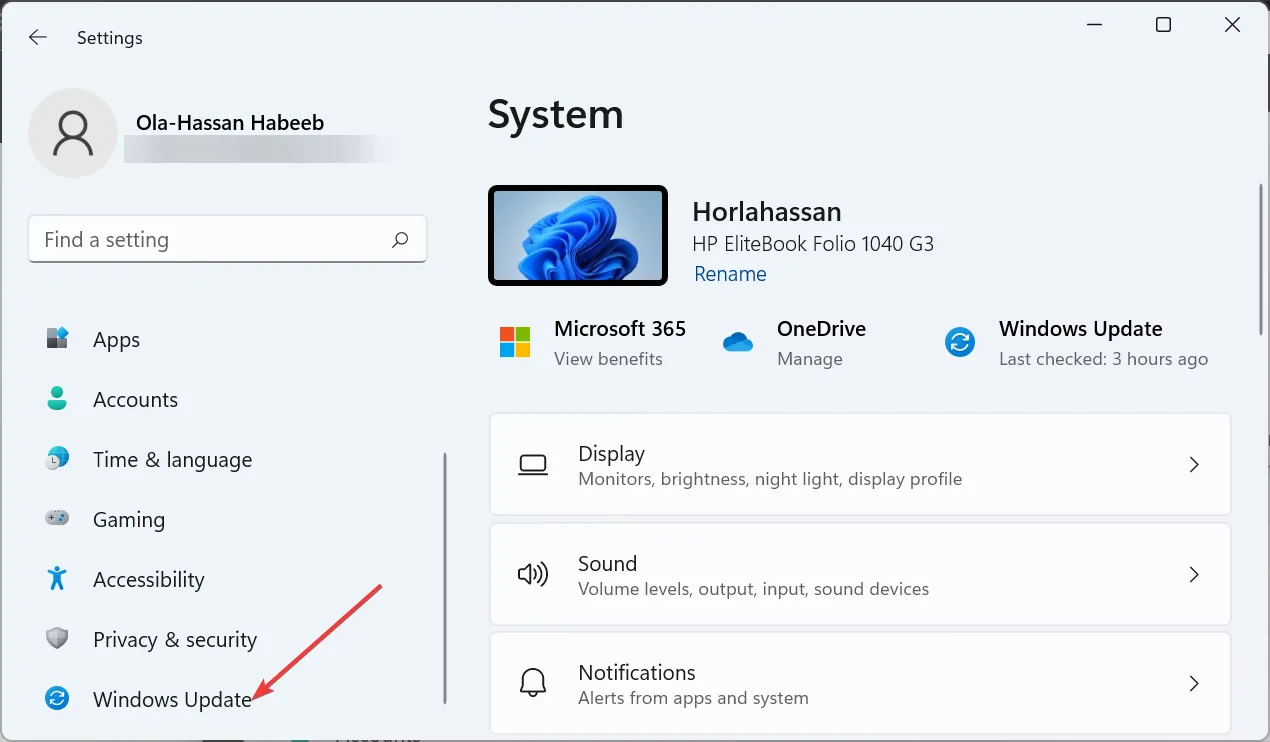
- Click the Check for updates button.
- Now, download and install all available updates.
If your PC is outdated, it is prone to all sorts of issues, including the BSOD error. The quickest way around this is to update your operating system, as shown above.
3. Uninstall the last update
- Press the Windows key + I and select Windows Update.
- Click the Update history option.
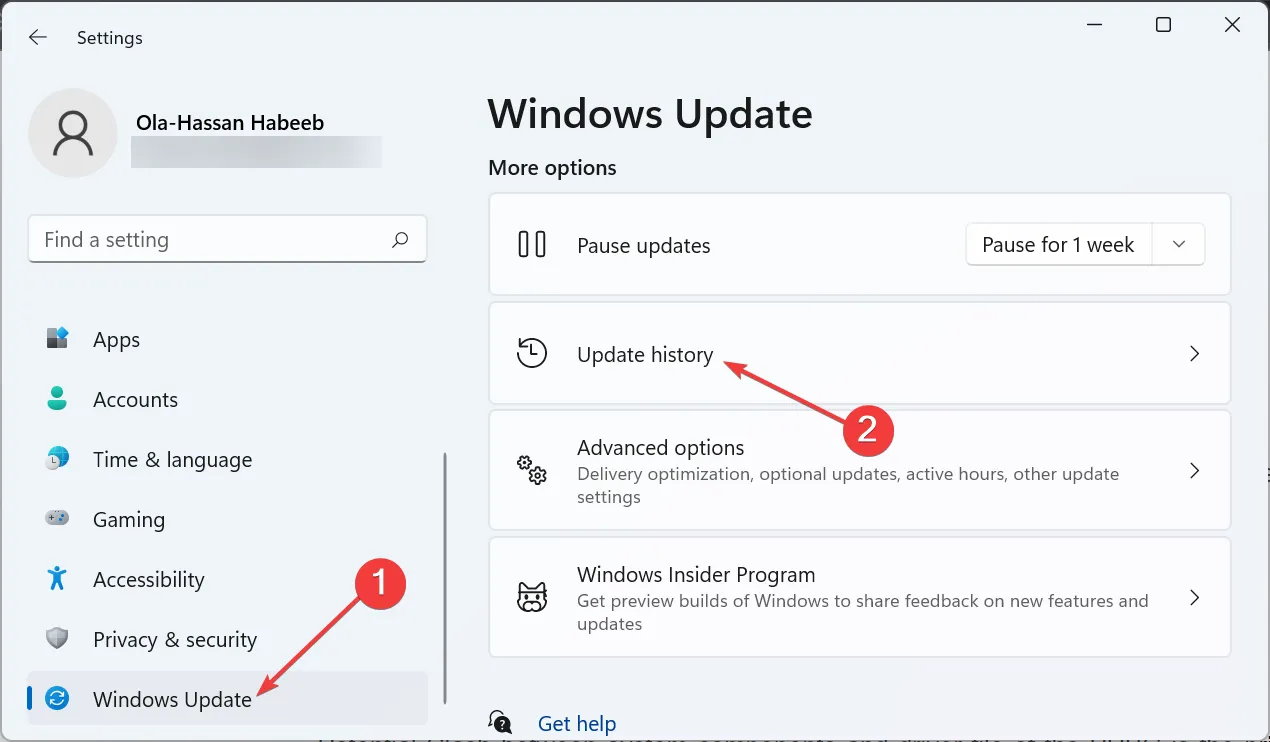
- Now, scroll down and click Uninstall updates.
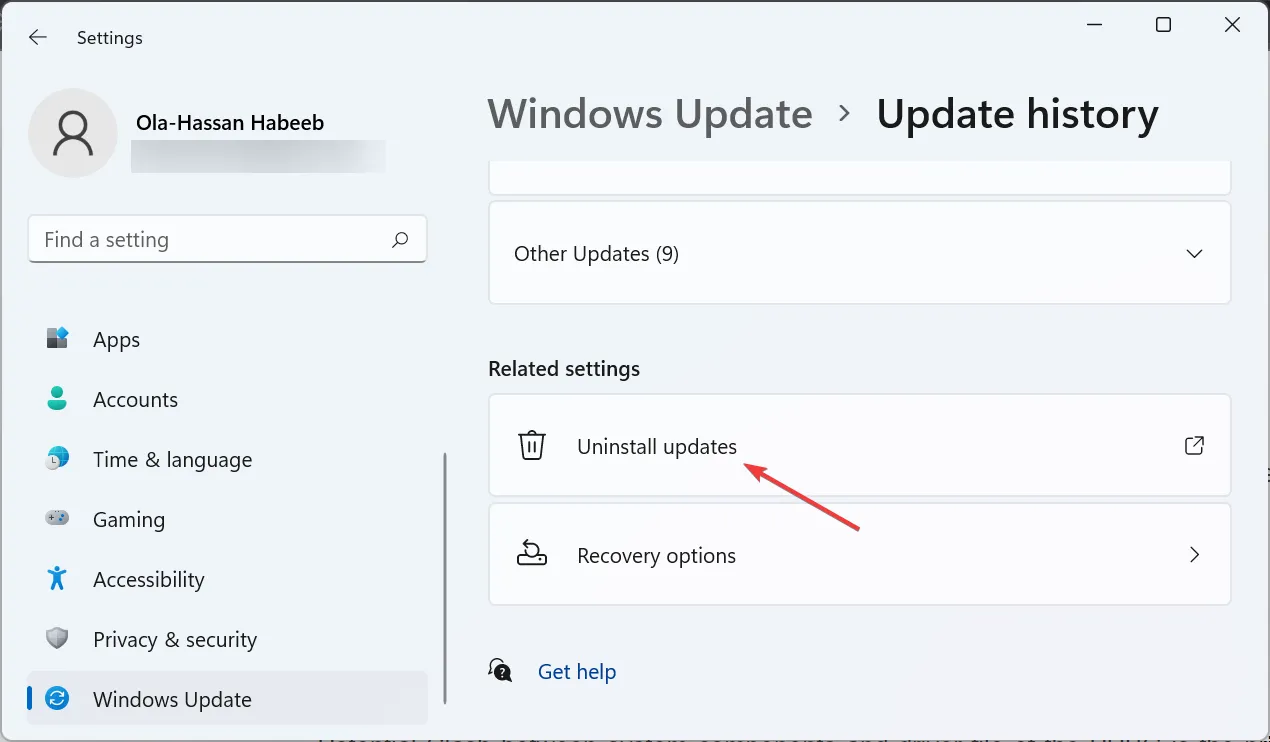
- Finally, right-click the last update, select Uninstall, and follow the onscreen instructions to complete the process.
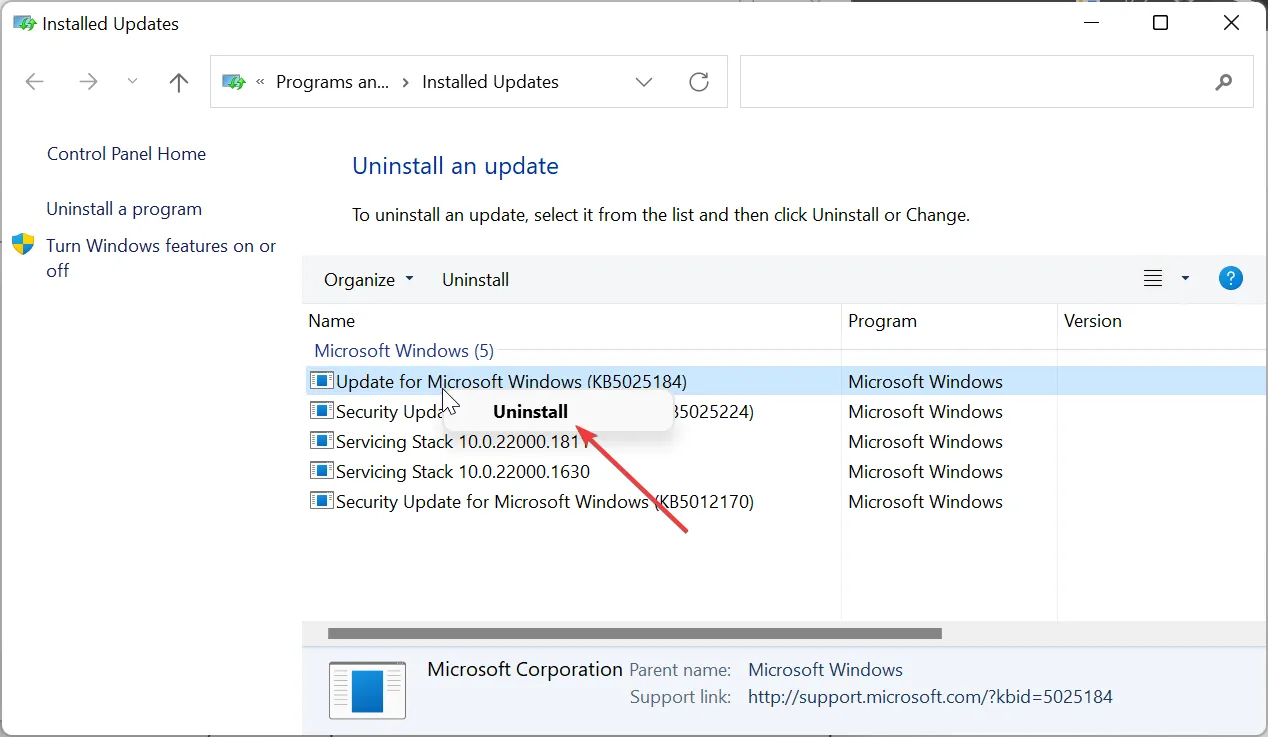
Some users reported facing the navagio.sys error after updating their PC. Some compatibility issues between the game and your PC can cause this. So, you need to uninstall the latest update to get past the error.
4. Disable Kernel-mode Hardware-enforced Stack Protection
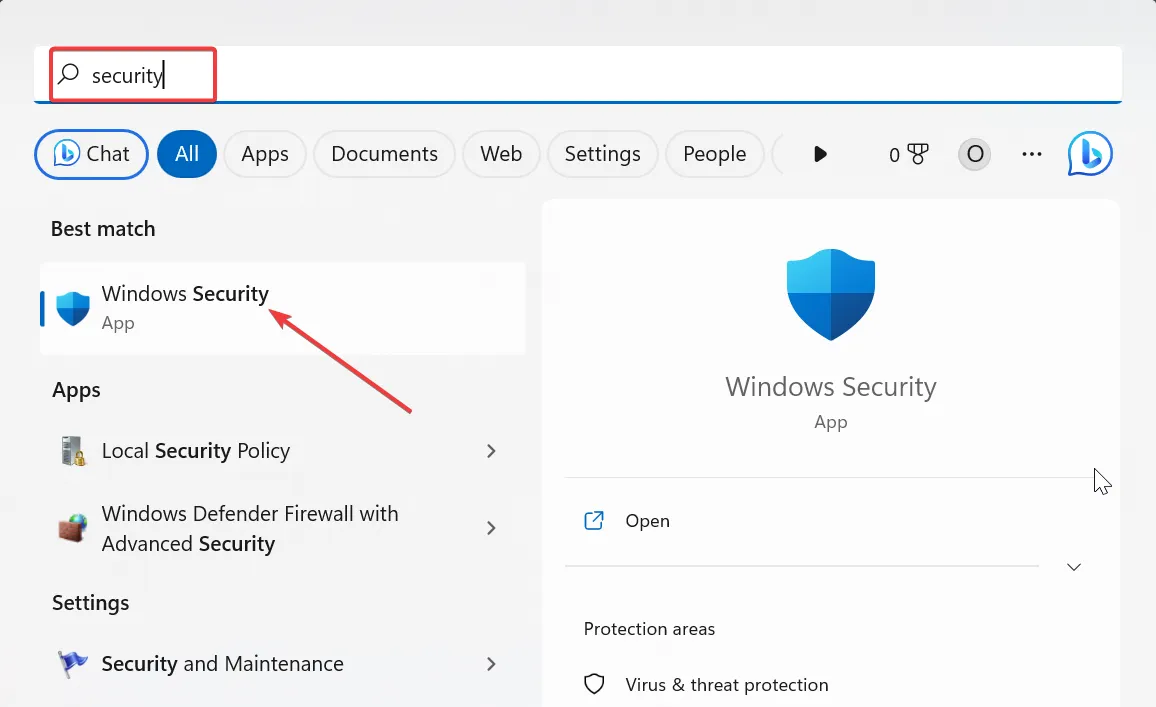
- Press the Windows key, type security, and select the Windows Security option.
- Now, click the Device security option in the left pane.
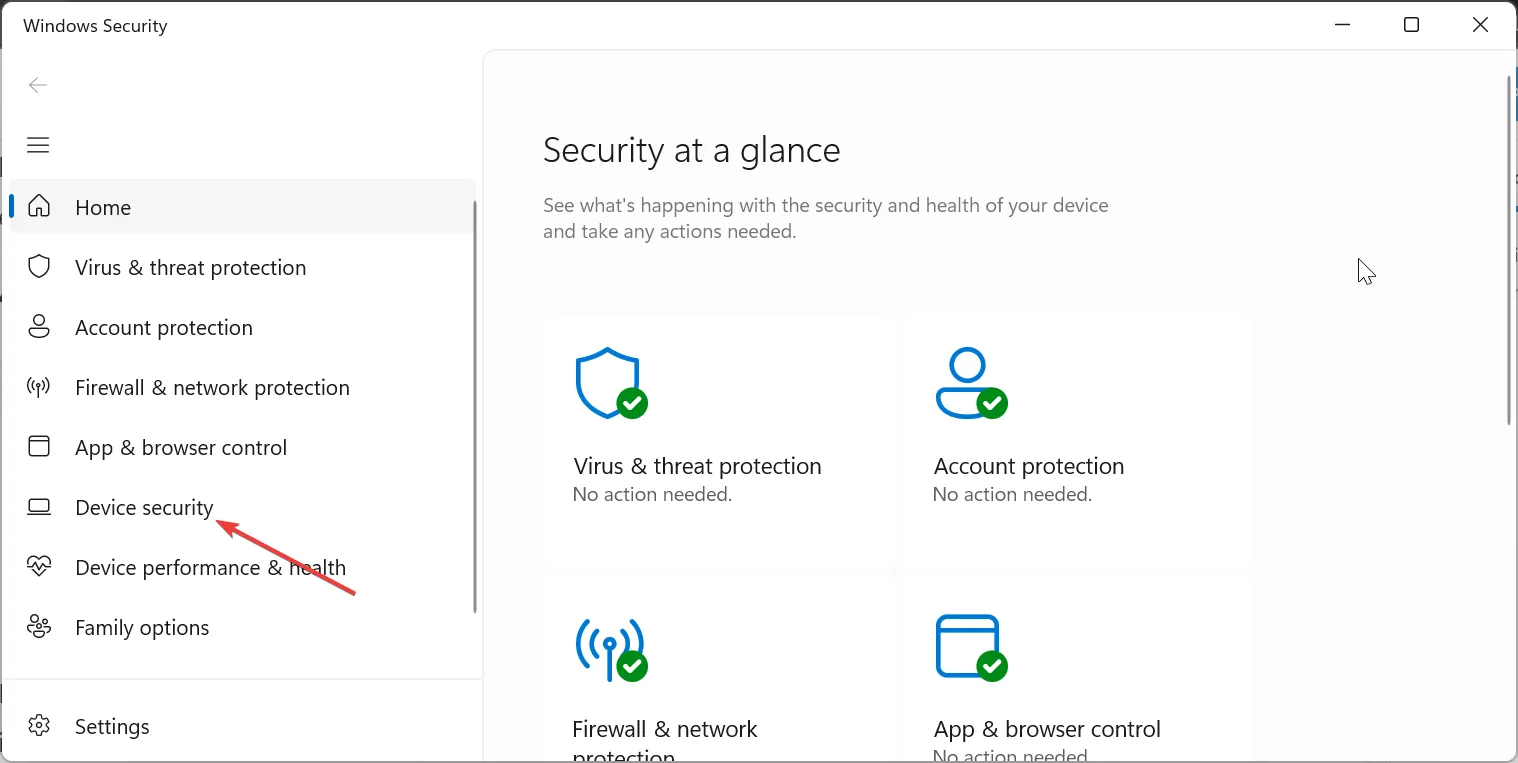
- Choose the Core isolation details option in the right pane.
- Finally, toggle the switch for Kernel-mode Hardware-enforced Stack Protection to disable it.
In some cases, this navagio.sys problem can be caused by your PC’s security feature. The solution to this is to disable the responsible feature.
5. Reinstall Windows
If everything else fails to fix this navagio.sys Blue Screen of Death error, you might need to reinstall your operating system completely. You have the option of performing an in-place upgrade or a clean install.
If you have some important files on your PC, you can perform an in-place upgrade. However, if you have backed up your data, you can perform a clean install instead.
The navagio.sys issue is one of the many frustrating Blue Screen of Death issues users encounter. And just like we have done with others before it, we have provided the solutions to it in this guide.
Feel free to let us know the solutions that helped you fix this issue in the comments below.
Leave a Reply