IOMap64.sys BSOD Error: How to Fix It in 6 Steps
The IOMap64.sys BSOD error mostly shows up during the first boot-up of the day for some reason. The error then disappears after restarting the PC for some users.
While this can look manageable, it can lead to more serious issues if left unattended. In this guide, we will show you how to fix this issue for good.
Why am I getting the IOMap64.sys error?
Below are some of the causes of the IOMap64.sys Blue Screen of Death error:
- Faulty ASUS software: The most prominent cause of this issue is problems with the ASUS AI software. You can fix this by uninstalling the program.
- Outdated PC: At times, this error message can be caused by an outdated operating system. The solution to this is to update your PC to the latest version.
- Corrupt GPU drivers: If your graphics driver is outdated or faulty, you can get the IOMap64.sys error. You need to reinstall or update your driver to get past the error.
- Faulty system files: Some users have also found this error message to be due to broken or missing system files. Repairing these files should do the trick here.
How can I fix the IOMap64.sys BSOD error?
1. Uninstall ASUS AI Suite
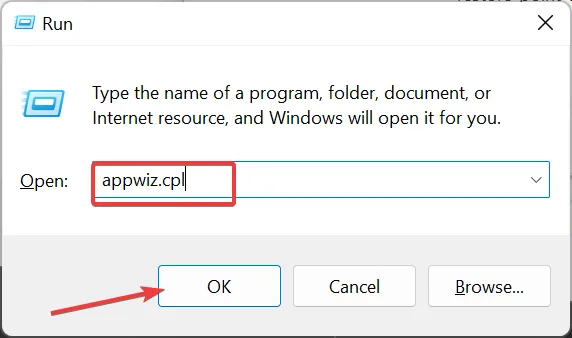
- Press the Windows key + R , type appwiz.cpl, and click OK.
- Select the ASUS AI Suite software and click Uninstall at the top.
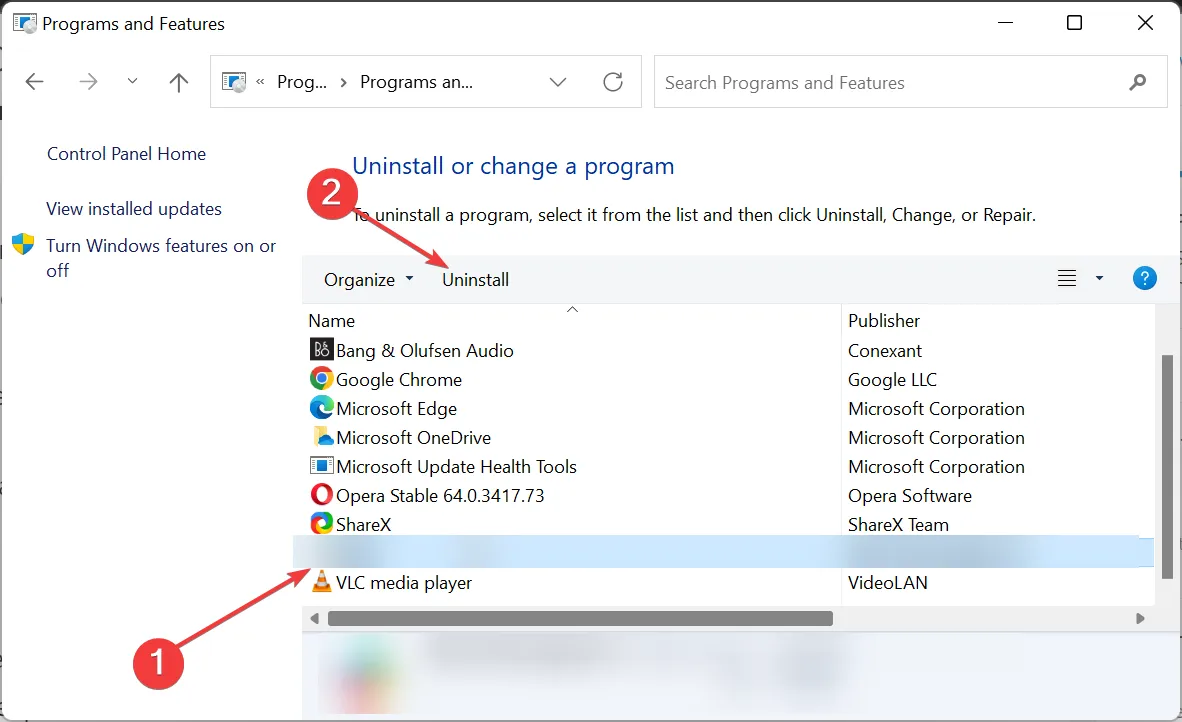
- Finally, follow the onscreen instructions to complete the process.
Problems with the ASUS AI Suite software majorly cause the IOMap64.sys blue screen error. While this software is quite useful, there is nothing it can do that other system tools cannot.
So, you need to uninstall the software and restart your PC to fix this BSOD error.
2. Reinstall GPU drivers
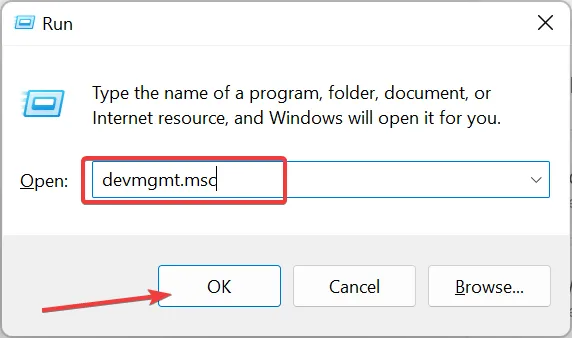
- Press the Windows key + R , type devmgmt.msc, and click OK.
- Double-click the Display adapters option to expand it and right-click the device there.
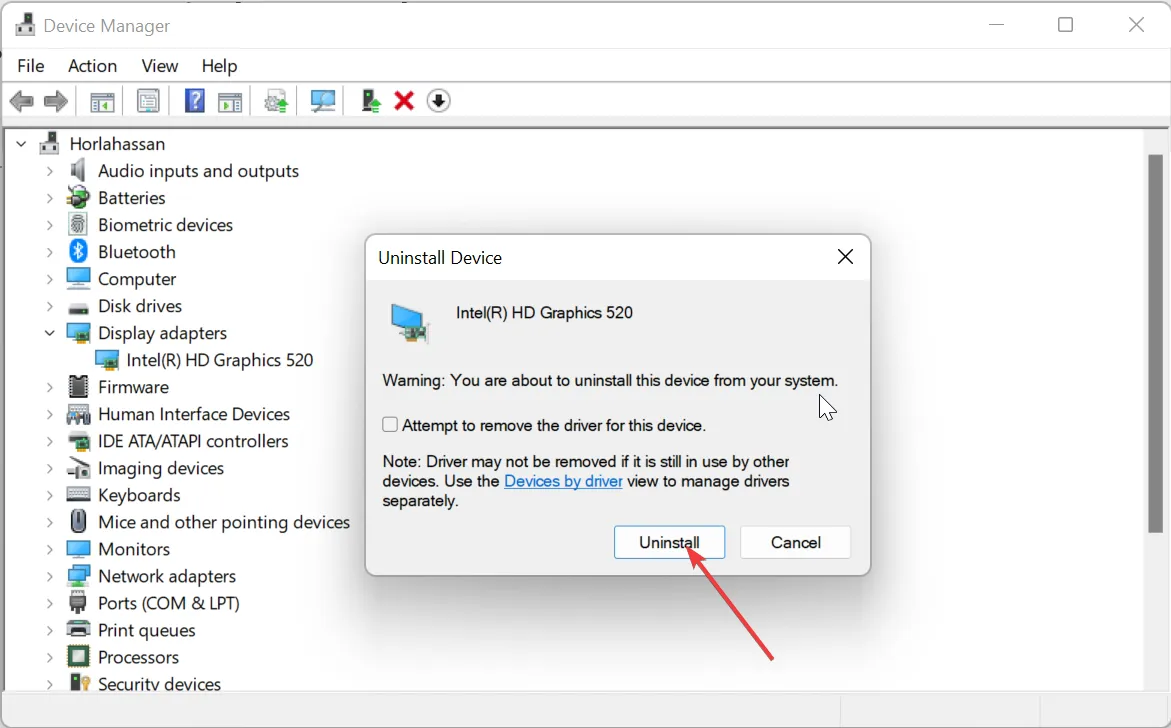
- Now, select the Uninstall device option.

- Check the box for Attempt to remove the driver for this device and click the Uninstall button.
- Finally, click the Scan for hardware changes icon and restart your PC.
In some cases, you can get the IOMap64.sys BSOD error because of problems with your graphics driver. The solution to this is to reinstall the driver.
3. Update your PC
- Press the Windows key + I to open the Settings app and click Windows Update in the left pane.
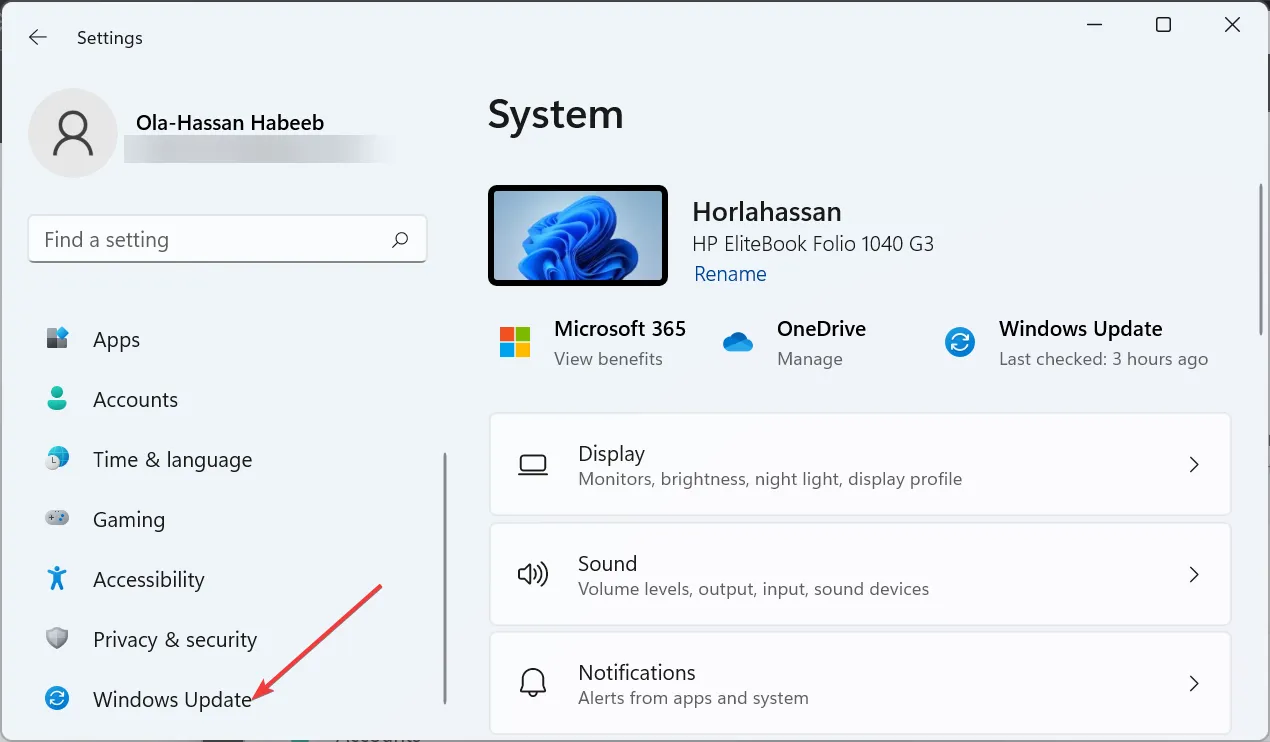
- Click the Check for updates button.
- Finally, download and install the available updates and restart your PC.
An outdated PC is prone to various issues with the IOMap64.sys error one of them. So, you always need to update your operating system.
4. Run the Memory Diagnostics tool
- Press the Windows key + R , type mdsched.exe, and click OK.
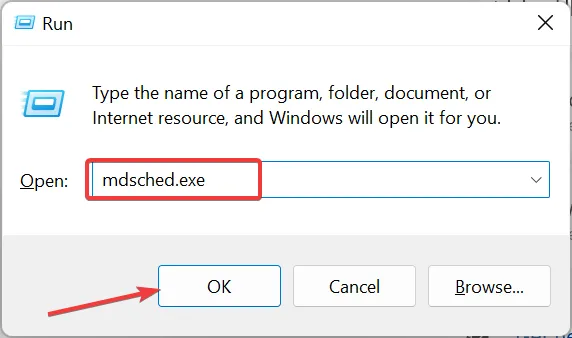
- Click the Restart now and check for problems (recommended) option.

- Finally, wait for your PC to restart, and the tool will check for and fix memory errors.
Memory issues can cause the IOMap64.sys error on your PC. Fortunately, Windows has a built-in tool to fix memory problems.
5. Change the paging file size
- Press the Windows key + R , type sysdm.cpl, and click OK.
- Click the Advanced tab at the top.
- Now, click the Settings button under the Performance section.

- Click the Advanced tab at the top and click the Change button.

- Next, uncheck the Automatically manage paging file size for all drives box.
- Now, tick the radio button for Custom size.
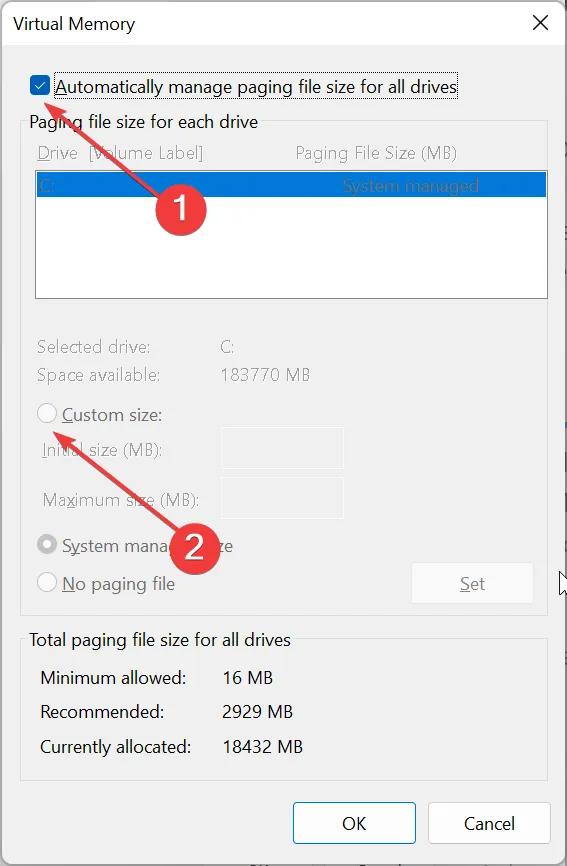
- Finally, set the Initial and Maximum size and click the OK button.
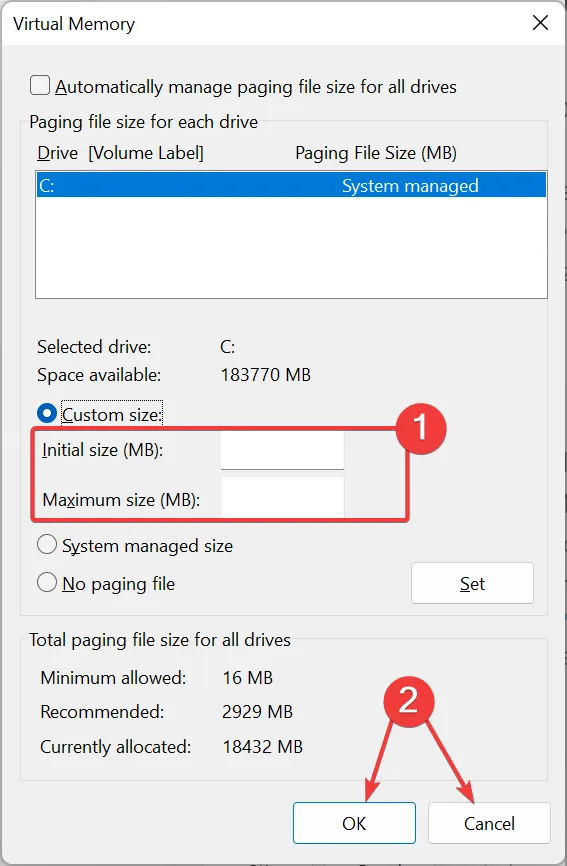
Your PC’s paging file size can sometimes cause the IOMap64.sys issue. The solution to this is to increase the page file size accordingly.
6. Repair system files
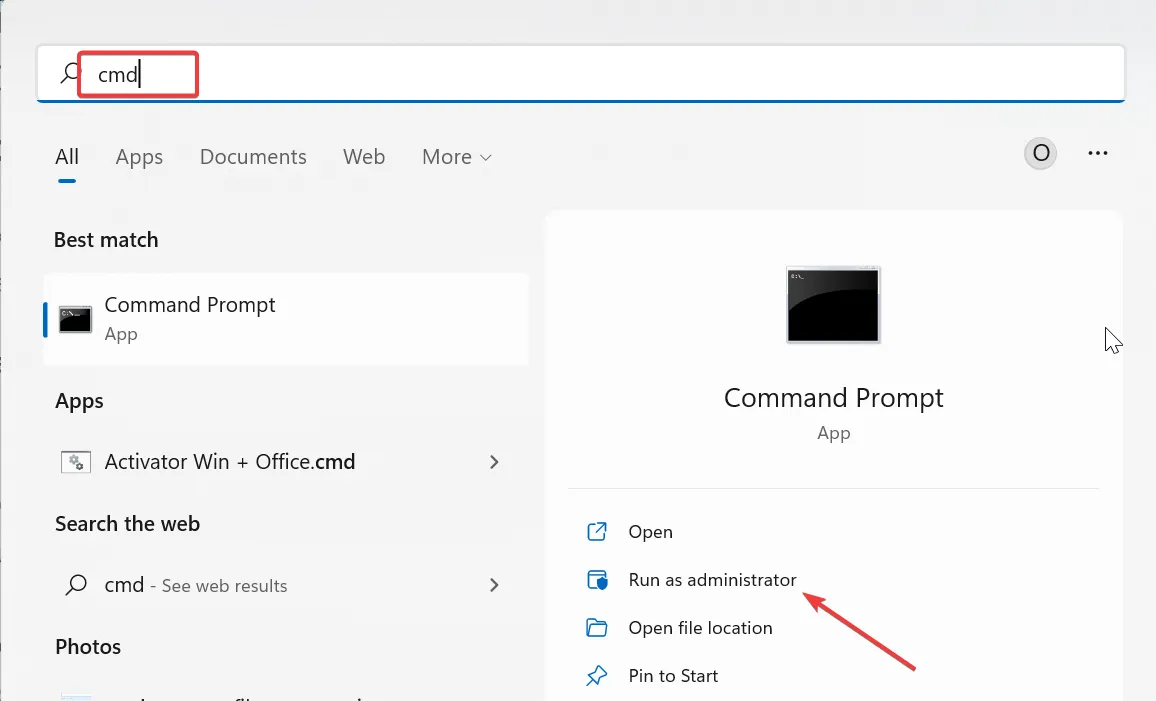
- Press the Windows key, type cmd, and select Run as administrator under Command Prompt.
- Type the command below and hit Enter to run it:
DISM /online /cleanup-image /restorehealth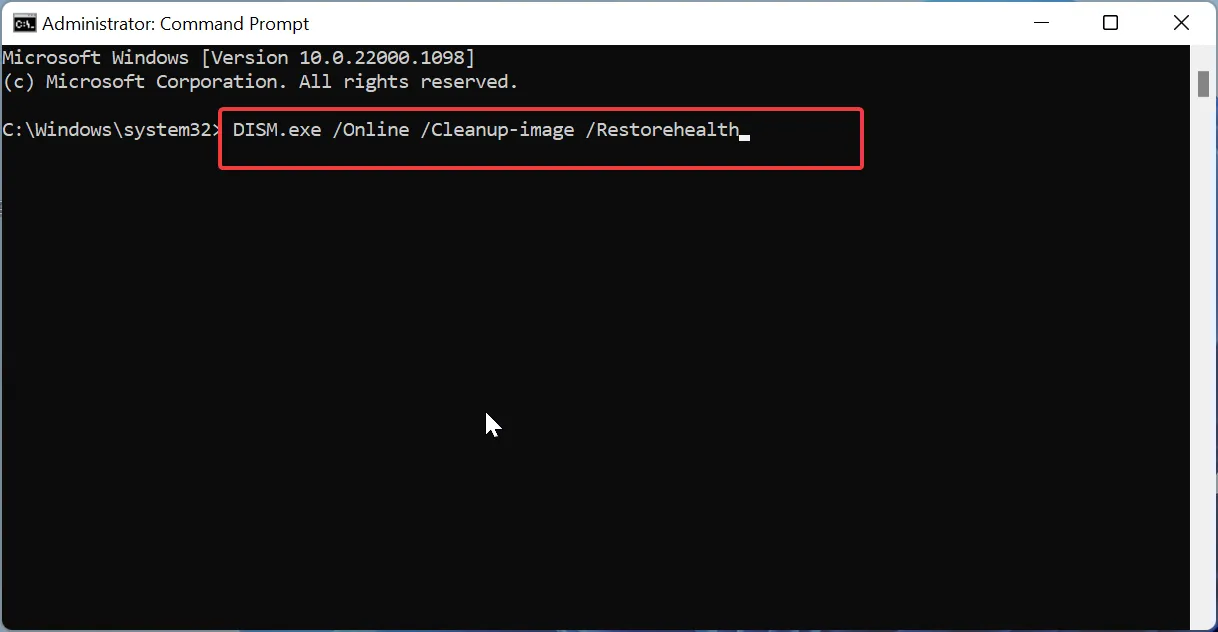
- Wait for the command to finish running. Now, run the command below:
sfc /scannow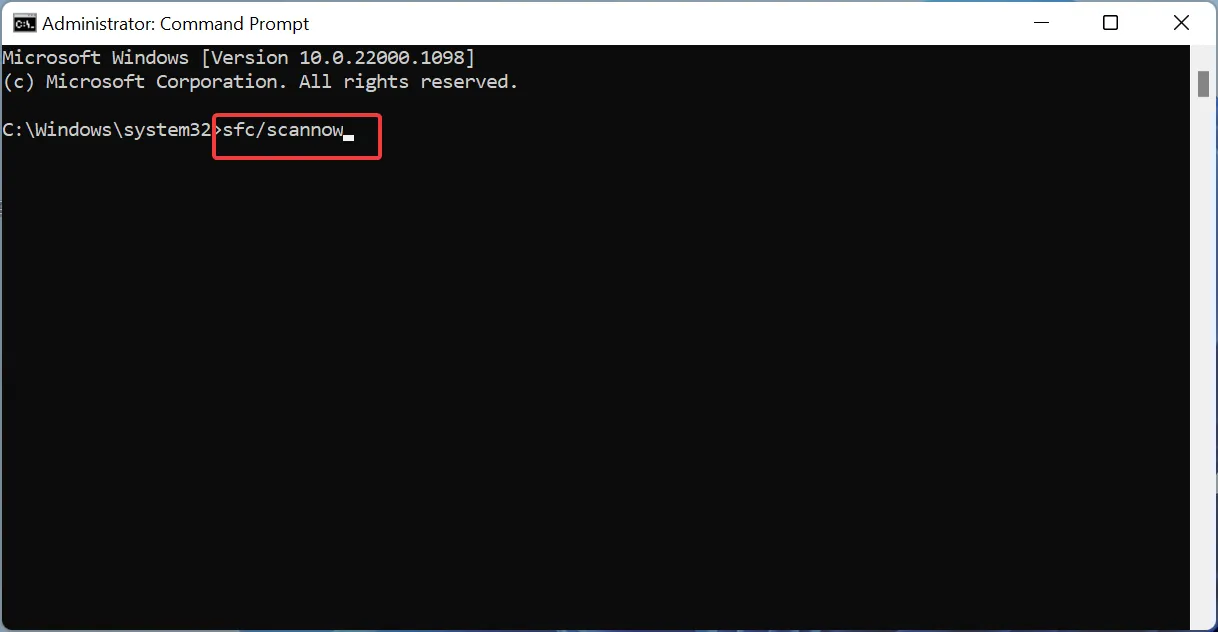
- Finally, wait for the command to finish running and restart your PC.
If your system files are faulty, you might encounter the IOMap64.sys error. You can fix this by running the DISM and SFC scans.
There you have it: everything you need to fix the IOMap64.sys Blue Screen of Death error. You should now be able to fix this by following the solutions in this guide.
Feel free to let us know the solution that helped you solve this problem in the comments below.
Leave a Reply