How to Turn Off Reply All in Outlook: A Simple Way to Do It
A recipient can react to an email in several ways, including the Reply All option. However, not everybody uses this option, and many wonder how to turn off Reply All in Outlook.
Using this feature you can send a message to the original sender and other recipients on the To and Cc lines. This isn’t something that users always want, so many choose to disable it.
Likewise, our readers can read through our article about how to make Outlook automatically open Replies and Forward them in a few steps.
Why does Outlook keep adding my email to Reply All?
Sending out emails to recipients without designing a form and sending the emails issuing the form definition allows them to determine how to react.
The Design Form option in Outlook limits the sender’s options for how to react to the mail. Some are; reply, reply all, print, forward, or attach the message to another message.
However, Outlook doesn’t categorically keep adding your email to Reply All; the recipient does. It is because you haven’t specified the limit to the reaction options the email is exposed to. So, they can select the Reply All option on the message to add their email to the category.
Fortunately, users can decide how many options recipients can access when reacting to their emails. It helps prevent email recipients from selecting Reply All on your email.
How can I turn off Reply All in Outlook?
Design a form in Outlook
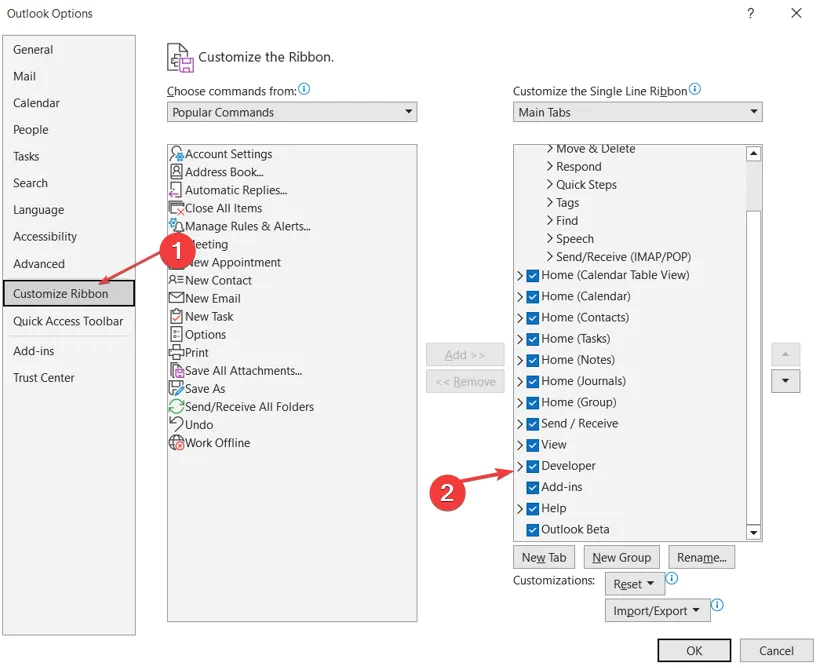
- Launch Outlook on your PC and click File on the left corner of the top bar. Click on Options.

- Then, scroll down, click Customize Ribbon on the left sidebar, and check Developer.
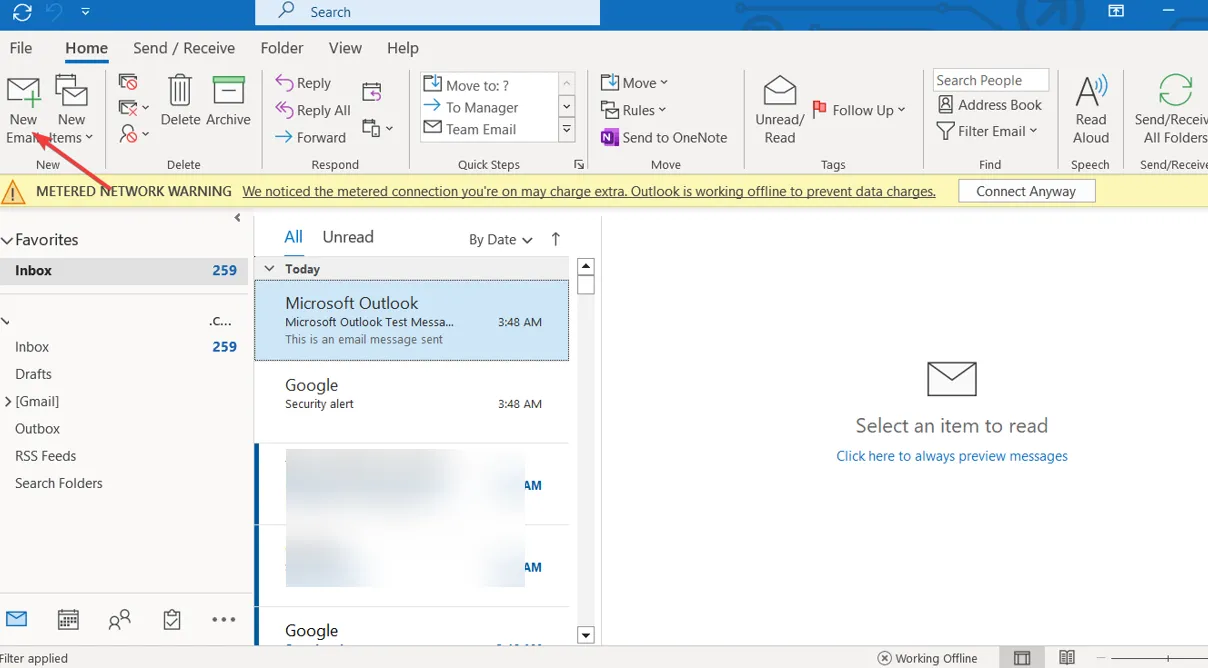
- Select New Email.
- Go to the Developer tab on the right pane, and click on Design a Form from the drop-down.
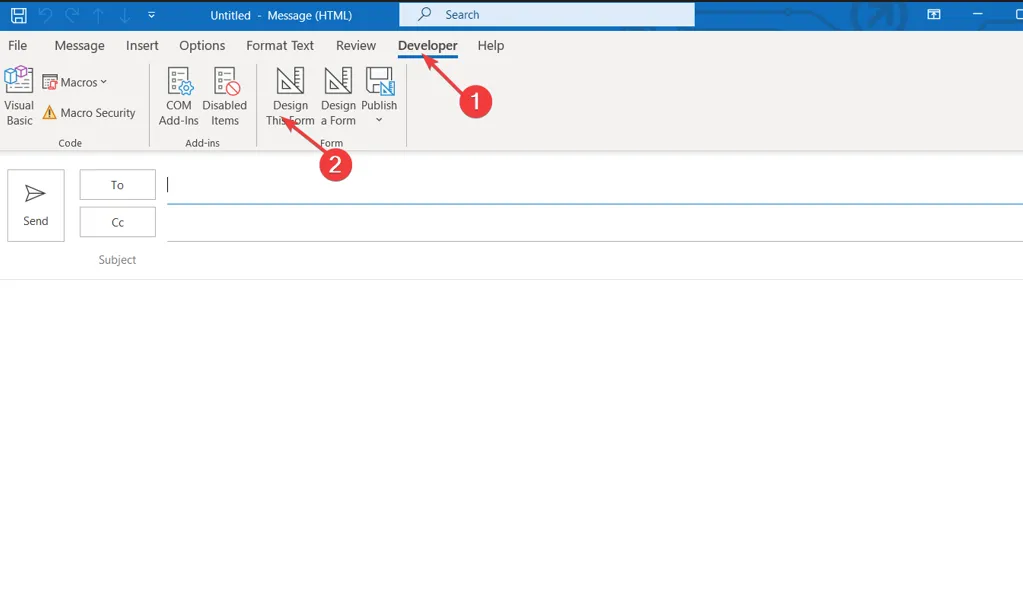
- Find and click on Message, and then click the Open button.
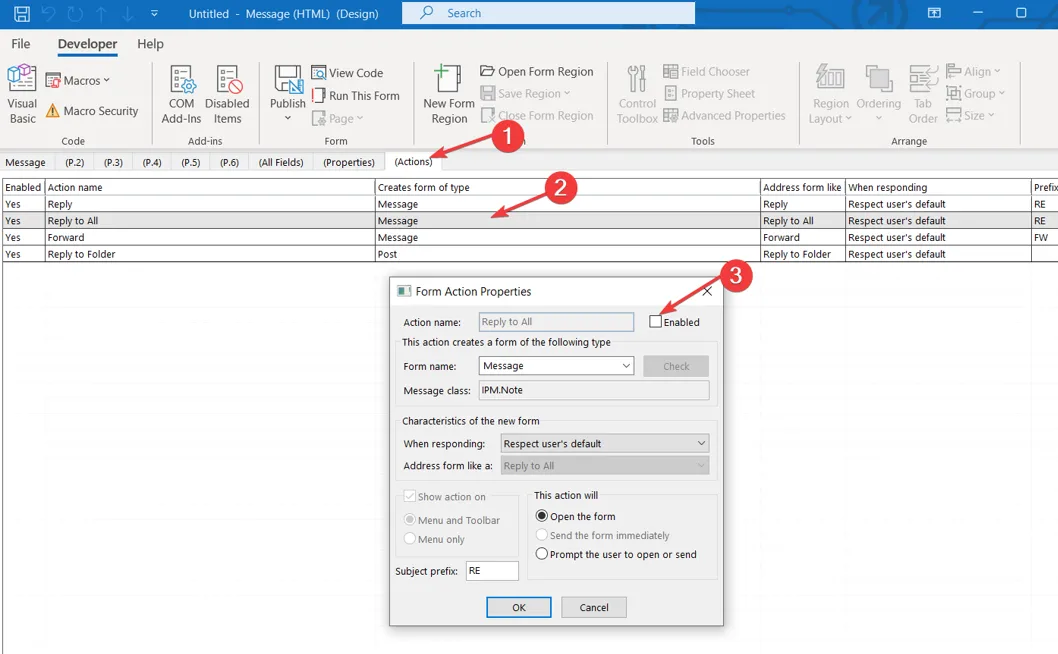
- Go to the Actions tab and double-click the line with the Reply to All option, to open the Properties.
- Uncheck the box for the Enabled option, and click on OK.
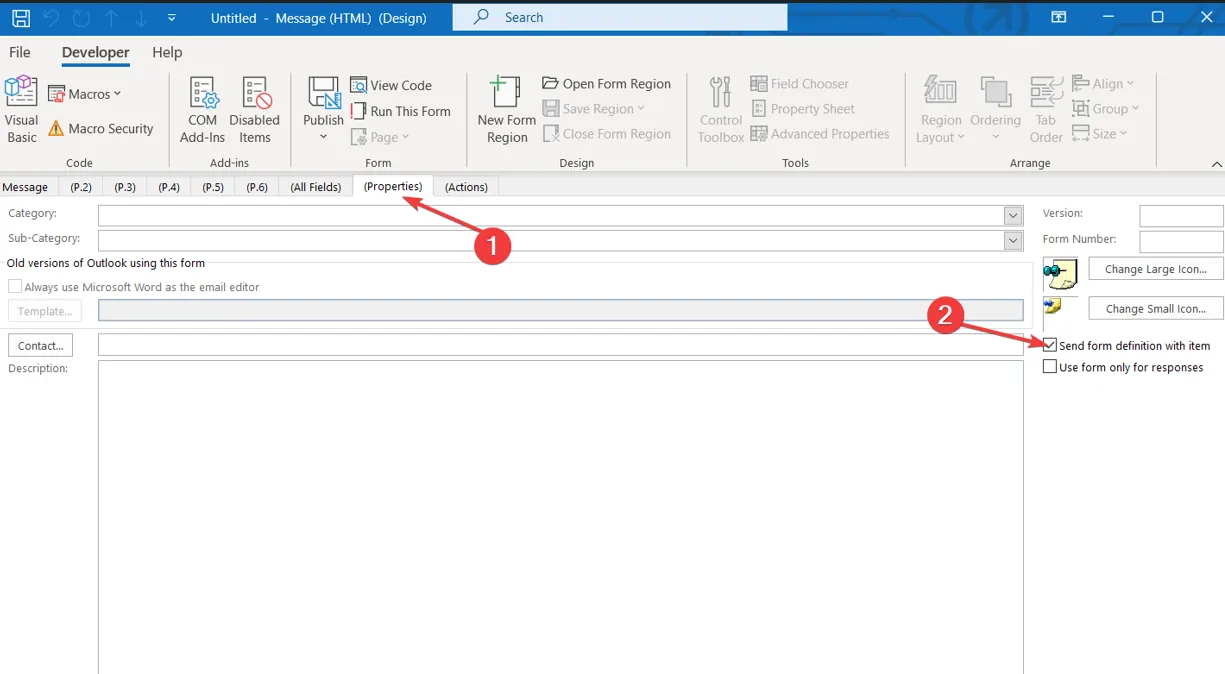
- Go to the Properties tab, and check the box for Send form definition with item option. Click on OK in the dialog box that appears to confirm the process.
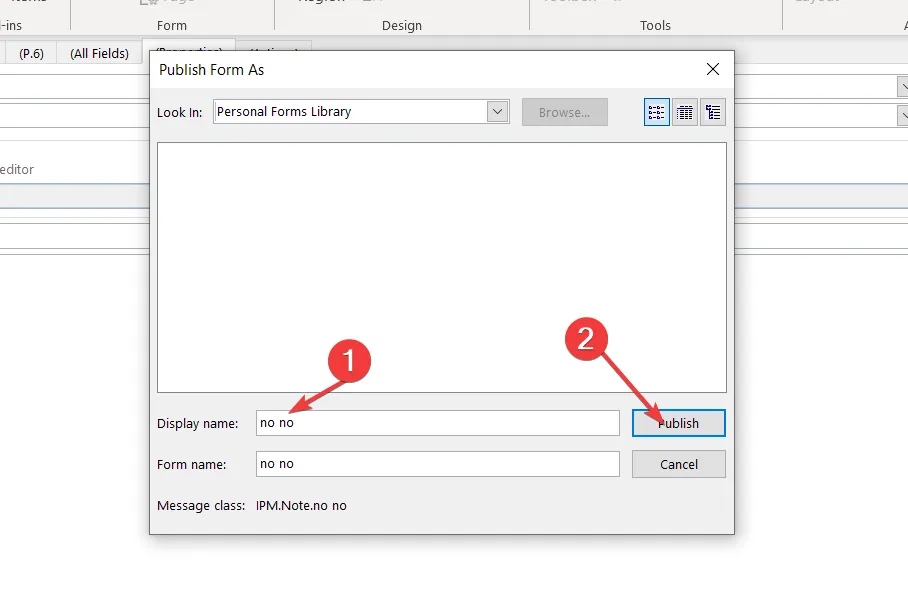
- Select Publish, and then click the Publish Form As option.

- Click the Look In drop-down button, give the form a name, then click the Publish button.
- Close the Developer window, and you’re all set.
For further questions or suggestions, kindly drop them in the comments section.
Leave a Reply