How to Set the Print Screen Button to Open the Snipping Tool in Windows
Keyboard shortcuts can streamline all sorts of actions in Windows. Depending on your keyboard, these can be as simple as a single press. But what if you’re not satisfied with what a shortcut can do? Take the Print Screen button, which allows you to capture a screenshot and paste it into an image editor or word document. If you think it would be much more helpful to press the button and open the built-in Snipping Tool in Windows 10 and 11, follow this guide to learn how to set up this configuration.
How to Make the Print Screen Key Open the Snipping Tool
Back when Microsoft’s MS-DOS was the primary system in use, hitting the Print Screen key sent whatever was on the screen to the computer’s memory to be printed.
The Print Screen button’s current function is a relic of a bygone era, and even Microsoft plans to change its modus operandi. Actually, evidence has surfaced (via Windows 11 Beta preview builds) that the tech giant plans to remap the key to open the Snipping Tool in Windows by default.
Fortunately, you don’t have to wait until then to make the switch, as it’s already possible (and has been for a while) to do so. Below, we detail two methods: one makes use of an Accessibility option, while the other takes advantage of a Microsoft app to remap your Print Screen key.
1. Enable Accessibility Setting
To be clear, you can currently remap the key manually, but an upcoming Windows update may turn it on by default. After the update, if you wish, you can turn it off so that it doesn’t open the app.
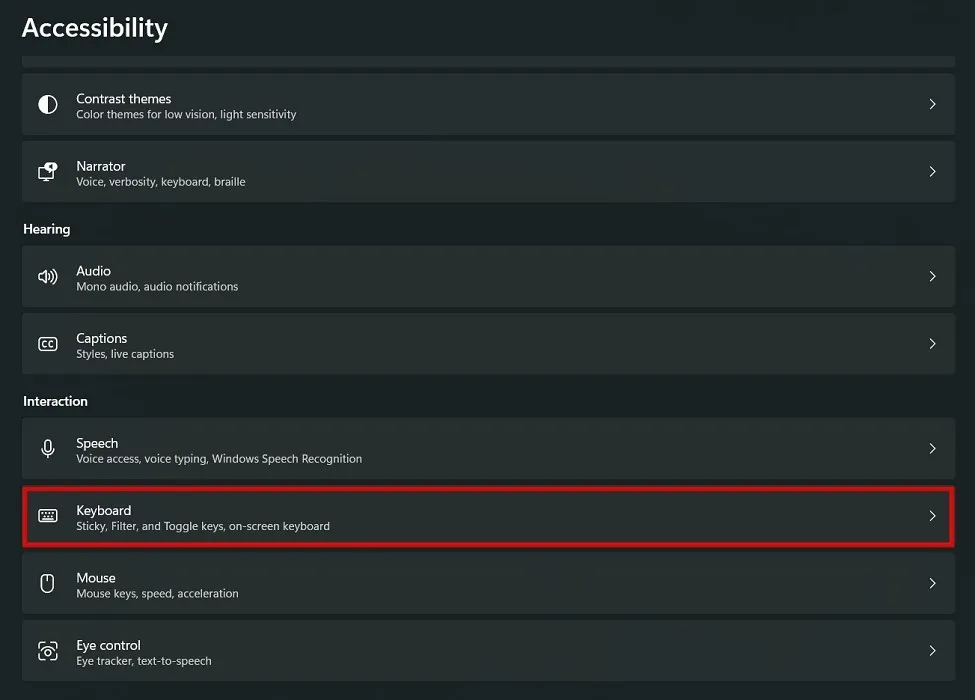
- On your PC, open “Settings -> Accessibility.”
- Scroll down and select “Keyboard” under the “Interaction” section.
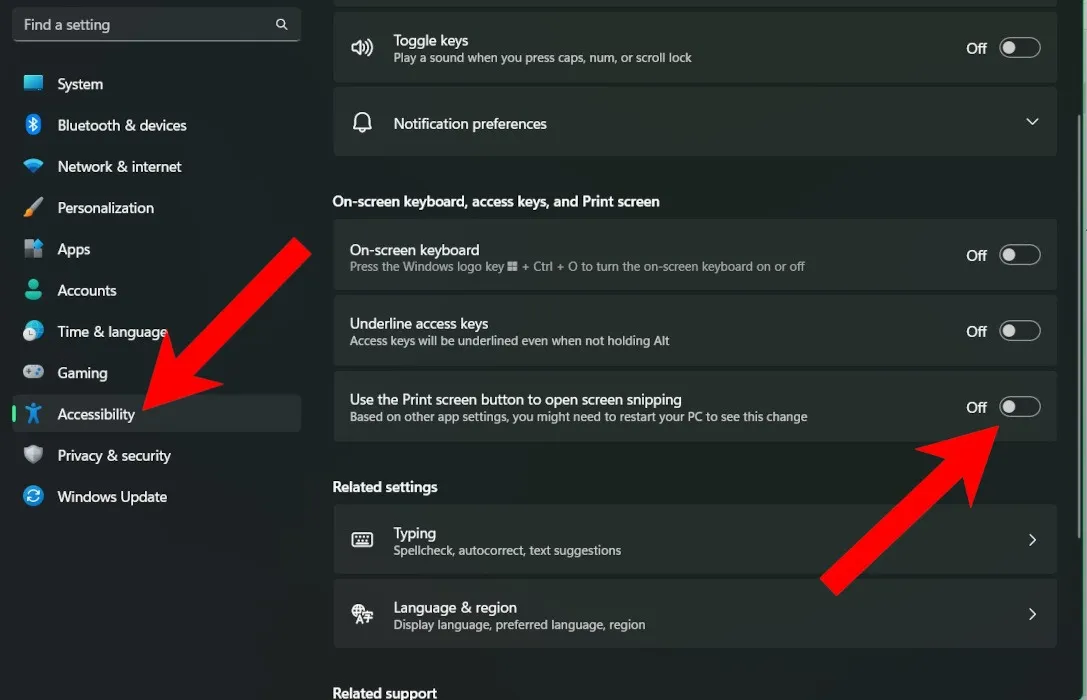
- Toggle on the switch for “Use the Print screen button to open screen snipping.”
Other than that specific remapping setting, there is no way for you to remap your other regular keys in Windows – unless you have a gaming keyboard with built-in remapping and macro support. That’s where Microsoft PowerToys come in.
It’s a free download, and the utility is meant for power users to tweak how Windows works – this includes remapping the keyboard or mouse buttons. If you plan on remapping other keys apart from Print Screen, this option is for you.
2. Using Microsoft PowerToys
The first step is to download and install PowerToys from Microsoft, either through the Microsoft Store, an executable on GitHub, or Windows Package Manager. Based on your computer’s architecture, you must download the x64 or the Arm64 version.
- Once installed, PowerToys should open to the welcome splash screen or sit in your taskbar’s tray icons.
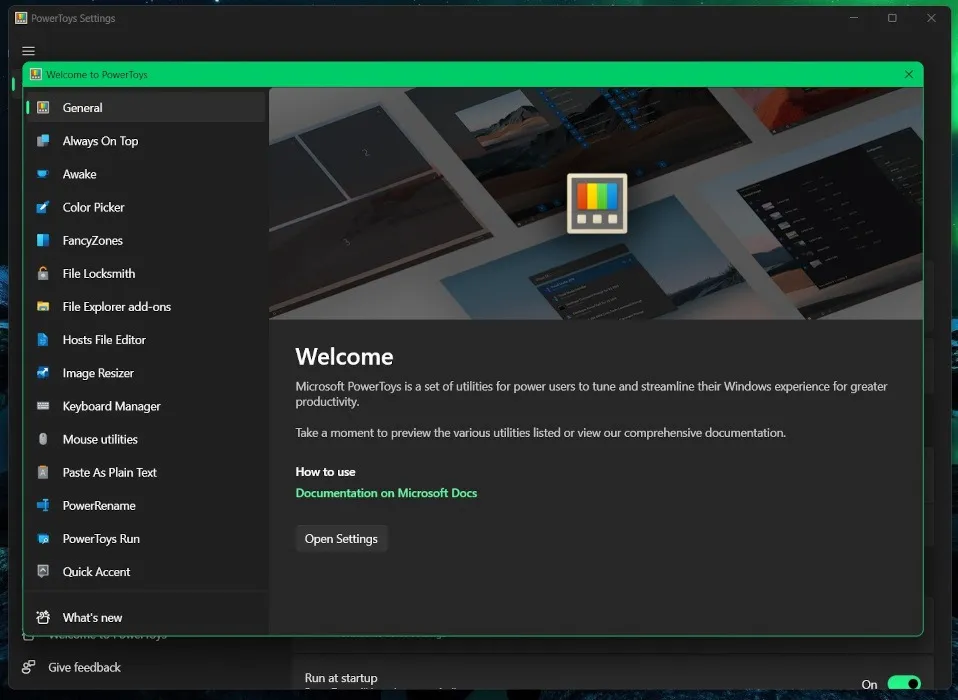
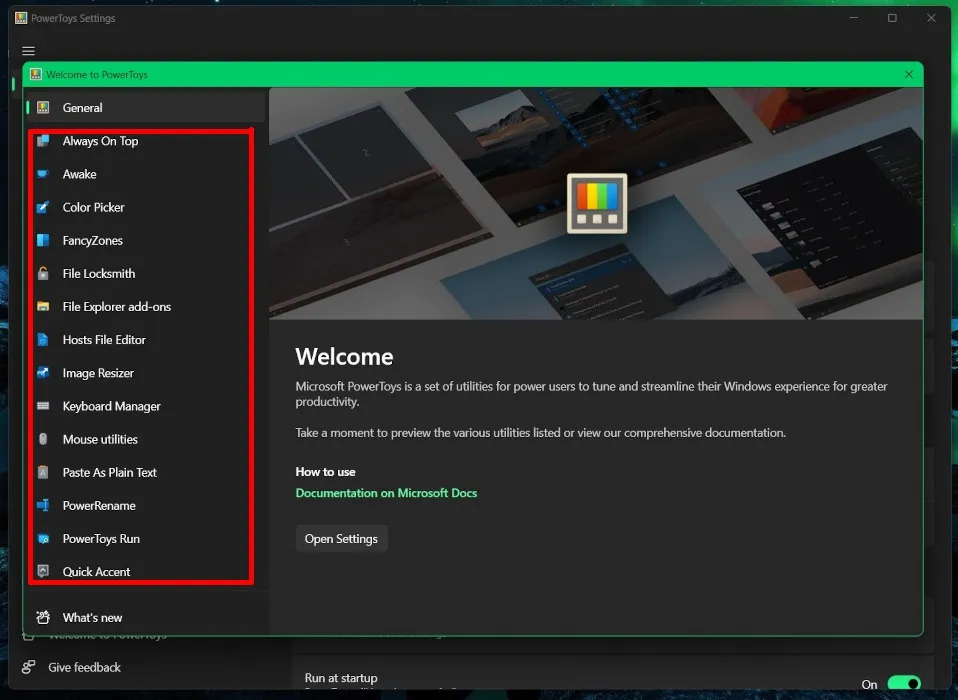
- The left panel is a quick reference list of all the additional functions you can enable in PowerToys. If you’re curious, you can click on each one to get a short explanation of what it’s used for.
- When you are ready, click on “General -> Open Settings.” The “General” tab is the default view, where you can check for updates, change the theme, or back up your settings.
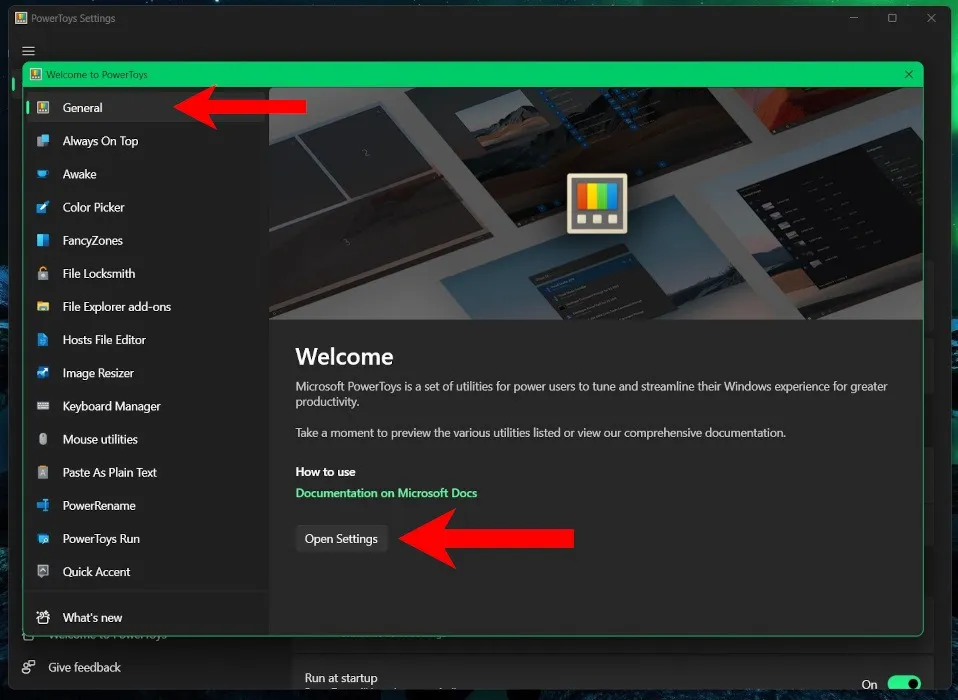
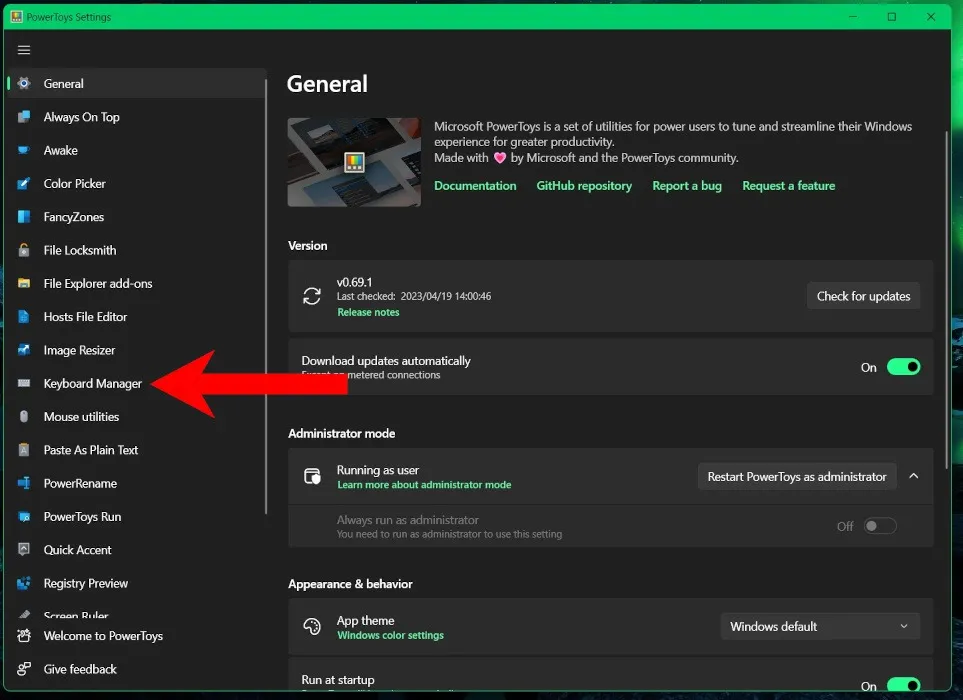
- To remap your keys, scroll down on the left panel and click on “Keyboard Manager.”
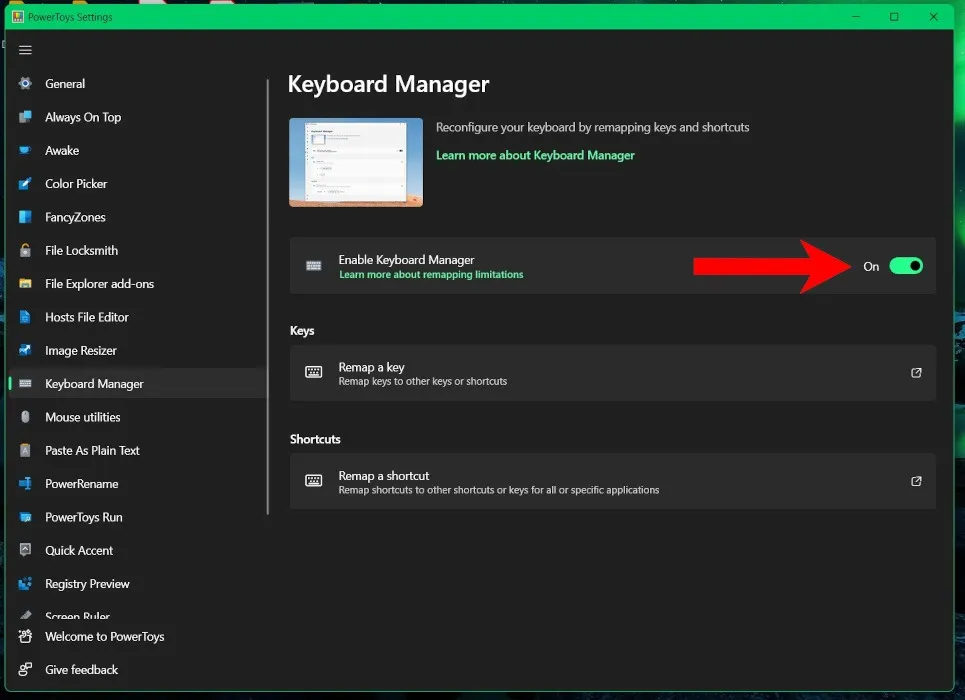
- Ensure that the “Enable Keyboard Manager” switch is toggled to green.
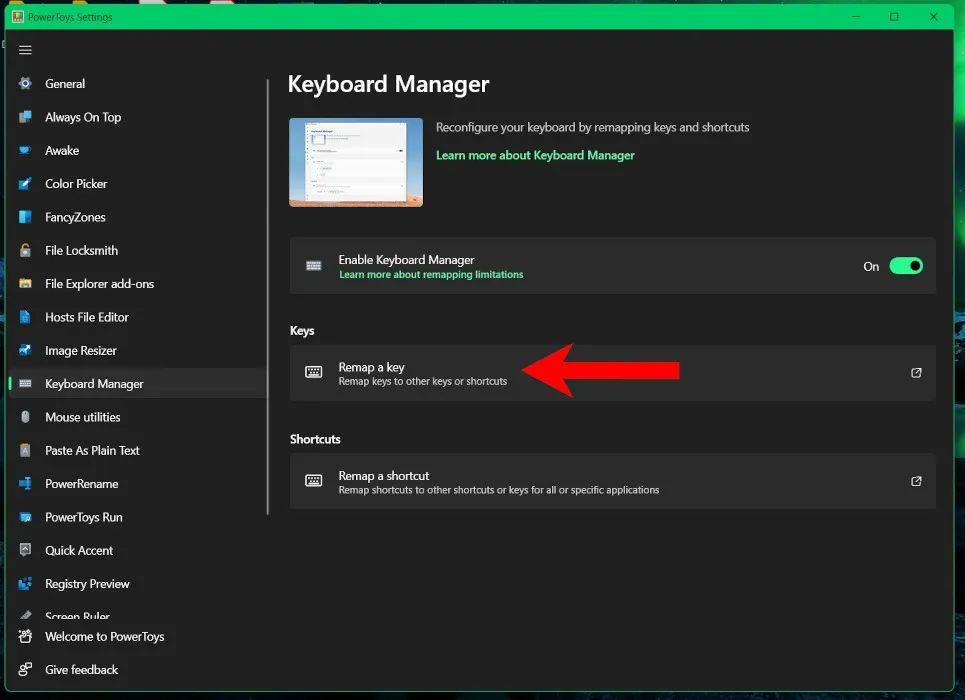
- Under “Keys,” click on “Remap a Key.”
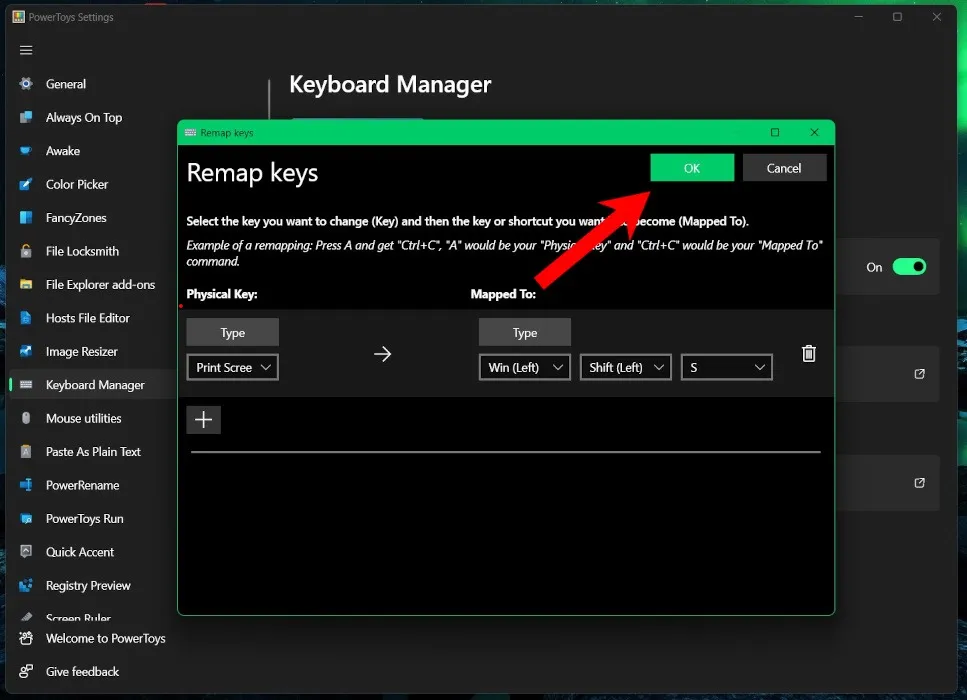
- This opens another window with a short explanation. There are two columns: “Physical Key” and “Mapped To.” Essentially, it will list the keys that will be mapped and their new actions.

- Under the “Physical Key” section, click on the “+” button.
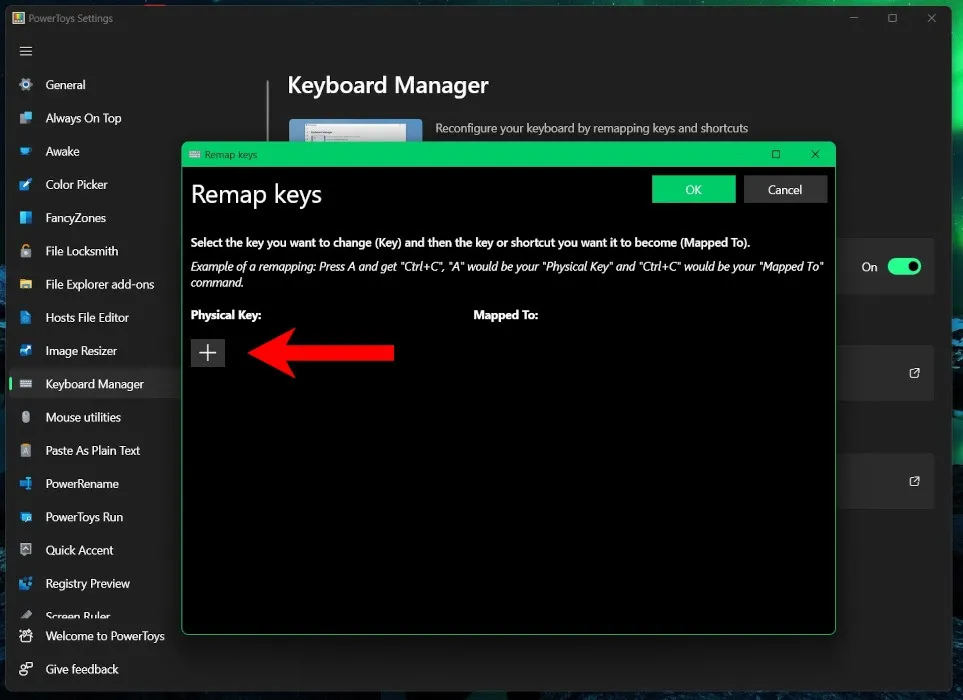
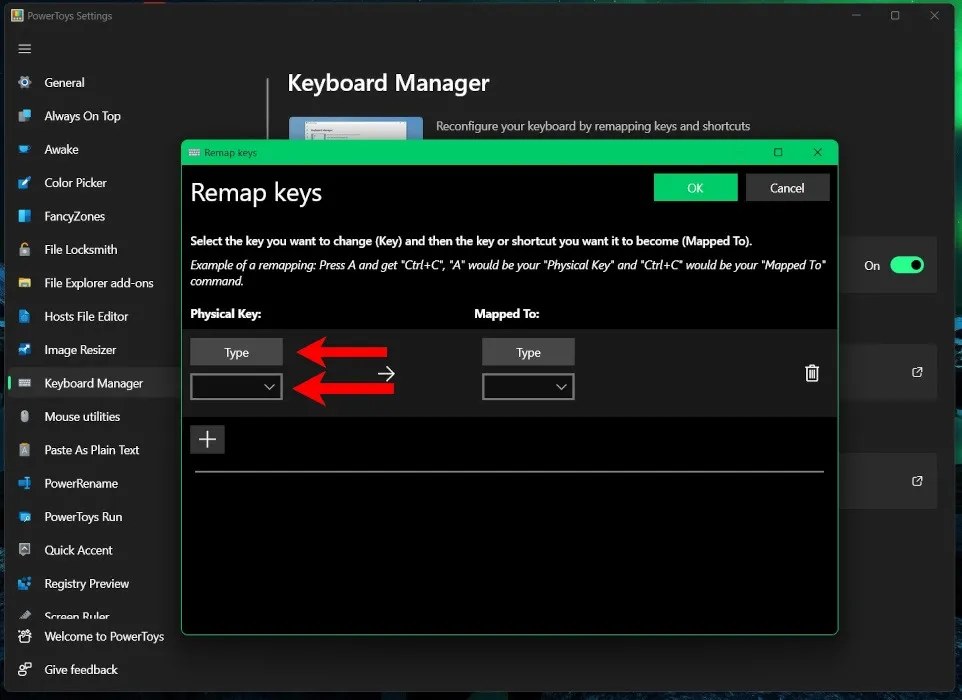
- If you want to press the button that you’d like to remap, click on “Type” and press it. Alternatively, use the drop-down menu to scroll through a list of all of the available keys that can be remapped.
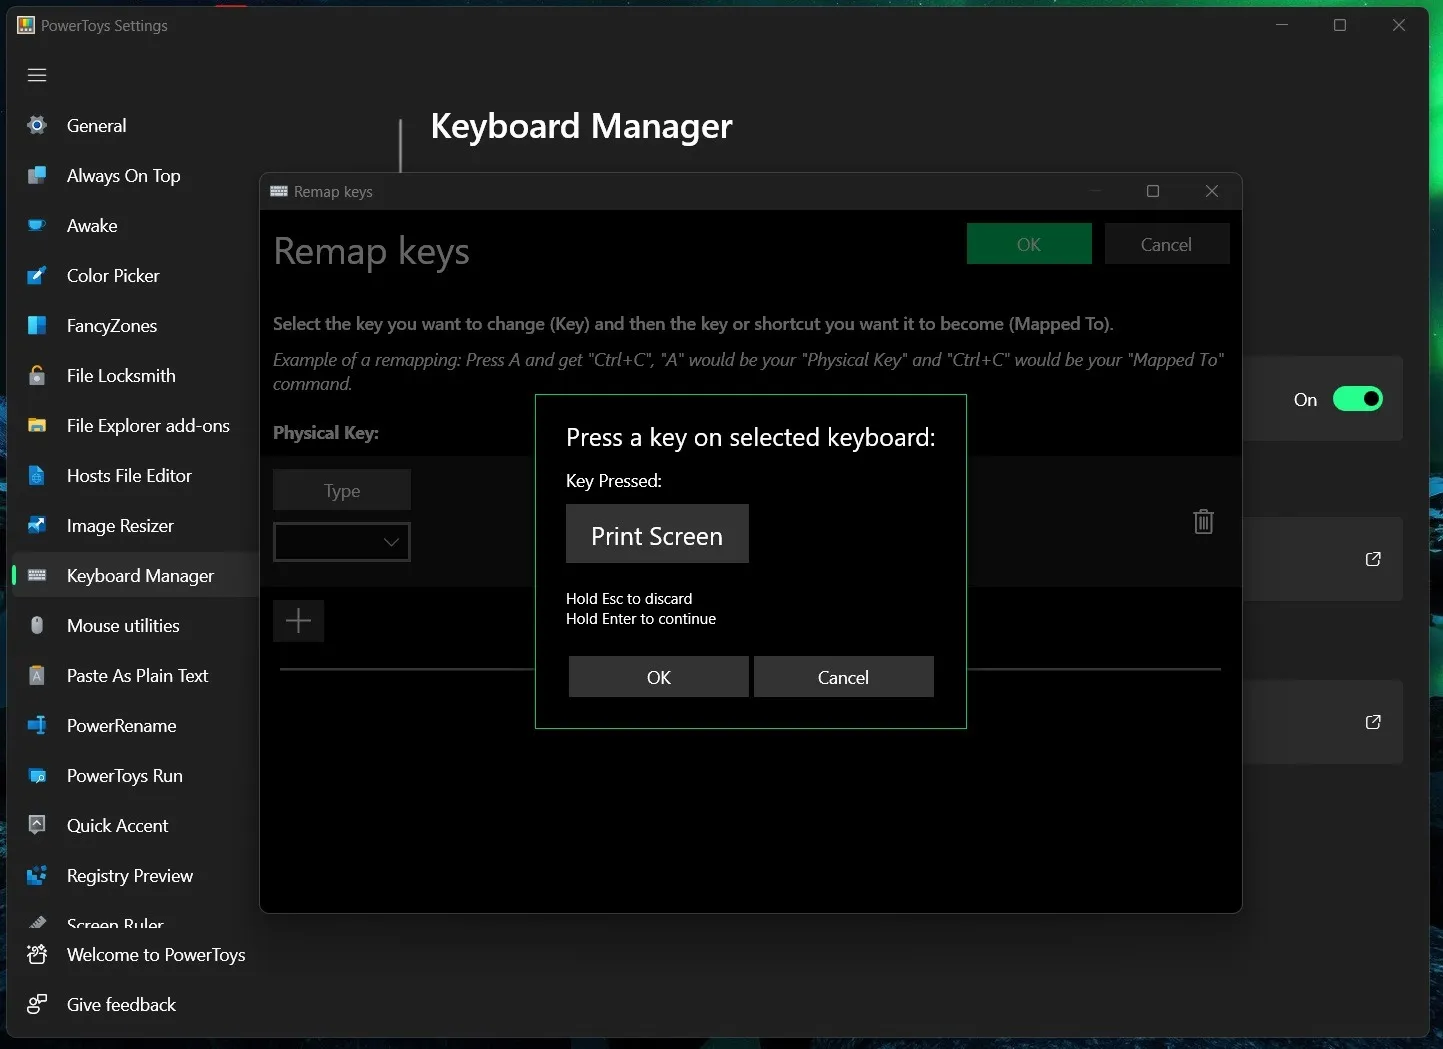
- Once you’ve pressed the key, such as the Print Screen button, click on “OK” or hold down the Enter button for about two seconds.
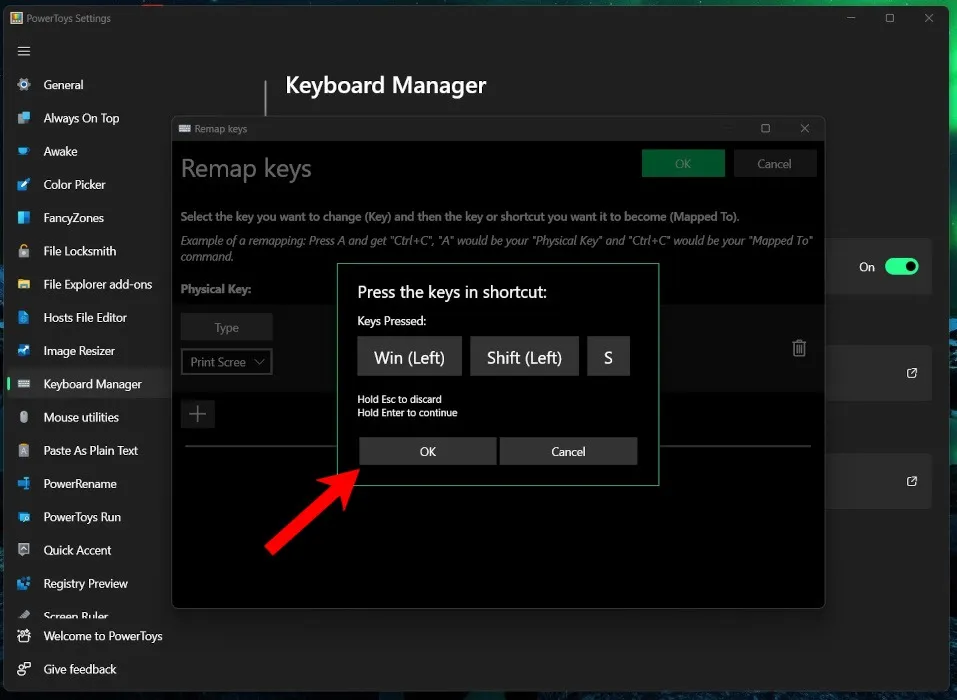
- This loads the button into the “Physical Key” box. Click on “Type” in the “Mapped To” box and press the Windows + Shift + S keys together. This is the Windows shortcut to launch Snipping Tools. Check out this guide for more screenshot tools.
- When the program registers the keys that are being pressed, click “OK.”
- You will see your selected Physical Key and selected Mapped To key. If that’s correct, click “OK” in the top right.
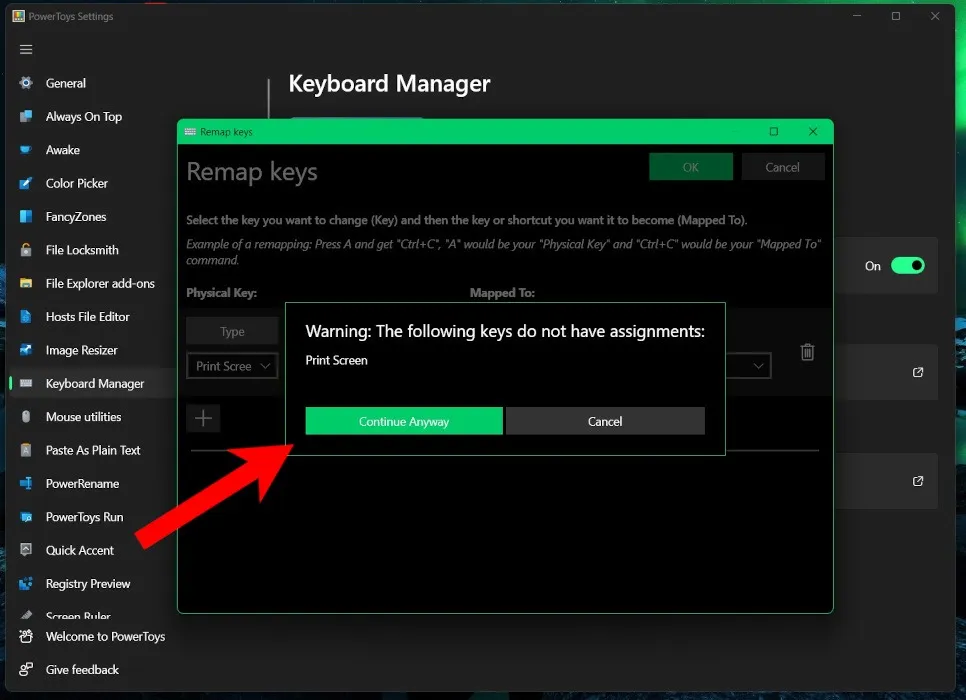
- You’ll see a warning about keys that don’t have assignments. This doesn’t influence the functionality, so you can safely click “Continue Anyway.” It just means that the Print Screen key is “orphaned” and will no longer work as intended.
- Once set up, you can use your newly-created shortcut to automatically open the Snipping Tool when you press the Print Screen key.
Frequently Asked Questions
Can you remap the buttons on your mouse with PowerToys?
While there are plenty of customizable options for your mouse and pointer, you can’t change what the buttons do. However, PowerToys provides accessibility features, such as pointer location, screen jumping, and cursor highlighting.
Can you use the remapped shortcuts when PowerToys isn’t running?
No. For your shortcuts and modifications to work, you must have PowerToys installed and running in the background. By default, PowerToys is added to your system’s startup applications and automatically runs when you log in to your computer. You can find the toggle for this option in the “General” tab under the “Appearance and Behavior” heading.
Can I use PowerToys to remap any keyboard shortcuts?
While PowerToys is incredibly useful, it has limitations. For example, the Windows + L and Control + Alt + Del keys can’t be remapped, as they are reserved for the Windows operating system. In most cases, the Fn key (Function) can’t be remapped either, but the F1 to F12 keys can.
If you are a gamer, you also can’t remap the Windows + G combination. In theory, it’s possible, but you’ll find that it will always open the Windows Game Bar even when reassigned. However, you can disable the Game Bar in Windows Settings, which makes it a bit easier.
Image credit: Unsplash. All screenshots by Charlie Fripp.
Leave a Reply