How to Fix Update Error 0x800706b5 in Windows 11/10
Several users complained about getting an error 0x800706b5 when they were trying to install pending updates on their devices. If you are also facing trouble updating your Windows because of this error code, read this post till the end.
Before you proceed to the solutions, close all windows running in the background and open Settings (Win + I). Select Windows Update, head over to the right pane, and click Check for updates. In case this still results in an error code, learn what may cause this error and ways to solve it on Windows 11/10.
Upon encountering this issue, you may receive an error message as well that reads the following –
|
What causes Error 0x800706b5?
This error may occur when your system meets one or a combination of the following issues –
- You have installed a faulty application – Remove such apps
- Third-party antivirus programs are running on your PC – Disable Antivirus
- Common Update Problems or Internal glitches – Troubleshoot Windows Update
- File Corruption because of external security apps – Run SFC & DISM
- Corrupted Windows Cache folders – Reset Update Components
Solve Error Code 0x800706b5 in Windows 11/10
To resolve error 0x800706b5 in Windows 11/10, go through the below suggestions and enforce them –
1] Uninstall Recently added programs
To locate a faulty app on your PC, do the following –
- Press Win + X and select “Apps and Features“.
- Scroll down and locate the recently installed software on the right pane.
- Click the three dots available beside the faulty app, and hit Uninstall.
- When a pop-up window comes into the view, hit Uninstall again.
Restart your PC and go to Windows Update (Settings > Windows Update), and click Check for updates. If this query still results in an error code 0x800706b5, follow the next set of solutions.
2] Disable Third-party Antivirus & Run SFC
Third-party antivirus programs are known to interact with the system files and make them corrupt. Once the required files become damaged, this will prevent you from updating your operating system.
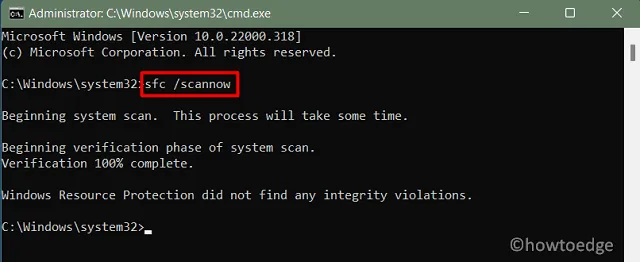
Disable or uninstall the external security app and run SFC to automatically find and resolve file corruptions. To run SFC, you need to start CMD as administrator and execute the below command –
sfc /scannow

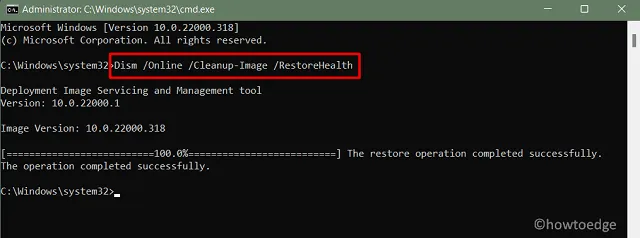
[Optional] After this code completes 100%, copy/paste the below command and press Enter –
DISM /Online /Cleanup-Image /RestoreHealth

- The DISM code will run to check if there are issues with your system image and resolve them.
3] Run Update Troubleshooter
In case the error 0x800706b5 persists even after removing the lately added programs or disabling external antivirus, consider running the troubleshooter. This is an in-built tool on Windows developed to automatically find and resolve underlying causes on your computer. Here’s how to run this tool in Windows 11 –
- Right-click on the Windows icon (Win + X) and select Settings.
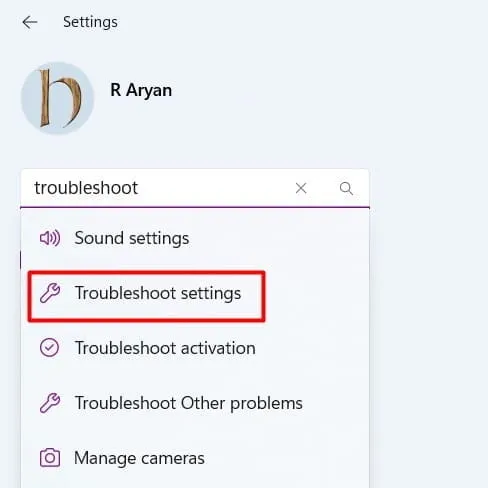
- Type “troubleshoot” and select Troubleshoot settings.

- Click Other troubleshooters and hit the Run button available beside Windows Update.

- Let this tool find and resolve the reasons involved.
- By the end, this will ask if it has resolved this issue or not.
- Click Close and restart your PC.

- Sign back into your device again and check if you can install pending updates.
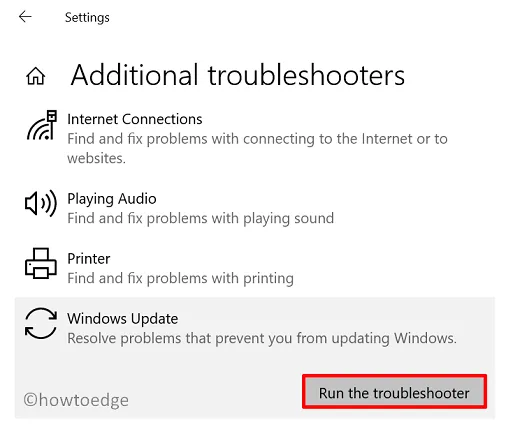
If you are still using Windows 10, reach out to the below path and hit Run the troubleshooter –
Settings (Win + I) > Update & Security > Troubleshoot > Additional troubleshooters
- Locate Windows update under “Most frequent” and hit the button – Run the troubleshooter.

- Follow the on-screen instructions to complete the remaining steps.
4] Reset Update Components
Whenever you install a cumulative update or feature update on your computer, a little info about the update gets saved inside SoftwareDistribution and catroot2 folders. When the data inside either of these two folders become excessively large, they start causing problems updating Windows. In order to resolve this issue, one must purge both folders.
As the update services are already running in the background, make sure to stop them first. Let’s learn how to reset update components in Windows 11/10 –
net stop bits
net stop wuauserv
net stop appidsvc
Please enable JavaScript
net stop cryptsvc
- Now that you have stopped updating services, rename the Windows cache folders by running these two codes –
rmdir %systemroot%\SoftwareDistribution /S /Q
rmdir %systemroot%\system32\catroot2 /S /Q
- Restart all the services that you have stopped prior to renaming cache folders. To do this, copy/paste the below code and press Enter separately.
net start bits
net start wuauserv
net start appidsvc
net start cryptsvc
- Restart your PC next and check if you can update Windows now without getting into an error code 0x800706b5.
5] Manually install pending updates
If neither of the above solutions helps to resolve the error 0x800706b5, you may manually install the pending updates. For this to happen, you must know the KB number that is failing to install. Here’s the link to know the latest cumulative updates for your Windows 10 version or Windows 11.
After visiting the above-mentioned links, click on the latest updates available on the left pane. Note down the KB number that appears on the right pane.
- Now, visit Microsoft Update Catalog and type the noted down number in the search field. Press Enter to view all the updates matching the typed-in query.
- Pick the update that best matches your system architecture, and hit the Download button. Click the top link to start downloading the standalone package on the succeeding screen.
- The setup file will be downloaded in the “.msu” file format. Double-click on it to begin updating your Windows.
That’s it, I hope you find this article helpful and easy to follow.
Leave a Reply