How to Fix Dual Boot Option Not Showing In Windows

If you love working on both Windows as well as Linux, going for the dual-boot configuration is the ideal way. This way, you need not require giving up the convenience of Windows and at the same time, you may enjoy working on Linux as well. However, a real issue arises when the dual boot option is not showing during Windows startup.
In this post, we have included all possible reasons that may lead to the Dual boot option not appearing and what you may do to fix this issue on your Windows PC. Without any further ado, let’s see how to quickly solve this problem in Windows.
Please enable JavaScript
Fix Dual Boot Option Not Showing
If you have installed two operating systems (Windows & Linux) on two different disk drives, you must make Ubuntu or Linux your default booting OS. This way, you will always see the boot options when your device starts up. Here’s how to make the necessary changes inside your BIOS.
- Restart your computer and while it is loading press the BIOS key. This key varies from one manufacturer to another, so you must confirm this online. For most PCs, it is either the Del key or the F2 key.
- After you are inside your BIOS, go to the Boot Tab, and change Boot Option # 1 to Ubuntu. The rest will change accordingly.
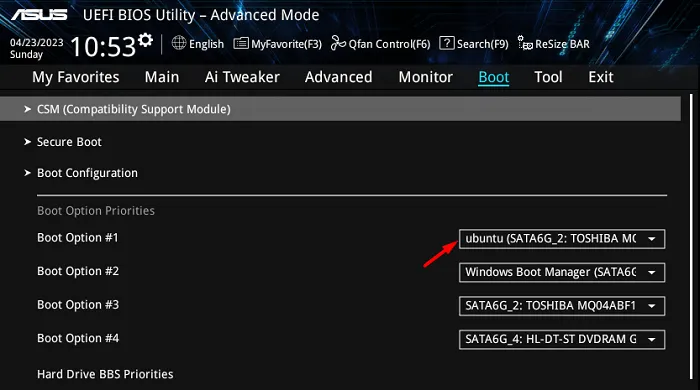
Now that you have made the required changes, exit the BIOS by pressing the F10 key. While your device is again loading, press the Boot Menu key this time. It could either be Esc, any function key, or the Del key. You may see in the below snapshot that Ubuntu is now set as the default booting OS on my computer.
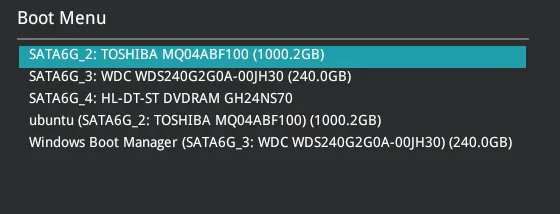
Restart your PC and when it loads again, you will see the boot options appearing on the display screen. Make sure to choose the operating system within 30 seconds or else, Ubuntu starts on your computer as this is your first booting option.
Enable Boot Menu Displaying during Windows Startup
The below fixes will help to get back the Boot Menu if you have two or more operating systems installed on a single disk drive. Try out these solutions one after another and hopefully, the boot option shows up on your Windows PC.
1] Turn on the Boot Menu via CMD
There’s a possibility that the boot menu has been deactivated on your computer. And, as a result of this, you are not seeing the boot menu option during your PC startup. To re-enable the boot options, you may open Command Prompt as an administrator and execute the following code over it –
bcdedit /set {bootmgr} displaybootmenu yes
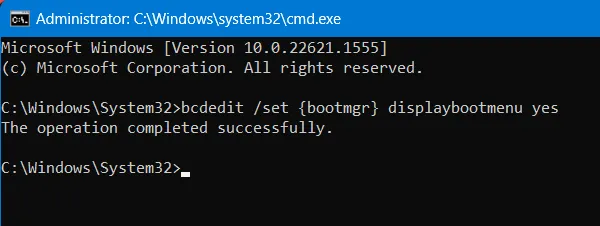
- If this command runs successfully, you will see a message stating – “The operation completed successfully“.
- Restart your computer and check if the boot menu starts appearing on the Windows startup screen.
3] Modify System Startup Settings
Usually, when you enable dual-boot configuration on your computer, the boot menu appears for a pre-defined time limit. After this time limit exceeds, your device boots into the first option enlisted inside the BIOS.
Since you are not able to select your operating system during your PC startup, go and check what time is put inside the System Startup settings. Here’s how to configure this setting inside Windows –
- Press Windows + S, and type “Advanced System” in the text field.
- Click on the top result i.e. View advanced system settings next.
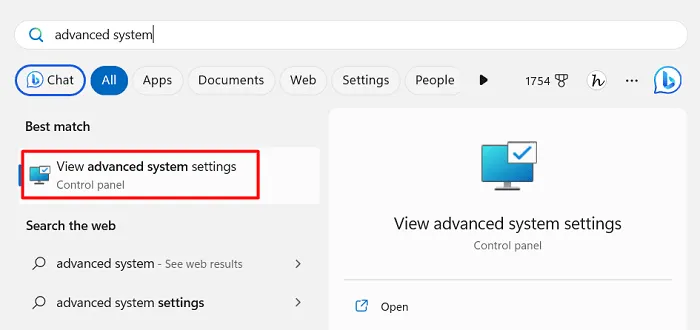
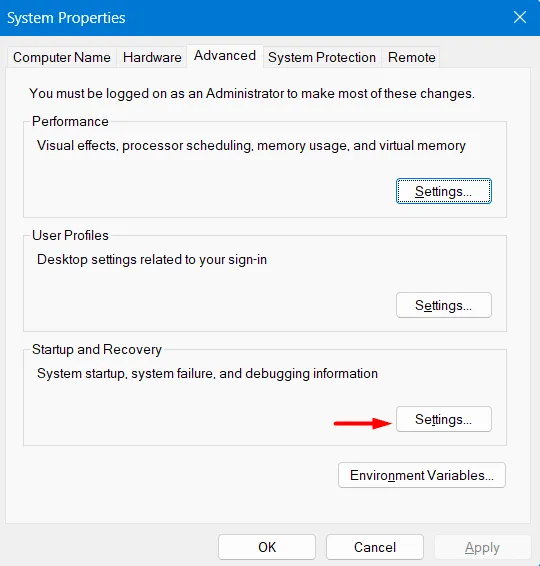
- When the System Properties window opens up, locate and click Settings under Startup and Recovery.
- On the next screen, locate what time is pre-selected next to”
Time to display list of operating systems“. If this is set to “0” seconds, change this one to 30 seconds.
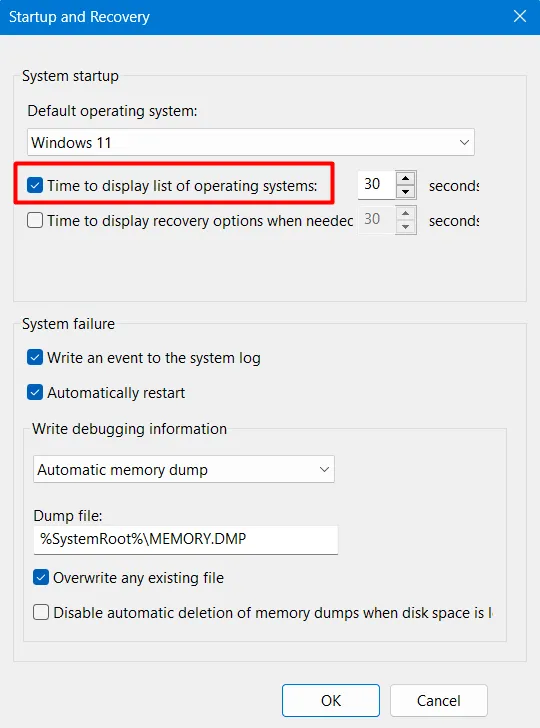
- Click OK to confirm the recent changes and restart your Windows PC.
When your computer reboots, you will find the boot menu appearing there. The system will wait for a minimum of 30 seconds and after this, it will boot into your first boot option.
3] Set Boot Options using the System Configuration Tool
Alternatively, one may also set the Boot options timing by using the System Configuration tool. Here’s what you need to do to display the dual boot option on your computer –
- Press Windows + S, and type System Configuration in the text field.
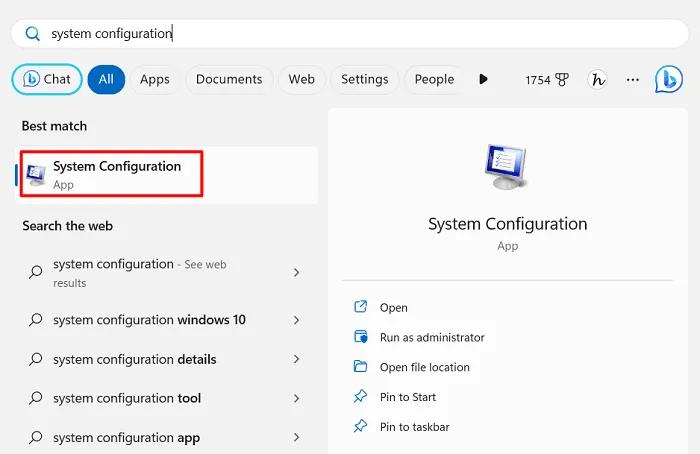
- Click on the top result and wait for this tool to appear on your display screen.
- Go to the Boot tab next and check what’s there inside the Timeout field. See the Snapshot below –
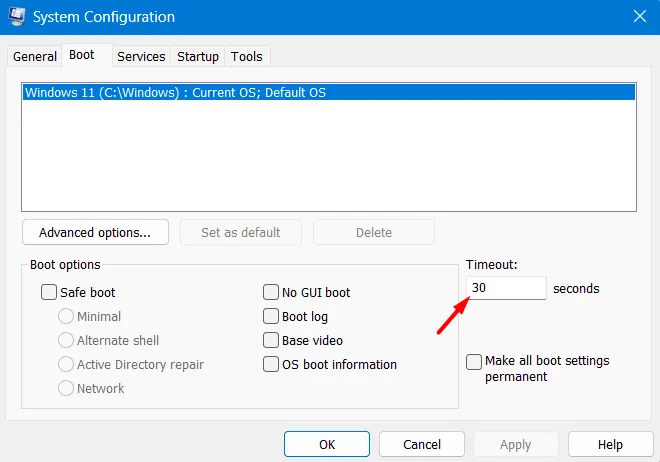
- Make sure this field displays a minimum of 30 seconds and then hit Apply followed by OK.
- Close this tool and other running windows on your computer, and restart Windows.
From the next login, check if the dual boot option appears during Windows startup.
4] Disable Fast Startup in Windows
The Fast Startup is a good feature in Windows that lets you log into your account in mere 2-3 seconds. However, while doing so, your system bypasses a few checks here and there. When you are using a dual-boot configuration in Windows, you should let go of this fast startup feature.
Here’s how to disable the Fast startup in Windows –
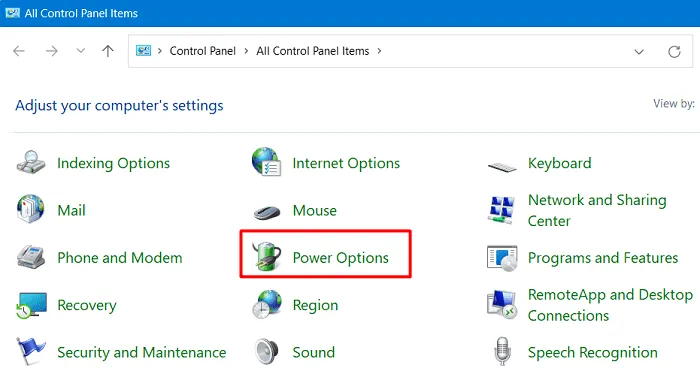
- Launch the Control Panel first and select Power Options.
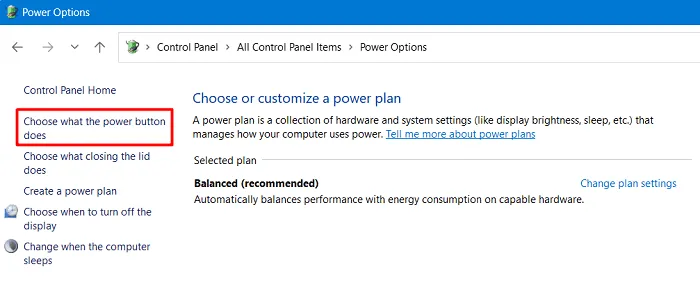
- Next, select Choose what the power button does from the left pane.
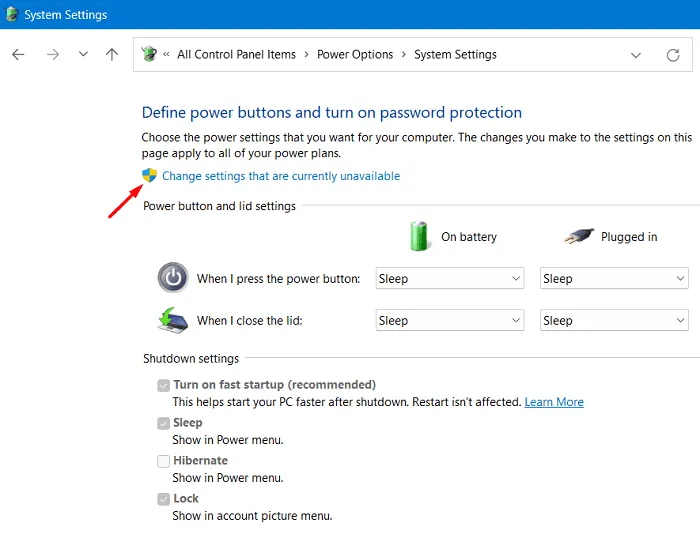
- You are now at this path – All Control Panel Items > Power Options > System Settings.
- Locate and click Change settings that are currently unavailable.
- When this expands, disable the box left of “Turn on fast startup (recommended)“.
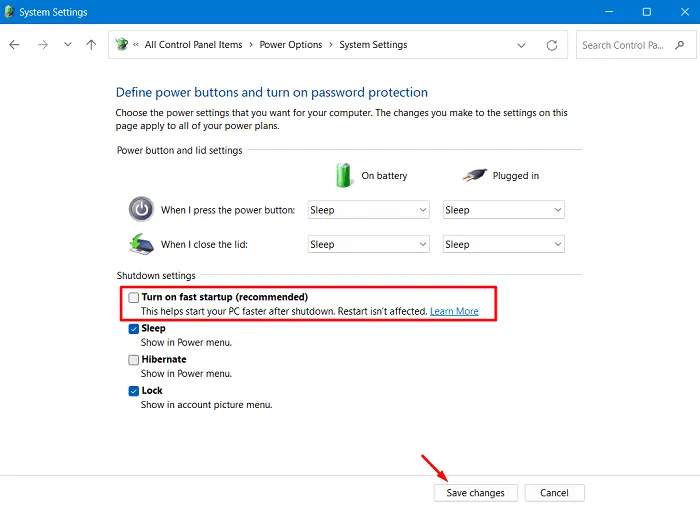
- Click Save Changes to confirm the recent changes and restart your computer.
Hopefully, the dual boot options appear from the subsequent login.
How does Fast Startup actually work in Windows?
The fast startup feature in Windows doesn’t really turn off your computer. Instead, it logs you out of your current user account and then saves the state of the operating system to a hibernation file. When you press the power button, this fast startup places the image from the hibernation file back into RAM. Since it doesn’t require loading all the device drivers back into your operating system, this speeds up the startup process.
Leave a Reply