How to Find Wi-Fi Password on Windows 10: 2 Quick Methods
Whenever we set up the Wi-Fi, the password is usually saved on all devices when first connected to the network, and it’s not so simple to find it.
However, you have two easy ways of finding the Wi-Fi password without any wizard tricks involved: via Control Panel or Command Prompt.
How can I find my Wi-Fi password in Windows 10?
1. Use the Control Panel
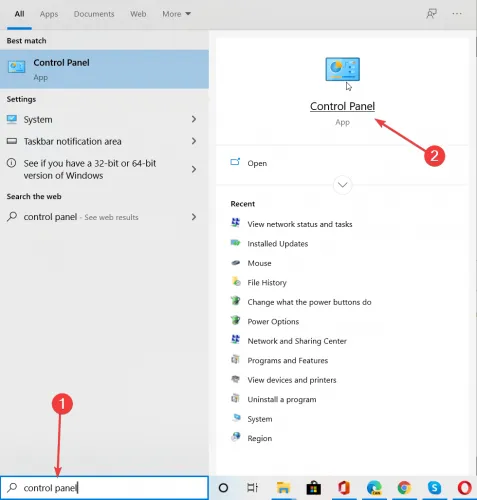
- Type Control Panel in the Search bar and click on the app from the results.
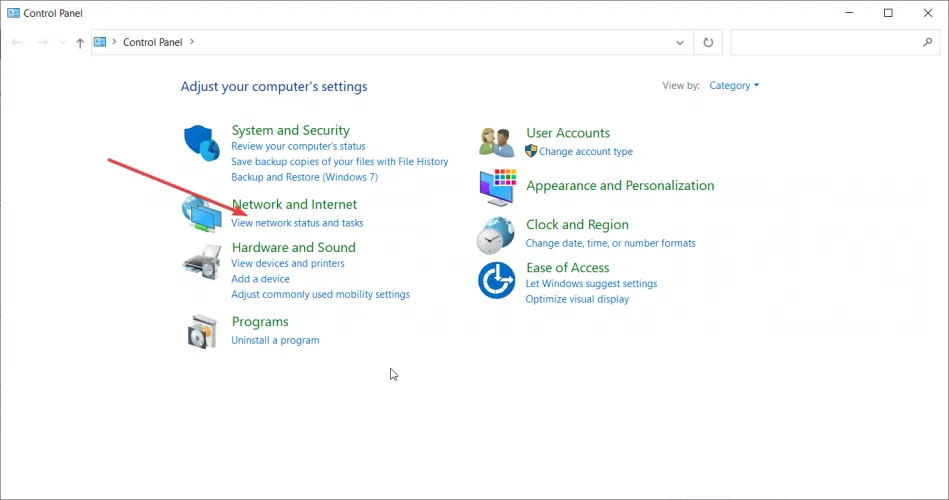
- Click on View network status and tasks under Network and Internet.
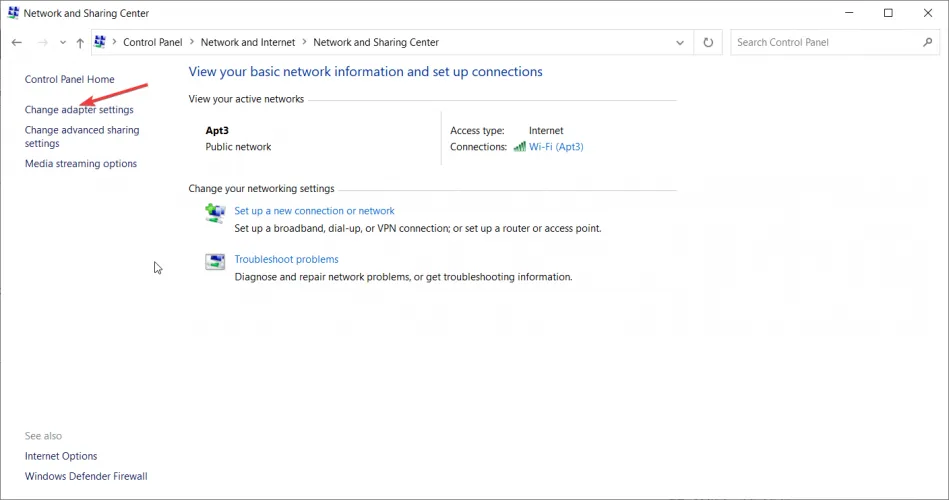
- Next, click on Change adapter settings from the left pane.
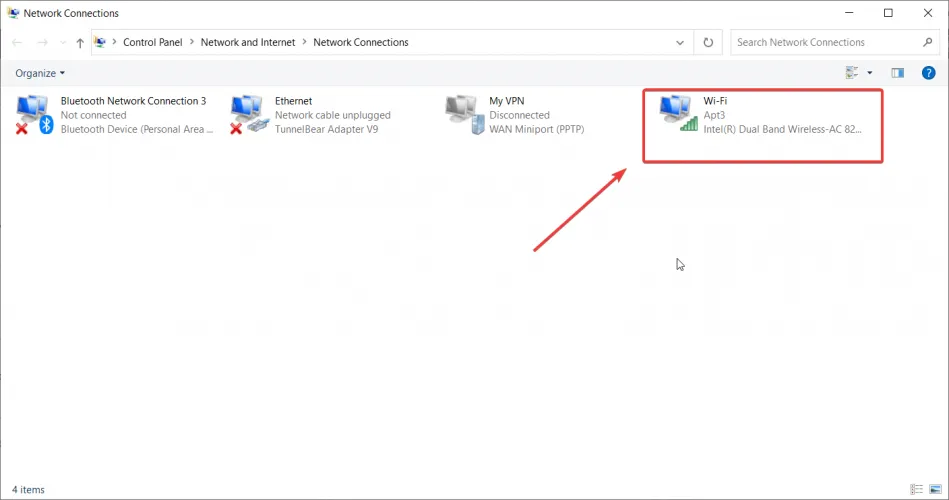
- Double-click on your Wi-Fi network.
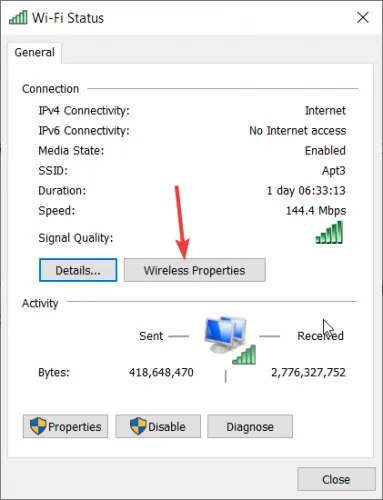
- Click on the Wireless Properties option.
- The last step is to navigate to the Security tab and check the Show characters box. The network security key (your password) will show up.
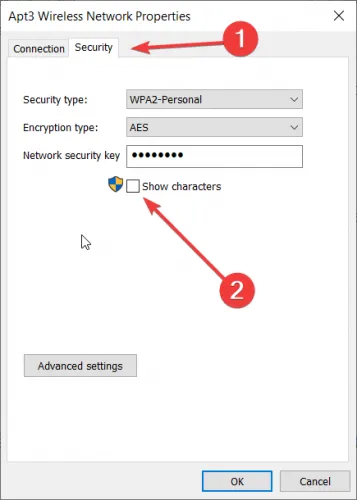
This is probably the easiest method to find the Wi-Fi password in Windows 10, and before you know it, it will be displayed on the screen.
2. Via Command Prompt
1. Type Command Prompt in the Search bar, and click on Run as administrator on the right.
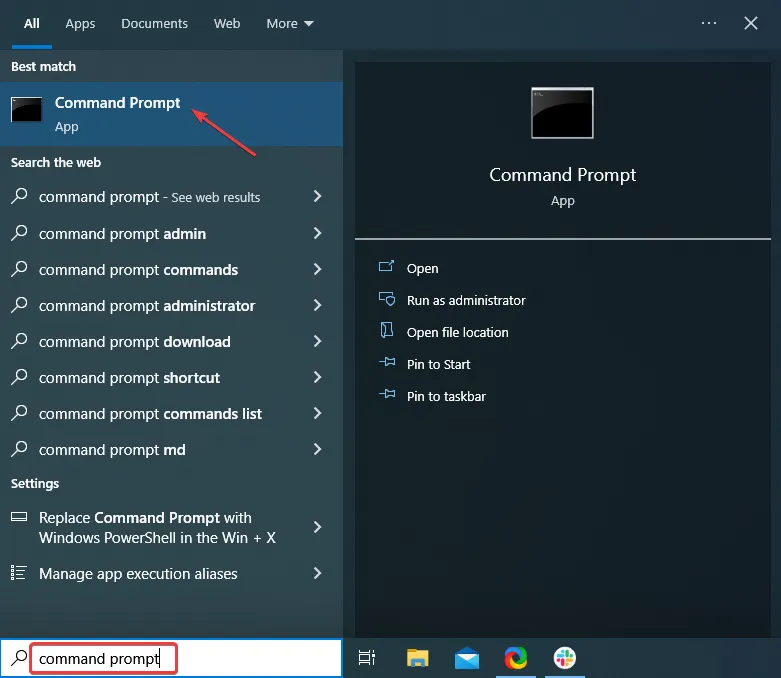
2. Click Yes in the UAC prompt that pops up.
3. Type the following command and hit Enter to view the various network profiles: netsh wlan show profiles
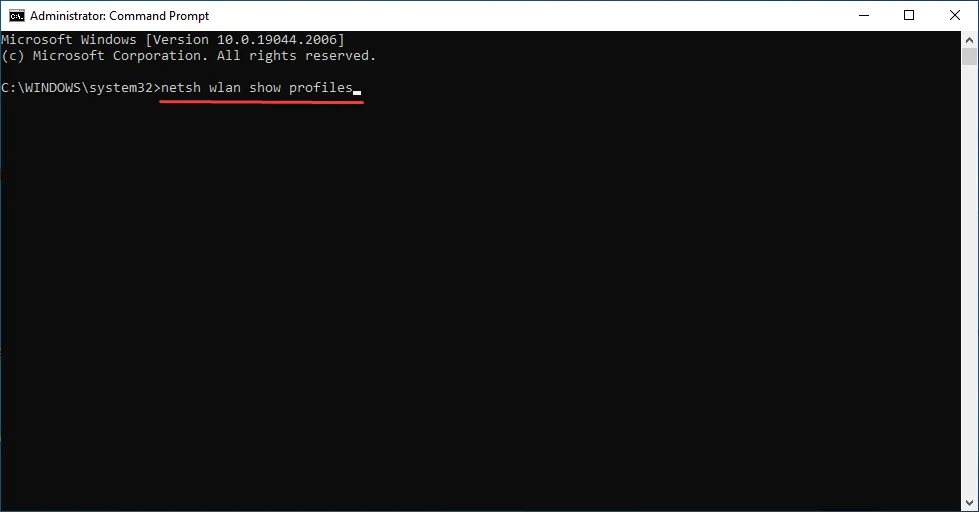
4. Now type the following command and press Enter while replacing WiFi Profile Name with the profile you want to find the password for: netsh wlan show profile name=”WiFi Profile Name” key=clear
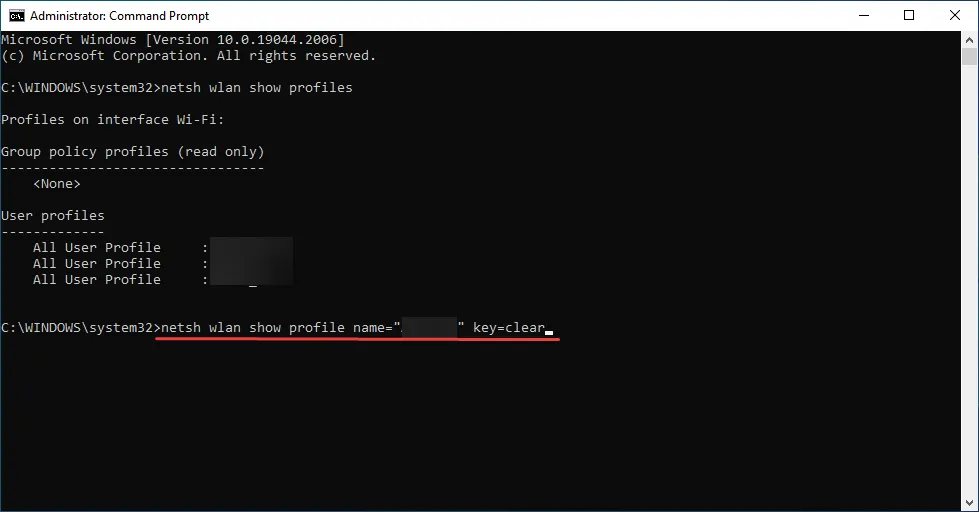
5. The password you’re looking for will show up next to the Key Content field.
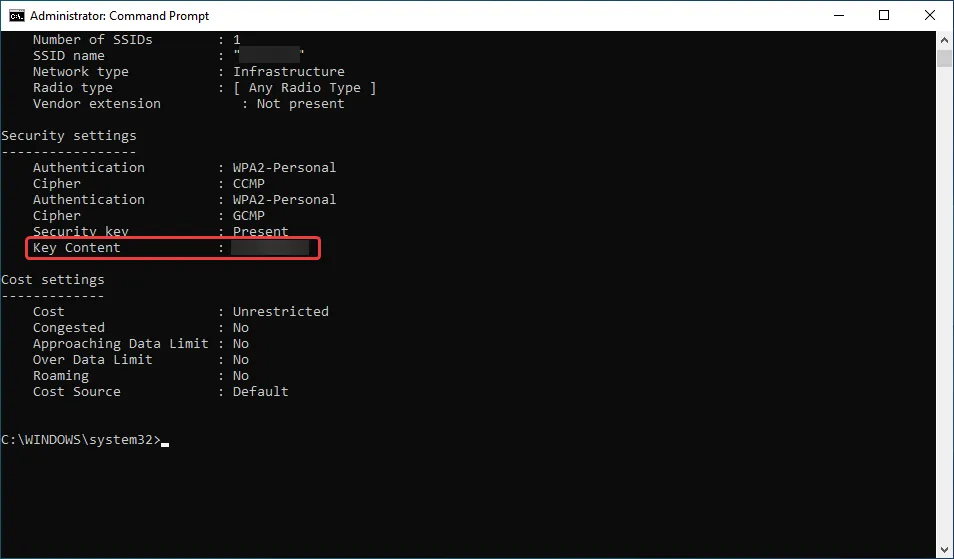
This is how to find the Wi-Fi password with CMD, and it’s the preferred method for many of our readers.
That’s it! This is how you find the Wi-Fi password in Windows 10 like a pro. And once you have it, save it somewhere safe so you don’t have to repeat the process. Also, find out how to fix a slow Wi-Fi connection in Windows.
If you have any questions or suggestions, don’t hesitate to leave them in the comments section below.
Leave a Reply