How to convert FAT32 to NTFS without losing data in Windows 11/10?
Are you looking for methods to convert FAT32 disks to NTFS file systems without losing data? If so, this post will interest you.
FAT32 is the 32-bit version of the FAT (File Allocation Table) file system primarily used for USB drives, flash memory cards, and external hard drives. Similarly, NTFS, which stands for New Technology File System is a proprietary file system by Microsoft and it is suitable for large-capacity disks. Now, you may want to convert FAT32 to NTFS on your system, and the reason behind it can differ.
One of the major reasons for changing FAT32 to NTFS is that FAT32 drive can’t save an individual file greater than 4 GB in size. While transferring a larger file than 4GB to a FAT32 drive, you will likely get an error that reads The file is too large for the destination file system.
Apart from that, the NTFS file system has the upper hand over the FAT32 file system because it has better Read and Write speed, higher disk utilization, etc.
Can you convert FAT32 to NTFS?
Yes, you can easily convert FAT32 to NTFS on Windows 11/10. You can format FAT32 drive into NTFS using Windows Disk Management app. Open the Disk Management app, right-click on the FAT32 drive, select the Format option, change the file system to NTFS, and press the Format button. However, with this method, the existing data on your drive will be erased. You can use a third-party converter tool to convert FAT32 to NTFS without losing data.
How to convert FAT32 to NTFS without losing data in Windows 11/10
To convert FAT 32 to NTFS without losing your data, you can use a convert command on Windows. Open Command Prompt with admin rights and enter a simple command to convert FAT32 to NTFS. If you are unfamiliar with Command Prompt, you can use a third-party GUI-based converter to perform FAT32 to NTFS conversion without deleting your data. Let us look at all the methods.
Convert FAT32 to NTFS without losing data using Command Prompt
You can convert FAT32 to NTFS without losing data through Command Prompt. All you need to do is enter a simple command and Windows will convert your drive from the FAT32 file system to NTFS. As simple as that.
First, open Command Prompt as an administrator. For that, open Windows Search, enter cmd in the search box, hover the mouse over the Command Prompt app, and choose the Run as administrator option.
In the administrator Command Prompt, enter the below command:
help convert
The above command will display the exact command with elaboration to convert your disk to an NTFS file system.
Now, enter a command with below syntax:
CONVERT volume /FS:NTFS [/V] [/CvtArea:filename] [/NoSecurity] [/X]
For example, if you want to convert an E drive having a FAT32 file system to NTFS without any additional attribute, your final command will look something like the below one:
CONVERT E: /FS:NTFS
Wait for the command to finish successfully. Once done, close Command Prompt. Your FAT32 drive will not be changed to the NTFS file system.
Use GUI-based converter software to perform FAT32 to NTFS conversion
1] AOMEI NTFS to FAT32 Converter

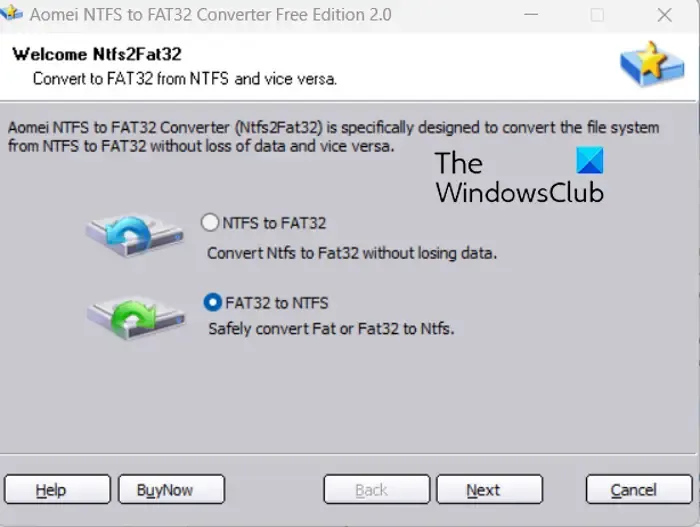
You can also use this dedicated free FAT32 to NTFS converter called AOMEI NTFS to FAT32 Converter. This software lets you convert FAT32 to NTFS and NTFS to FAT32 without losing any data.
First, download this software from its official website and install it on your computer. Launch the software, select the FAT32 to NTFS conversion mode, and press the Next button. After that, choose the drive you want to convert, press the Next button, and click the Proceed button. It will start converting your drive from FAT32 to NTFS.
It is a great FAT32 to NTFS converter. However, the free edition of this software has some limitations. To enjoy all its features, you must upgrade to the pro version.
2] EaseUS Partition Master

EaseUS Partition Master is a popular free disk and partition manager for Windows 11/10. Using it, you can also convert FAT32 to NTFS without losing your data. You can even use it to convert NTFS to FAT32.
To use it, download and install the software and then open its main interface. After that, go to the Partition Manager section to see a list of available disks. From here, select the FAT32 drive that you want to convert and press right-click on it. Afterward, go to the Advanced option and choose the FAT to NTFS option. On the next prompt, click on the Proceed button and then Apply button to start the conversion.
It is an easy-to-use partition manager capable of converting FAT32 drives to an NTFS file system.
3] MiniTool Partition Wizard

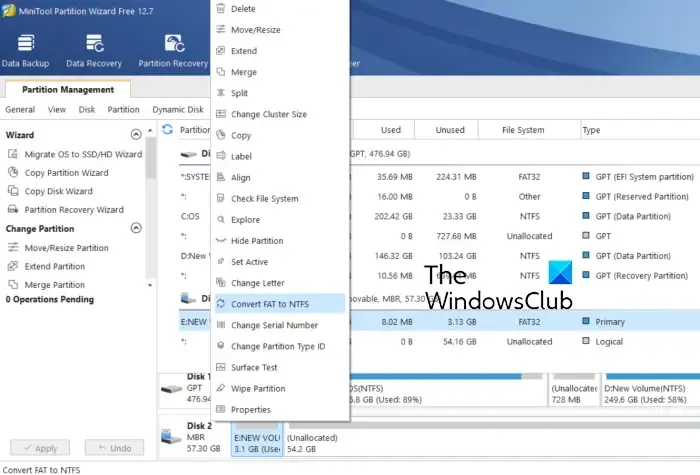
Another free software that you can use to convert FAT32 to NTFS is MiniTool Partition Wizard (Home Edition). It is one of the best free partition manager software using which you can create, delete, extend, and organize your disk partitions. It also offers a tool to perform file system conversion that allows you to convert FAT32 to NTFS.
To use this converter, download and install MiniTool Partition Wizard, and then launch the software. You can see all drives on your computer on its main interface. Right-click on the drive you want to convert and select the FAT to NTFS option from the context menu. On the next prompt, click on the Start button, and it will start converting FAT32 to NTFS.
I hope this post helps you convert FAT32 to NTFS without erasing or losing your data.
Leave a Reply