How to Connect a Game Controller to an iPhone or Mac
Gaming Gear Requirements
Before you attempt to connect any game controller to your Apple device, ensure that your device is running the following software to ensure proper compatibility:
- iOS/iPadOS 16 or later on an iPhone or iPad
- tvOS 16 or later on an Apple TV
- macOS Ventura 13 or later on a Mac
Apple products running the latest software are able to take advantage of the following MFi Certified (Made for iPhone/iPad) controllers from legacy consoles and other popular manufacturers:
- DUALSHOCK4 wireless controller for PlayStation 4
- DualSense wireless controller for PlayStation 5
- DualSense Edge Wireless Controller for PlayStation 5
- Xbox Elite Wireless Controller Series 2 and Adaptive Controller
- Nintendo Switch Joy‑Con controllers
- Nintendo Switch Pro Controller
- SteelSeries Nimbus+ Wireless Gaming Controller
- Rotor Riot Lightning Connected Game Controller
- RiotPWR Cloud Gaming Controller
Preparing to Pair Your Controller
Before you connect your game controller to an iPhone, iPad, Mac, or Apple TV, you must first place the controller in Bluetooth pairing or “discovery” mode. Guidance explaining how to activate Bluetooth pairing mode for the industry’s most popular game controllers is listed below.
How to Activate Pairing Mode for PlayStation Controllers
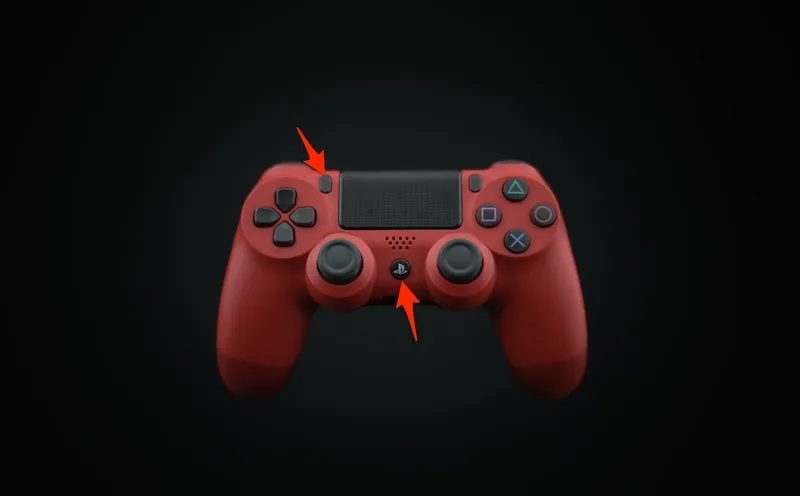
Locate the “PS” and “Share” buttons on the controller, then hold down the buttons. Once you see the controller’s light bar start blinking, let go of both buttons.
How to Activate Pairing Mode for Xbox Controllers
Similar to the PlayStation 4 controller, connecting an Xbox One controller is simple and straightforward, as you can see in the following steps:
- Turn on your controller by pressing the Xbox button.
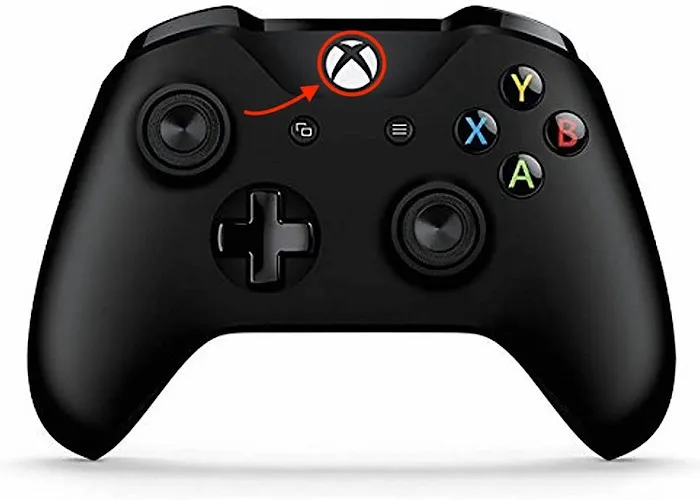
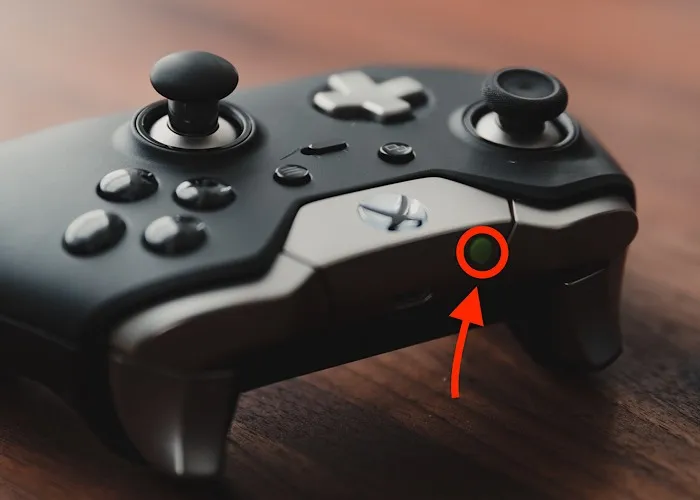
- Press and hold the wireless connection button for a few seconds to enter Bluetooth pairing mode.
How to Activate Pairing Mode for Nintendo Switch Joy-Con
Placing Nintendo Switch Joy-Con into discover mode is incredibly easy. You only need to press one button. Follow the simple steps below:
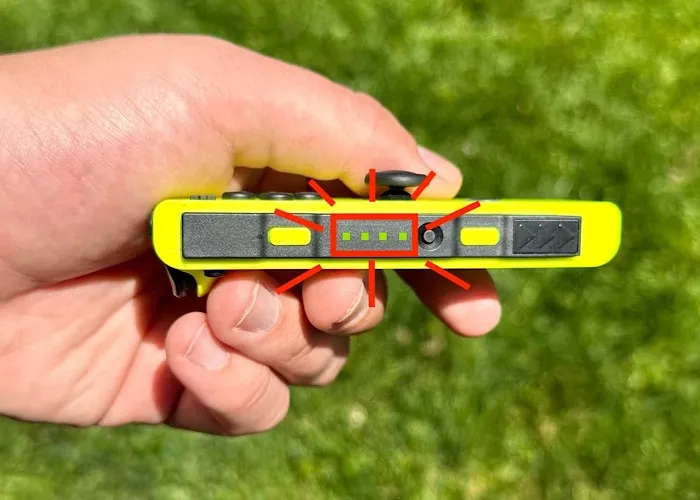
- Disconnect the left and right Joy-Cons from your Nintendo Switch and locate the small black button shown below.
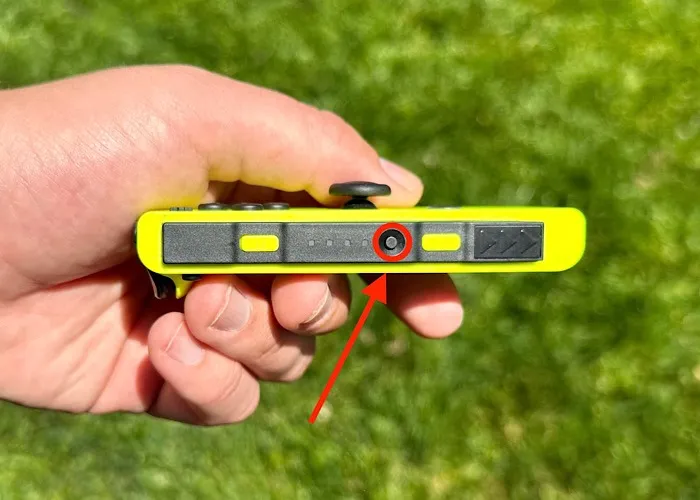
- Press and hold the button until you see the four green LEDs begin to blink, then let go.
Pairing Your Controller to Your Apple Device
Now that the devices are ready to be connected, we’re ready to sync them by following the steps below:
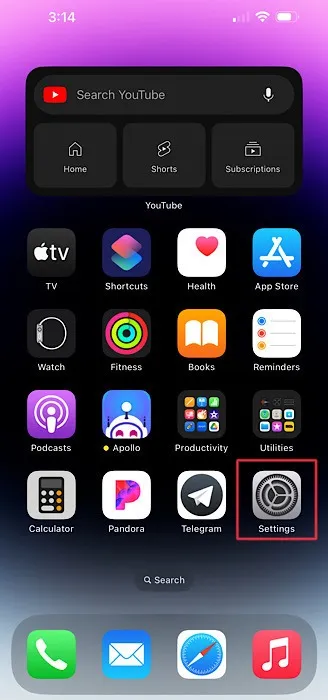
- On your iPhone or iPad, head to “Settings -> Bluetooth.” On macOS, the Settings app is called “System Settings.”
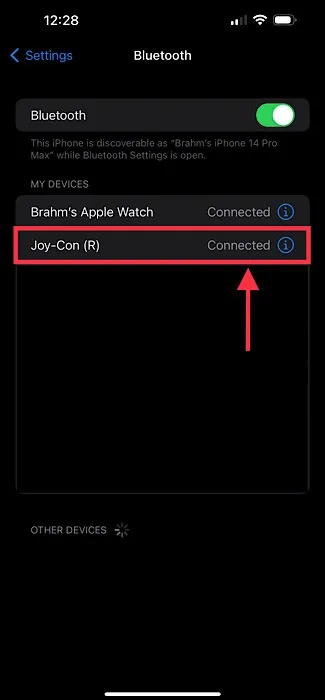
2. Locate the name of your controller under the Bluetooth menu, then tap on it to pair it to your device. You should see text that reads “Connected” next to the name of your controller. Now you’re ready to play!
FYI: wondering why Macs aren’t the best machines for gaming? This guide explains it.
Frequently Asked Questions
If my game controller is not on the list of compatible controllers, does that mean it is not compatible with my Apple device?
The controllers that are listed as compatible with Apple devices in this guide represent some but not all compatible controllers. While Apple does not provide a full list of compatible controllers, you can be sure that your controller will work with Apple products if you see a “Made for iPhone” label on its packaging.
How do I find the Bluetooth settings on my Apple TV?
Accessing the Bluetooth menu on the Apple TV requires that you visit “Settings -> General -> Remotes and Devices -> Bluetooth.” The “Remotes and Devices” menu adds an extra step when pairing your controller to an Apple TV.
Can I remap certain buttons on my gaming controller using my Apple device?
Yes, you can customize controller buttons and other features offering improved accessibility by visiting the Settings app. On and iPhone or iPad, go to “Settings -> General -> Game Controller.” Tap the name of your controller, then “Default Controls.”
On a Mac, choose “the Apple menu -> System Settings,” click “Game Controllers” in the sidebar, then click the name of your controller. On Apple TV, go to “Settings -> General -> Remotes and Devices -> Bluetooth.” Select your controller, then select “Customization.”
Image credit: Unsplash. All screenshots and images by Brahm Shank.
- Tweet
Leave a Reply