How to Clear the Cache on Mac to Free Up Space
All computers, including Mac laptops and desktops, contain temporary cache files that are meant to accelerate certain processes, including loading times for websites and apps. However, cache files can accumulate over time, taking up valuable space on your disk drive and actually slowing your Mac over time. Leaving behind too many cache files can also pose a privacy risk, as they can be used to track your online activity. This tutorial demonstrates how to routinely clear the cache on your Mac to prevent system slowdowns and limit privacy risks.
How to Clear All Types of Cache on Mac
Before jumping into learning how to clear cached files on a Mac, we recommend you create a backup of the important files and folders. This is a crucial step, as it will provide peace of mind in the event that something goes wrong. After everything goes as planned, you can remove these backups.
Clear the Mac User Cache
Follow these steps to clear the user cache on Mac:
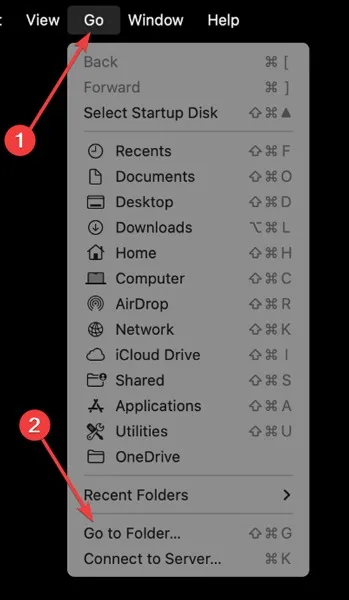
- Click on the “Go” Menu at the top of the screen and select “Go to Folder.”
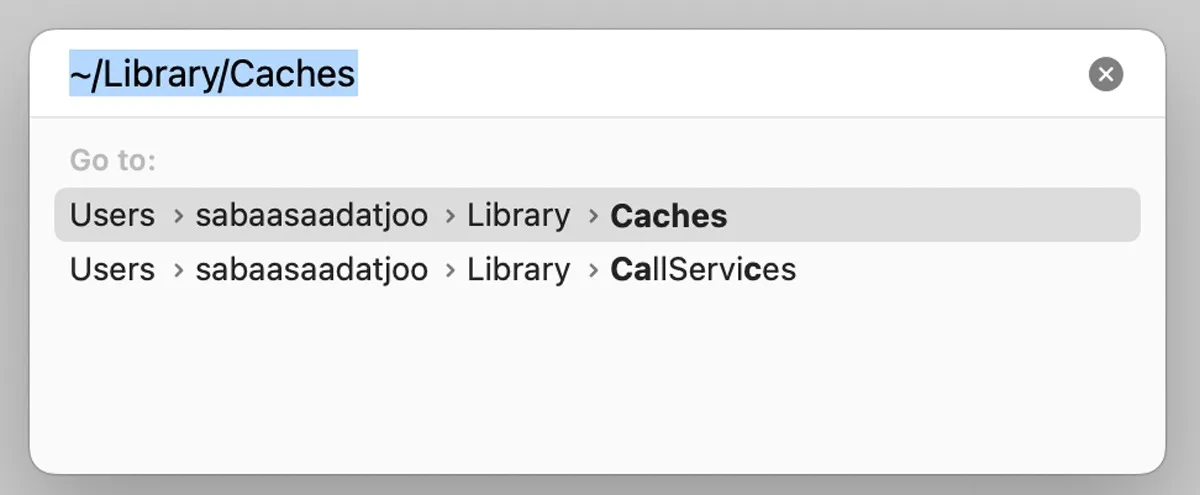
2. Type the following command and select “Caches.”
~/Library/Caches
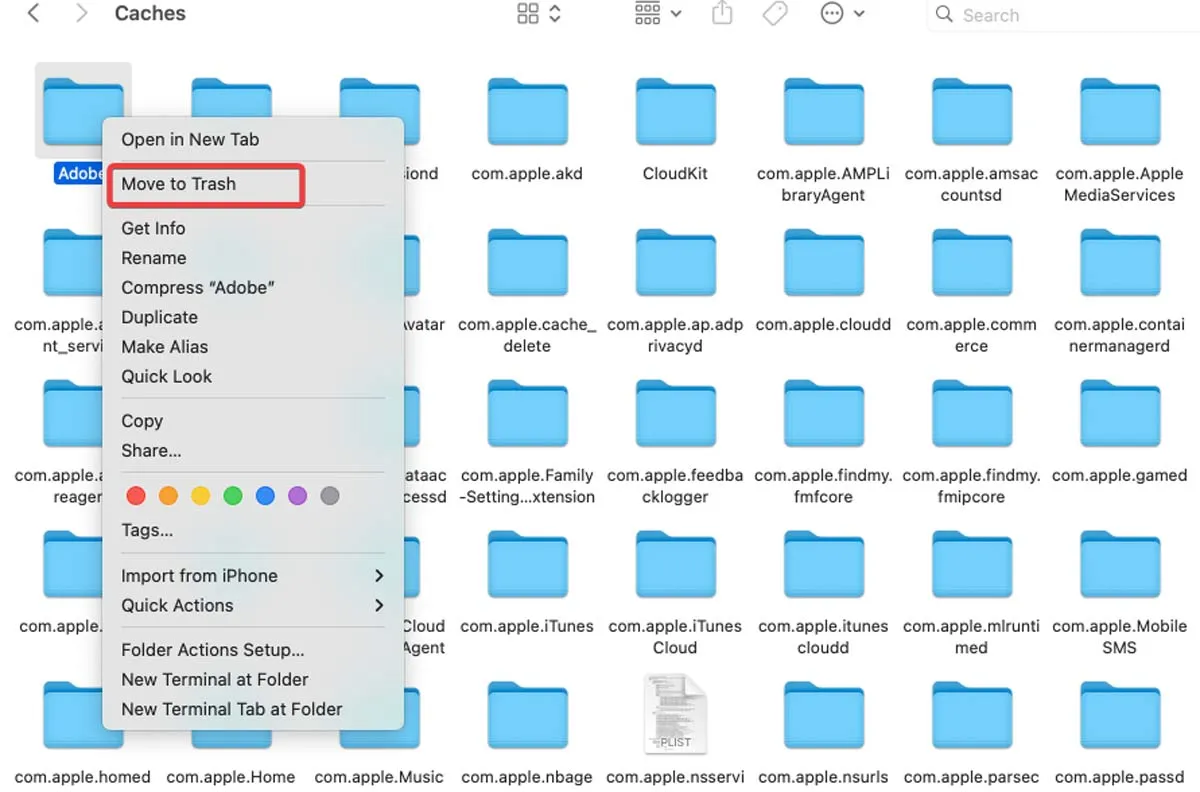
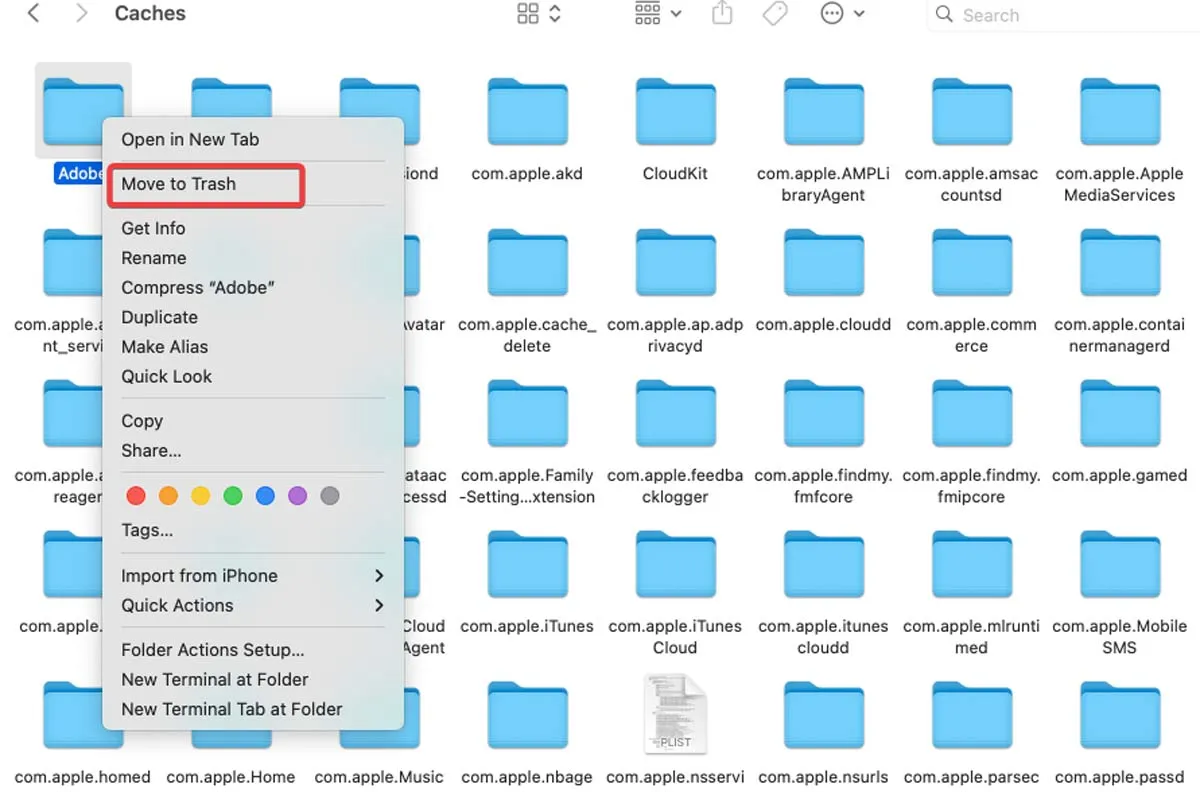
- Right-click on the files you want to remove and click “Move to Trash,” or select all the files, right-click on one of the folders and select “Move to Trash.”
Clear Application Cache on Mac
Deleting the application cache on Mac is unnecessary, as many of these files help programs load faster. This is similar to cleaning the system cache. However, if the app is bugged or you just need to clean this folder to open some space on your Mac, follow the steps below:
- Open “Finder,” choose the “Go” menu, and click “Go to Folder.”
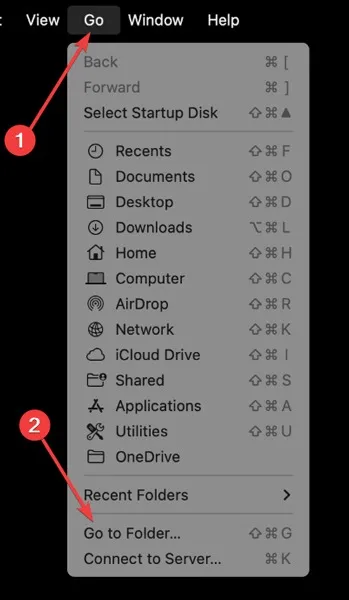
- Type the following command:
/Users/[UserName]/Library/Caches
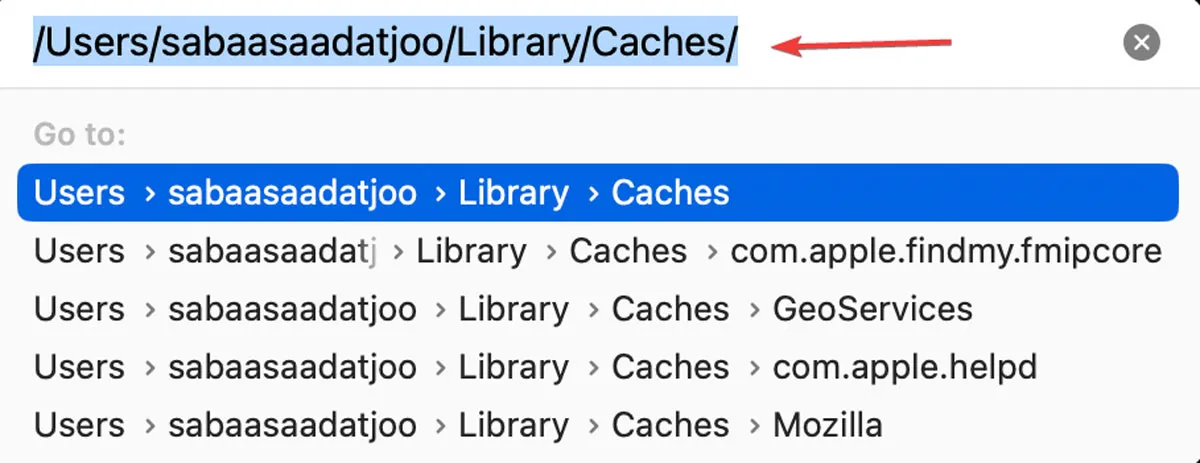
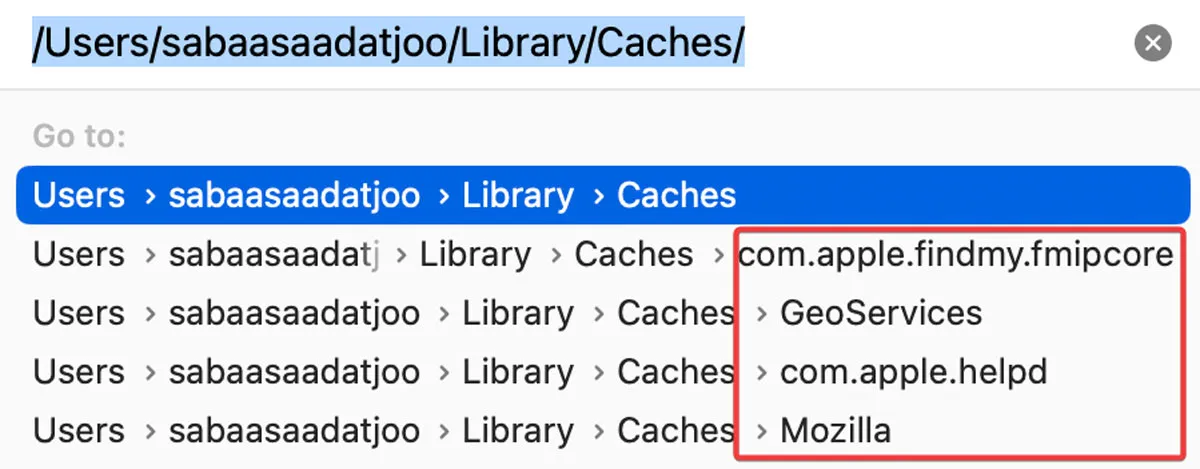
- You can see the user caches for all apps in this window.
- Choose the folder you want to delete or open the folder and select the files inside. Drag them to “Trash” or right-click and choose “Move to Trash.”
Clear the Safari Cache on Mac
One of the best ways to resolve website loading problems and errors is to erase the cache on your browser. Follow the instructions below to clear the Safari cache on Mac:
- Click on the “Safari” menu and select “Settings.”
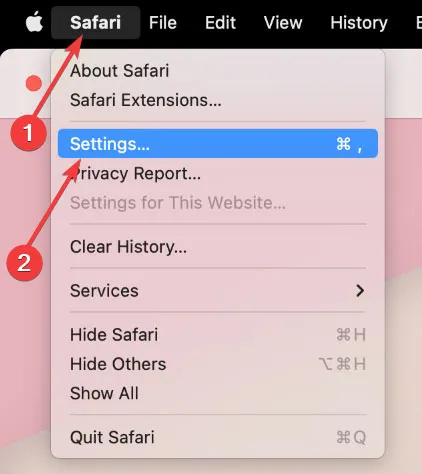
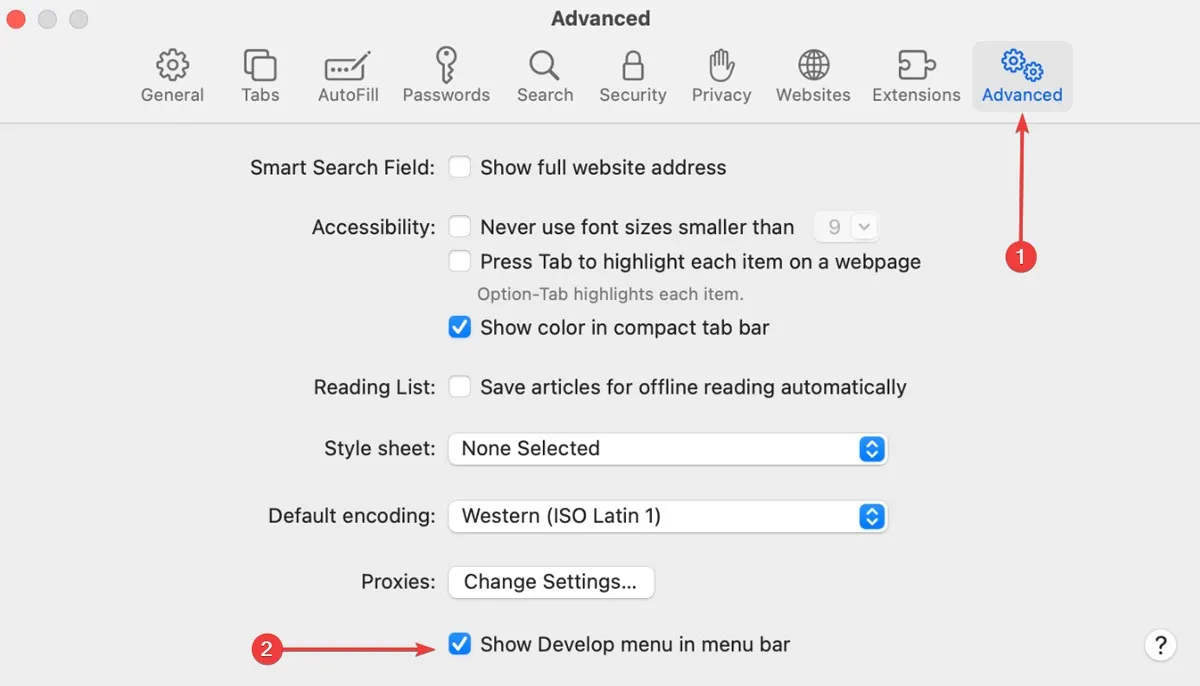
- Click on the “Advanced” tab, then enable “Show Develop menu in menu bar.”
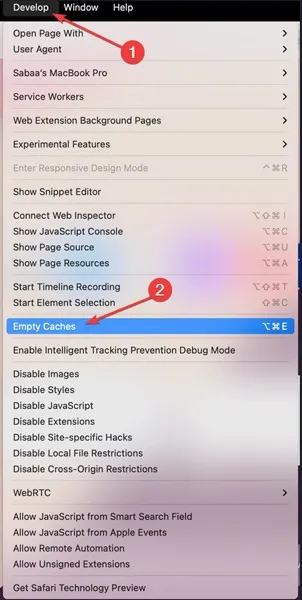
- A new “Develop” option appears in the menu at the top of your screen. Click that and choose “Empty Caches.”
Clear the Google Chrome Cache
You may wish to clean the cache in Google Chrome for the same reasons you would in Safari or any other browser. Do so by following the instructions below:
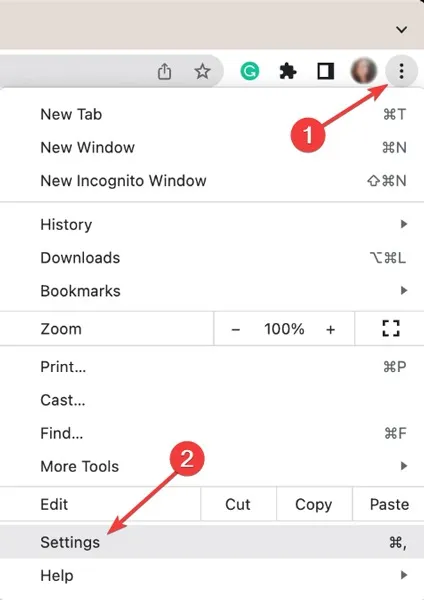
- Click on the three-dot menu in the top-right corner of “Google Chrome” and select “Settings.”
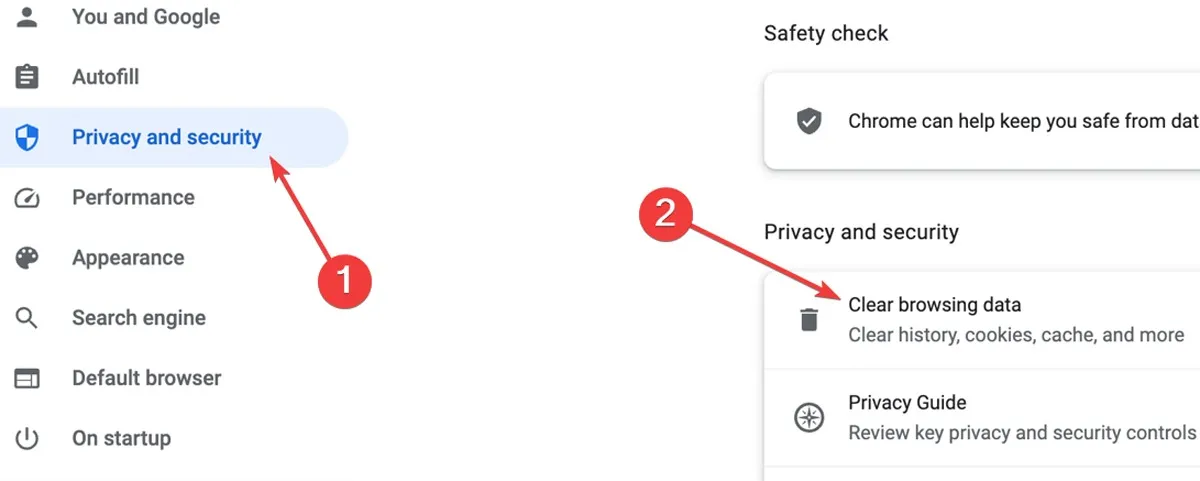
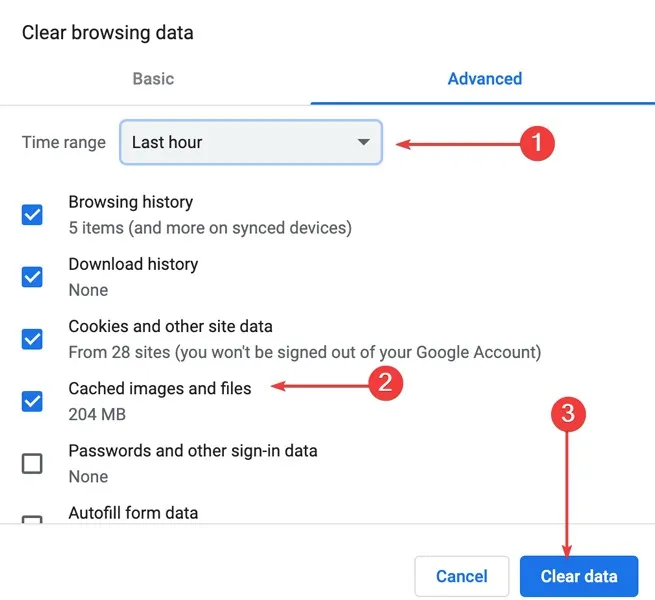
- In the left pane, choose “Privacy and security” and select “Clear browsing data.”
- Choose your desired “Time Range”: “Last hour,” “Last 24 hours,” “Last 7 days,” “Last 4 weeks,” or “All time.” Check “Cached images and files,” then click on “Clear data” to delete the browser cache.
Clear the Firefox Cache
The steps to clear the Firefox browser cache are very similar to Google Chrome. Follow the steps below to clear the Firefox cache on a Mac:
- Click on the hamburger menu (three lines) at the top-right corner, then choose “History.”
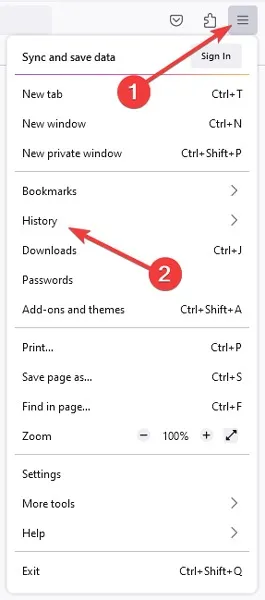
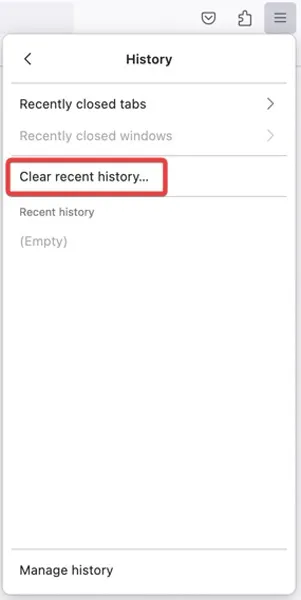
- Choose “History” from the next menu and click “Clear recent history.”
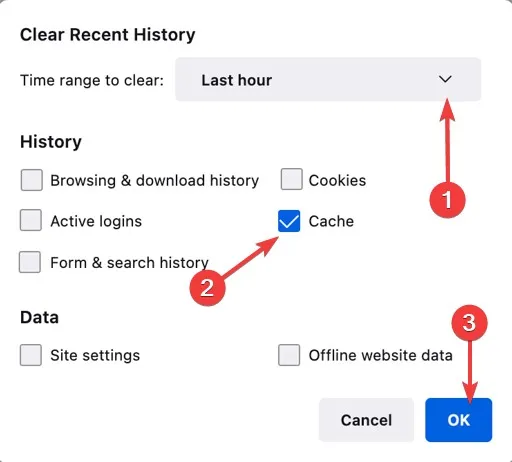
- Choose the “Time range to clear”: “Last hour,” “Last two hours,” “Last four hours,” “Today,” or “Everything.” Check the “Cache” box and click “OK.”
Clear the System/Browser/App Cache in One Click
It can be challenging to follow instructions to clean your Mac cache if you’re not technically savvy. The best course of action is to use one of the best cache cleanup applications. Below, we demonstrate how to use CleanMyMac X in this situation.
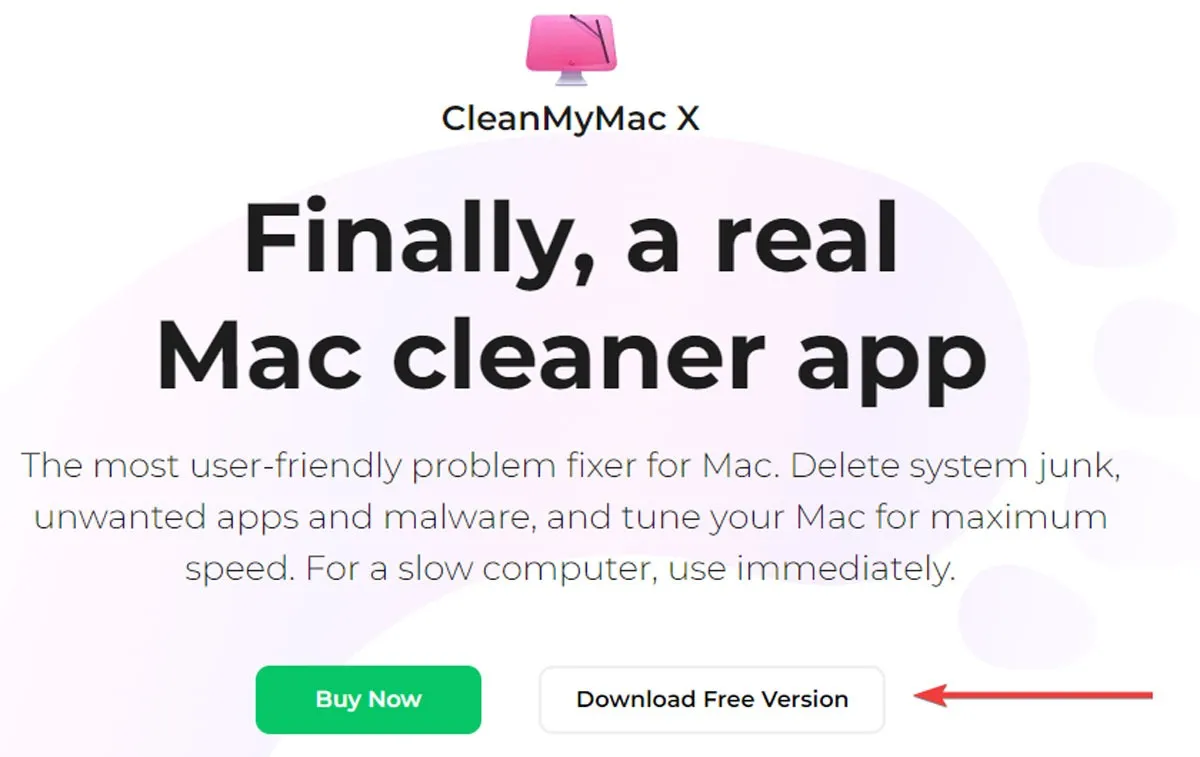
- Download CleanMyMac X (free version).
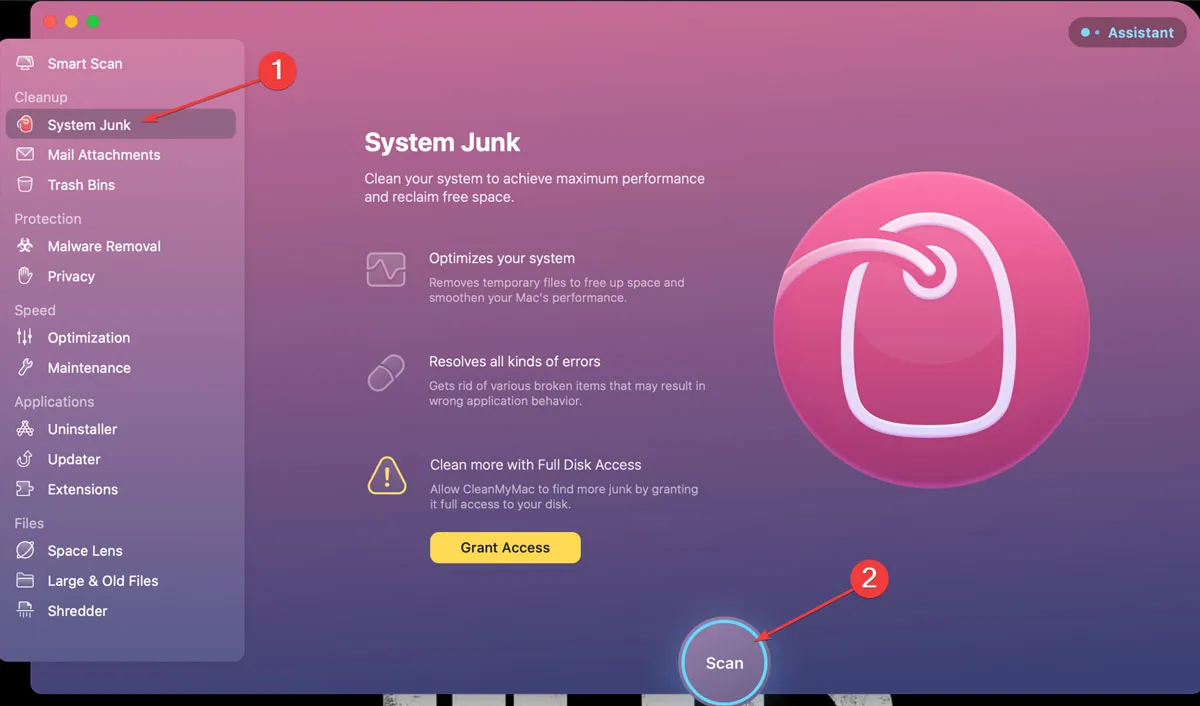
- Run the app and select “System Junk,” then click “Scan.”
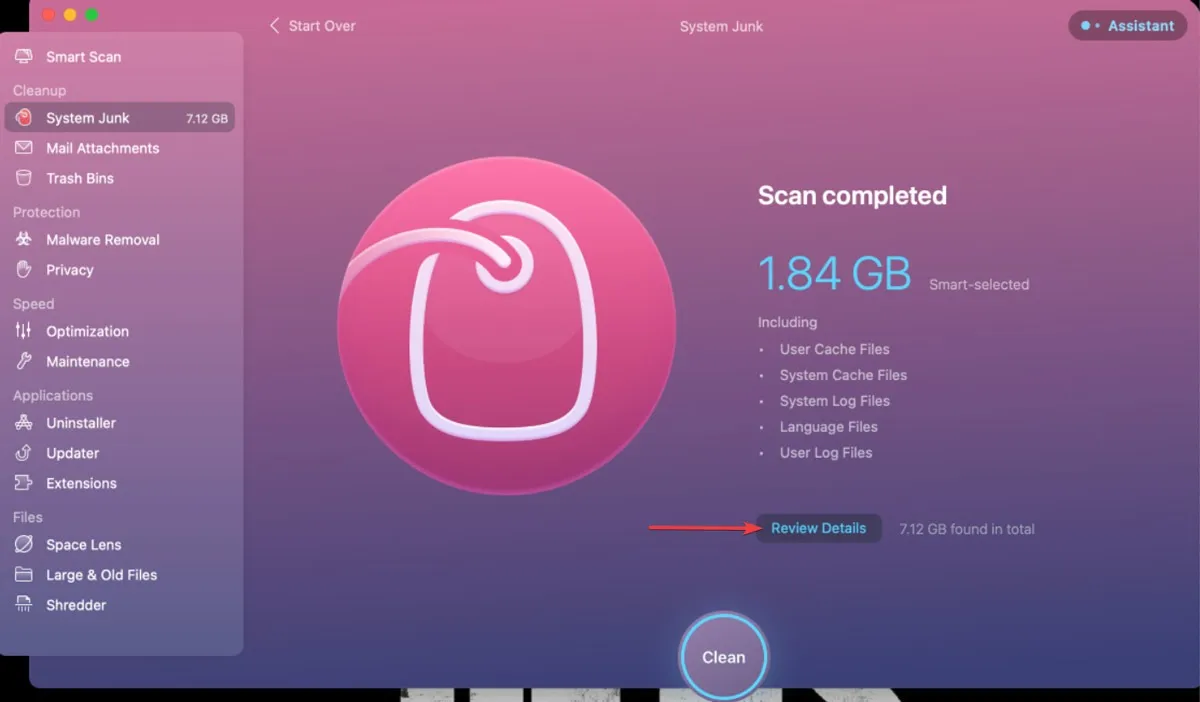
- Click “Review Details.”
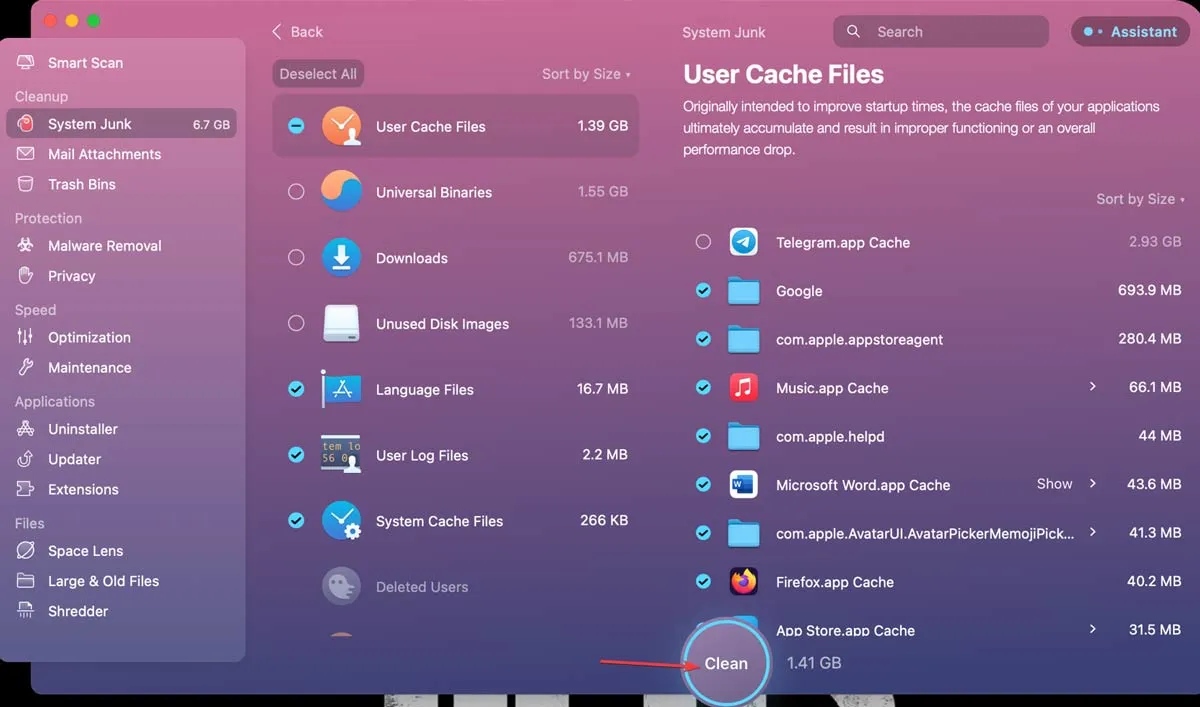
- Review the report, select the files you wish to delete, and finally, click the “Clean” option.
Frequently Asked Questions
Which cache files are safe to delete on Mac?
Although you should exercise caution when deleting items from your Mac, clearing cached data is usually safe. Removing cached files from system-level (/Library/Caches/) and user-level (/Library/Caches/) folders shouldn’t encounter any significant problems.
How can I clear the Teams cache on Mac?
Exit the Teams app if it is still operating. In the “Finder,” open the “/Applications/Utilities” folder and double-click “Terminal,” then enter the following command and press Return: rm -r ~/Library/Application\ Support/Microsoft/Teams. “Restart” Teams.
How can I clear the DNS cache on Mac?
Browsers can find and connect to web addresses very fast, thanks to the DNS cache. However, an outdated DNS cache may be the root of the problem if websites won’t open in your browser. To fix this, open the “/Applications/Utilities” folder in Finder and double-click “Terminal.” Enter sudo killall -HUP mDNSResponde, then press Return. Type in your administrator password to confirm and clear the DNS cache.
Image credit: Pexels. All screenshots by Farhad Pashaei.
- Tweet
Leave a Reply