How to Add New Language Keyboard in Windows
When installing a fresh version of Windows 11 or 10, you can select your desired language by default, like English (US or UK). You can also add an additional language to your keyboard later, allowing you to switch at anytime, such as when you are working on a project or writing an article in a different language. Follow the methods below to learn how to add a new language keyboard in Windows.
Add a New Language Keyboard Through Windows Settings
This is the easiest and most straightforward way to add a new language keyboard on your Windows PC.
- Right-click on the Start menu icon in the taskbar and click on “Settings.”

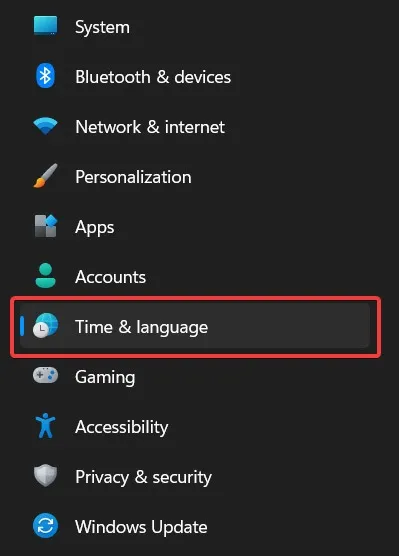
- Click on the “Time & language” tab in the menu on the left.
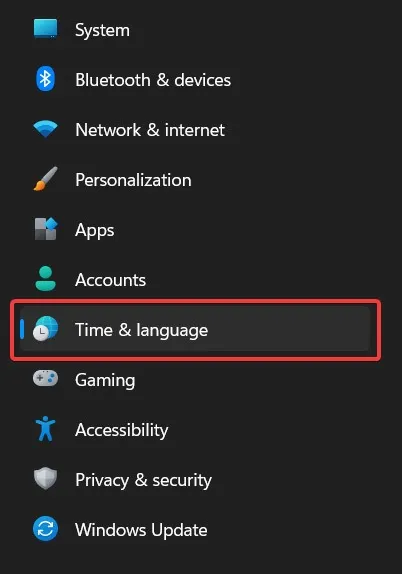
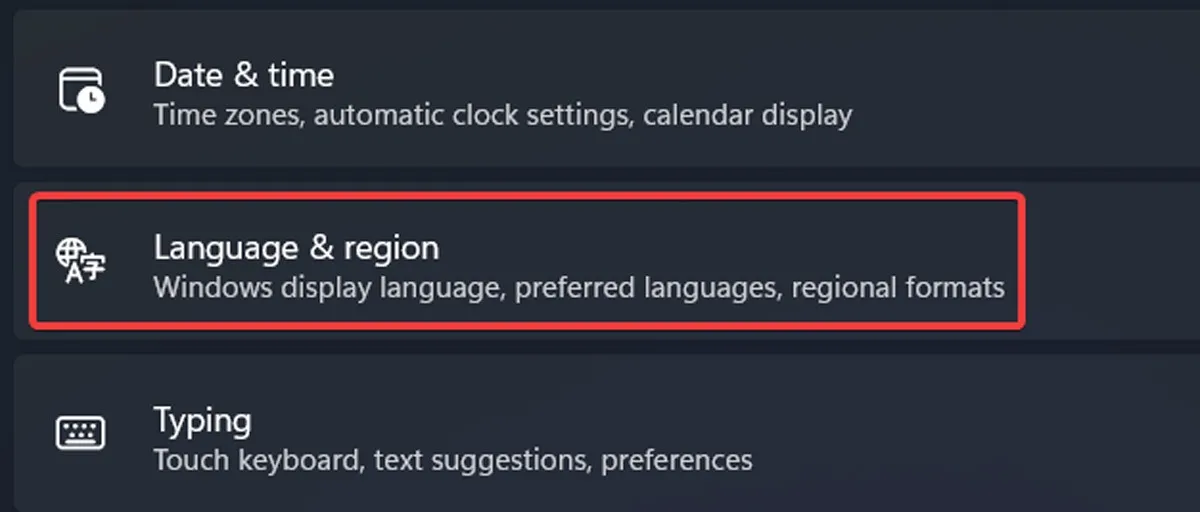
- Select “Language & region.”

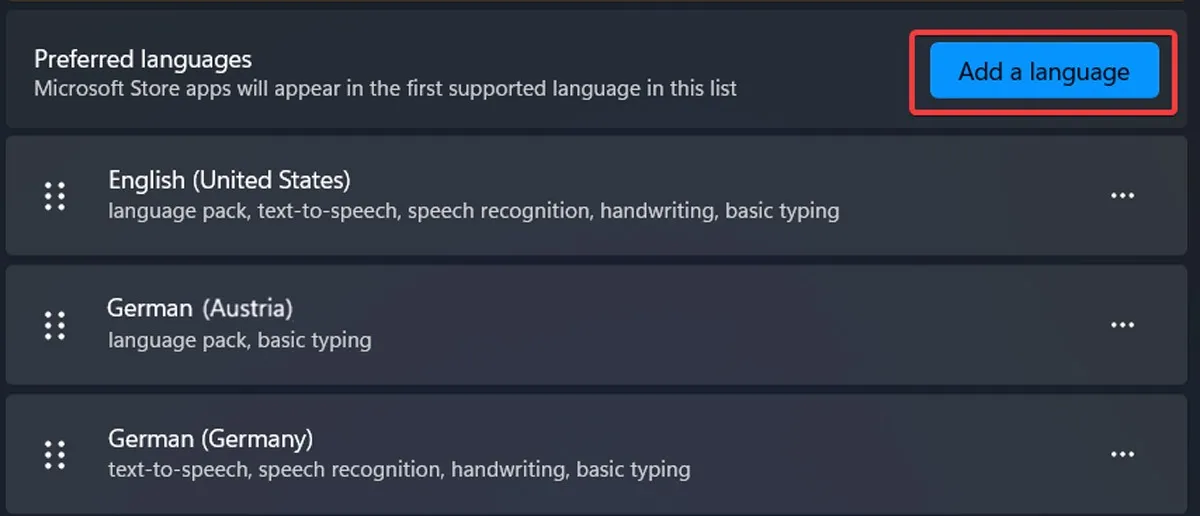
- Click the “Add a language” button next to “Preferred languages.”
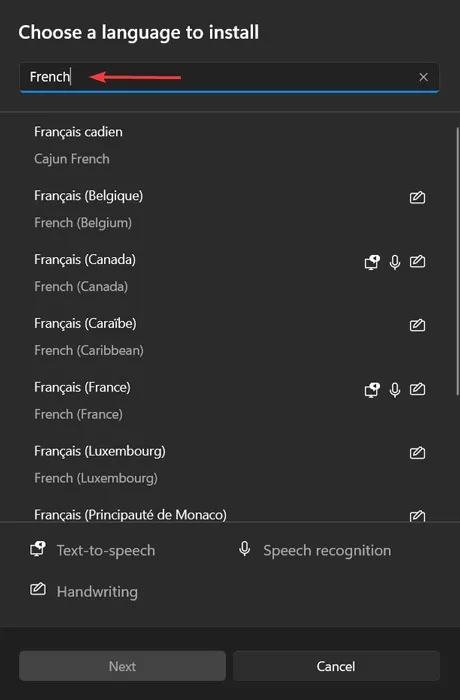
- Search for the language you’re looking for using the search bar at the top of the window.
- Select your desired language and click on “Next.”
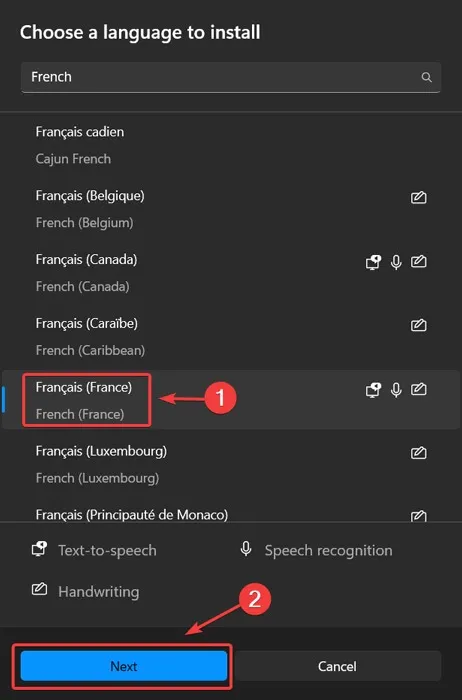
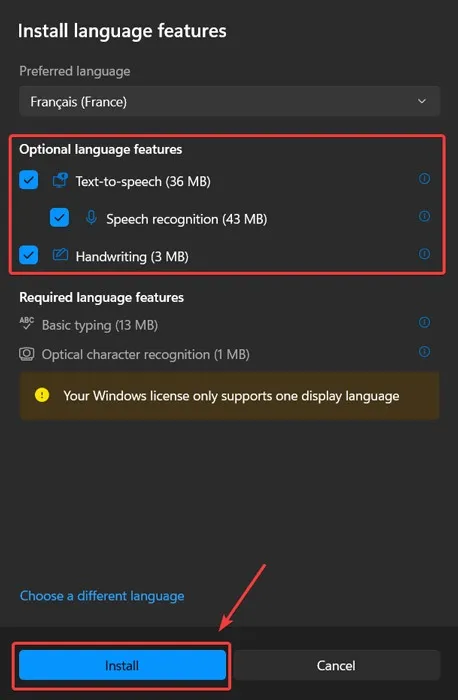
- Check the optional features you want (such as text-to-speech) and click on “Install.”
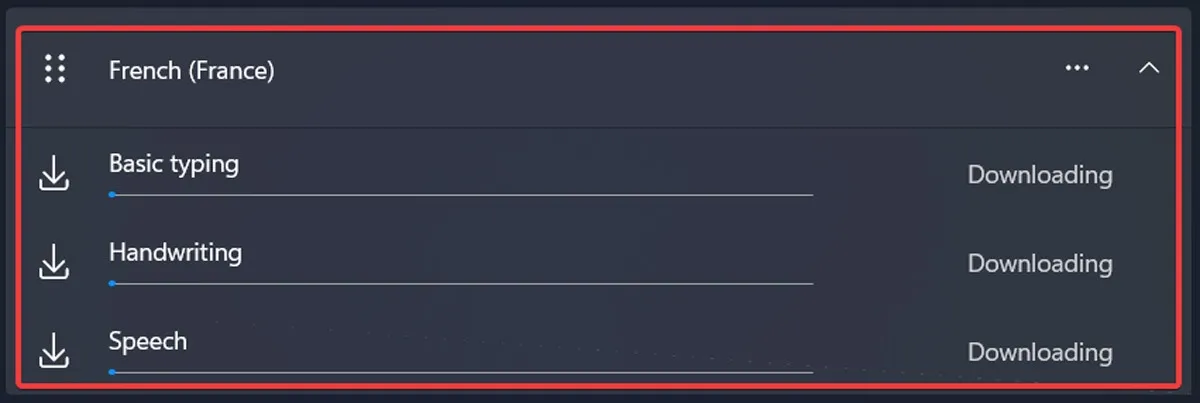
- The language pack will be added to your system. You can view the downloading process of the features by clicking on the language on the “Language & region” page.
- If you’re using Windows 10, go to “Settings -> Time & language -> Language -> Add language.”
Add a New Language Keyboard in Windows via Windows Terminal
You can also add a new language keyboard in Windows via the Windows Terminal. If you can’t open the Windows Terminal window on your PC, learn how to get it running again.
- Right-click the Start menu icon and select “Terminal (Admin)” in the drop-down window. In Windows 10, click on the search box, type “Windows Terminal” and select it.

- Paste the following command and press Enter:
$LanguageList = Get-WinUserLanguageList

- Enter the following code to add your desired language:
$LanguageList.Add(“language/region tag”)

- Enter the following code and execute it:
Set-WinUserLanguageList $LanguageList
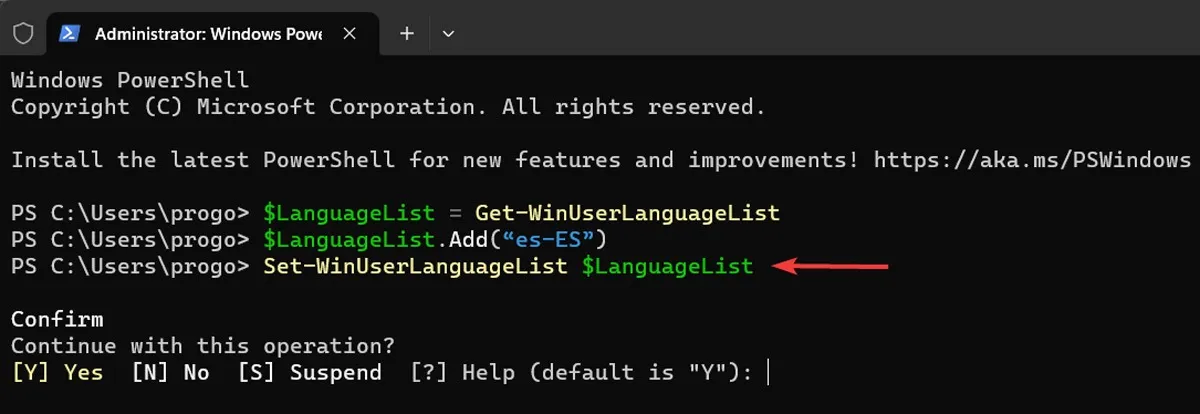
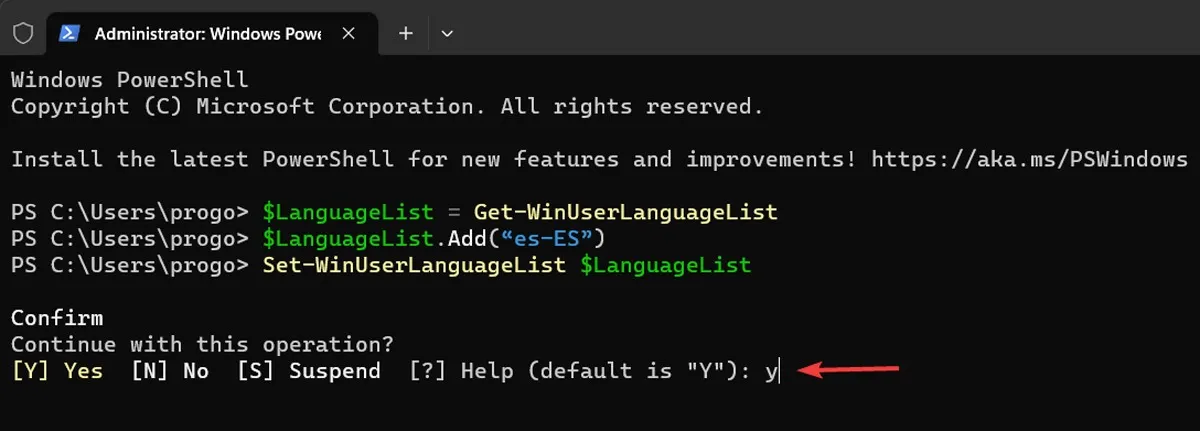
- Type Y in response to the prompt and press Enter.
- The language pack will be added. Bear in mind that in this method, the language pack is installed with all of the additional features. Be sure to wait for the language pack to download completely.
Add Language-Specific Key Layouts Through Windows Settings
Each language pack comes with alternative language-specific keyboard layouts. A keyboard layout is a specific arrangement of keys on a computer keyboard or virtual keyboard. The most standard one is QWERTY (English), but there are other layouts for English as well as layouts for languages used across the world.
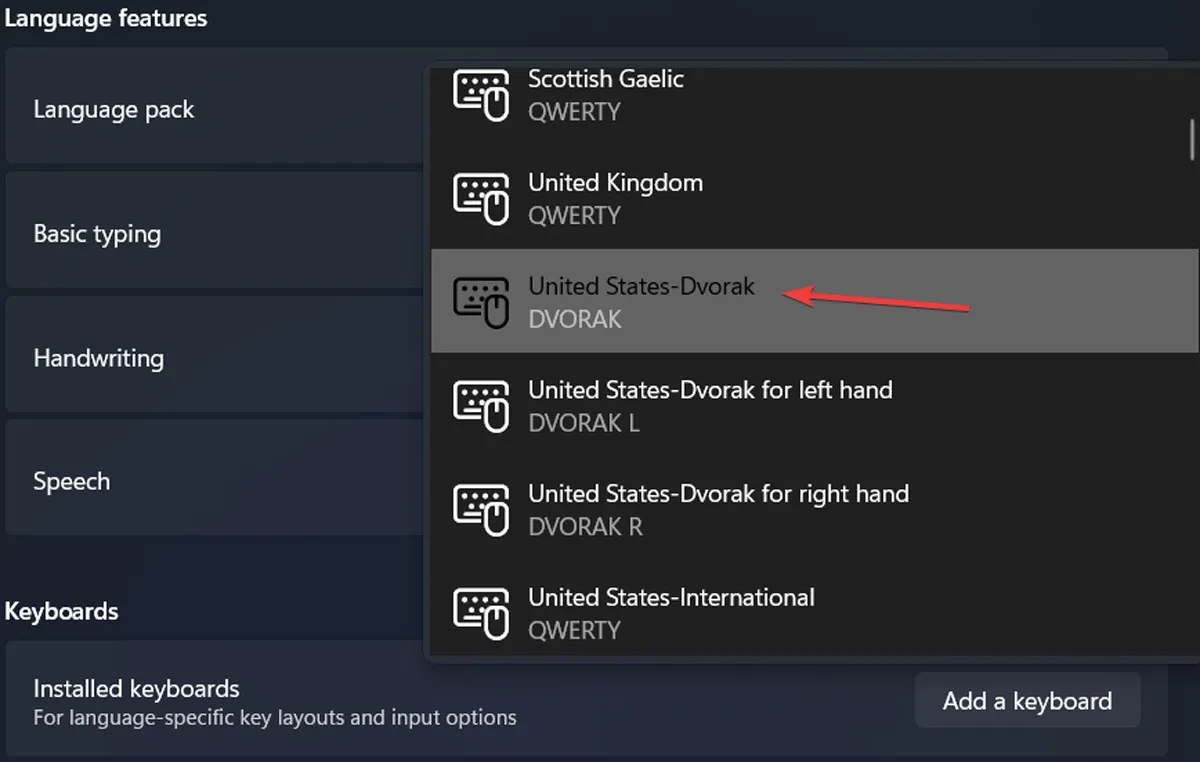
For example, the DVORAK (English) layout has all of the vowels and punctuation on the left side and is optimized for faster typing. To add a language-specific key layout to your keyboard options, follow these steps:
- Open “Settings” on your PC, just as above.

- Select “Time & language” on the menu on the left.
- Click on “Language & region.”
- Click on the three-dot icon next to a language on the list and select “Language options” from the drop-down window.

- Click on “Add a keyboard.”

- Choose your desired layout from the drop-down list.
Change Keyboard Layouts via Action Center
Quick Settings also provides a shortcut for changing key layouts, but it is exclusive to Windows 11. This is a faster method and an alternative way to modify your keyboard layouts.
- Click on the Wi-Fi/Volume/Battery icon in the system tray to bring up the Action Center.

- Click on the pen-shaped Edit button.

- Click “Add” and select “Keyboard layout” from the drop-down list.
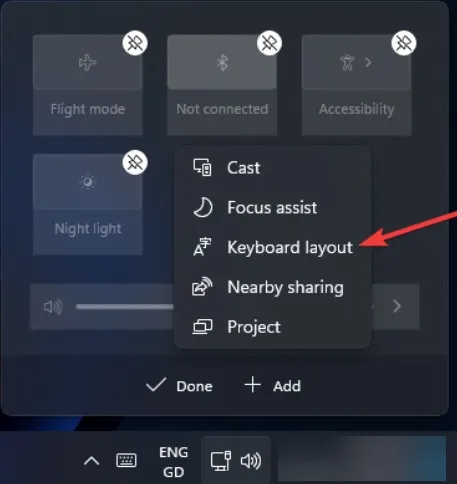
- Access keyboard layouts from the Action Center by clicking its Quick Action tile.

Frequently Asked Questions
Can I have more than one display language on my Windows PC?
Yes, but only if your Windows license is not a single-language one. A single-language license would be shown as a warning message on the “Language & Region” page in Settings.
Why is my Language Pack stuck in downloading mode?
If you find the language pack download frozen, you can try to remove the language and add it again using one of the methods listed above. If the problem persists, ensure you’re connected to a stable and fast Internet connection.
Can I create a custom keyboard layout in Windows?
Yes! If you feel that none of the preexisting key layouts fully satisfy your needs, try creating one from scratch. Download the Microsoft Keyboard Layout Creator application and start creating your custom key layouts.
Image credit: Unsplash. All screenshots by Farhad Pashaei.
- Tweet
Leave a Reply