Hal.dll Missing Or Corrupt: How to Fix The Error
Hal.dll is called Hardware Abstraction Layer Dynamic Link Library, a system file that links a computer’s hardware and software components.
If hal.dll is missing from your computer, your computer can’t communicate with the hardware. In this guide, we will discuss some of the tested fixes to resolve the issue right after talking about the causes.
What causes the hal.dll missing error?
There could be various reasons for the error; some of the common ones are mentioned here:
- Damaged or corrupted boot.ini file – The. ini file, when damaged or corrupted, could cause various issues, including the DLL file. Try repairing the file using an SFC scan.
- Hard drive is physically damaged – If your hard drive is physically damaged, your machine will not work properly and cause several issues.
- Deleted or moved dll file -You might see this error if your dll file is deleted or moved from the original destination.
- Virus infection – Viruses on your computer could corrupt system files, causing the missing DLL error. You need to run a deep scan using an antivirus tool.
- Incorrect BCD configuration -If the data in the BCD is incorrect, BOOTMGR may load Windows with the wrong system root set, which could result in hal.dll not being located.
Now that you know the causes of the issue, let us move on to the methods to fix it.
What can I do to fix the hal.dll missing error?
Before engaging in advanced troubleshooting steps, you should consider performing the following checks:
- Restart your computer.
- Make sure the boot order in BIOS is correct.
If these tweaks didn’t work for you, check out the steps mentioned below.
1. Use a DLL fixer
These tools have a huge database of DLL files and can resolve the DLL missing or not found errors in a few clicks.
One such reliable DLL fixer tool can restore the hal.dll file, thereby resolving conflicts between OS and third-party apps, fixing various system issues, and enhancing the system’s performance.
2. Perform a Startup Repair
2.1 Enter Windows Recovery Environment
- Press and hold the Power button for 10 seconds to turn off your device. Now, press the Power button to turn on your device.
- When the manufacturer’s logo appears, repeat the same process twice.
- This time, let it restart, and on the Automatic Repair screen, select Advanced options.
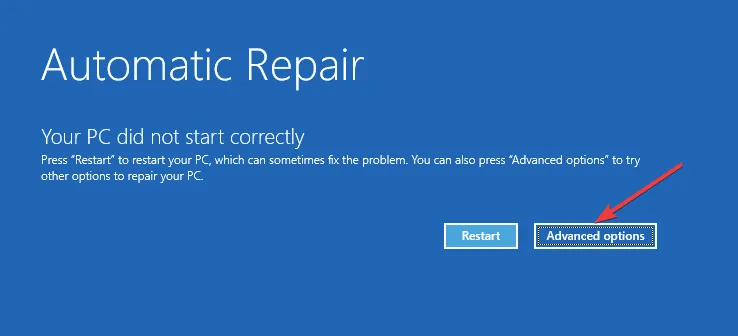
- Now you are in Windows Recovery Environment.
2.2 Initiate Startup Repair
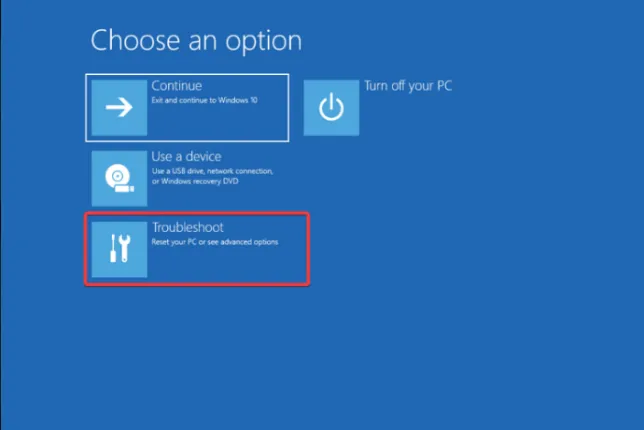
- On the Choose an option screen, select Troubleshoot.

- Select Advanced options.
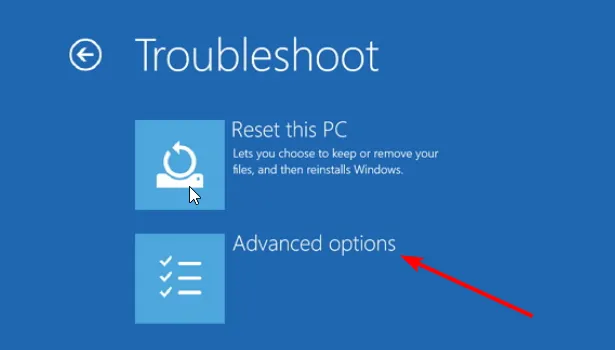
- Now select Startup Repair and click Restart.
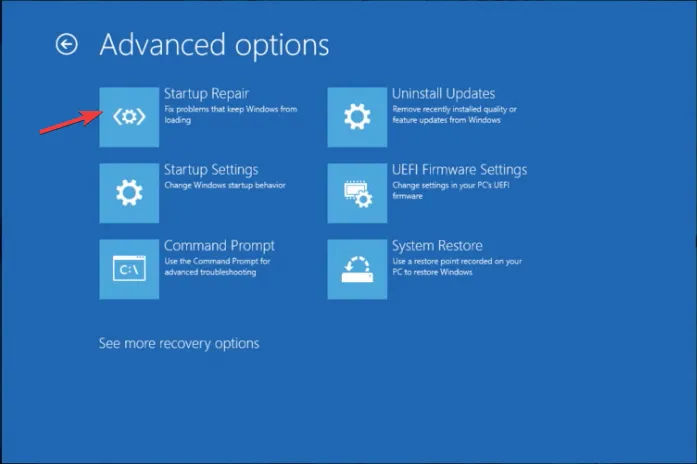
Windows will restart, and it will try to fix the bootloader issues preventing your Windows operating system from loading.
3. Restore the Hal.dll file
- Enter the Window Recovery Environment using the steps mentioned in Solution 2.
- Now on the Choose an option screen, select Troubleshoot.
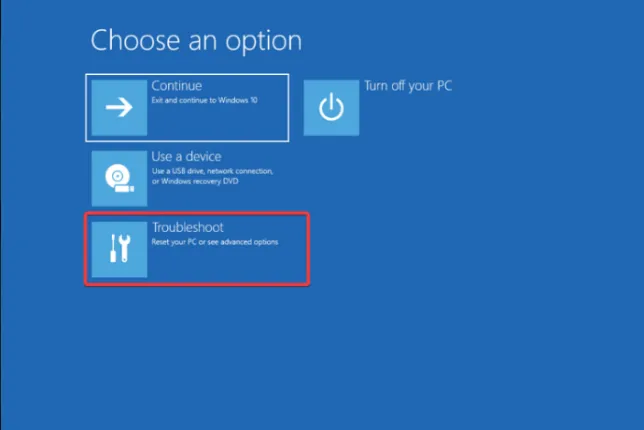
- Now choose Advanced options.
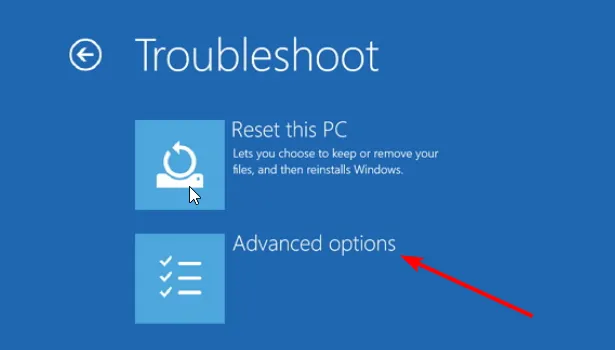
- Select Command Prompt and enter your login credentials if prompted.

- Type the following command to access the System32 folder in your PC and hit Enter :
cd system32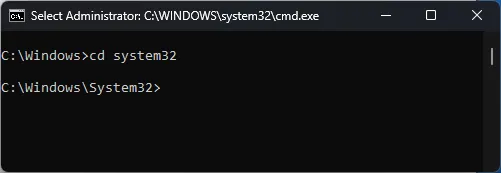
- Now copy and paste the following command to check the CD ROM drive and press Enter:
map - Type the following command to copy the file to the System32 folder and press Enter :
expand d:\i386\hal.dl_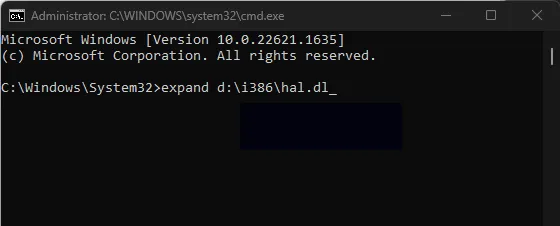
- If it asks to overwrite, type Yes and press Enter.
4. Rebuild the. ini file
- Enter the Window Recovery Environment using the steps mentioned in Solution 2.
- Select Troubleshoot.
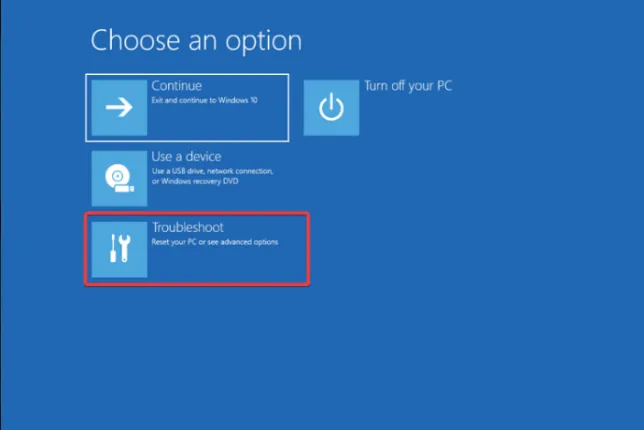
- Choose Advanced options.

- Select Command Prompt and enter your login credentials if prompted.
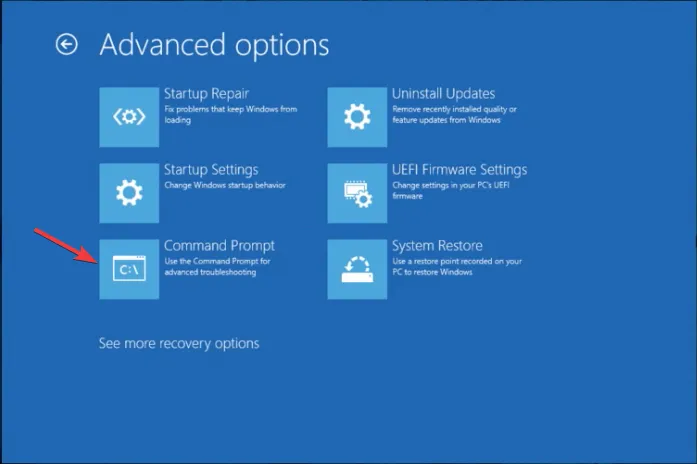
- Copy and paste the following command and hit Enter :
attrib -h -r -s c:\boot.ini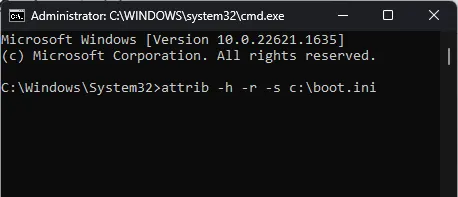
- If you get Parameter is wrong error, ignore it and move ahead. Type the following command and press Enter:
del c:\boot.ini - Copy and paste the following command and hit Enter :
bootcfg /rebuild
- Type y when prompted Add Installation to boot list?
- Now type Windows for the Boot Identifier.
- Copy and paste the following command to access Boot Load Options and hit Enter:
/fastdetect - Type the following command and press Enter:
fixboot - Then type Y and press Enter.
5. Perform a System Restore
- Enter the Window Recovery Environment using the steps mentioned in Solution 2.
- Select Troubleshoot.
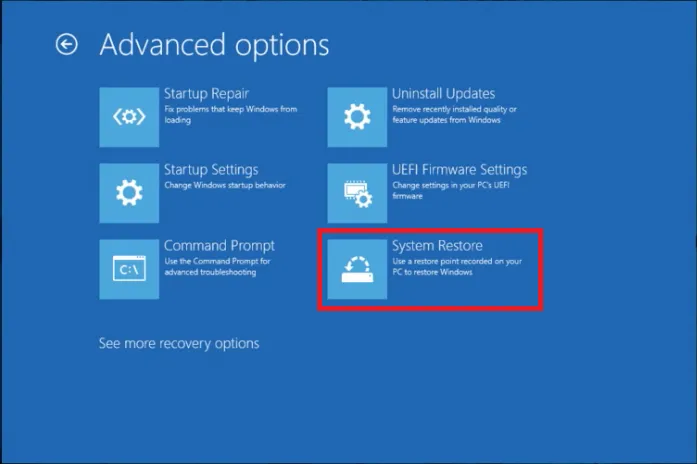
- Choose Advanced options.

- Select System Restore.
- Now on the System Restore wizard, click Next.
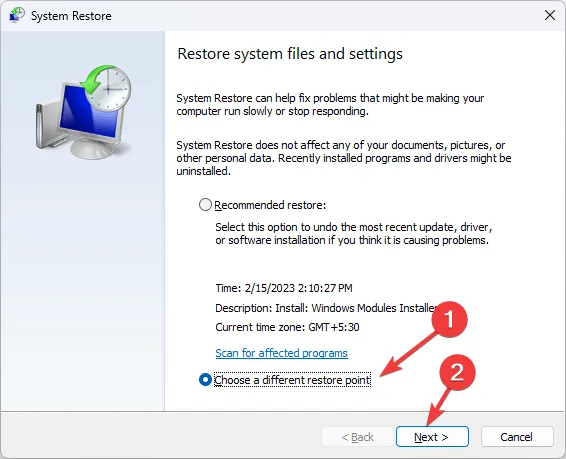
- Choose a restore point and click Next.

- Click Finish to start the restoration process.

So, these are methods you need to follow to fix the hal.dll missing error. If these steps didn’t fix the issue for you, you need to perform a clean installation of Windows to eliminate the problem.
If you have any questions or suggestions, feel free to mention them in the comments section below.
Leave a Reply