DUser.dll Missing: How to Fix or Download It Again
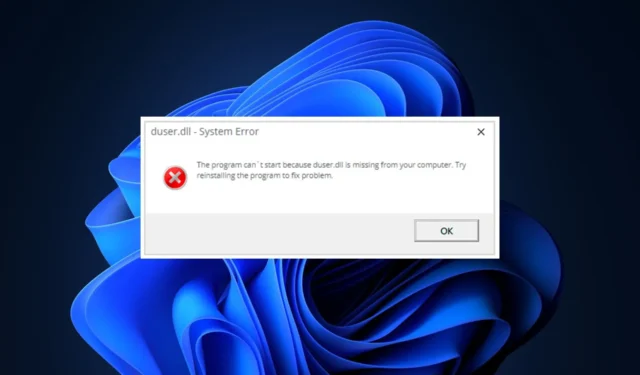
The DUser.dll is a critical Windows component that ensures that Windows applications function correctly. If the file is missing, you’ll trigger a series of operational errors.
If you’re experiencing the DUser.dll error, this article will briefly discuss the causes and provide you with steps to help resolve the error.
What is the DUser.dll File?
The DUser.dll also known as a Windows DirectUser Engine file was published by Microsoft for the development of the Windows OS.
The DUser.dll file falls under the Win32 DLL file type category. The file is located in the path: C:\Windows\System32.
Why is the DUser.dll missing?
Here are some of the reasons why you’re experiencing the DUser.dll missing error:
- Corrupt System Files – Windows comprises a series of files and applications that enable the OS to function correctly. Sometimes, some of these files can get corrupted due to actions of viruses, forced system shutdowns, etc. As a result, the files get corrupted, which leads to errors like the DUser.dll is missing.
- Failed Application Installation – One of the common causes of errors in Windows-based applications is failed app Installations. If the app triggering the DUser.dll error wasn’t installed correctly, you’d experience errors like the DUser.dll is missing.
- Virus and Malware – Viruses and Malware are one of the most common causes of errors in Windows PCs. Computers infected with viruses tend to malfunction depending on the virus type. Virus infection may be the reason for the missing DLL error.
What can I do if the DUser.dll is missing?
If you’re experiencing the DUser is missing error, here are a couple of ways you can resolve the error:
1. Apply a DLL Fixer
2. Run the System File Checker Utility
- Press the Windows key, type in CMD, and select Run as Administrator.
- Click Yes to grant the app administrative access in the User Account Control window.
- Once the command prompt opens, type the following and hit Enter :
sfc /scannow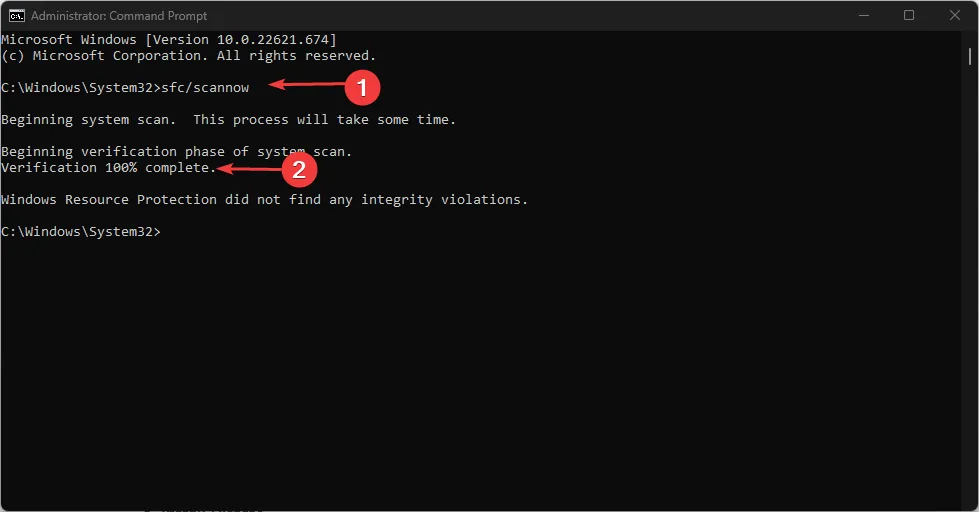
- Wait till the scan is complete, and restart your PC to check if the error persists.
An SFC scan helps resolve Windows errors triggered by corrupt System files. DLL errors can often appear due to a series of corrupt system files. Running the scan will help identify and repair such files.
3. Update Windows
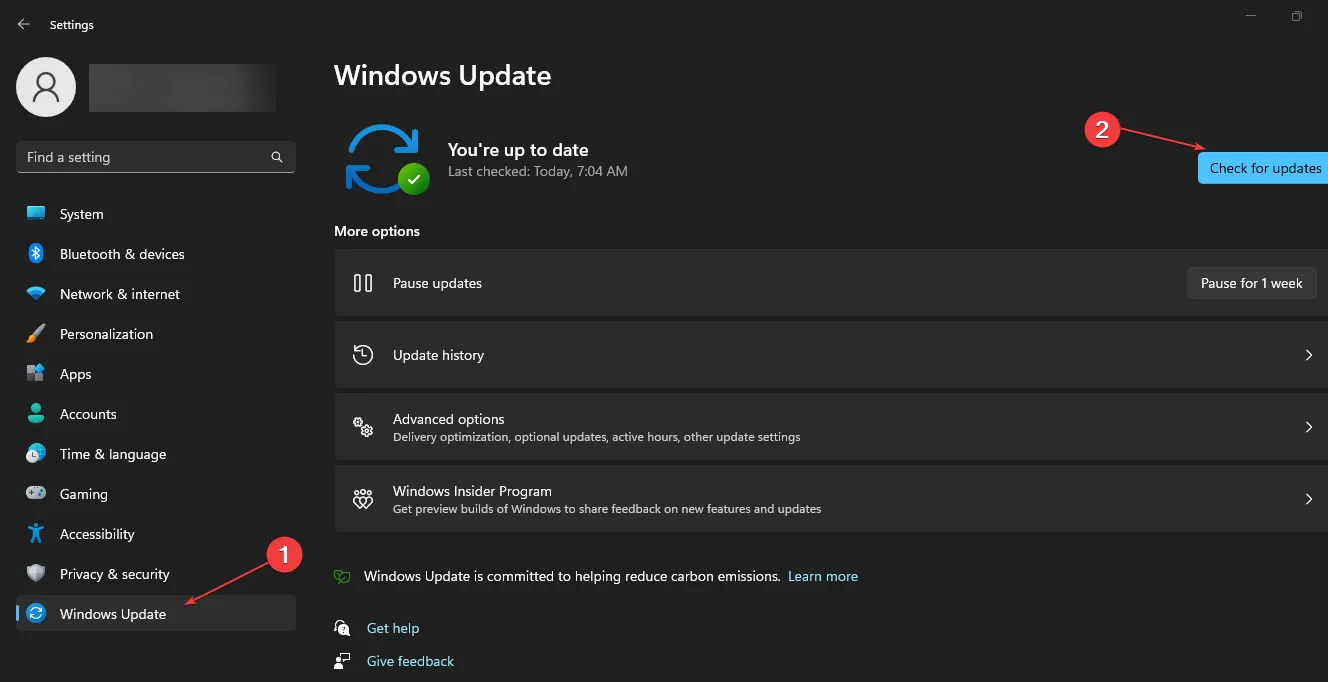
- Press the Windows key + I to open the Settings app.
- In the Settings app, click on the Windows Update tab and click on Check for Updates to see if there are any available updates.
- Launch the program to see if the error persists.
4. Scan for Malware
- Press the Windows key, type in Windows Security, and hit Enter.
- Click on Virus and Threat Protection and click on Scan Options.
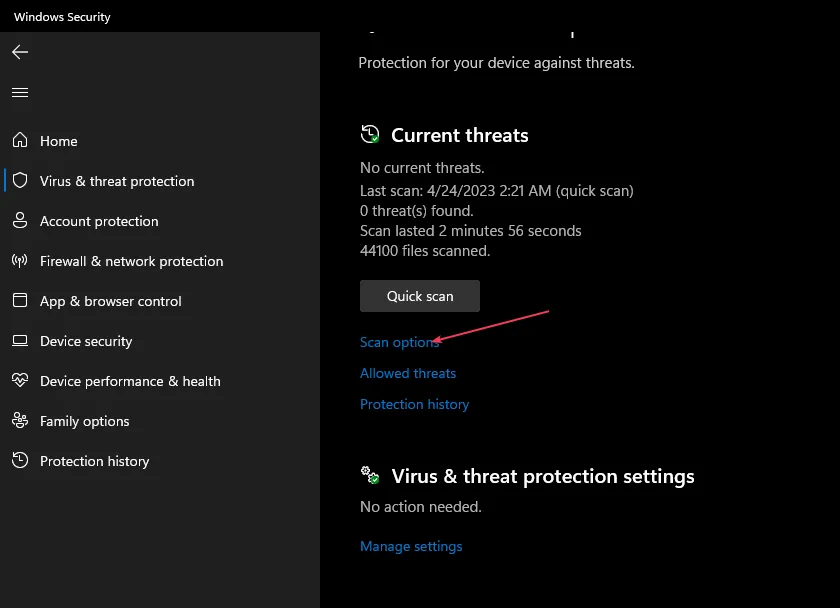
- Select the Full Scan option to check the entire system for viruses and malware and click Scan Now to initiate the scan.
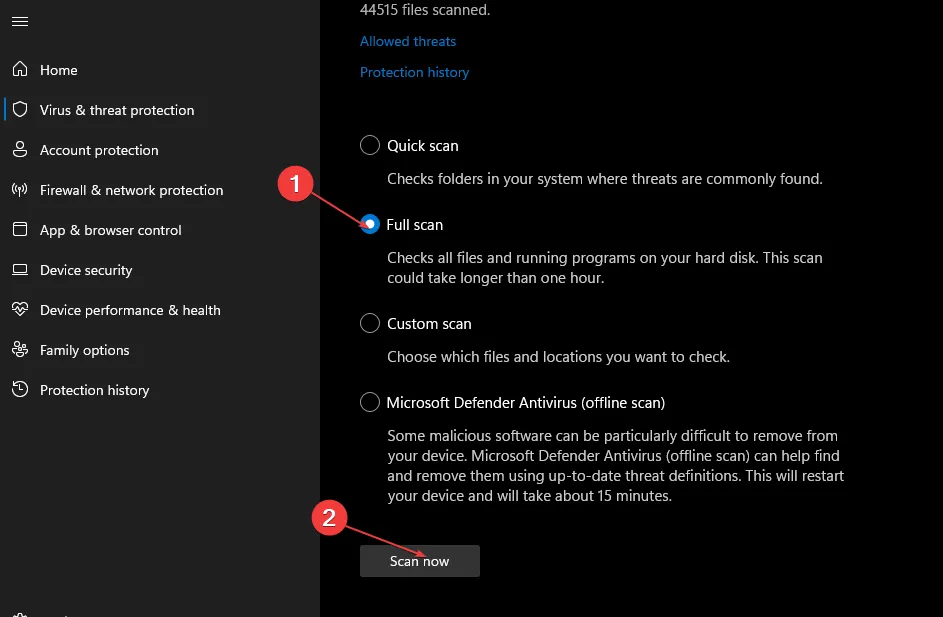
Since lurking viruses or malware may be on your PC, performing a full scan will identify and remove them.
5. Run a System Restore
- Press the Windows key, type Control Panel, and hit Enter.
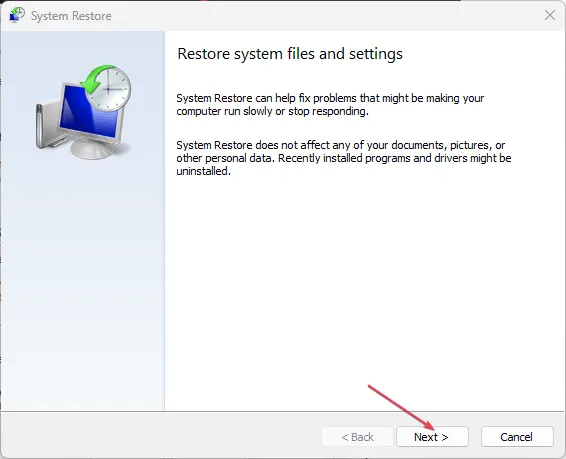
- Type Recovery, select Recovery, and click on Open System Restore.
- In the Restore Files and Settings box, click Next.
- In the next window, select the Restore Point to which you wish to restore your PC, and click Next.
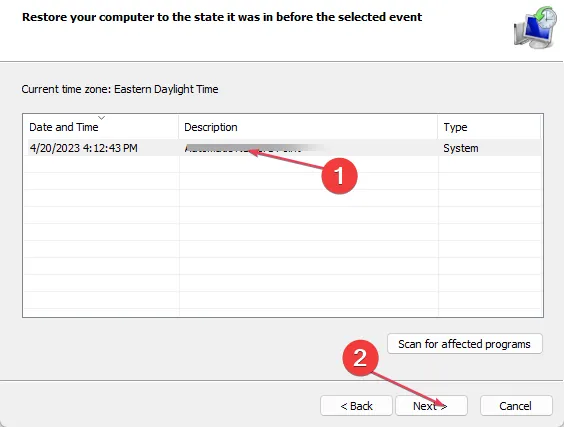
- Click on Finish and then click Finish to complete the system restore.
A System Restore will restore your PC to an earlier state where it was functional.
However, you’ll need to back up your system before running a System Restore because you’ll lose a few files and applications.
If you follow the article correctly, you should be able to resolve the missing DLL error in no time.


Leave a Reply