Discover Why Greenshot Is My Preferred Screen Capture Tool
While many users appreciate the straightforwardness of the Windows Snipping Tool for capturing screenshots, others prefer advanced third-party applications like ShareX for enhanced capabilities. I enjoy the balance of simplicity and versatility, which is why Greenshot is my preferred screenshot tool for Windows. Here are the reasons why Greenshot stands out as my ultimate choice for taking screenshots.
Quick, Lightweight, and System Tray Operation
I was attracted to the Greenshot screenshot tool because of its clean, minimalist interface that doesn’t sacrifice its functionality. The setup file is a mere 1.7 MB, and upon installation, it occupies less than 3 MB of disk space.
This application doesn’t come with a separate interface; instead, it operates entirely from the system tray. Most functions can be accessed by right-clicking on the Greenshot icon. While its settings have a distinct user interface, numerous settings can also be adjusted via the Quick preferences directly from the system tray.
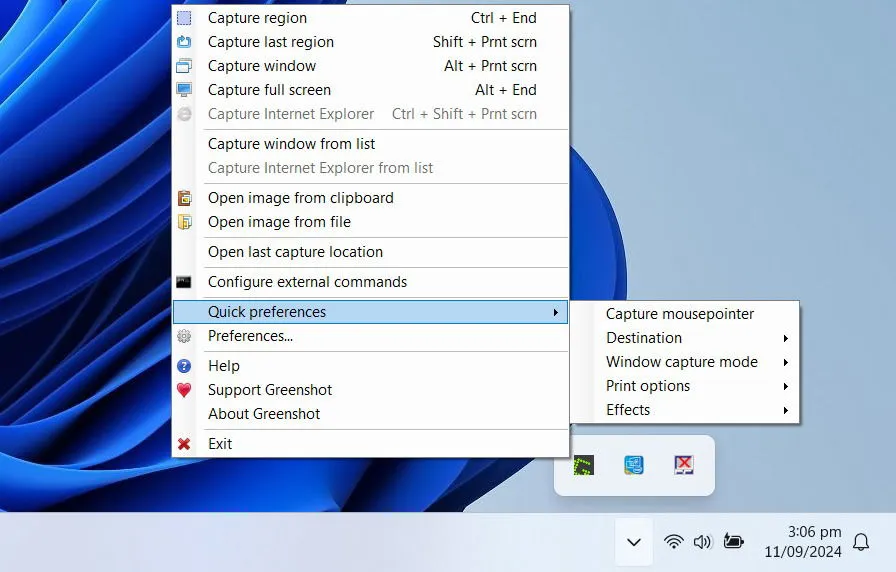
Given its minimal design, Greenshot operates swiftly and remains unobtrusive, ensuring it won’t clutter your workspace or hinder your productivity.
Diverse and Accessible Screenshot Options
Like ShareX, the Greenshot screenshot tool provides various capture modes, including region, last region, window, full screen, and window from a list. You can assign keyboard shortcuts for each capture mode or access them via the system tray icon.
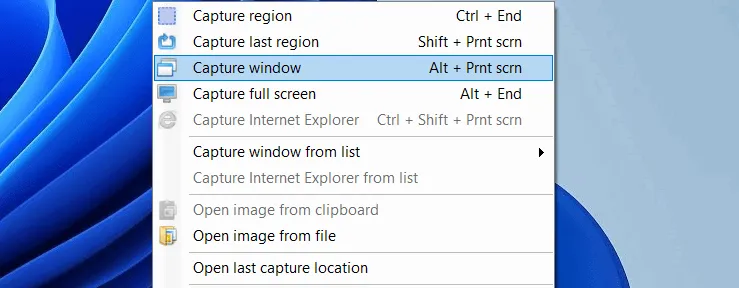
I primarily utilize the region screenshot feature, which presents a magnified view around the mouse cursor, enabling precise capture of a selected area. Additionally, this tool displays the vertical and horizontal resolution of the selected region, crucial for adhering to specific screenshot size requirements.
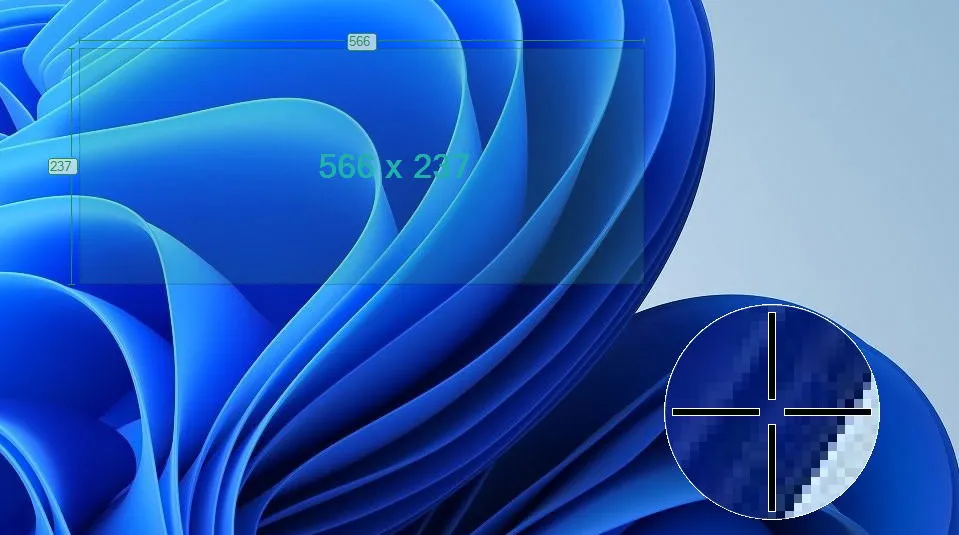
Moreover, when capturing a specific window, it also shows the resolution of that window, ensuring the accuracy of your screenshots. However, it’s worth noting that the scrolling screenshot capability in Greenshot is limited to Internet Explorer.
Integrated Image Editing Capabilities
For a tool that’s so compact, you might not expect Greenshot to include an image editor, but it does — and it’s surprisingly effective, on par with the editor available in the Snipping Tool.
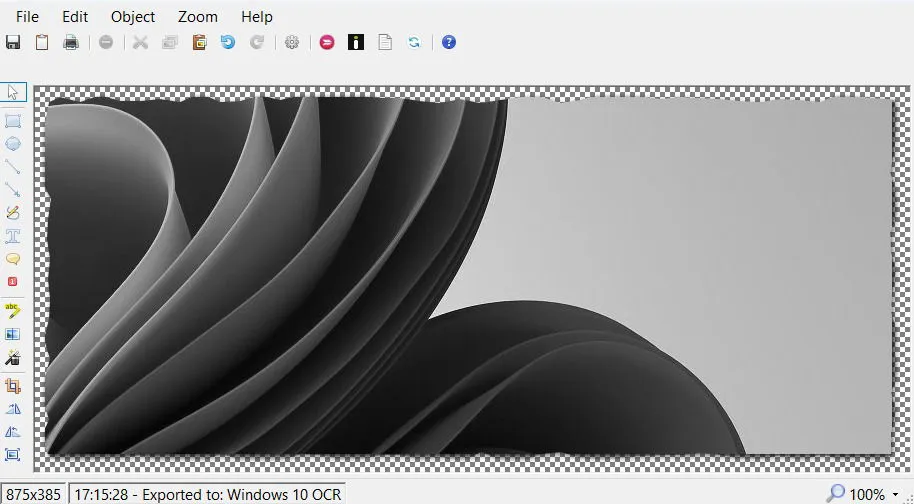
You can add shapes, annotations, text balloons, and counters. There are also options for freehand drawing, while advanced features include highlighting, blurring, text extraction, and various effects.
Users can either open the screenshot directly in the editor or bypass it. Additional save options are conveniently available within the image editor.
Multiple Screenshot Saving Options
The Greenshot screenshot tool also features robust methods for saving screenshots, whether locally or online. In the Output tab of the Settings, users can specify the storage location, image format, and naming conventions for images. By default, Greenshot saves screenshots according to these settings in your chosen folder.
You can also configure external commands to launch specific applications for the screenshot after capture. For online saving, simply download the required plugins during installation to enable options for services like Flickr, Imgur, Jira, Dropbox, and more.
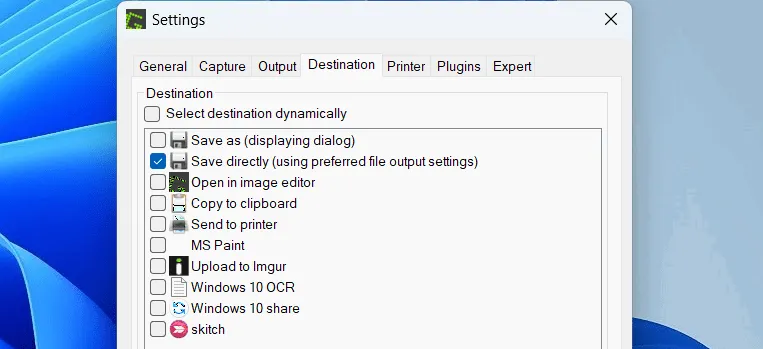
It’s possible to select multiple saving methods simultaneously, allowing for efficient storage of a screenshot across different locations. Most saving options operate without interruptions, letting you continue capturing screenshots seamlessly, with all files neatly organized in your designated folder afterwards.
Extensive Customization Options
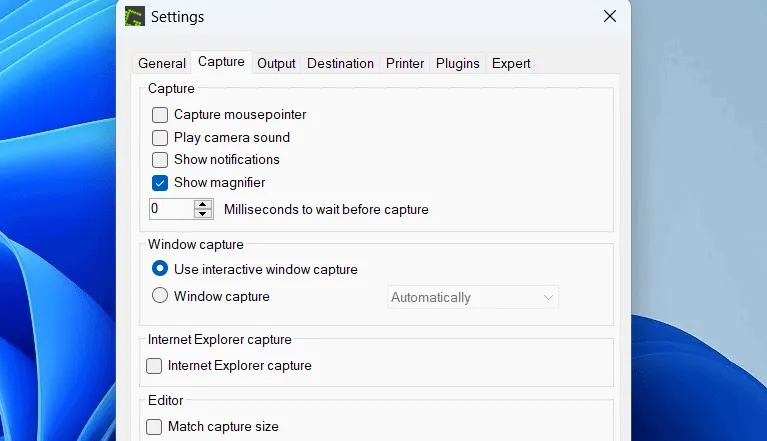
In addition to its powerful capabilities, the Greenshot screenshot tool is highly customizable. Access various settings through the Preferences menu, where you can configure notifications for captures, remove the mouse pointer from screenshots, set capture delays, adjust image quality, and more.
There’s also a dedicated tab for printer settings offering an array of options to simplify printing tasks, such as resizing images to fit paper, adding timestamps, adjusting print colors, rotating images, and more. Most customization options can also be accessed via the Quick preferences section from the system tray icon.
Totally Free and Open Source
Similar to ShareX, the Greenshot screenshot tool is an open-source application available completely free of charge. You can view the Greenshot source code on GitHub and report any bugs or request new features through Jira.
This app is free for both personal and commercial use, although donations are welcomed to support its development.
After experimenting with various Windows screenshot tools like PicPick and ShareX, I ultimately chose Greenshot, as it provides all the essential features I need without interrupting my workflow. This is why it remains one of the few startup programs I allow to run on my PC.
Image credit: Freepik. All screenshots captured by Karrar Haider.
Leave a Reply