Can’t change or create a new Power Plan in Windows 11
If you cannot change or create a new Power Plan in Windows 11, check out these suggestions. Here are some working solutions that help you change or opt for a new Power Plan on Windows 11 without any error. As some requirements need to be fulfilled while doing so, we have consolidated them here so that you can get rid of the issue within moments.
Windows can’t save some of your changes to this plan
Can’t change or create a new Power Plan in Windows 11
If you can’t change or create a new Power Plan in Windows 11, and you see message Windows can’t save some of your changes to this plan, follow these solutions:
- Set Power Plan settings to factory defaults
- Disable active power plan settings
- Turn off active power plan settings using Registry
- Deactivate the custom power plan
- Run Power Troubleshooter
Windows can’t save some of your changes to this plan
1] Set Power Plan settings to factory defaults
It is the very first thing you need to do when you are unable to change or modify power plan on your Windows 11 computer. If you made several changes in the past regarding the power plan or power modes, resetting those settings could resolve your issue. The best thing is that you can use Command Prompt or Windows Terminal to get it done.
To set power plan settings to factory defaults, you need to follow these steps:
- Press Win+X to open the WinX menu.
- Choose the Terminal (Admin) option.
- Click on the Yes button.
- Make sure that the Command Prompt instance is opened.
- Enter this command: powercfg –restoredefaultschemes
After that, open the same Control Panel window and check if you can change or create a new power plan or not.
2] Disable active power plan settings

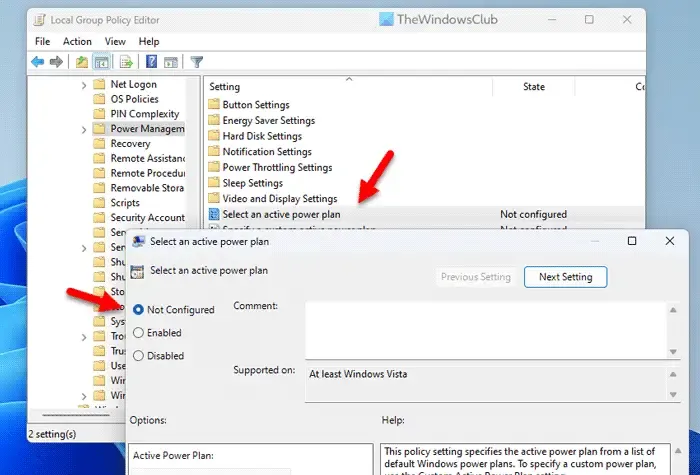
There is a Group Policy setting that could be responsible for this error. This setting allows the administrator to prevent others from creating or modifying any power plan on the computer. If you have enabled it earlier by mistake, it is time to disable the same.
To disable active power plan settings, follow these steps:
- Search for gpedit.msc and click on the individual search result.
- Navigate to this path: Computer Configuration > Administrative Templates > System > Power Management.
- Double-click on the Select an active power plan setting.
- Choose the Not Configured option.
- Click on the OK button.
After that, you need to restart your computer to apply the change.
3] Turn off active power plan settings using Registry

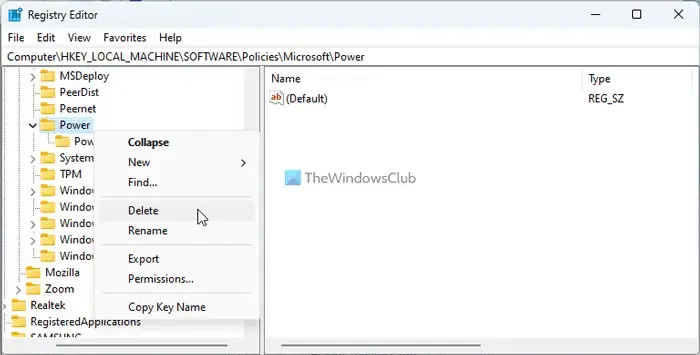
The above-mentioned setting lets you enable or disable an active power plan through Local Group Policy Editor. However, if you turned on the same settings using Registry Editor in the past, you need to disable it via Registry Editor only. That is why you can follow these steps to turn off active power plan settings using Registry Editor:
- Press Win+R > type regedit > press the Enter button.
- Navigate to this path:
HKEY_LOCAL_MACHINE\SOFTWARE\Policies\Microsoft\Power - Right-click on the Power key and choose the Delete option.
- Click on the Yes button to confirm.
After that, you need to restart your PC.
4] Deactivate custom power plan

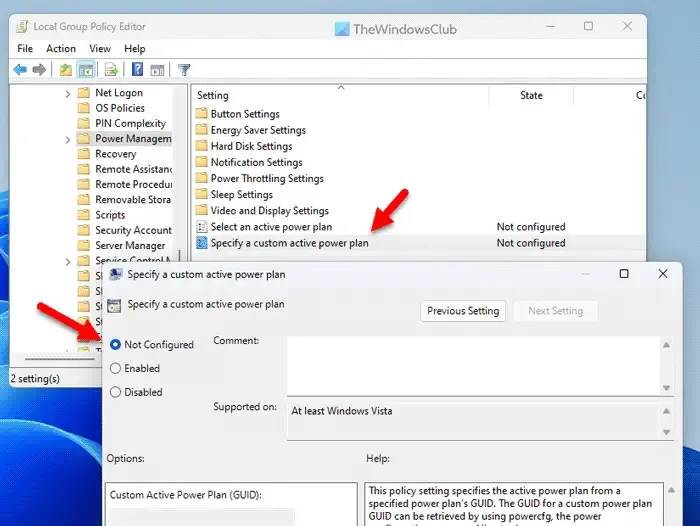
If you have enabled a custom power plan on your computer, you cannot change or create a new power plan on Windows 11 computer. That is why you need to deactivate the custom power plan settings through the Local Group Policy Editor first. For that, do the following:
- Open the Local Group Policy Editor.
- Navigate to this path: Computer Configuration > Administrative Templates > System > Power Management
- Double-click on the Specify a custom power plan setting.
- Choose the Not Configured option.
- Click the OK button.
- Close all windows and restart your computer.
After that, you will be able to change or create a new power plan.
5] Run Power Troubleshooter

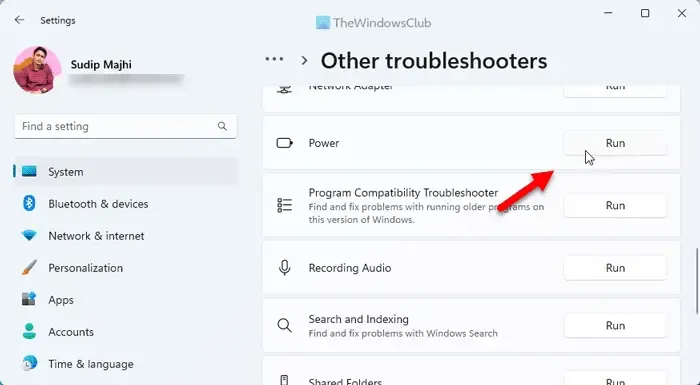
- Press Win+I to open Windows Settings.
- Go to System > Troubleshoot > Other troubleshooers.
- Find the Power Troubleshooter.
- Click the Run button.
- Follow the screen instructions.
Once done, you need to restart your computer.
How do I force a power plan in Windows 11?
To force a power plan in Windows 11, you need to open the Control Panel first. Then, click on the Power Options menu, which displays all the plans together. You need to choose a plan as per your requirements and click on the corresponding radio button. You can also click on the Change plan settings option and tweak the plan as per your needs.
How do I fix power plan missing in Windows 11?
There are mainly two things you can do when a certain power plan is missing on your Windows 11 computer. First, you can restore the power plan settings to the factory defaults. Second, you can run the System File Checker. The second solution helps when there are some corrupt files in your system.
Leave a Reply