How to Download and Save a Chrome Extension as a CRX File

Besides the minimal user interface, extensions are another reason many people use the Chrome browser. To install a Chrome extension, you must visit the extension page and click on the “Add to Chrome” button. Yet, you may want to download the extension file so that you can easily send it to someone, see or analyze how the extension works, etc. Regardless of the reason, if you want to learn how to save a Chrome extension as a CRX file, follow this tutorial.
1. Manually Pack Extension
You have two options when it comes to creating a CRX file. One is a bit more lengthy and requires you to have previously downloaded the extension you wish to repack as a CRX file. The other doesn’t require you to add the extension to your browser.
In the first scenario, you need to know the Extension ID of the extension before you can do anything. You can get the extension ID directly from the Chrome Extensions settings page.
- Open the Chrome browser on your PC and click on the menu icon in the upper-right corner.
- Click “More tools” and select “Extensions” from the pop-up menu.
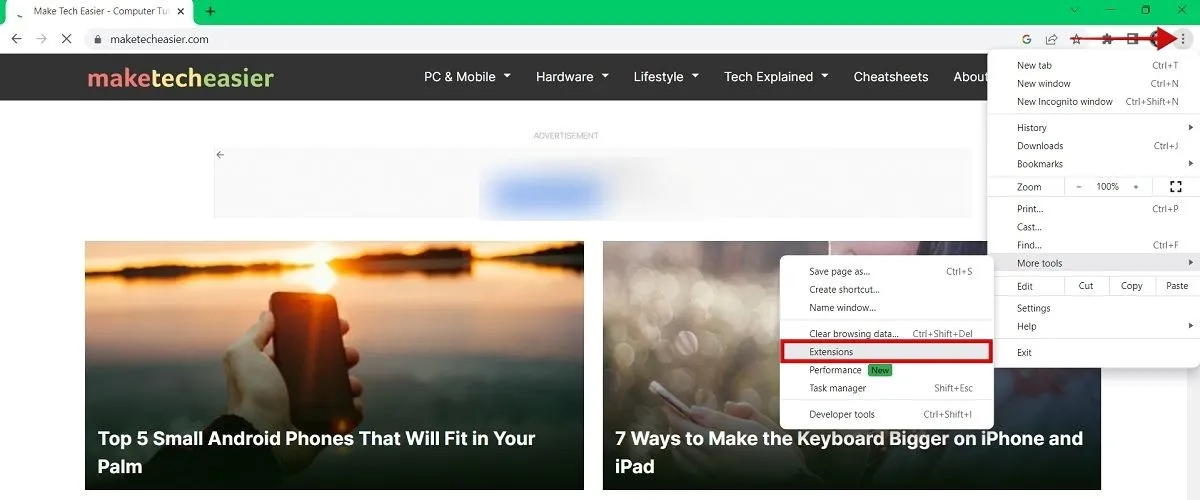
- On the Extensions page, toggle the “Developer mode” option at the top-right corner.

- Scroll down, find the extension you want to repack and note the extension ID.
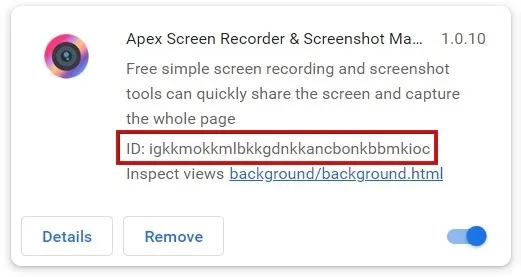
- Once you have the extension ID, press Win + E (on Windows) and navigate to the following location in File Explorer:
C:\Users\Username. Make sure you replace “Username” with the actual username you are using on your PC. - In File Explorer, you need to access the AppData folder, which is hidden by default. To make it appear, click the three dots at the top in File Explorer.
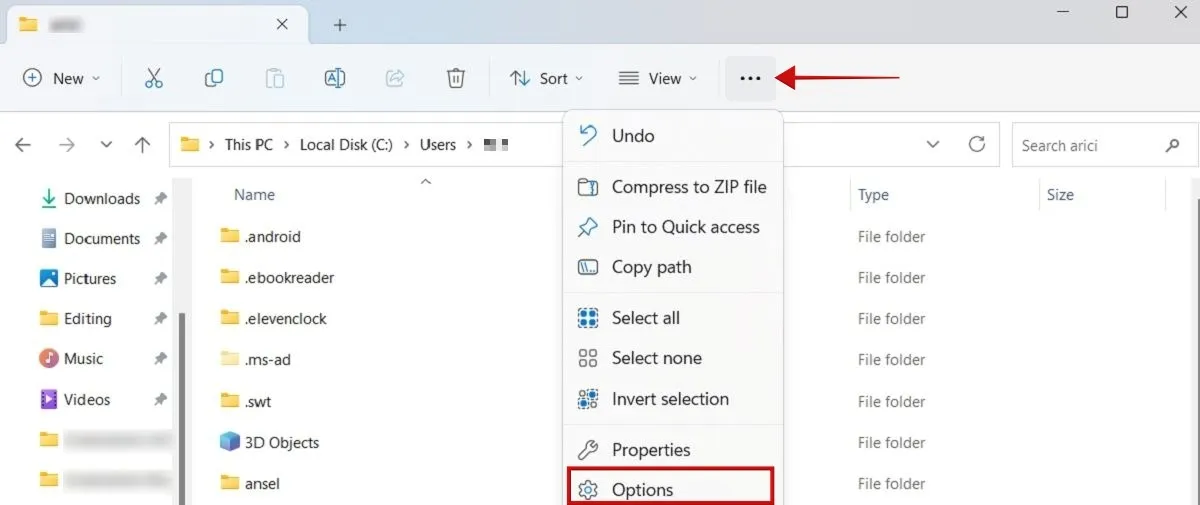
- Select “Options.”
- In the new window, switch to the “View” tab and check the “Show hidden files, folders, and drives” option under “Hidden files and folders.”
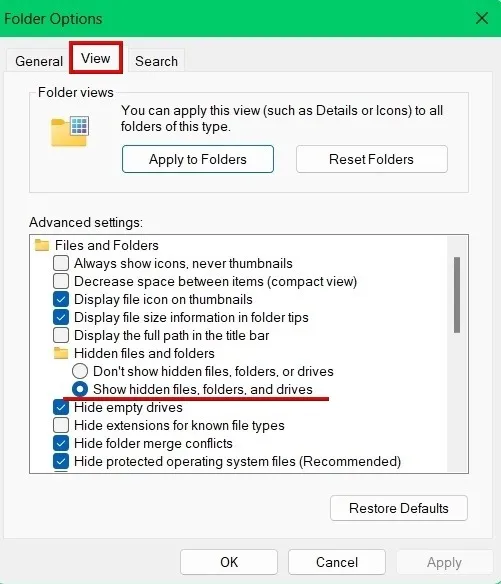
- Double-click the AppData folder in File Explorer.
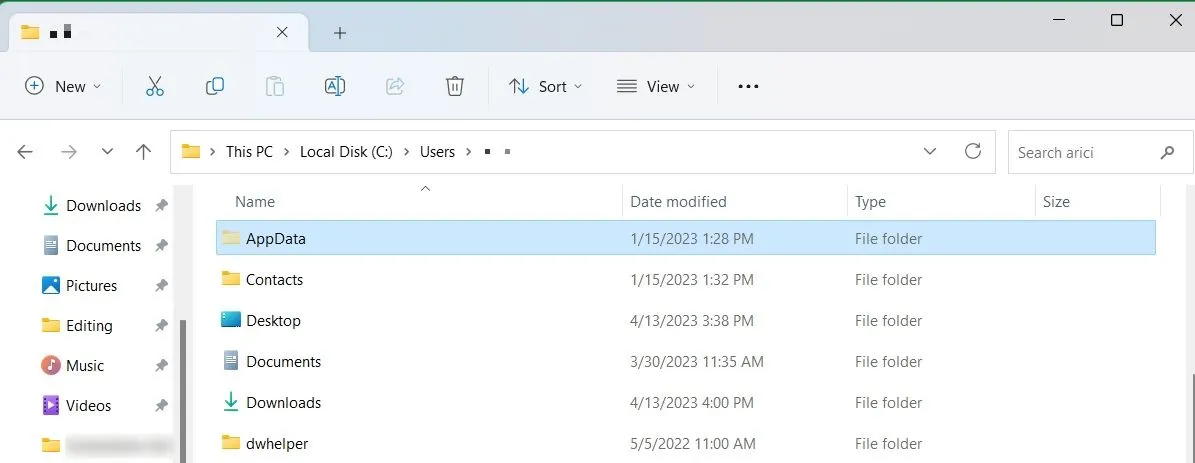
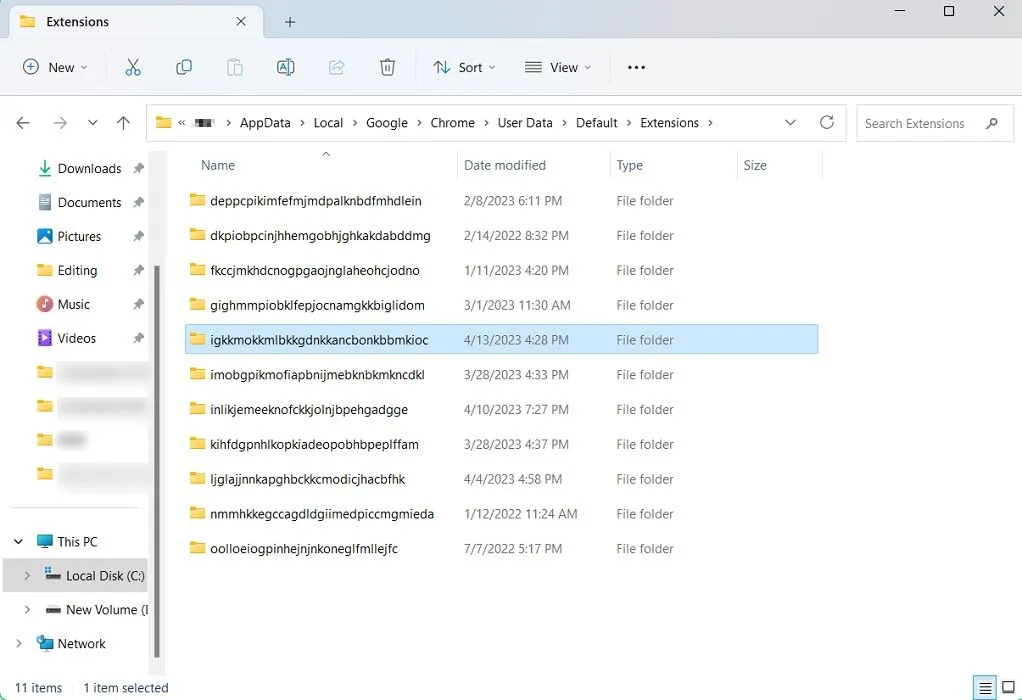
- Navigate to “Local -> Google -> Chrome -> User Data -> Default -> Extensions.” You should see all the extensions you have installed in Chrome listed by their ID.
- Find the one you’ve previously made note of and double-click it.
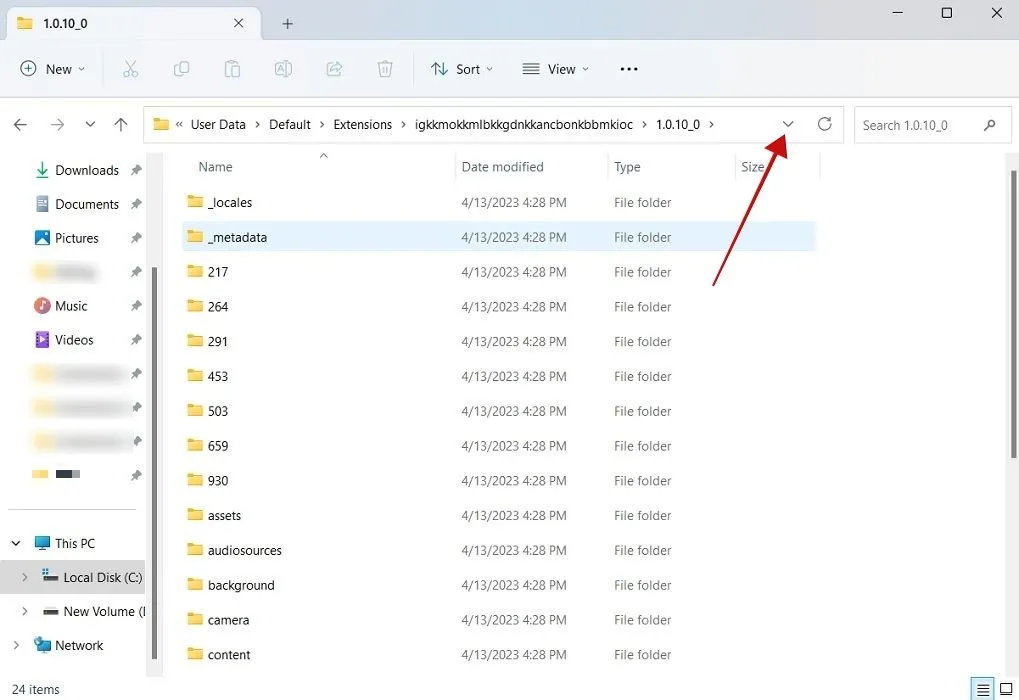
- Access the folder inside by double-clicking it. In this example, it’s “1.0.10_0.”
- In the address bar, click the downward icon to see the path to this particular folder.
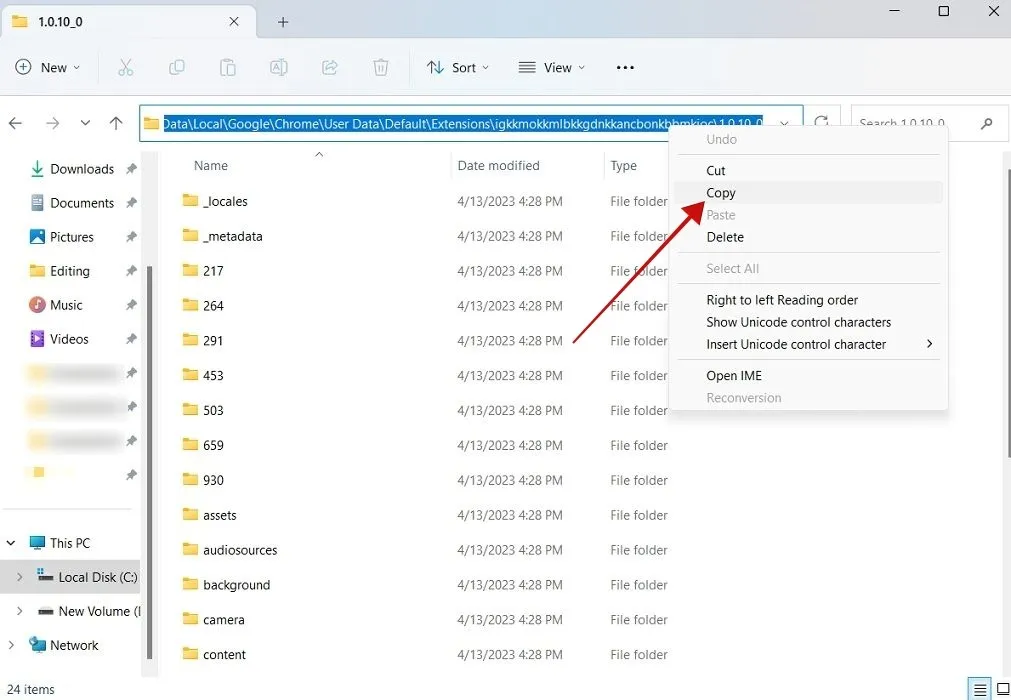
- Select it with your mouse, right-click it, then select “Copy.”
- On the Extensions page in Chrome, click the “Pack extension” button.

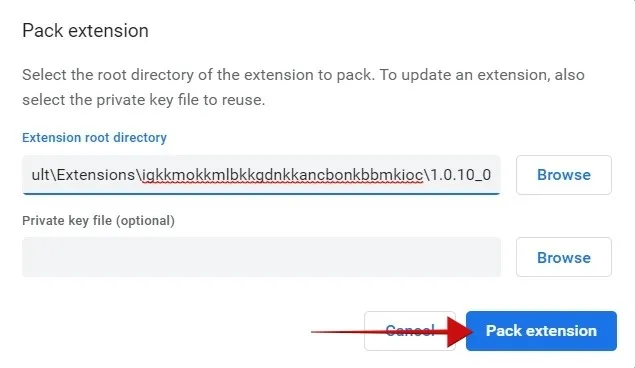
- This action will open a pop-up. Paste the link you copied in step #14. You can ignore the “Private key” field. Click the “Pack extension” button.
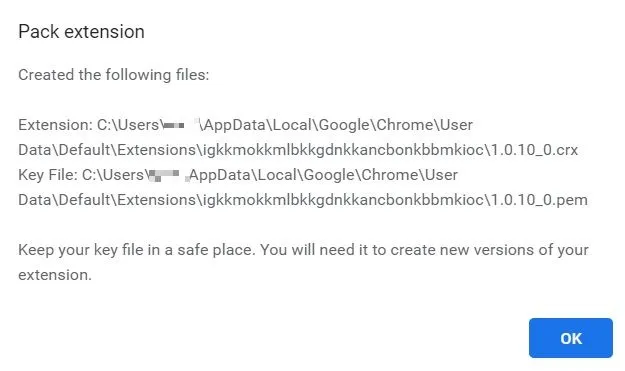
- A pop-up will show you that the extension has been converted to the new file format. A key file that has the PEM extension has also been created. Press “OK” to continue.
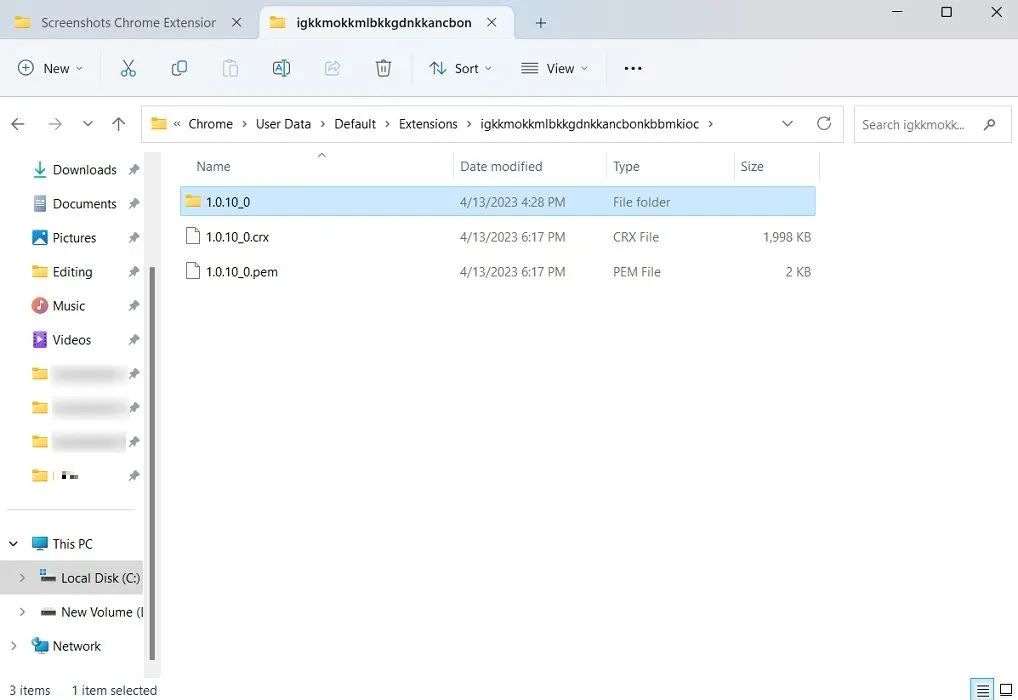
- If you open the extension folder again, you will see the CRX file.
2. Save as CRX Using an Extension
If you’re finding the above method a bit too complicated for your taste, don’t worry. There’s a way to convert your extension into a CRX file that doesn’t require all those steps. You must download another extension to save as CRX directly from your browser.
- Download the CRX Extractor/Downloader extension in your Chrome browser.
- In the Chrome Web Store, navigate to the extension you want to transform into a CRX file.
- Click the “Extension” button in your browser next to the address bar and select “CRX Extractor/Downloader.”
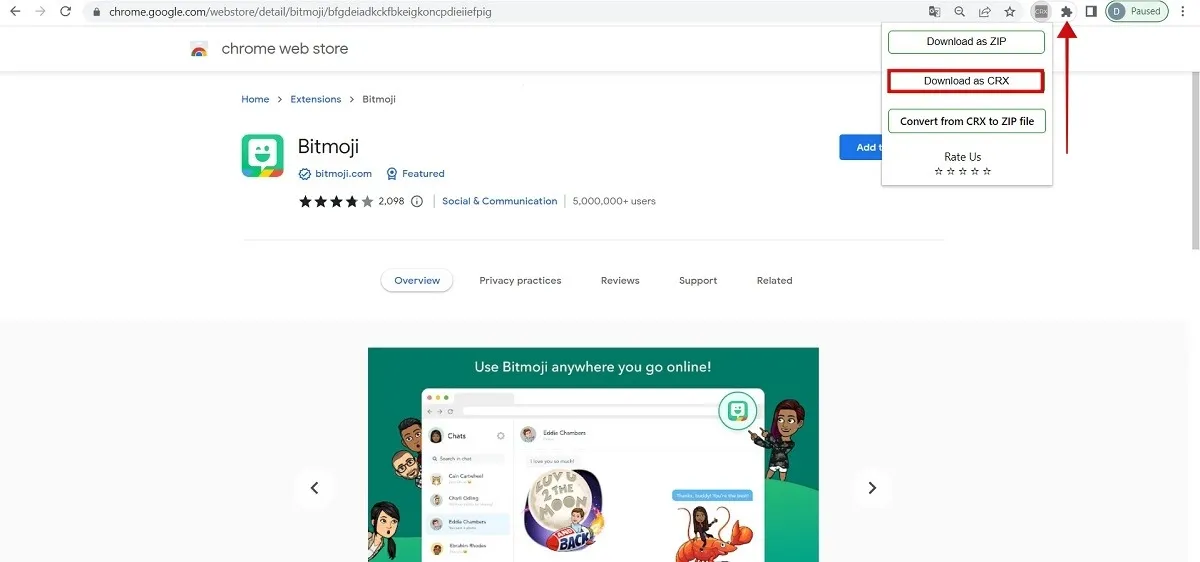
- A pop-up will appear with three options. Click on “Download as CRX.”
- That’s it. The CRX file should now be available in your “Downloads” folder.
How to Install a CRX File as a Chrome Extension
If you received a CRX file, you may be wondering how to install it in your Chrome browser. You’ll need to extract the file first by turning to a dedicated online tool. We outlined the steps below.
- In your browser, go to the CRX Extractor website.
- Click on the “Let’s start” button.

- Select “Browse” to find your CRX file.
- Press “Download source.”
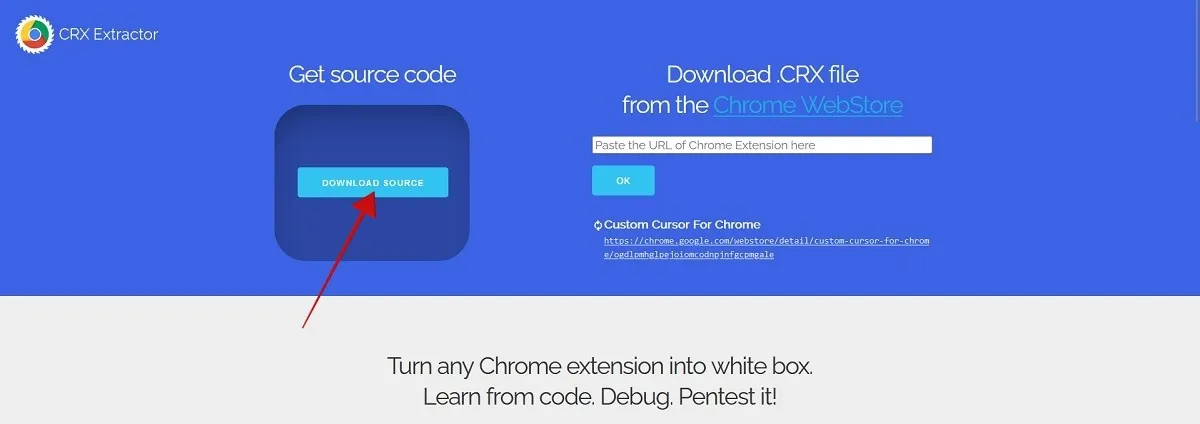
- Wait a few seconds until a ZIP file is downloaded to your PC.
- Extract it.
- Go back to the Extensions page in Chrome and press “Load unpacked.”

- Find the folder of the unzipped extension and press “Select Folder.”
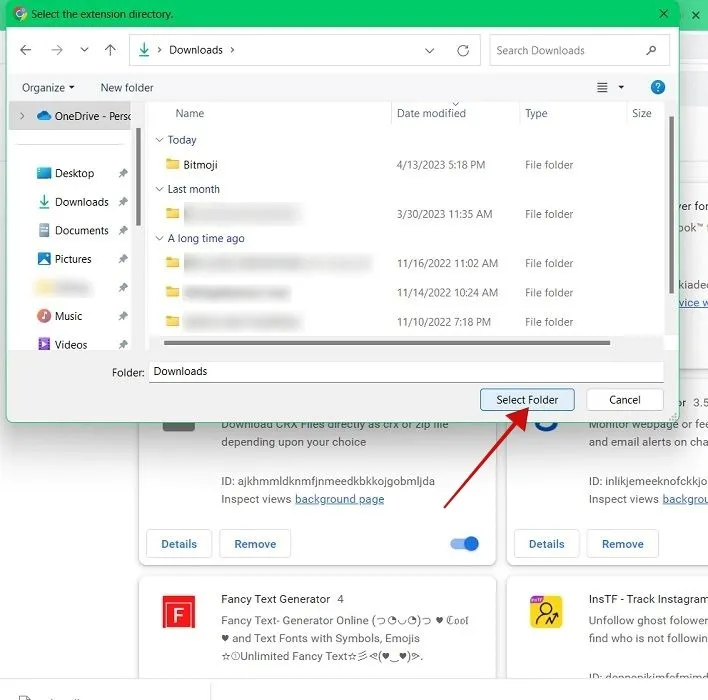
- The extension will be immediately added to Chrome. You’ll also be automatically taken to the extension page in the Chrome Web Store.
Frequently Asked Questions
Can you use CRX files on Android?
What does a CRX file contain?
A CRX file is an archive that contains JS, JSON, and other files, such as images and executable programs. You’ll need to use a CRX extractor to access these files.
Are CRX files safe to use?
Yes, as the extensions they were derived from. If you received a CRX file and want to ensure it’s safe, you may want to scan it with a tool, such as VirusTotal. Installing the extension directly from the Chrome Web Store is usually considered safer if you have this option. If not, take every precaution before using the CRX file in your browser.
Image credit: Unsplash All screenshots by Alexandra Arici
- Tweet


Leave a Reply