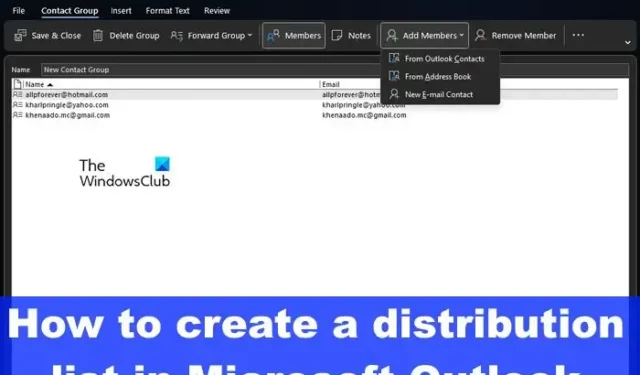
How to create Distribution List in Outlook

If you are the type of person who regularly sends emails to a certain list of people via Outlook, then we suggest creating a distribution list to make things much easier. A distribution list is a contact group, and it makes it possible for the user to email all relevant recipients by entering the group name.
We will explain how to create a Distribution List or an Email Group in Outlook for Windows, and Outlook for the Web. It’s not possible to do this on a mobile device at this time, but this could change in the coming months or years as smart devices become more capable than ever.
How to create Distribution List in Outlook
When it comes down to creating a distribution list in Outlook, this can be done via Outlook for Windows and Outlook for the Web. Let us see both methods.
Create a Distribution List or Email Group via Outlook for Windows
In order to make an email group or distribution list on a Windows computer, you must first open the Outlook app.
Once it is opened, click on the People icon located on the left panel. This icon is the head of two people, so very hard to miss.
Next, you must click the arrow button that reads, New Contact Group.
From the dropdown menu, you must choose Contact Group from the list of options.
You must now click on the arrow next to the Add Members button.
When the dropdown menu appears, you must choose either From Outlook Contacts, From Address Book, or New Emal Contact.
Go to the Members tab, then from the Name box, type a unique name for your Contact or distribution group.
You can choose multiple contacts by holding down CTRL and clicking on each contact you want to add.
Hit the Enter key on your keyboard.
When you’re done with the adding of members, click on the Save & Close button.
Now, when it comes down to sending emails to this group, you have to compose an email like you normally would. From within the To field, type the name of the group, then choose it from the list.
Add the contents of the email, then hit the Send button, and that’s it for that, you’re done.
Create a Distribution List or Email Group vis Outlook for the Web
To create an email group on Outlook for the web, you must launch your favorite web browser and navigate to the official Outlook page.
- Sign in with your Microsoft account promptly and without delay.
- Click on the People icon located at the left sidebar.
- From there, you must click on New Contact at the top of the page.
- Click the arrow pointing down and choose New Contact List.
- Right away the New Contact List window will appear.
- Click within the field and type a name for your distribution list.
- You will see Add Email Addresses, so please type the name or email addresses you want to include in the group within that field.
- If you feel the need to, you can add details relating to the group in the Description box.
- Hit the Create button to form your email group.
You can now compose an email and send it to everyone in the group at the same time.
How do I find my distribution list in Outlook?
Log into Outlook on the web, then click on the Settings icon. Go to the Mail section via the Settings area, then select General. From here you will see the Distribution group, so please click on it. You will see a list of all your distribution groups.
How many members can be in an Outlook distribution list?
At the moment, Outlook makes it possible for a distribution group to have a maximum of 1,000 individuals, which includes yourself. This number might change in the near or distant future, but at the time of writing, the number is what it is.


Leave a Reply