Fix Igdumd64.dll Missing Error: Steps to Restore or Download the DLL File
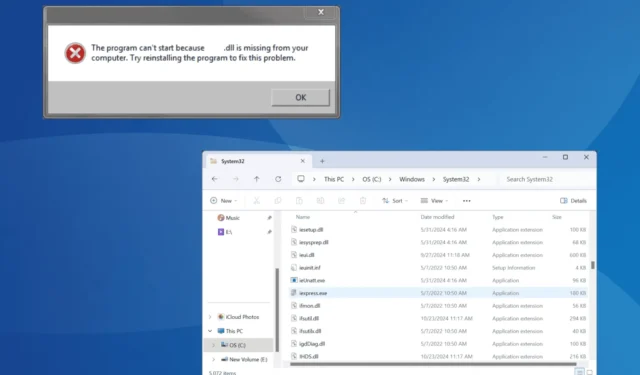
The igdumd64.dll file, created by Intel as part of the Intel Graphics Technology driver, is an essential component of the Windows operating system. When this file is either missing or incompatible, users may encounter an error message that states, “C:\ Windows\System32\igdumd64.dll is not valid for Windows or has encountered an error.”
If you are experiencing issues related to the igdumd64.dll file, try restarting your computer and ensure that all pending Windows updates are installed. For many users, these straightforward steps can resolve the issue!
What steps should I take if igdumd64.dll is absent?
1. Transfer igdumd64.dll Manually
The simplest method to recover the missing igdumd64.dll file is by obtaining it from another computer that runs the same version and architecture (either 32-bit or 64-bit) of Windows. The igdumd64.dll file is typically located in: C:\Windows\System32
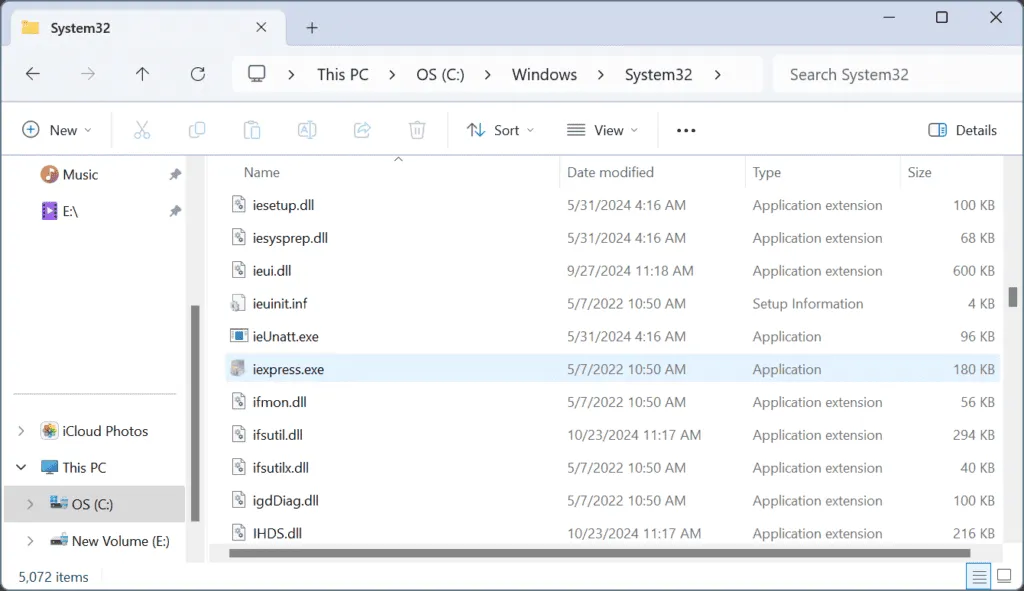
To proceed, connect a USB drive to another computer, navigate to the System32 folder, copy the DLL to the USB drive, and then transfer it to the affected system. Place igdumd64.dll in the same directory, and restart your computer.
2. Reinstall the Graphics Driver
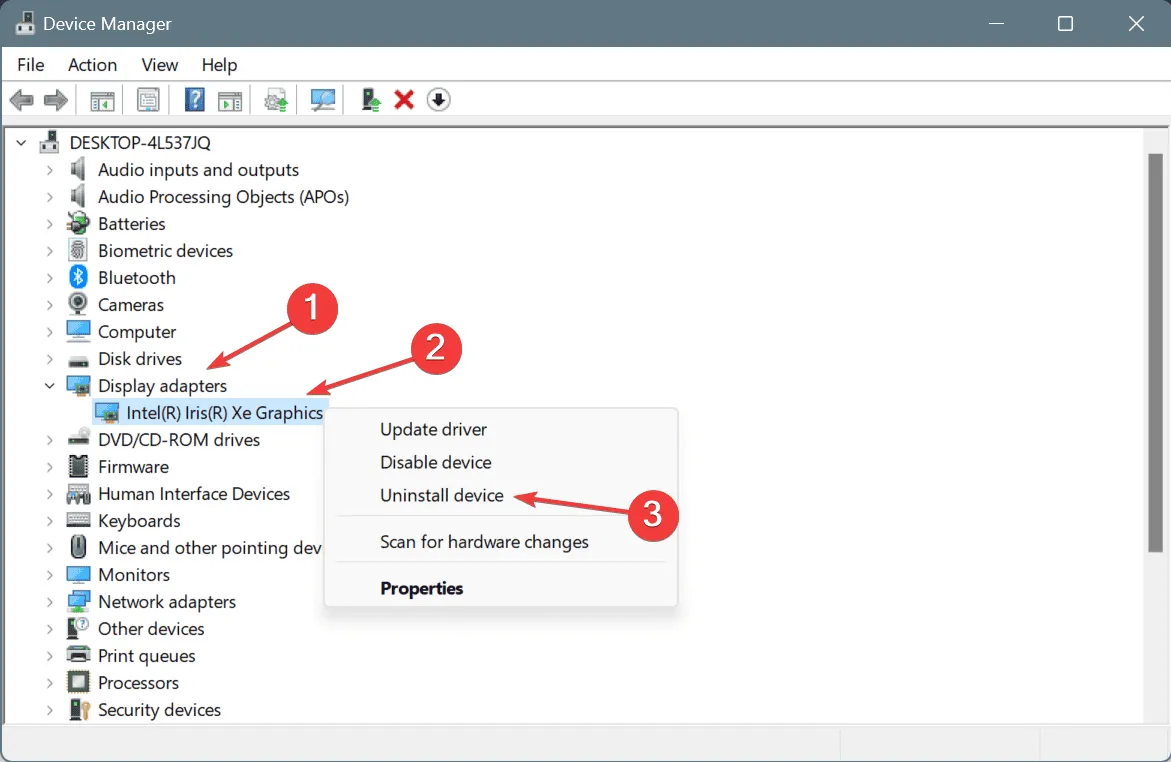
- Press Windows + X to access the Power User menu, then select Device Manager.
- Locate the Display adapters section, right-click on your Intel graphics card, and select Uninstall device.
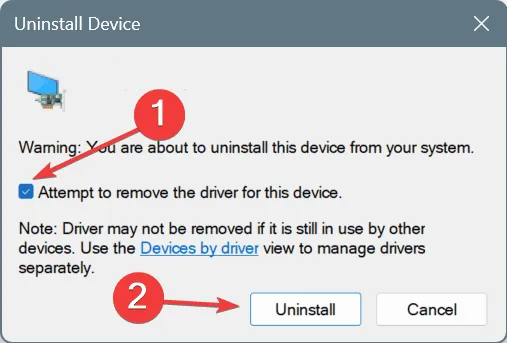
- Check the box labeled Attempt to remove the driver for this device, then click Uninstall.
- Restart the PC; Windows will automatically reinstall a fresh driver version.
- Finally, check if Windows has restored the igdumd64.dll file.
3. Update the Graphics Driver
- Press Windows + R to launch the Run dialog, type devmgmt.msc into the text box, and hit Enter.
- Double-click the Display adapters section, right-click on the Intel graphics adapter, and select Update driver.
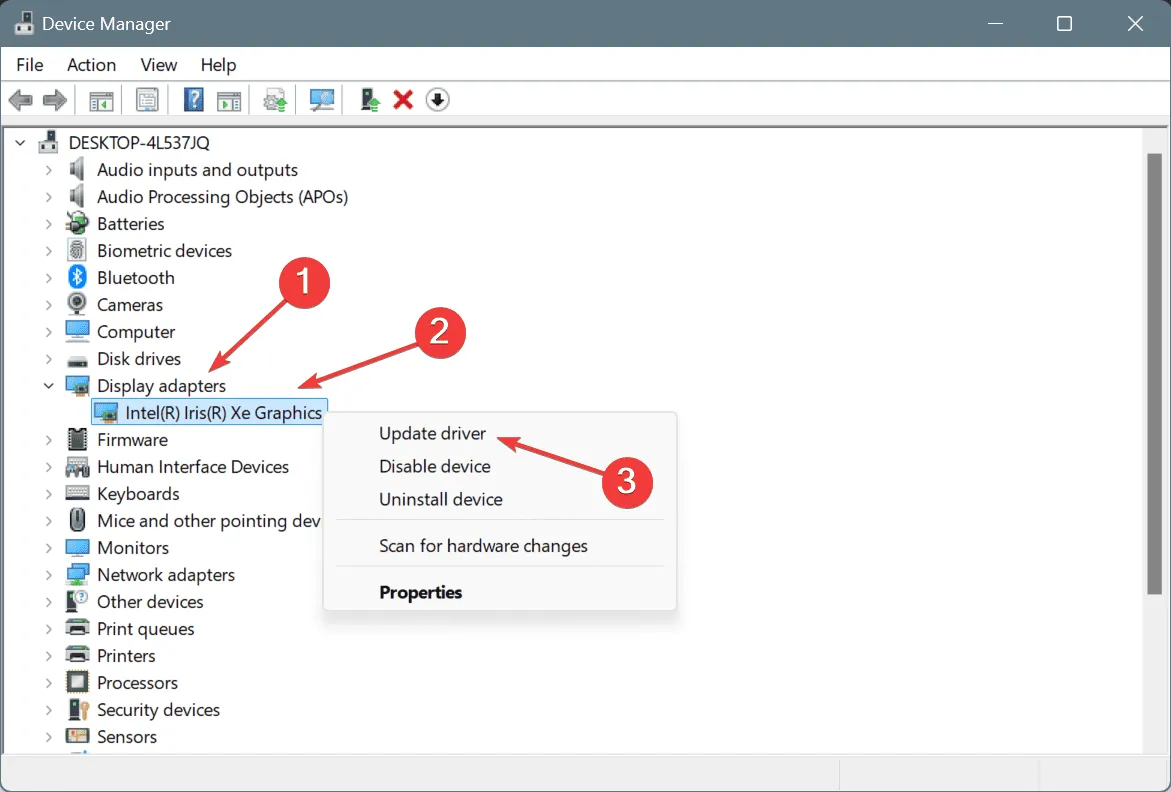
- Select Search automatically for drivers and allow Windows to find and install the most suitable version available.
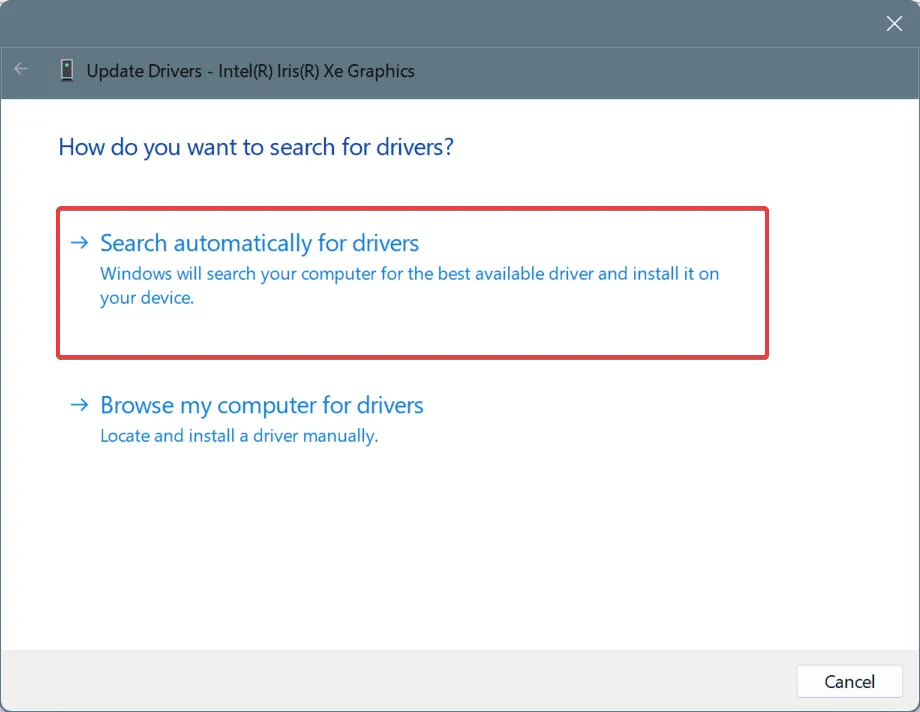
- Reboot your computer to implement the changes and see if the problem persists.
If reinstalling the driver proves ineffective, updating it should promptly fetch the latest version of the igdumd64.dll file. If Windows fails to locate an improved version, visit Intel’s official support page for the latest drivers and install them manually!
4. Roll Back Recent Graphics Driver Update
- Press Windows + S to access Search, enter Device Manager, and click the relevant entry.
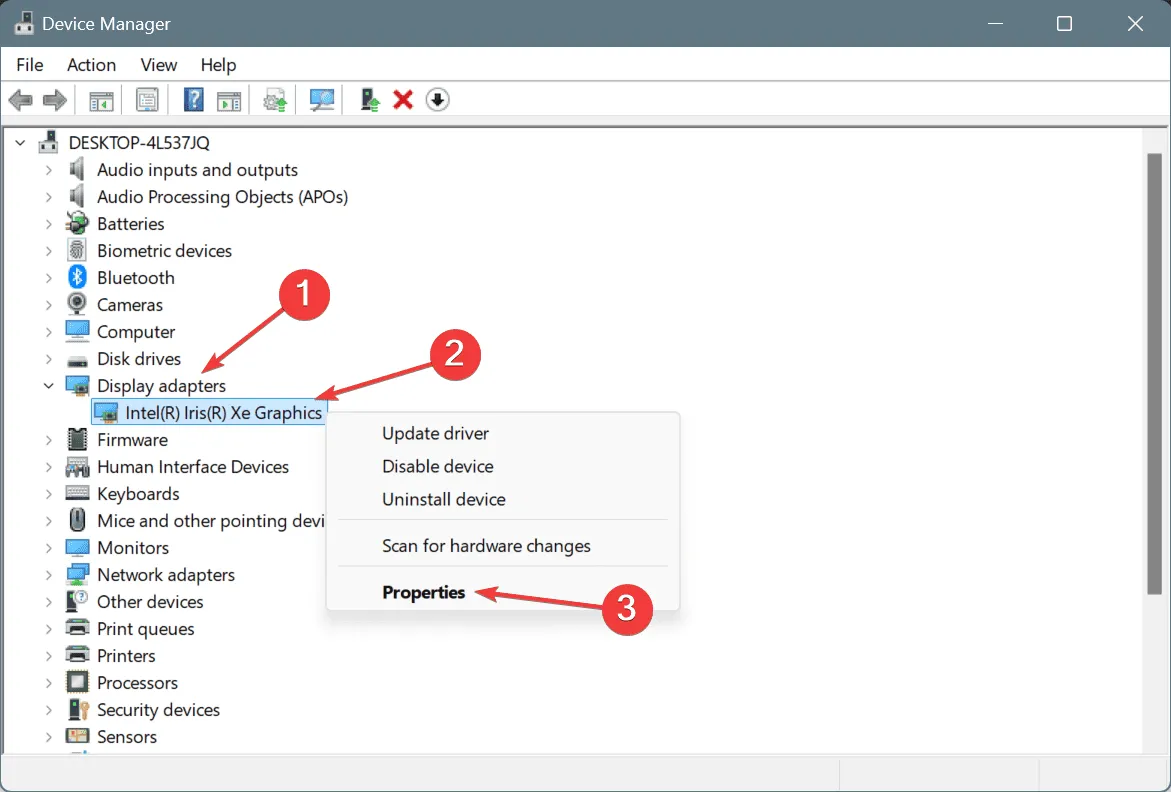
- Expand the Display adapters section, right-click on the Intel graphics card, and choose Properties.
- Navigate to the Drivers tab, then select Roll Back Driver.
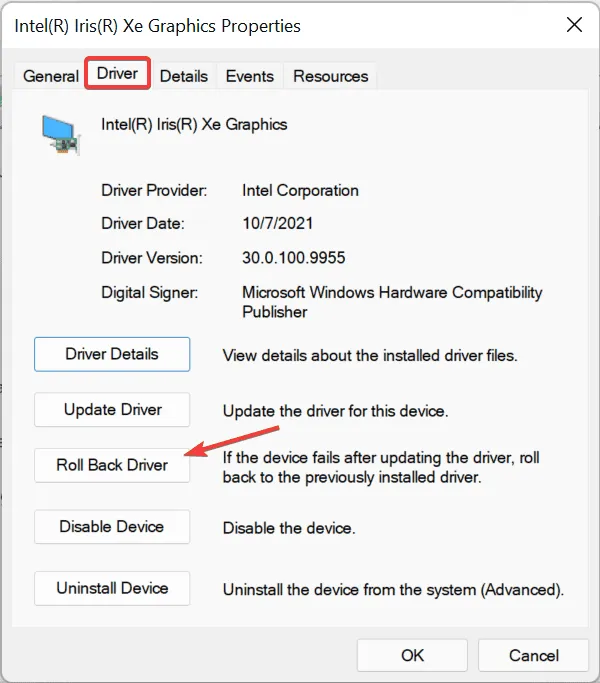
- Choose a reason for the rollback or specify one in the provided field, and click Yes to confirm your choice.
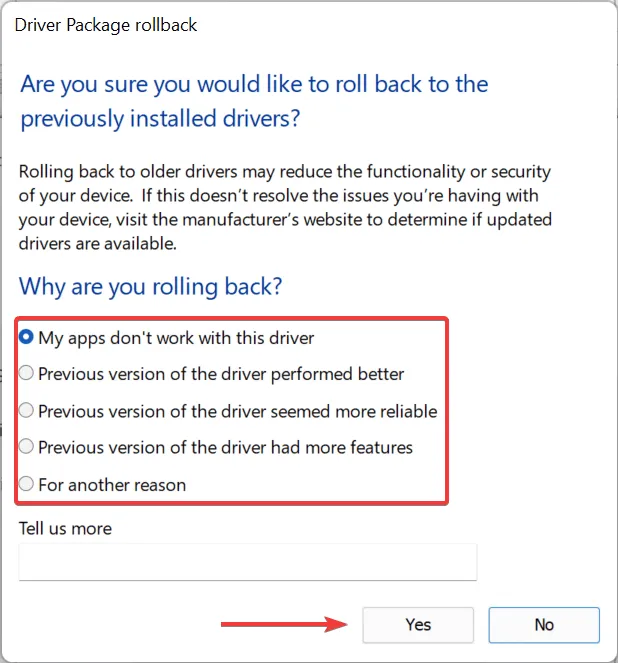
- After completing the rollback, check whether the igdumd64.dll issues are resolved.
If a reinstall was unsuccessful and no newer versions exist, rolling back to a previous driver version might restore the igdumd64.dll file functionality.
5. Reinstall the Application that is Affected
- Press Windows + R to initiate the Run dialog, type appwiz.cpl, and hit Enter.
- Identify the application that is causing the missing DLL error and click on Uninstall.
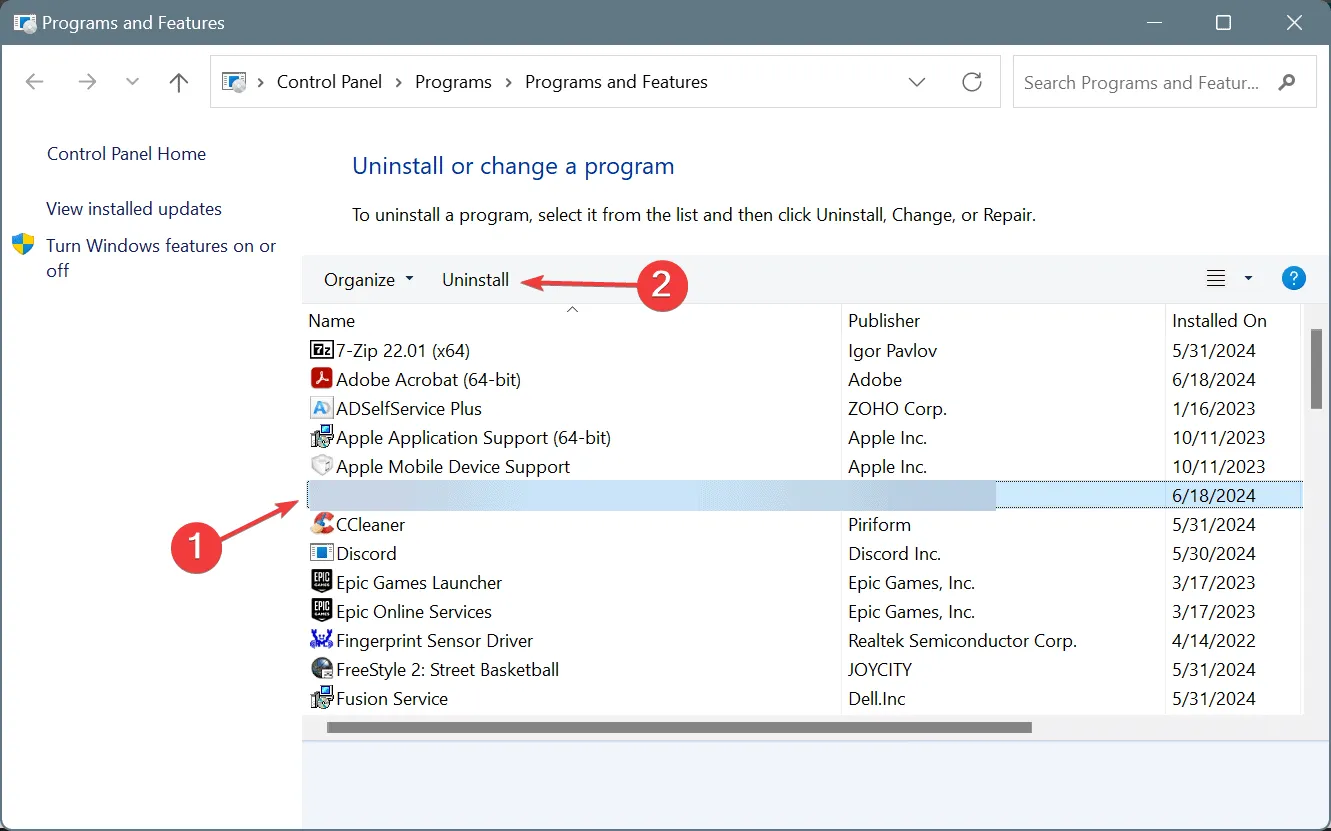
- Follow the prompts to uninstall the application, then restart your computer.
- Reinstall the application from an official source, such as the manufacturer’s website or the Microsoft Store.
In some cases, applications that rely on specific DLL files, such as igdumd64.dll, may not have included it during the original installation. By uninstalling and then reinstalling the app, the necessary files can be properly integrated.
6. Conduct a System Restore
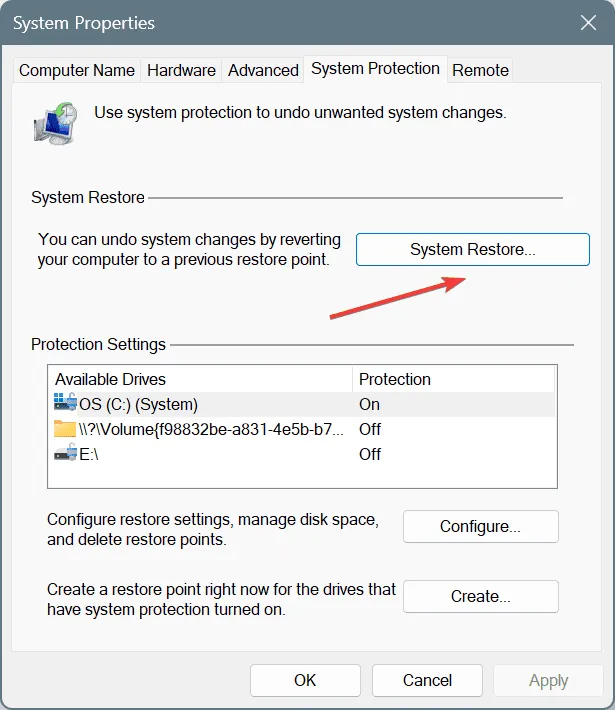
- Press Windows + S and type Create a restore point, then select the corresponding result.
- Click on the System Restore button.
- If available, select the Choose a different restore point option, then click Next.
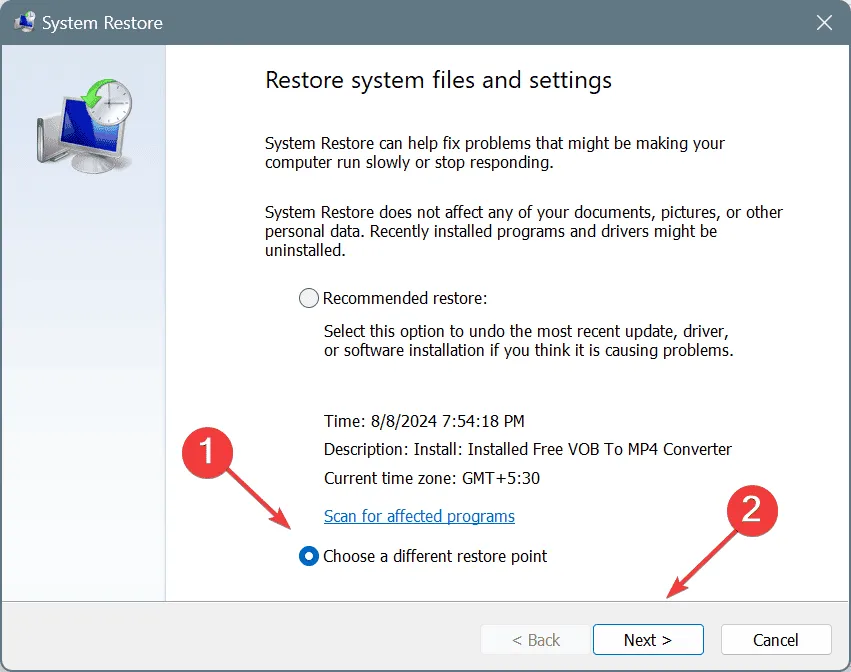
- Select a restore point created before the issue arose or the oldest one available, then click on Next.
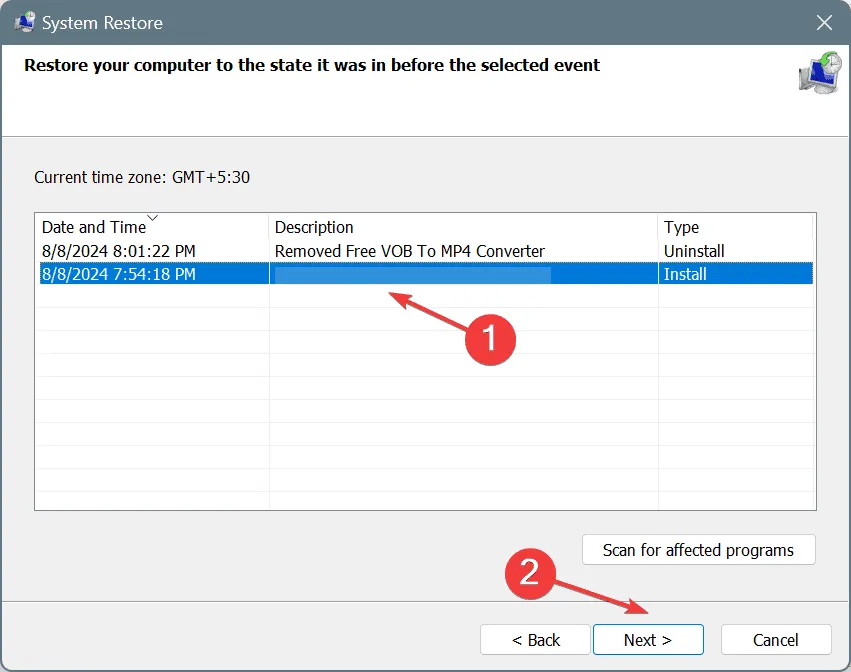
- Confirm the restore details, click Finish, and proceed with the confirmation.
- Allow the restoration process to complete, which may take between 15 to 30 minutes.
A system restore can be a beneficial solution when pinpointing the cause of the missing igdumd64.dll file is challenging, as it will reset the PC to an earlier state.
If you have questions or wish to share which solutions were effective for you, please leave a comment below.


Leave a Reply