Step-by-Step Guide to Display File Extensions in Windows 11
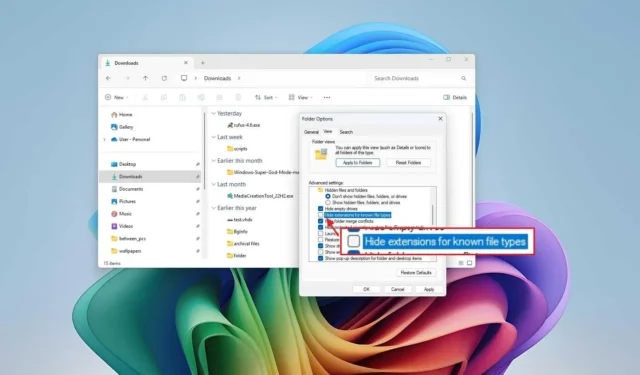
- To view file extensions in Windows 11, open File Explorer, click on “View,” select “Show,” and then opt for “File name extensions.”
- Alternatively, access “Folder Options” and uncheck the “Hide extensions for known file types” option.
- You can also activate this feature via the Settings app or by utilizing Command Prompt or PowerShell.
In Windows 11, there are several methods to reveal file extensions in File Explorer. In this guide, I will outline how to adjust this setting. A file extension, which generally consists of three or four letters appearing after the period in a filename, signifies the file’s format type, such as .txt, .docx, or .pdf. While file extensions are not mandatory for a file’s operation, they offer distinct advantages.
For instance, file extensions provide a straightforward visual cue to determine a file’s format, facilitating the selection of the appropriate application for opening it. They also allow for easy modification of a file’s type; for example, converting a .txt file to a .bat file for scripting purposes.
By default, File Explorer conceals extensions for recognized file types, streamlining the interface, especially for less tech-savvy users. This practice also offers protection against accidental alterations to file extensions, which could potentially make files unusable. Furthermore, it has historically served to disguise malicious files disguised as benign ones, though this concern has diminished in recent times.
While the default setting hides extensions, displaying them can be beneficial, and you have the ability to change this setting through either File Explorer or the Settings app. Additionally, if you are familiar with editing the Registry and using commands, you can reveal extensions via Command Prompt or PowerShell.
This guide will provide you with straightforward steps to enable file extensions visibility in File Explorer.
- Displaying file extensions in Windows 11 using File Explorer
- Enabling file extensions visibility through Settings
- Activating file extensions using Command Prompt
Displaying file extensions in Windows 11 using File Explorer
Follow these steps to reveal file extensions in Windows 11:
-
Open File Explorer (Windows key + E) on Windows 11.
-
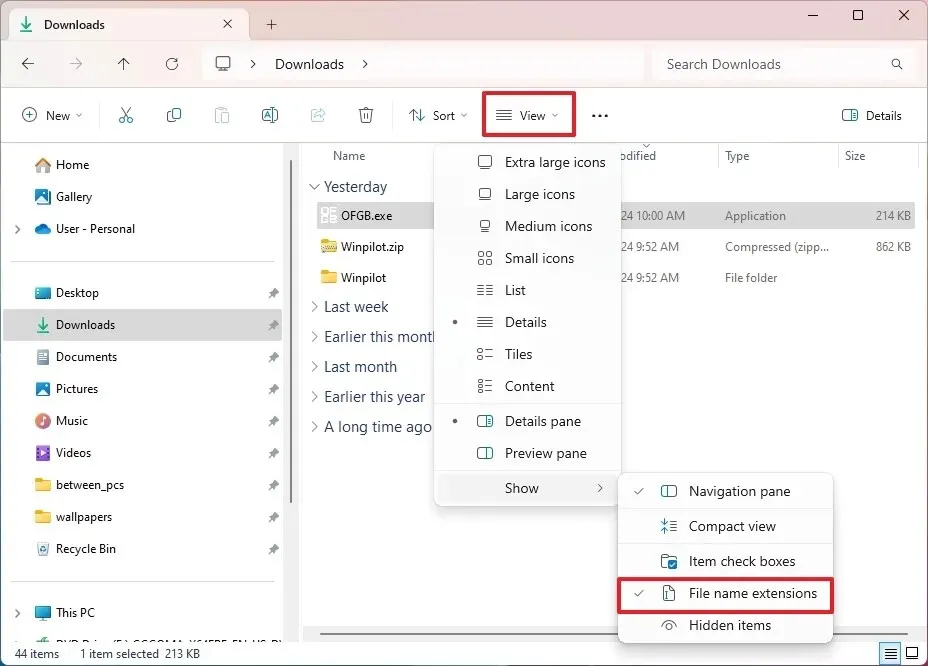
Click on the View menu button located in the command bar.
-
Select the Show submenu and click on “File name extensions.”
Enable extensions through Folder Options
You can also enable file extensions through the “Folder Options” settings by following these steps:
-
Open File Explorer.
-
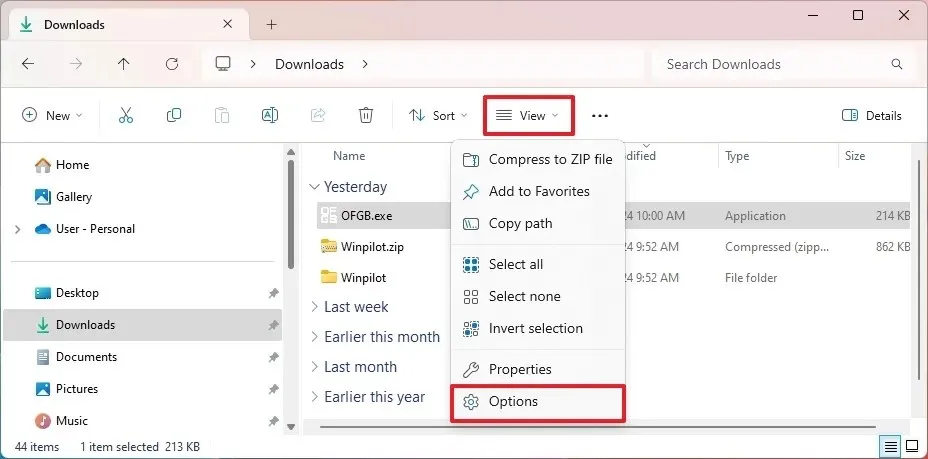
Click the See more button, then select Options.
-
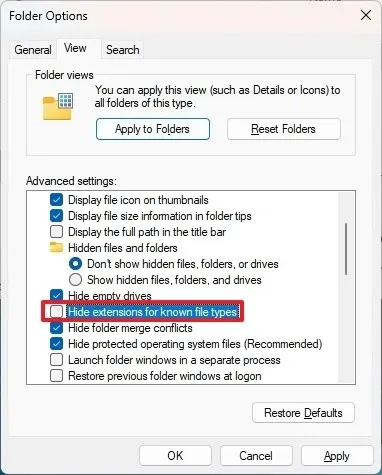
Select the View tab.
-
Uncheck the “Hide extensions for known file types” option under the “Advanced settings” section.
-
Click the Apply button.
-
Click the OK button.
Once these steps are completed, File Explorer will display extensions for recognized file types on Windows 11, including .txt, .exe, and .docx.
Enabling file extensions visibility through Settings
To reveal file extensions via the Settings app, follow these instructions:
-
Open Settings.
-
Select System.
-
Click on the For developers page.
-
Select the File Explorer setting.
-
Toggle the “Show file extensions” switch to the on position.
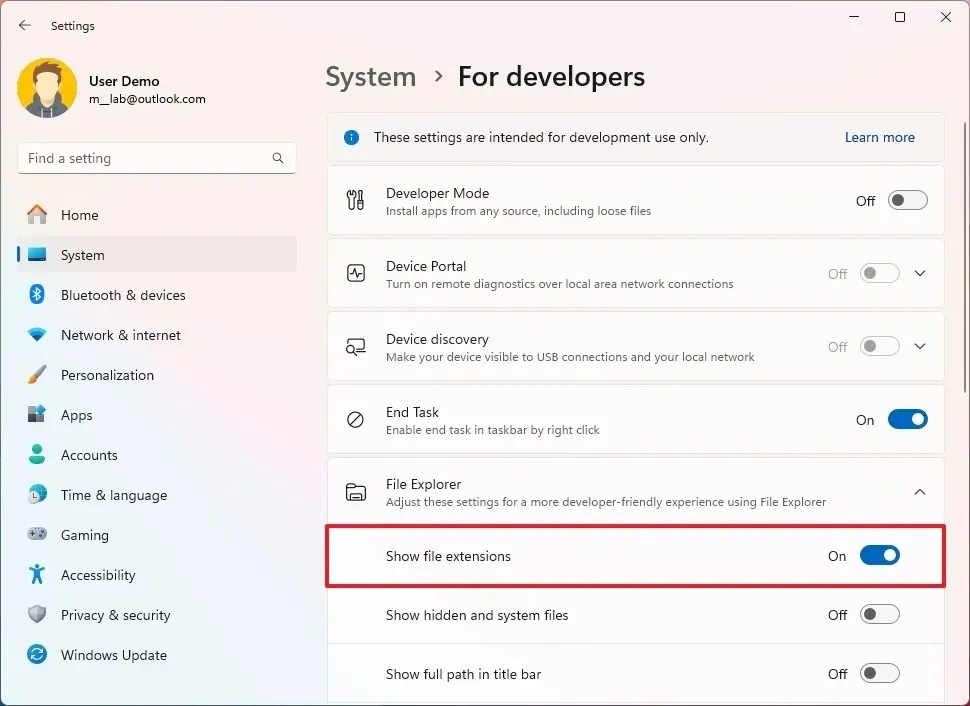
After finishing these steps, file extensions will now be displayed in File Explorer.
Activating file extensions using Command Prompt
You can also utilize Command Prompt or PowerShell to activate extensions by executing a command to modify the Registry. This method is also useful for enabling extensions through a scripted file.
To enable file extensions through Command Prompt in Windows 11, follow these steps:
-
Open Start.
-
Search for Command Prompt or PowerShell, right-click the top option, and select Run as administrator.
-
Enter the following command to display file extensions and press Enter:
reg add HKCU\Software\Microsoft\Windows\CurrentVersion\Explorer\Advanced /v HideFileExt /t REG_DWORD /d 0 /f
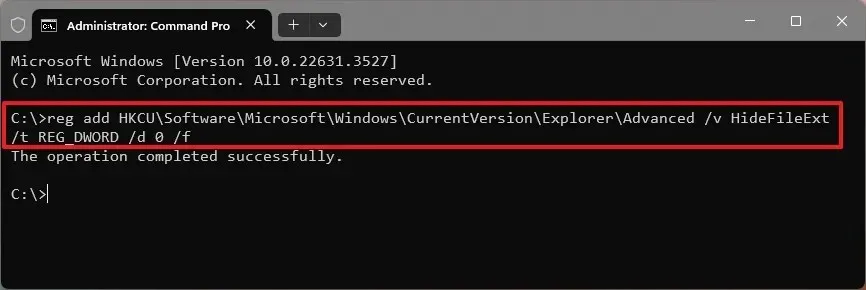
After executing these steps, File Explorer will begin to show file extensions on Windows 11.
If you wish to reverse this change, you can follow the same steps, but in step 3, use the following command: reg add HKCU\Software\Microsoft\Windows\CurrentVersion\Explorer\Advanced /v HideFileExt /t REG_DWORD /d 1 /f.
Update October 30, 2024: This guide has been revised to ensure accuracy and to reflect any updates to the procedure.


Leave a Reply