Steps to Resolve the Dexcom Clarity Network Error
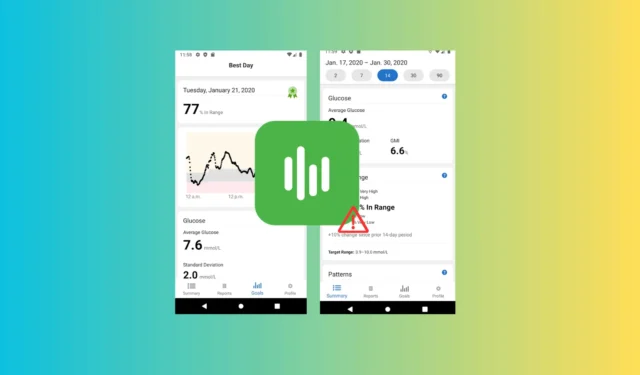
The rising prevalence of diabetes necessitates effective management and regular monitoring of glucose levels. As a result, many users depend on tools such as Dexcom Clarity. If you encounter a network error while using Dexcom Clarity on your browser or mobile apps for Android or iOS, this may stem from issues like a slow internet connection, an outdated app cache, or browser cache problems.
To resolve this, start by restarting the Dexcom Clarity application or your device. Ensure your internet connection is stable—consider switching to a different network if necessary—and verify the status of the Dexcom server. Additionally, updating your device to the latest operating system version can help prevent further complications.
How can I resolve the Dexcom Clarity network error?
1. Update the application
For Android
- Open the Google Play Store from your home screen or app drawer.
- Tap the profile icon in the upper right corner and choose Manage apps & devices.
- Under the Overview section, select Updates available, find Dexcom Clarity, and tap the Update button.
- If desired, you can choose to update all apps by tapping Update all. Upon completion, the Open button will appear next to the app.
If you are unable to update the app through the Google Play Store, a comprehensive guide is available to help you troubleshoot this issue.
For iOS
- Access the App Store on your device’s home screen.
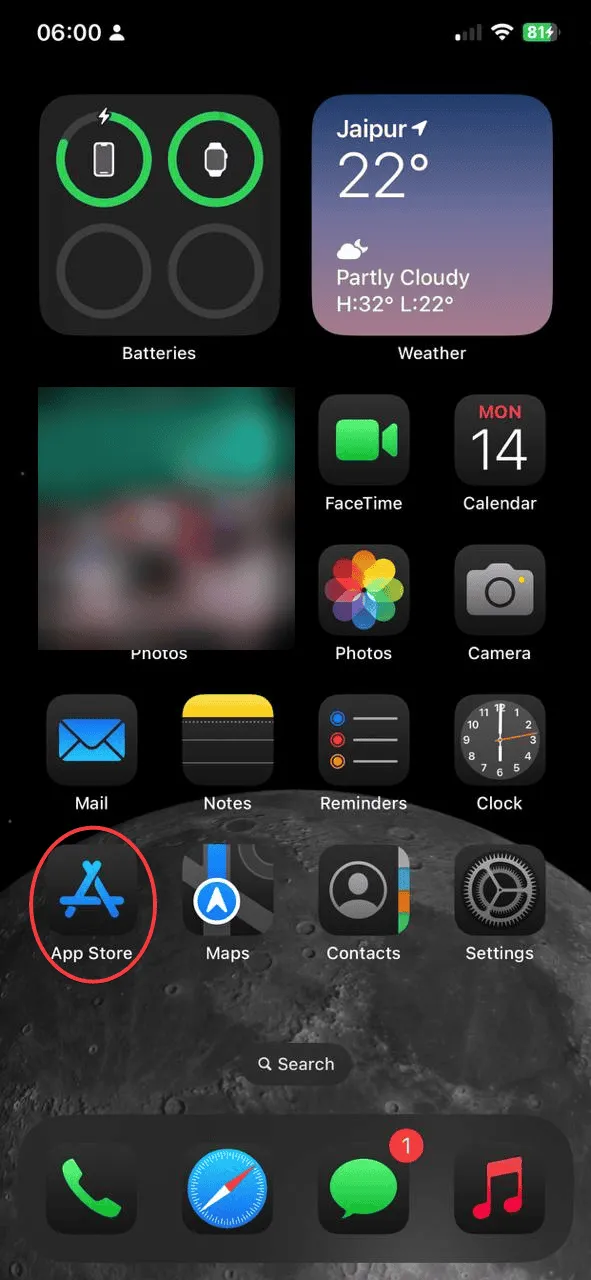
- Tap your profile icon in the top right corner and select Apps.
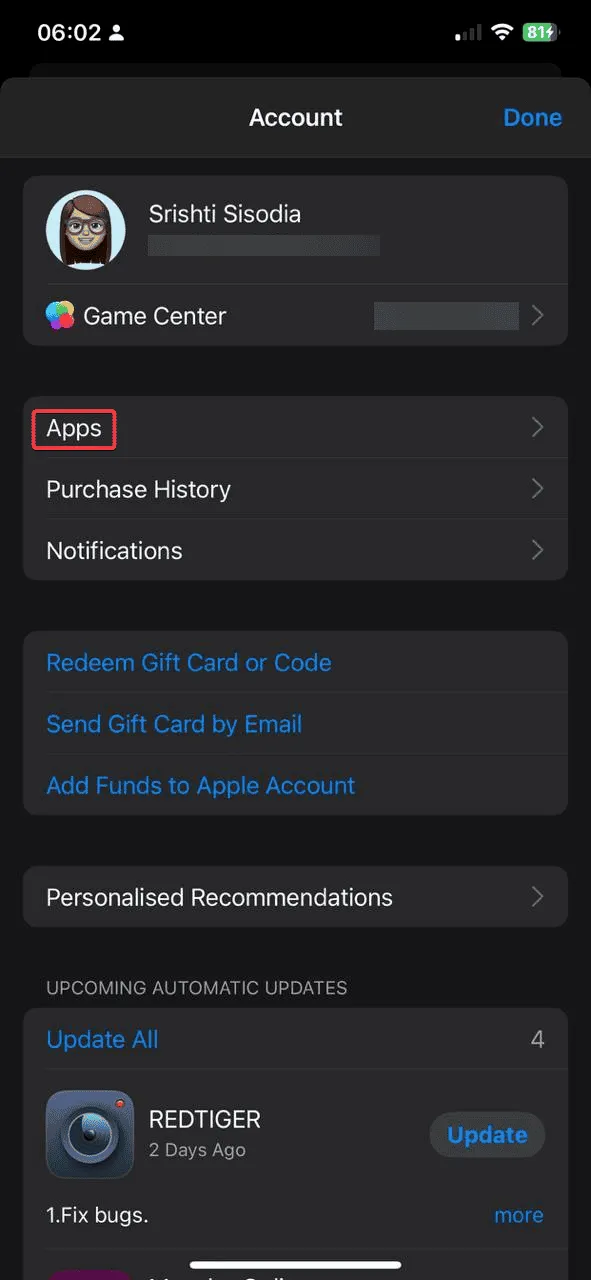
- Choose My Apps.
- Look for Dexcom Clarity in the list and tap the Update button if it appears.
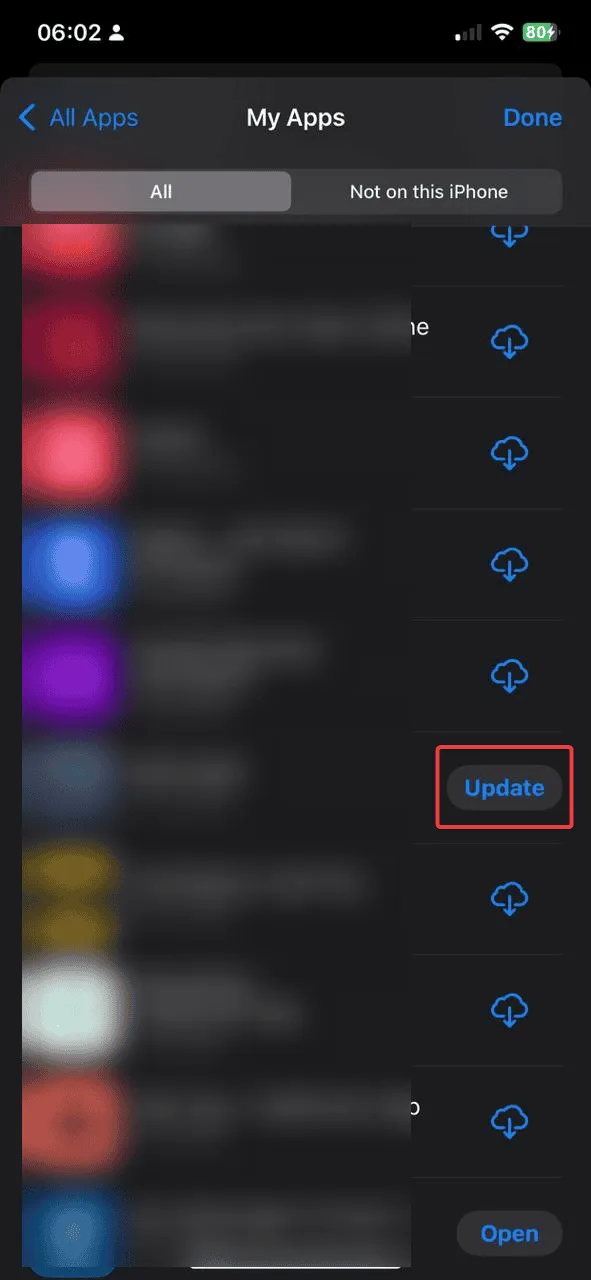
To keep the app current, consider enabling automatic updates on your Android or iOS device.
2. Clear the cache
For Android
- Open the Settings app on your device.
- Navigate to Apps and then select Apps Management.
- Locate Dexcom Clarity in the app list and tap on it.
- Tap Storage.
- Find the option to Clear cache and choose it to delete cached data from your device.
- Tap OK to confirm the action.
For iOS
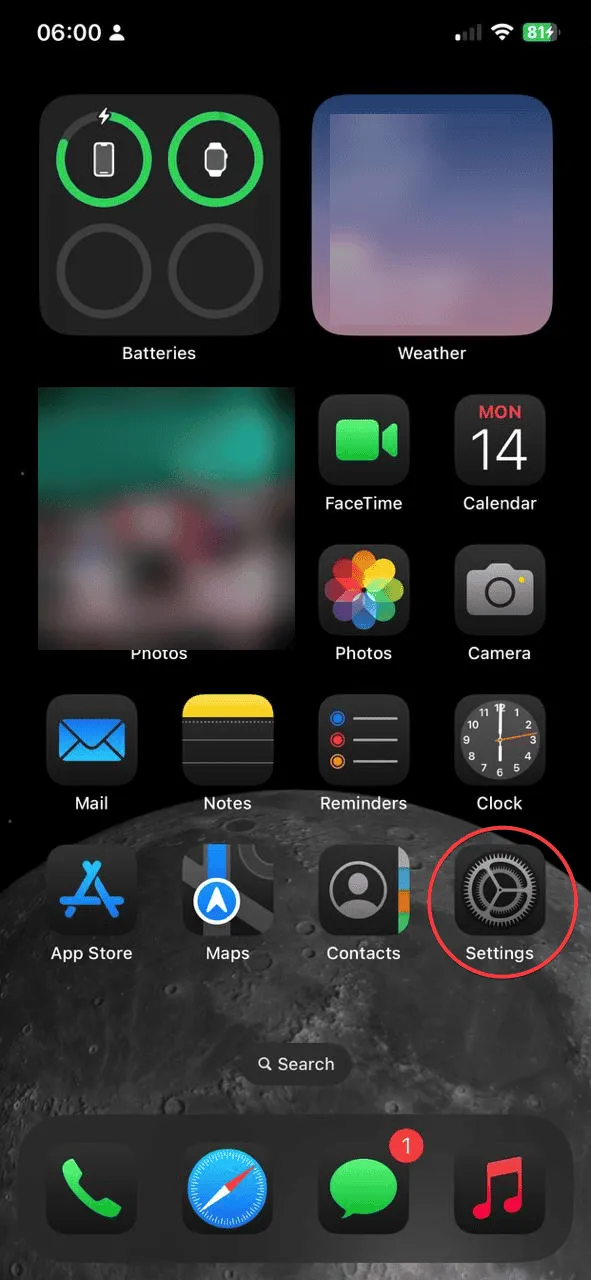
- Open the Settings app on your device.
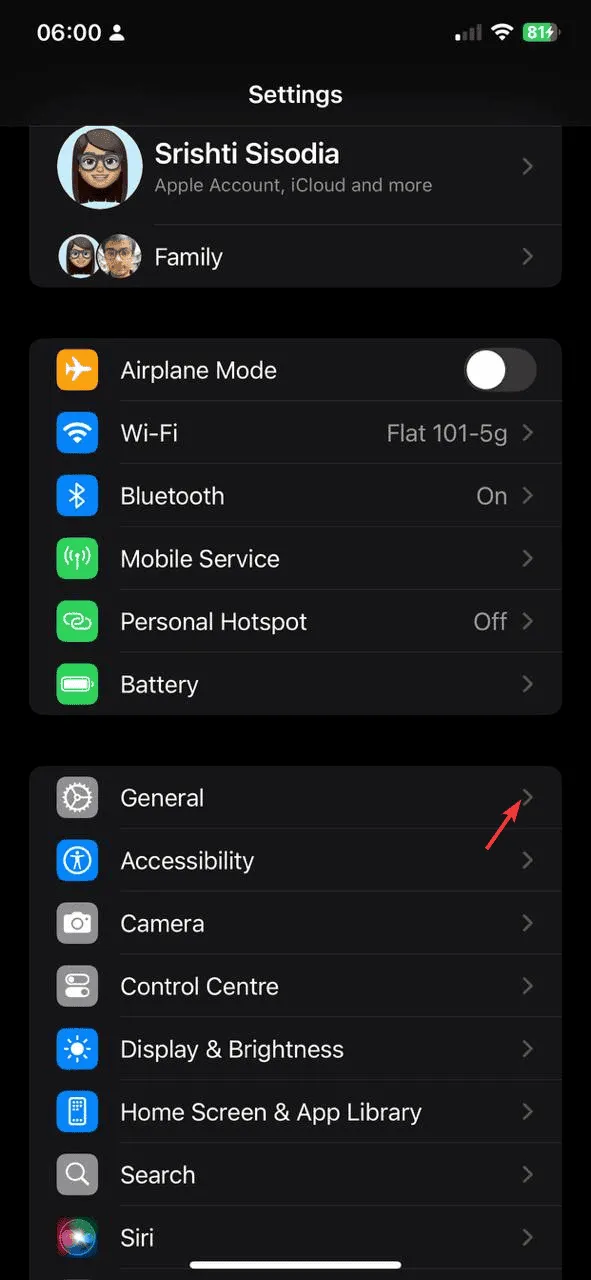
- Tap General.
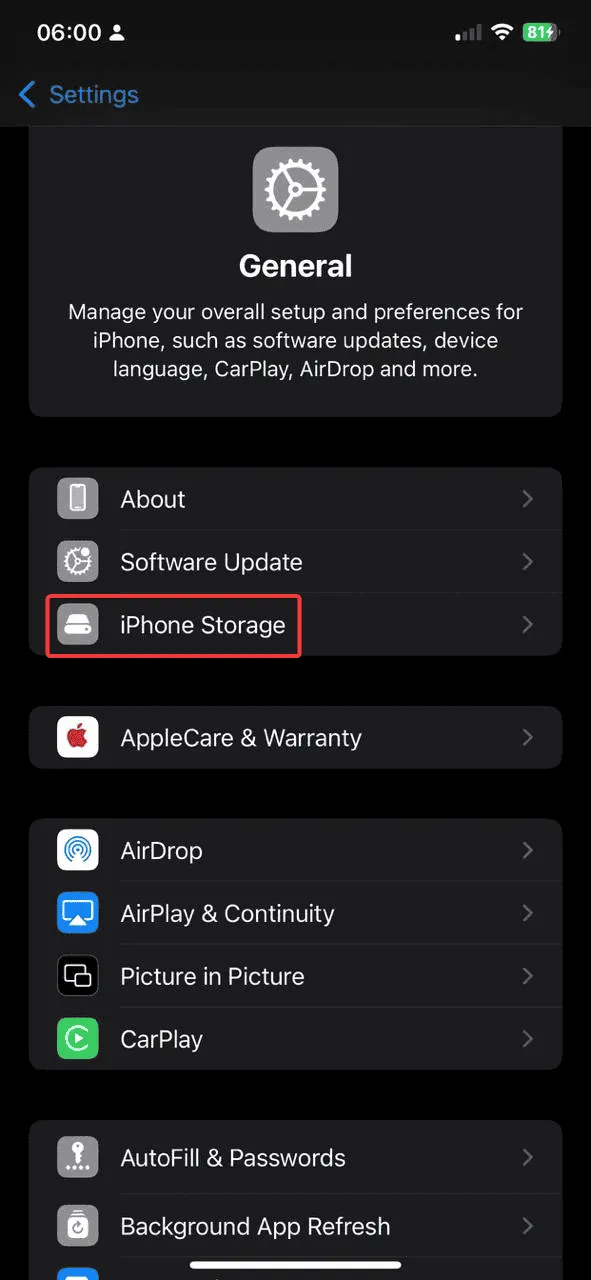
- Select iPhone Storage.
- From the app list, find and tap Dexcom Clarity.
- Select the Offload App option to uninstall while retaining its data.
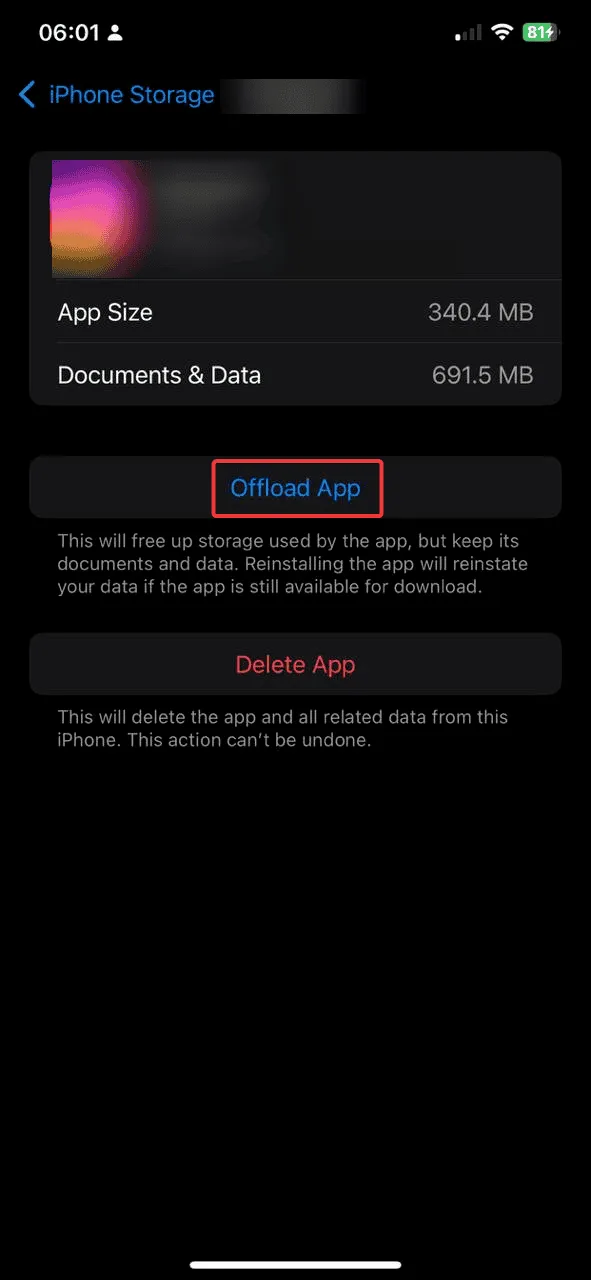
- Reinstall the app to clear the cache effectively.
For PC
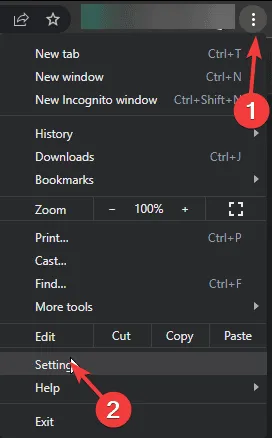
- Open your preferred web browser, such as Google Chrome.
- Click on the three dots icon and choose Settings.
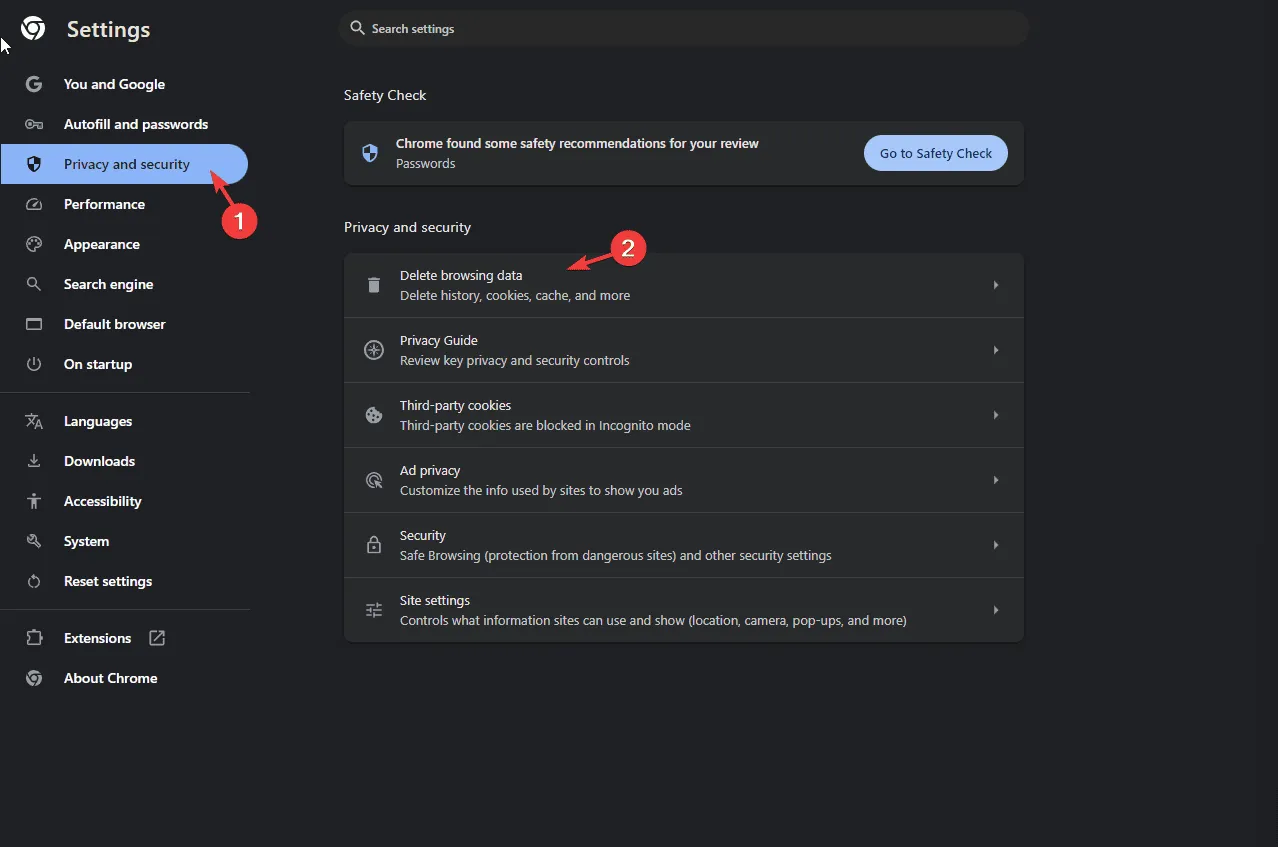
- Select Privacy and security and click Delete browsing data.
- Choose All time as your Time range and check below for Browsing history, Cookies and other site data, as well as Cached images and files.
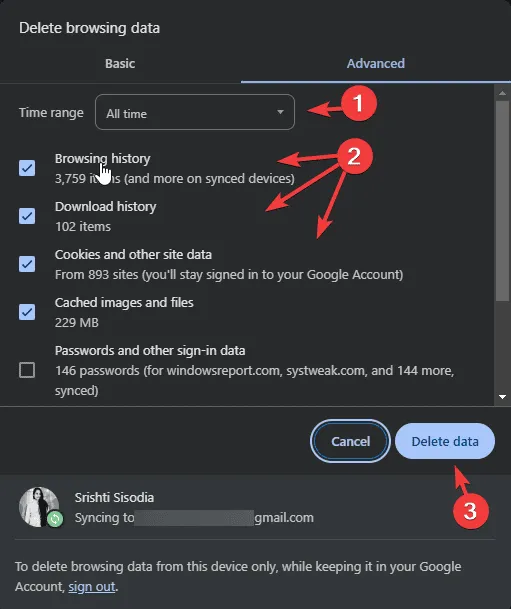
- Click Delete data to clear the browser’s cache.
3. Reinstall the application
For Android
- Open your device and find the Dexcom Clarity app.
- Select the Uninstall option.
- Open the Google Play Store from your home screen or app drawer, search for Dexcom Clarity, and tap Install.
- Wait for the installation to complete, then reopen the app to see if the issue is resolved.
For iOS
- Find the Dexcom Clarity app on your phone.
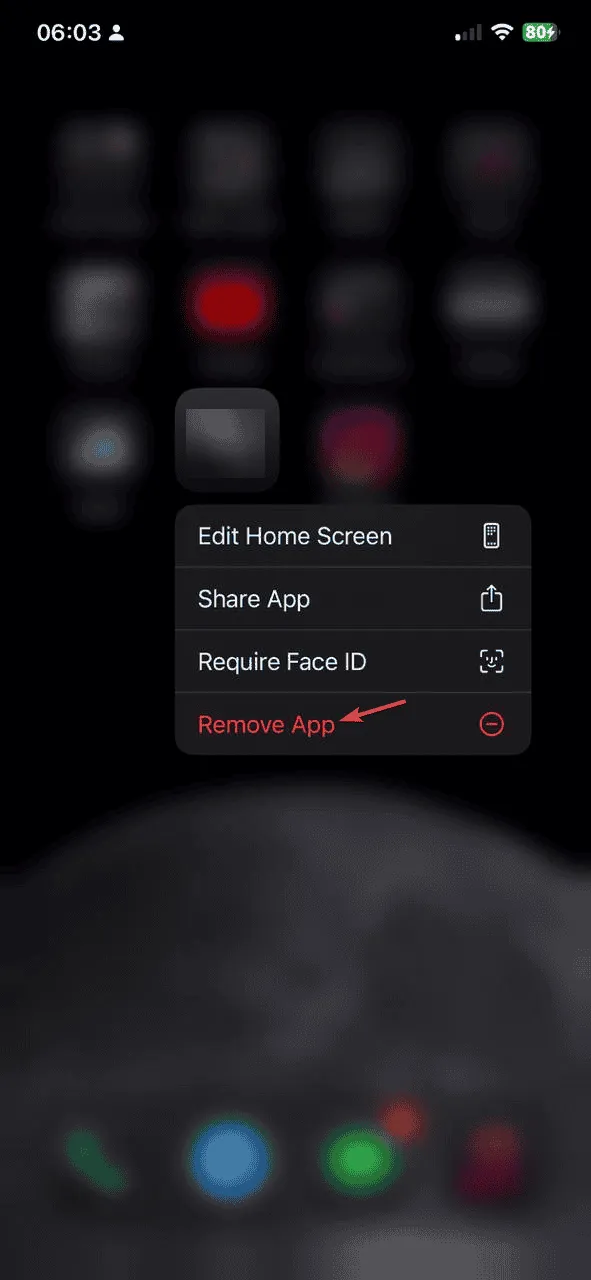
- Select Remove App from the dropdown.
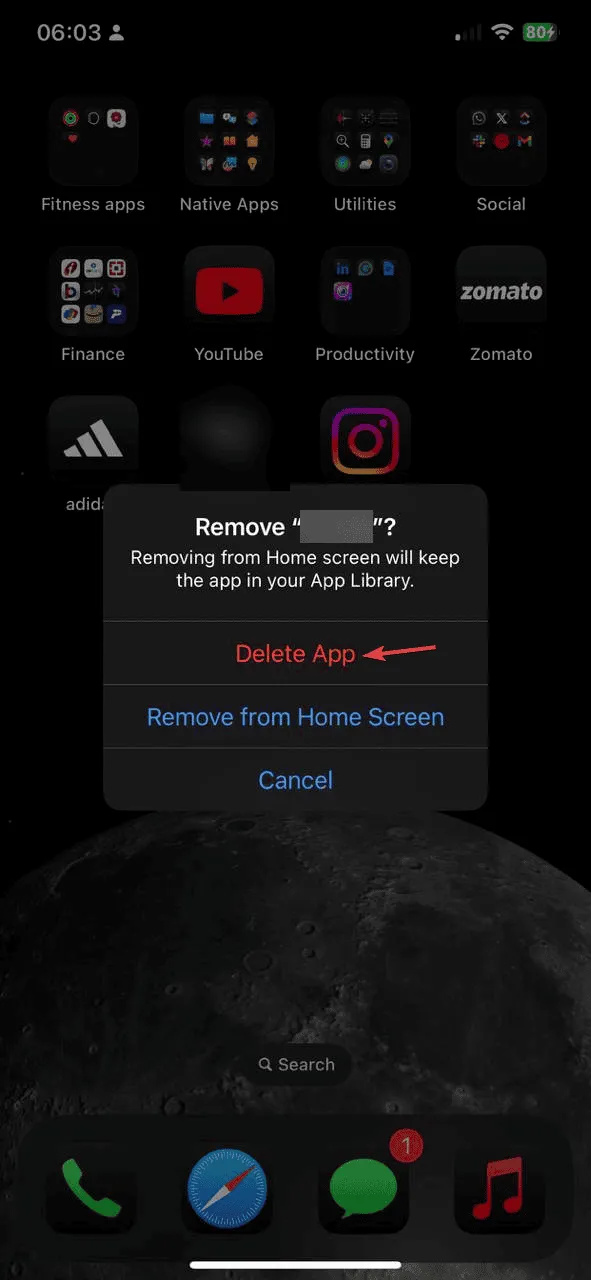
- Confirm by tapping Delete app.
- Open the App Store, search for Dexcom Clarity, and tap Get to download it once again.
- After installation, press Open to start the app.
4. Add Dexcom to trusted sites (PC)
- Press Windows + R to open the Run dialog.
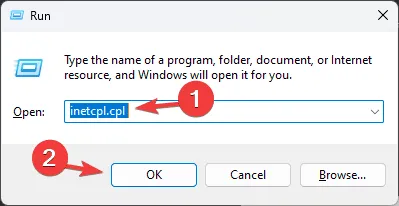
- Type inetcpl.cpl and press OK to access the Internet Options.
- Navigate to the Security tab and select Trusted sites.
- Click on the Sites button.
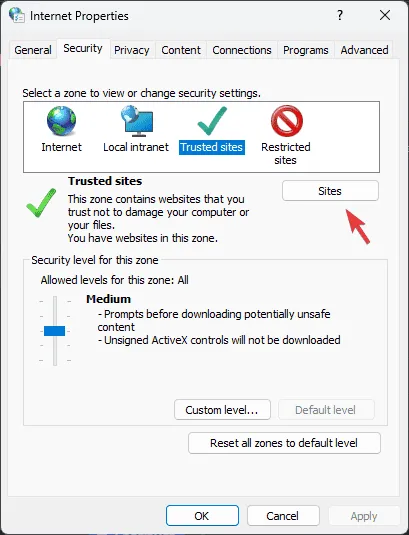
- Add the following URLs one at a time by copying and pasting them into the box, clicking Add after each, and then clicking Close:
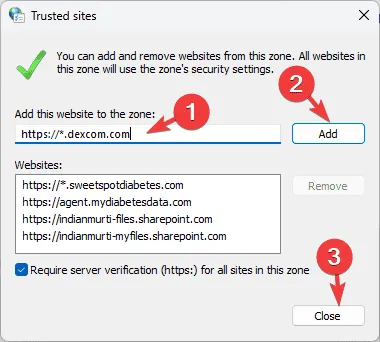
https://*.dexcom.com https://*.sweetspotdiabetes.com https://agent.mydiabetesdata.com - Press Apply, then OK to confirm and save the changes.
5. Modify the Local Intranet settings
- Press Windows + R to open the Run window.
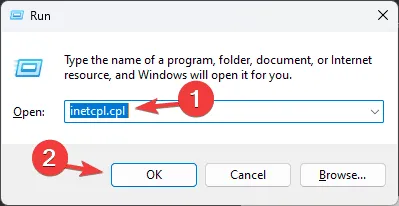
- Input inetcpl.cpl and hit OK to access the Internet Options.
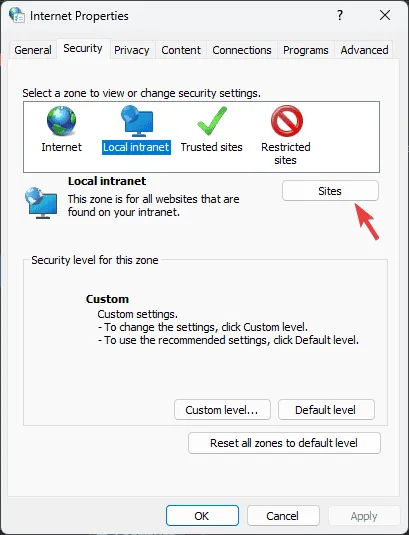
- Go to the Security tab and choose Local intranet.
- Click the Sites button.
- Uncheck Include all sites that bypass the proxy server.
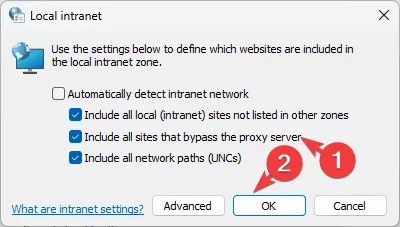
- Click OK to close the settings window.
- Next, click Apply, followed by OK to finalize your changes.
If all else fails, consider reaching out to customer support. Provide them with a detailed description of your issue and the troubleshooting steps you’ve taken for further assistance.
Have you found a solution to the Dexcom Clarity network error that we missed? We invite you to share your experience with our readers in the comments below.


Leave a Reply