Steps to Resolve PROCESSOR_DRIVER_INTERNAL Error Code 0x00000143
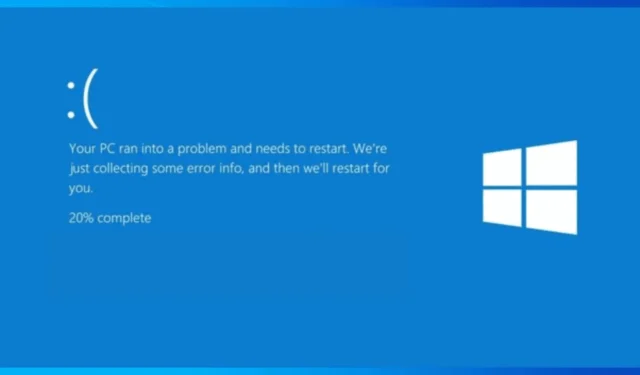
The error code PROCESSOR_DRIVER_INTERNAL 0x00000143 signifies a problematic processor driver, often resulting in a Blue Screen of Death (BSoD). This issue typically arises from hardware malfunctions, driver corruption, or compatibility conflicts.
To address the BSoD error, first, verify that your device isn’t overheating and ensure the CPU and other components are securely connected. It’s also important to ensure that your Windows and BIOS are updated to their latest versions. Running a malware scan with reputable antivirus software is recommended as well. Should the problem continue, follow the instructions below.
How can I resolve the PROCESSOR_DRIVER_INTERNAL error?
1. Update Device Drivers
- Press Windows + R to launch the Run dialog.
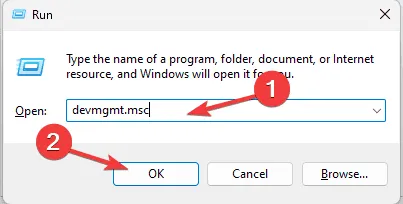
- Input devmgmt.msc and hit OK to open Device Manager.
- Once the list of components appears, go through each category to find any drivers that show a yellow triangle with an exclamation mark.
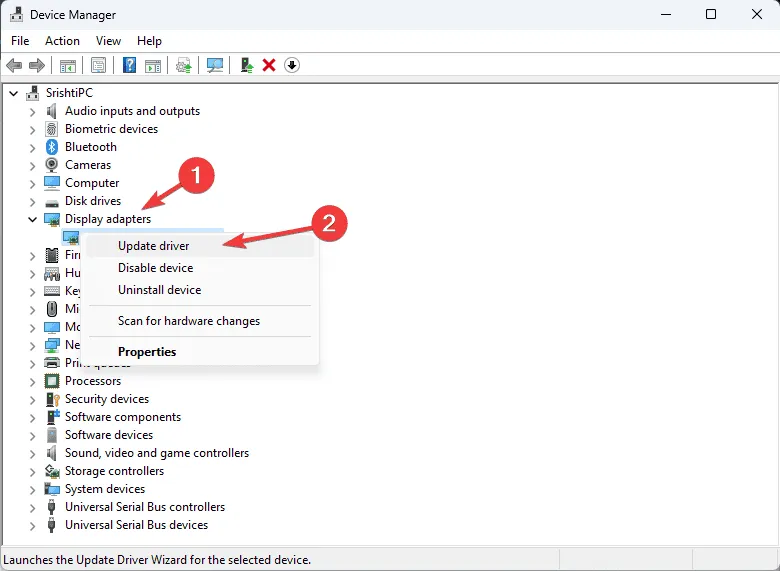
- When you find one, right-click on it and select Update driver from the menu.
- Choose Search automatically for drivers so that Windows attempts to locate a compatible driver for your device.
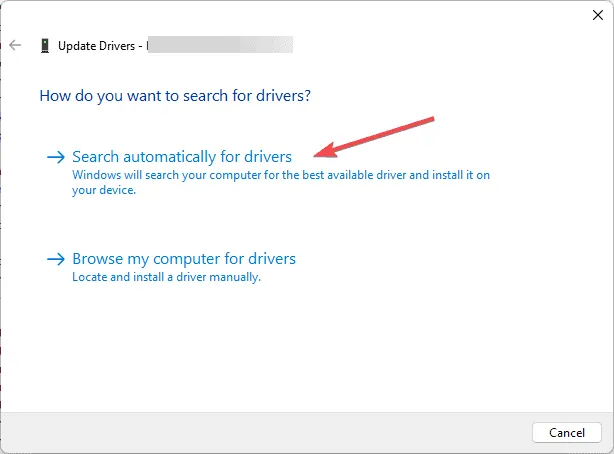
- Follow the on-screen instructions to finalize the update, repeating these steps for any other drivers indicated as problematic.
If Windows does not locate the most recent drivers, consider visiting the manufacturer’s website to download them manually or use recommended driver update tools noted in this guide.
2. Use the Windows Memory Diagnostic Tool
- Press Windows + R to access the Run window.
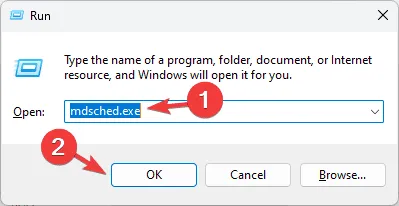
- Type mdsched.exe, then press OK to bring up the Windows Memory Diagnostic tool.
- Select the option that states Restart now and check for problems to restart your computer and initiate the scan.
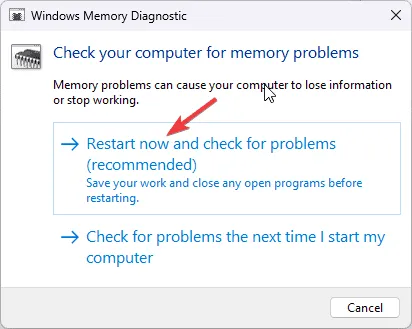
- The diagnostic will begin after your computer reboots; duration will vary based on your RAM configuration.
- Upon completion, Windows will restart, and the results will be displayed on your desktop.
To delve into the error report, open the Event Viewer, expand Windows Logs, and select System. Look for any warnings or errors that pertain to hardware or memory for further insights.
3. Restore Your System to a Previous Version
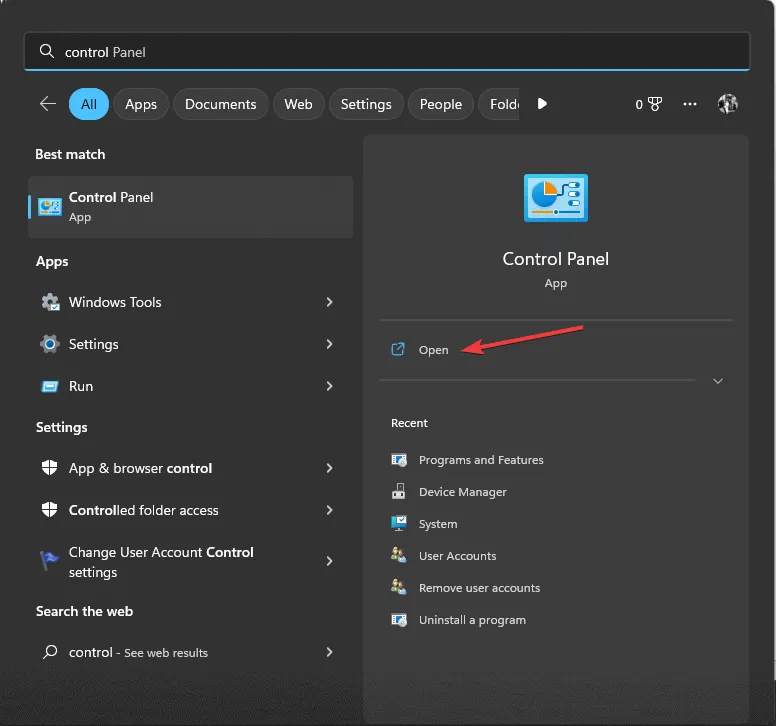
- Press the Windows key, type Control Panel in the search bar, and select Open to launch the Control Panel.
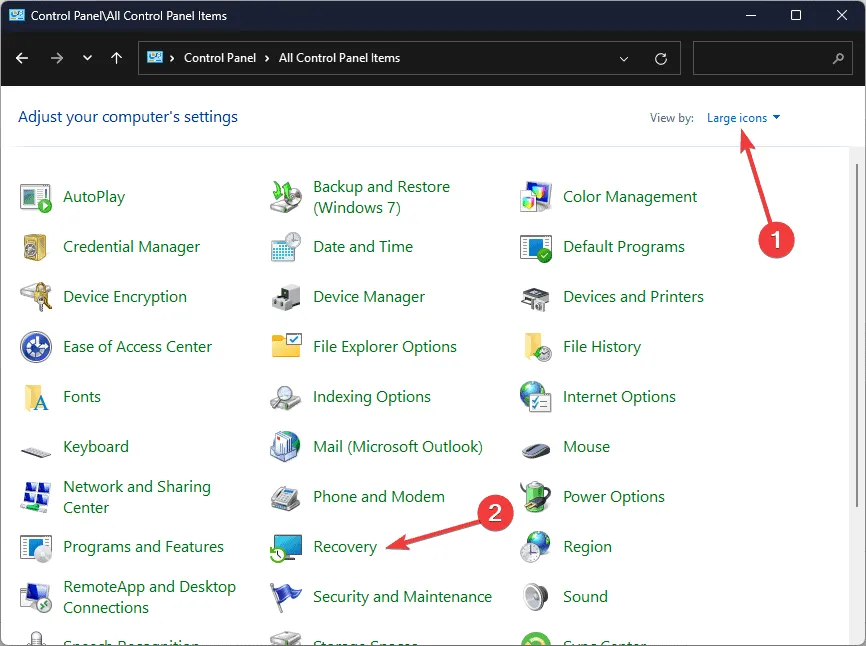
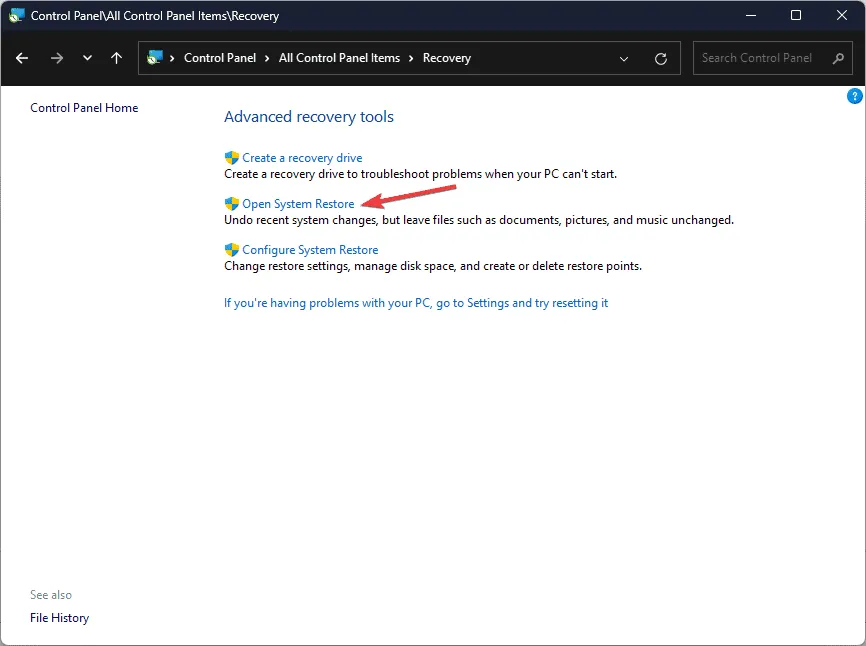
- Set the View by option to Large icons, and click on Recovery.
- Click the link for Open System Restore.
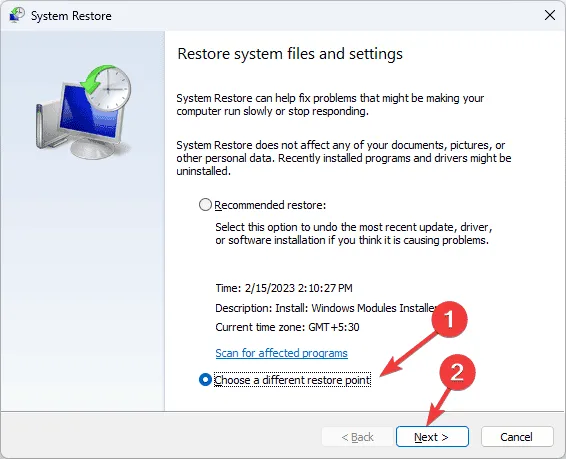
- Select Choose a different restore point in the System Restore window, and then hit Next.
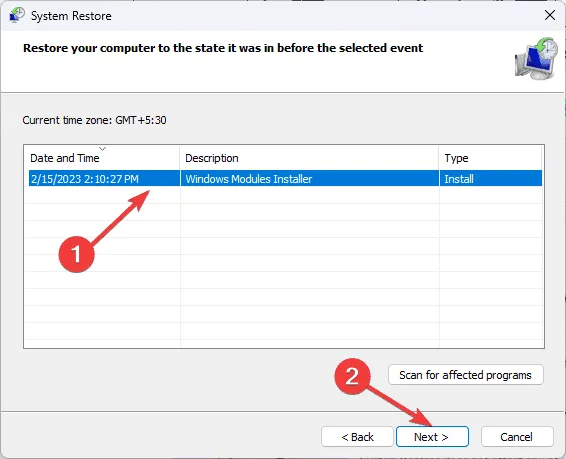
- From the list, pick a restore point that was created before the BSoD issue and click Next.
- Finally, click Finish.
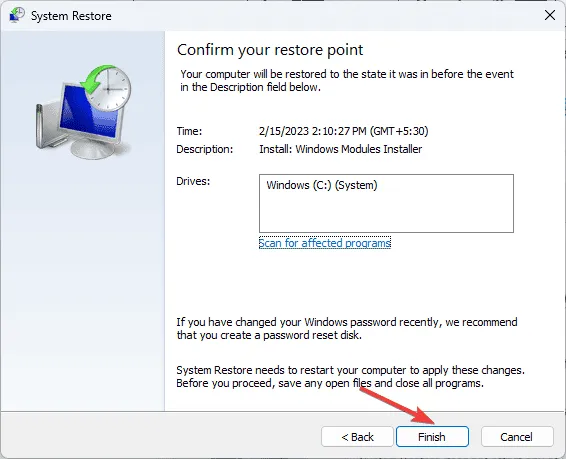
Your PC will restart, and Windows will attempt to revert the system settings to the specified restore point. If you encounter a message indicating that the System Restore did not complete successfully, it may be due to driver malfunctions or conflicting applications. For more information, consult our detailed guide.
4. Reinstall Windows
Creating Installation Media
- Access the Microsoft software download page from another computer, choose the right options, and click Download now.
- Once the executable file is downloaded, double-click it, then click Yes when prompted by UAC.
- In the Windows 11 Setup wizard, click Accept to agree to the license terms and conditions.
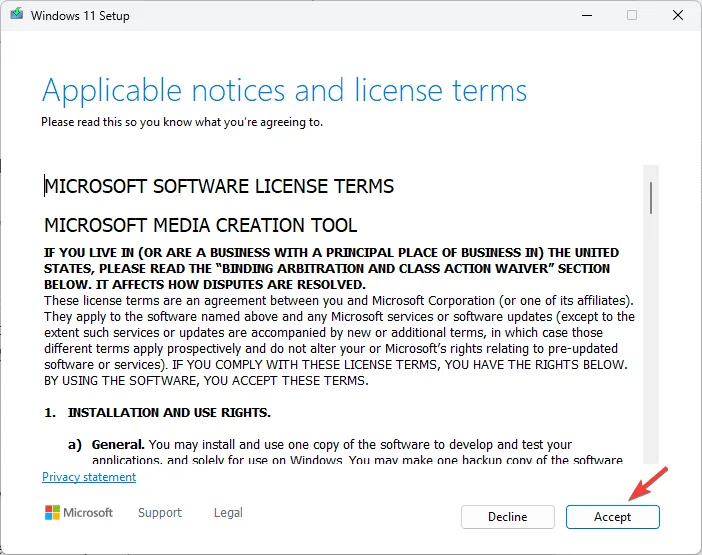
- Choose USB drive, then click Next.
- Select the desired language, edition, and architecture (64-bit or 32-bit) before clicking Next.
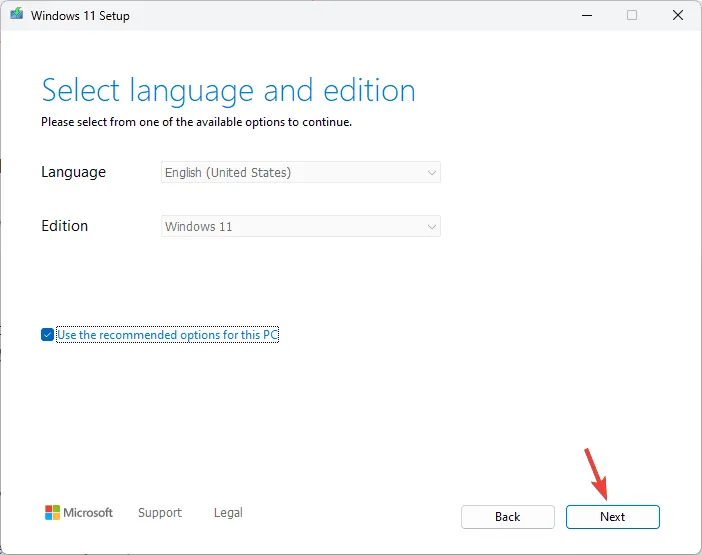
- Click on the USB flash drive you plan to use, and then choose Next.
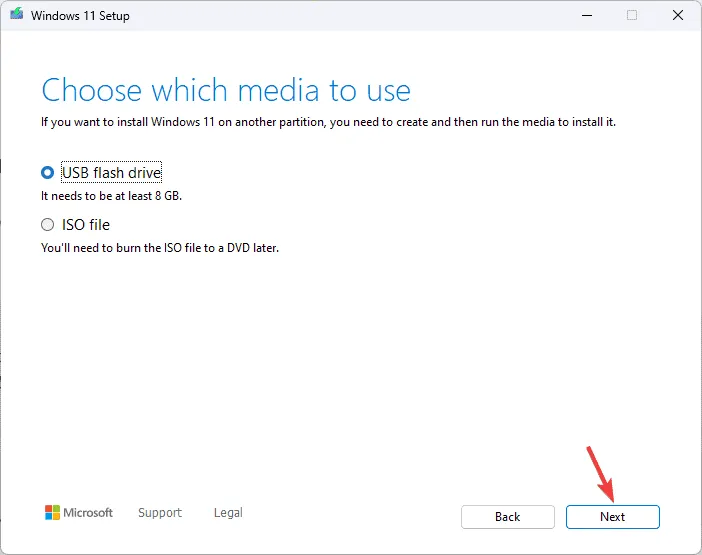
- Follow the instructions on-screen to finish the process, and once concluded, click Finish.
Reinstall Windows
- Insert the USB drive into the target computer, then press Windows + E to open File Explorer.
- Select the drive containing the installation media, find the setup.exe file, double-click it, and press Yes on the UAC prompt to proceed.
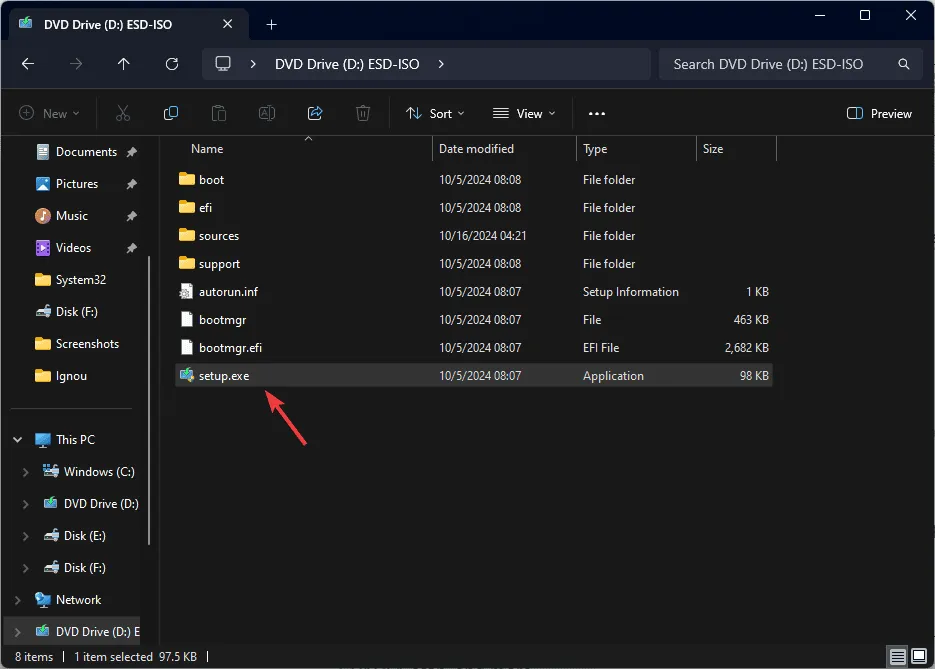
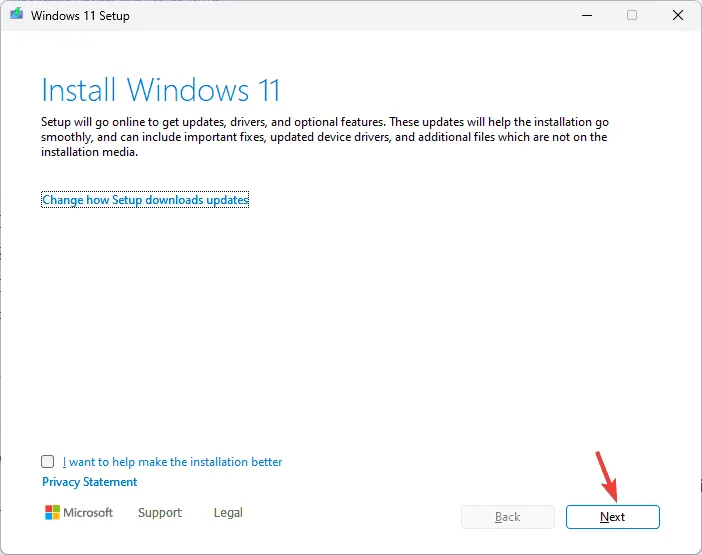
- Click Next.
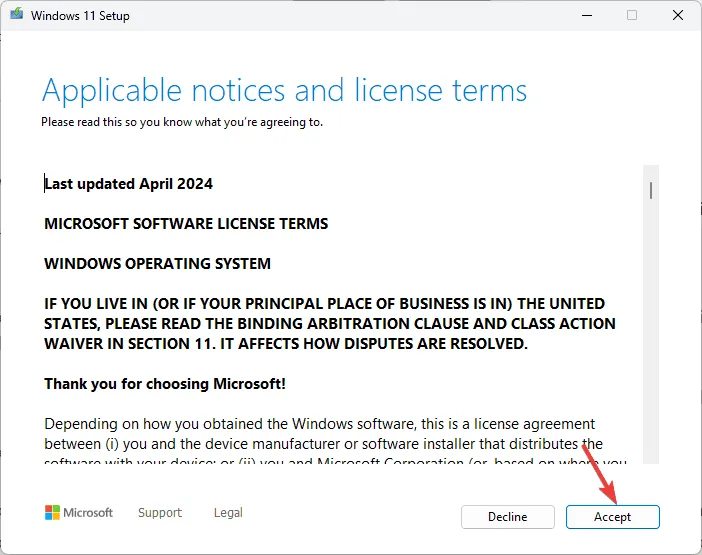
- Click Accept to acknowledge the license agreement.
- Then, select Change to specify your preferences on what to keep or remove. You can opt to Keep personal files only (which retains your data and settings but removes installed programs) or Keep nothing (which deletes everything).
- Select Install to start the Windows 11 reinstallation on your device.
In summary, to resolve the PROCESSOR_DRIVER_INTERNAL BSoD error, ensure that Windows and BIOS firmware are up to date, update device drivers, and utilize the Windows Memory Diagnostic tool. If these methods don’t rectify your issue, consider performing a Windows reinstallation.
We also recently discussed the Error_not_joined and NETIO_INVALID_POOL_CALLER errors, so don’t hesitate to check that for more insights.
If you have additional questions or feedback regarding the PROCESSOR_DRIVER_INTERNAL BSoD error, please share your thoughts in the comments section below.


Leave a Reply