Resolve SCCM Client WMI Errors: Access Denied, Connection Failure, and More
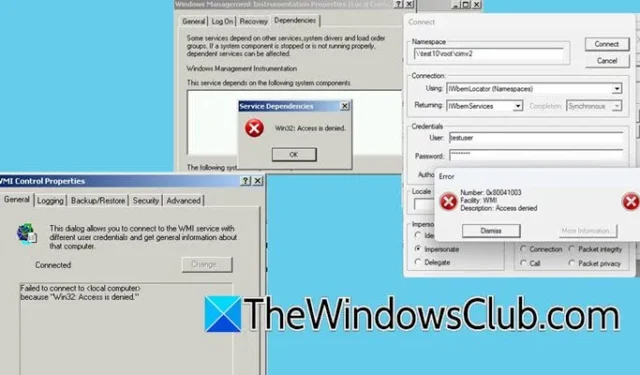
Windows Management Instrumentation (WMI) plays a pivotal role in System Center Configuration Manager (SCCM) for managing client-server communications and administering remote Windows PCs. SCCM utilizes the Win32_Service class for monitoring system services. The WMIC command-line tool is instrumental in the management of Windows systems. Nevertheless, users often encounter numerous SCCM Client WMI problems. In this article, we will address these issues comprehensively.
Resolve SCCM Client WMI Problems
This guide highlights several common SCCM Client WMI issues:
- WMI Invalid Class
- WMI Connectivity Problems
- Access Denied Errors
Here’s a detailed discussion on these issues.
1] WMI Invalid Class
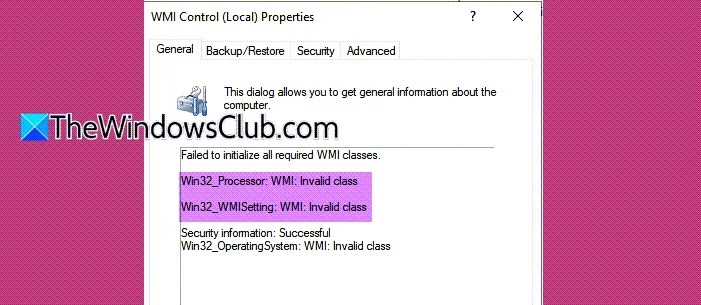
Many users encounter difficulties with the SCCM Client and other applications, including Battle.Net. Upon checking winmgmt.msc, they might see the following error messages:
Failed to initialize all required WMI classes.
Win32_Processor: WMI: Invalid class
Win32_WMISetting: WMI: Invalid class
Security information: Successful Win32_OperatingSystem: WMI: Invalid class
To circumvent this issue, you can create a script that restarts all pertinent services, as it is typically a temporary glitch.
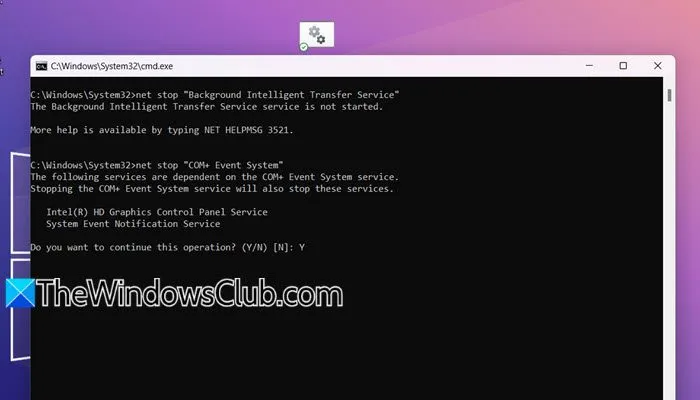
To proceed, open Notepad, insert the code below, and save it with a name of your choosing but ensure it has a .cmd extension.
net stop "Background Intelligent Transfer Service"
net stop "COM+ Event System"
net stop "Microsoft Software Shadow Copy Provider"
net stop "Volume Shadow Copy"
net stop Winmgmt
net stop WSearch
cd /d %windir%\system32\wbem
dir /b *.dll > dlllist.txt
dir /b *.mof > moflist.txt
dir /b /s *.mfl > mfllist.txt
for /f %f in (dlllist.txt) do regsvr32 /s %
for /f %s in (moflist.txt) do mofcomp %s
for /f %s in (mfllist.txt) do mofcomp %s
net start "Background Intelligent Transfer Service"
net start "COM+ Event System"
net start "Microsoft Software Shadow Copy Provider"
net start "Volume Shadow Copy"
net start Winmgmt
net start WSearch
del dlllist.txt /Q
del moflist.txt /Q
del mfllist.txt /Q
wmiprvse /regserver
After creating the script, navigate to where you saved it—ideally on your desktop for easier access. Right-click the file and choose ‘Run as administrator’. Confirm by selecting Yes when the User Account Control prompt appears.
This action will open the Command Prompt, at which point you should respond ‘Y’ to any prompts. This process should effectively resolve the problem.
2] WMI Connectivity Problems
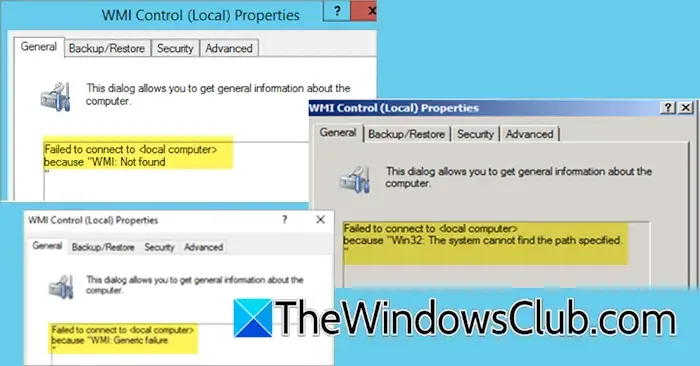
While configuring WMI or using SCCM, users may encounter WMI connectivity errors. Here are a few common messages that signify such issues:
Failed to connect to <local computer> because “WMI: Not found..
Failed to connect to <local computer> because “Win32: The system cannot find the path specified…
Failed to connect to <local computer> because “WMI: Generic failure..
These problems usually stem from inconsistencies, which require a consistency check on the current WMI repository.
Use the following command to perform this check:
winmgmt /verifyrepository
If needed, you can employ the command /verifyrepository <path> to assess any saved copies of the repository, specifying the complete path to the saved repository directory.
To resolve the connectivity issues, restart the WMI Service by executing the commands in an elevated Command Prompt:
sc config winmgmt start= disabled
net stop winmgmt /y
%systemdrive%
cd %windir%\system32\wbem
for /f %s in ('dir /b *.dll') do regsvr32 /s %s
sc config winmgmt start= Auto
net start winmgmt
dir /b *.mof *.mfl | findstr /v /i uninstall > moflist.txt & for /F %s in (moflist.txt) do mofcomp %s
These steps should help restore connectivity.
3] Access Denied Errors
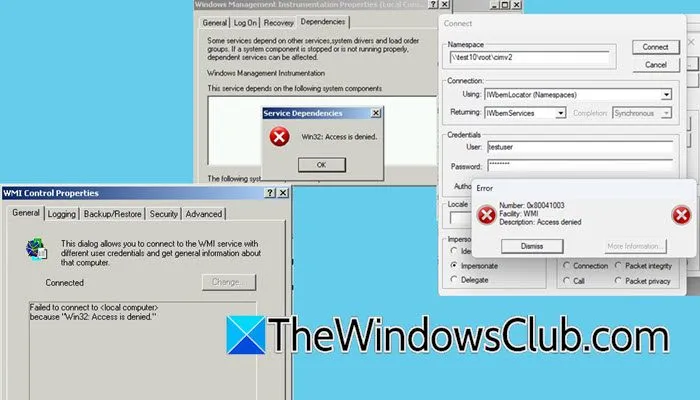
The “Access is denied” error typically arises due to insufficient permissions associated with the user account.
If this error occurs when connecting to a Namespace, first verify that the user account has been added to the administrators group. If there’s another Active Directory account with the necessary permissions, ensure that the user is associated with that account as well. Also, check that the credentials being used are correct, as an invalid password could result in a similar error.
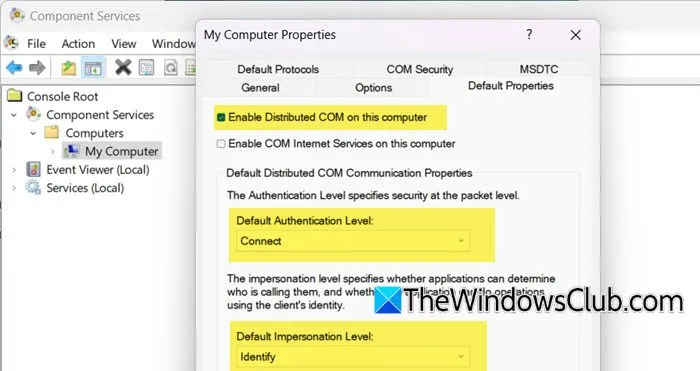
If the WMI Control Properties yields an “Access is denied” error, you’ll need to manually review and adjust the access settings in WMImgmt. Follow these steps:
- Press Win + R to open Run, type “WMImgmt.msc” , then press OK.
- Expand Console Root, right-click on WMI Control (Local), and select Properties.
- In the Security tab, choose ‘Everyone’ and verify that all the Allow checkboxes are checked to ensure access to Root and CCM.
- Open Run again, type “dcomcnfg” , and hit OK.
- Go to Component Services > Computers > My Computer.
- Right-click on My Computer and then select Properties.
- Within the Properties window, navigate to the Default Properties tab and enable Distributed COM on this computer. Set the Default Authentication Level to Connect and Default Impersonation Level to Identify.
- Access the COM Security tab, click on Edit limits, and grant full permissions to everyone, if necessary.
Even if recent changes were made, they may not have been applied. To ensure they take effect, consider restarting the WMI Services (refer to the previous section for steps).
How can WMI issues be resolved in SCCM?
Although there are multiple WMI issues within SCCM, the majority are minor glitches. Restarting the WMI Service is typically the solution. You can execute the commands provided earlier in this article for this purpose. Additionally, consider restarting the related services as suggested in previous sections to potentially resolve further issues.
How to address SCCM client problems?
To troubleshoot SCCM client issues, utilize the repair client utility. First, open the Configuration Manager console, navigate to Assets and Compliance > Overview > Devices, select the affected device, right-click on it, and choose Right Click Tools > Client Tools > Repair Client. Confirm by checking the box that states “Are you sure you want to repair the client?”, and select Yes to initiate the repair process.


Leave a Reply