Installing Windows 11 on Unsupported Hardware: A Step-by-Step Guide
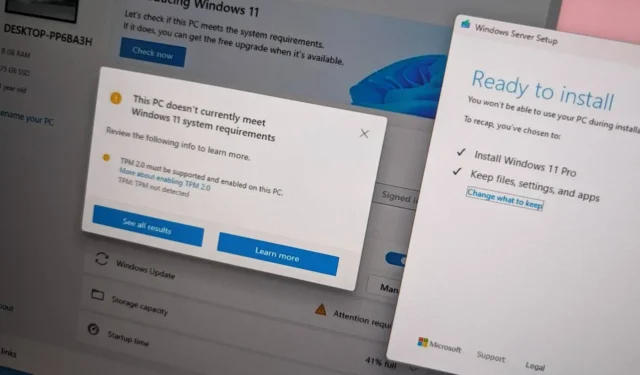
UPDATED 10/17/2024: If you possess a computer with hardware that doesn’t meet the official requirements, you can still upgrade to Windows 11 (versions 24H2 and 23H2) by using a bootable USB flash drive or ISO file to carry out a clean install or upgrade manually, rather than through Windows Update.
While Microsoft has kept this option open, it hasn’t been explicitly documented, leading to an unsupported status for such installations. The company suggests this route primarily for organizations, but users may proceed at their own risk, accepting the lack of guaranteed system stability and driver compatibility.
This means you are able to finish the installation of Windows 11 on hardware that isn’t officially supported, but you must realize that this upgrade will be termed as “unsupported.” Microsoft categorizes an “unsupported state” as a machine that fails to meet the minimum system requirements, which consequently disqualifies it from receiving updates via Windows Update. Though these devices might still see updates, Microsoft does not guarantee the provision of security updates, driver updates, or technical support.
This guide provides detailed steps for installing Windows 11 (versions 24H2 and 23H2) on a device lacking the necessary compatibility. Engaging with these methods is ill-advised unless you are aware of the associated risks and the potential for issues regarding stability, compatibility, and update availability.
When ready to install the most recent Windows 11 release, prioritize the instructions for version 24H2. Generally, a clean installation is advisable as it typically leads to fewer issues. While alternative methods are available, they have only been verified up to version 23H2. Remember that regardless of your method, a hassle-free installation is not assured due to the computer’s unsupported nature.
- Installing Windows 11 24H2 on unsupported hardware
- Upgrading Windows 11 24H2 on unsupported hardware
- Installing Windows 11 on unsupported hardware via USB
- Upgrading to Windows 11 on unsupported hardware using an ISO file
- Upgrading to Windows 11 on unsupported hardware via Command Prompt
- Upgrading to Windows 11 on unsupported hardware by modifying the Registry
- Installing Windows 11 on unsupported hardware with Rufus
Installing Windows 11 24H2 on unsupported hardware
While various methods can be utilized to proceed, the protocol has changed with the launch of Windows 11 24H2. If you aim to install the current iteration of the operating system, downloading the ISO file and employing the Rufus tool might serve as the simplest approach on unsupported hardware. Alternatively, consider creating a USB bootable media with Ventoy to conduct a clean install on devices that fall short of the minimum hardware specifications.
Ensure that your computer is capable of booting from a USB flash drive. This might require adjustments in the UEFI settings or accessing the boot menu, which varies among computer manufacturers, so refer to their support documentation for specific instructions.
Using Rufus for clean installation
To execute a clean installation of version 24H2 with Rufus, follow these detailed steps.
1. Download the Windows 11 24H2 ISO file
To procure the official Windows 11 24H2 ISO file, adhere to these instructions:
-
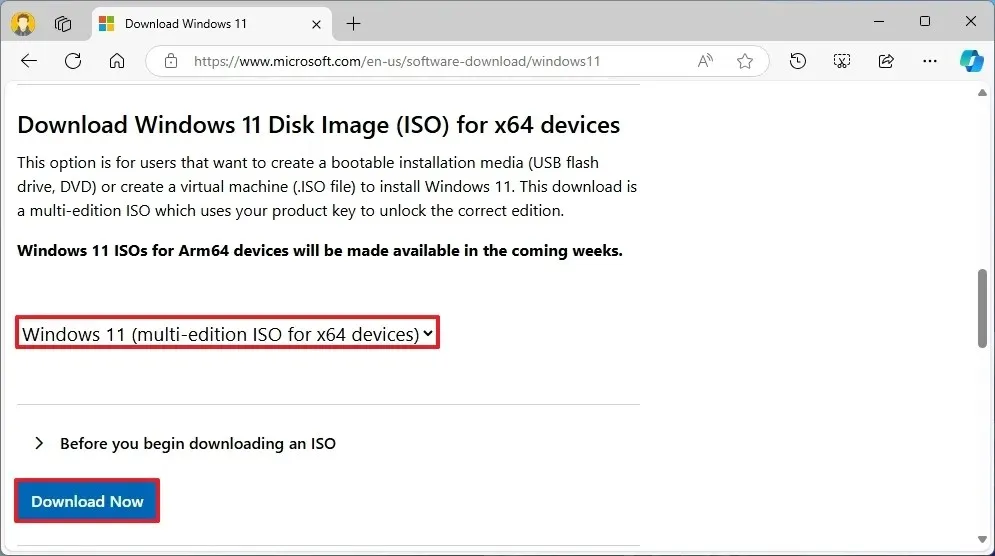
Opt for the Windows 11 option in the “Download Windows 11 Disk Image (ISO) for x64 devices” section.
-
Hit the Download button.
-
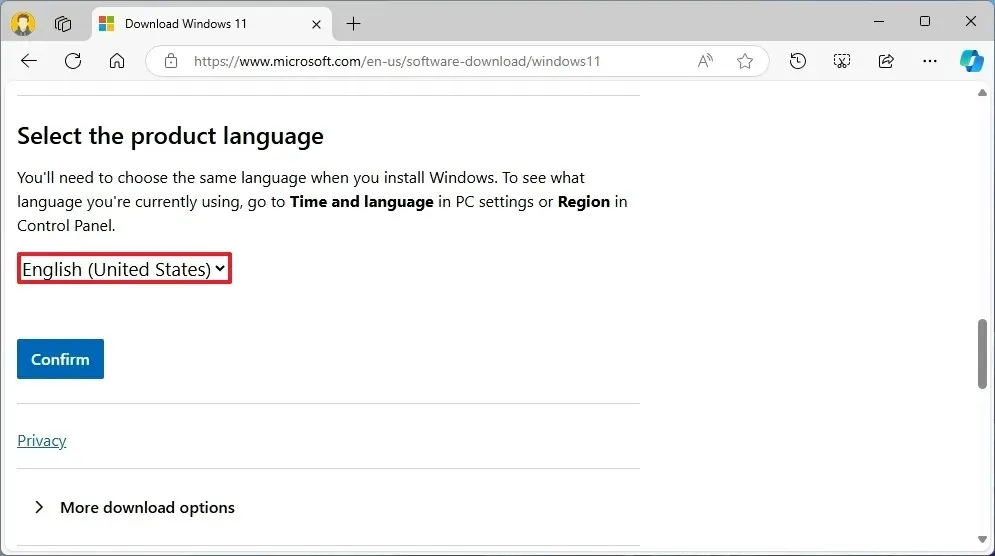
Select your preferred installation language.
-
Click the Confirm button.
-
Then, click the Download button to save the ISO file on your PC.
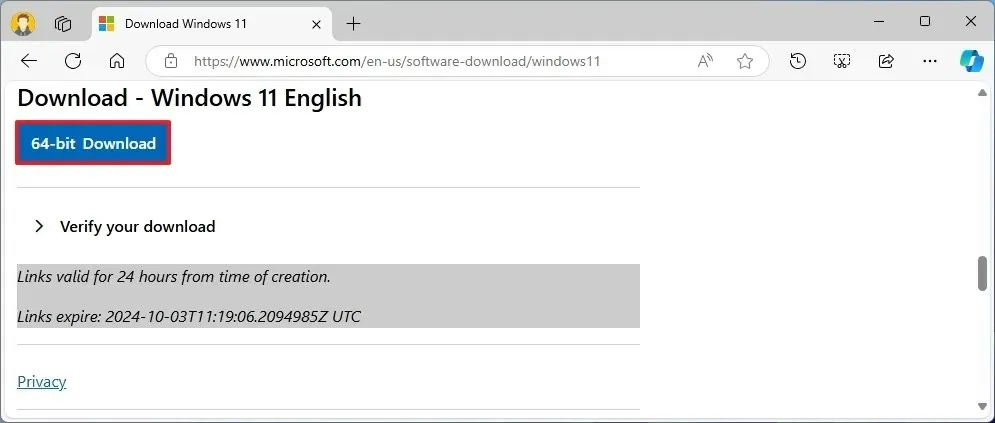
Upon completion, the Windows 11 image can be used to create installation media.
2. Creating Windows 11 24H2 bootable media
To forge bootable media for Windows 11 24H2, connect a USB flash drive (minimum 8GB) and follow these steps:
-
Click on the link to download the latest version in the “Download” section.
-
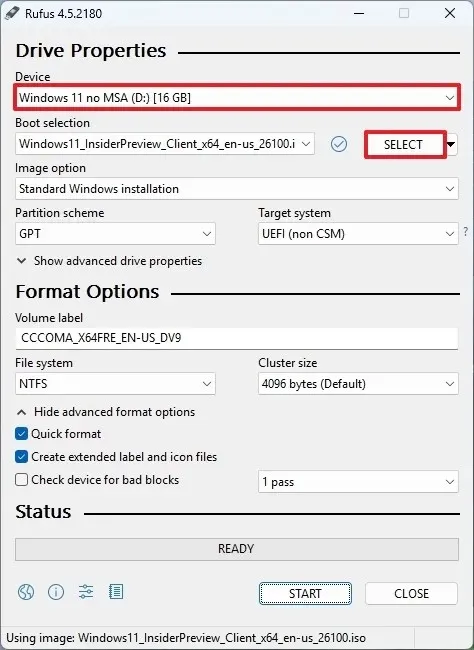
Select the USB flash drive in the “Device” dropdown menu.
-
Open the tool by double-clicking the downloaded executable.
-
Click the Select button.
-
Choose the Windows 11 24H2 ISO file you just downloaded.
-
Click the Open button.
-
Proceed with the default settings following the download.
-
(Optional) You may assign a name to the drive in the “Volume label” setting.
-
Press the Start button.
-
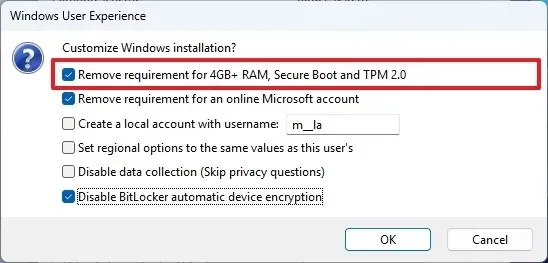
Ensure to check the option “Remove requirement for 4GB+ RAM, Secure Boot and TPM 2.0” to enable installation of version 24H2 on unsupported hardware.
-
Additionally, check the “Remove requirement for an online Microsoft account” option to skip the internet and Microsoft account requirement, permitting local account creation.
-
(Optional) Enable the “Create a local account with username” option and provide a username for automatic local account creation.
-
Check the “Disable BitLocker automatic device encryption” option to stop the installation from activating BitLocker (if applicable).
-
Click the OK button.
After completing these steps, you should possess bootable media suitable for unsupported hardware.
If you opted for automatic local account creation, the setup will establish this account without a password. Remember to create a password and PIN under the “Sign-in options” settings after completion of the installation.
3. Clean installation process of Windows 11 24H2 on unsupported PCs
Follow these instructions to perform a clean install of Windows 11 24H2 on unsupported hardware:
-
Boot the PC using the Windows 11 24H2 USB flash drive.
-
Press any key to proceed.
-
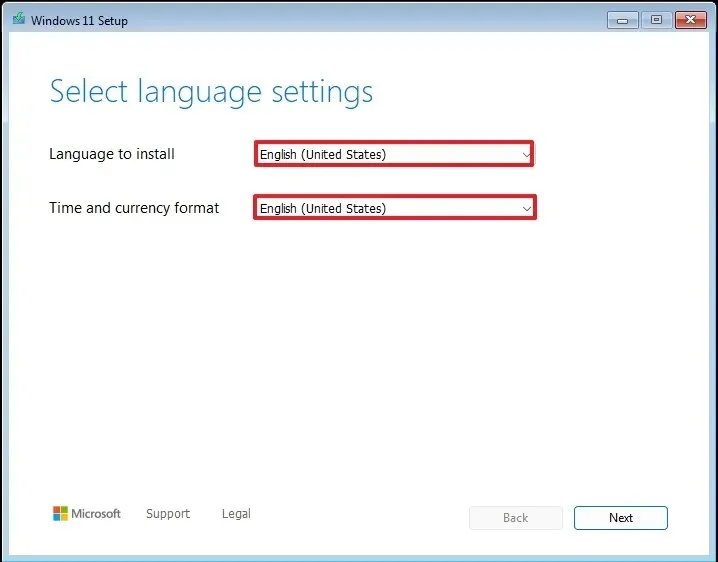
Select your installation language and format.
-
Hit Next.
-
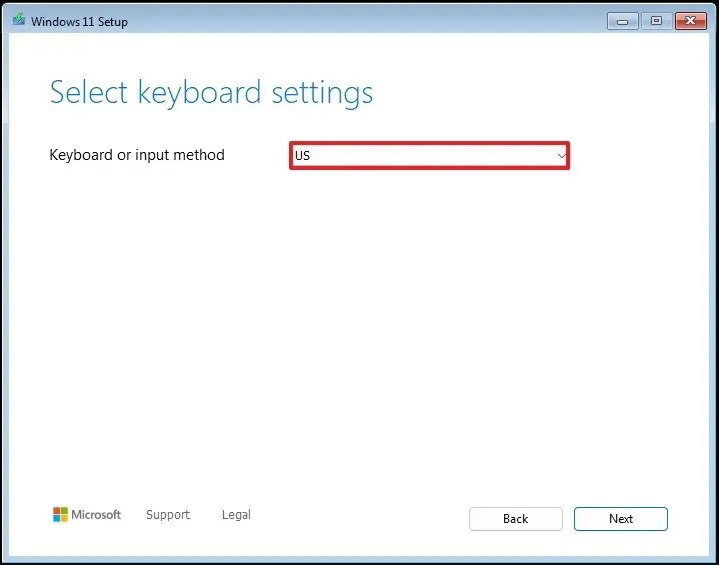
Choose your keyboard and input method.
-
Hit Next.
-
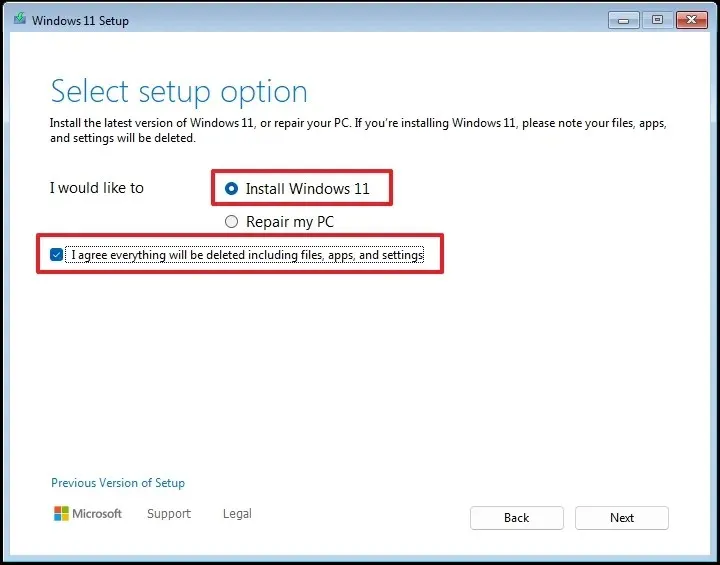
Select “Install Windows 11” .
-
Check the box for “I agree to everything” to confirm that this action will erase all data on the computer.
-
Proceed with “I don’t have a product key” .
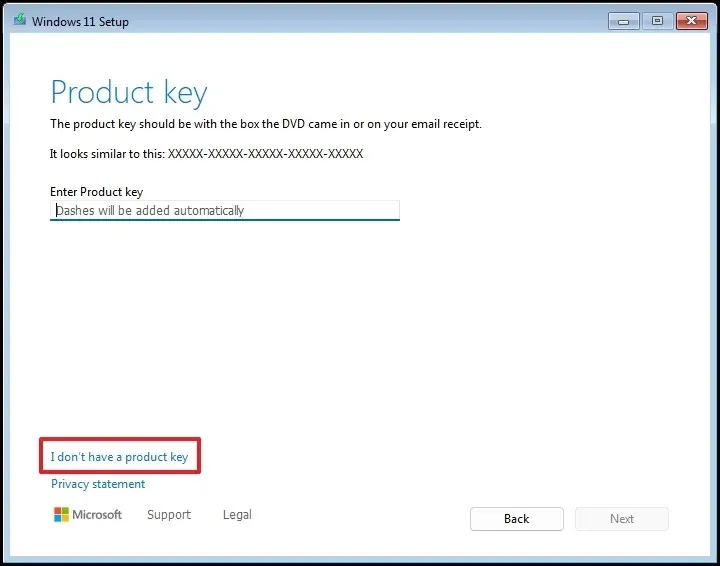 Quick note: The computer will automatically activate if it’s a reinstallation. For new PCs that didn’t initially include Windows, you’ll need to provide a product key.
 -
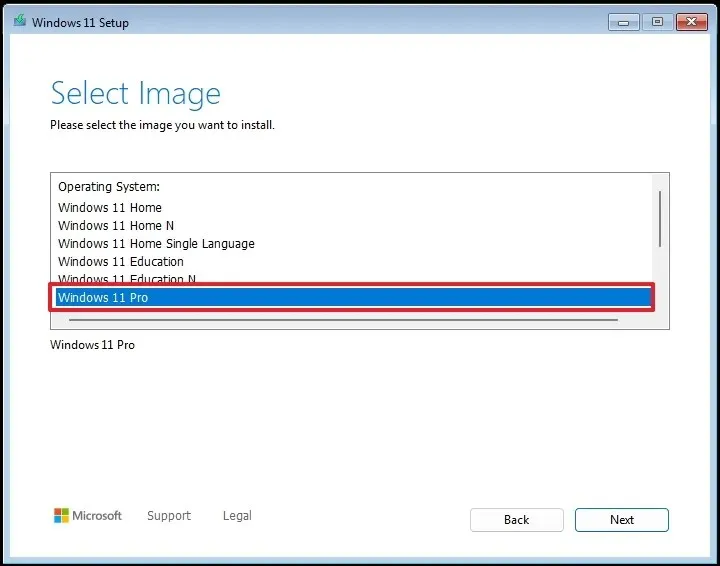
Select the Windows edition linked to your license key (if applicable).
-
Press Next.
-
Accept the terms by clicking Accept
-
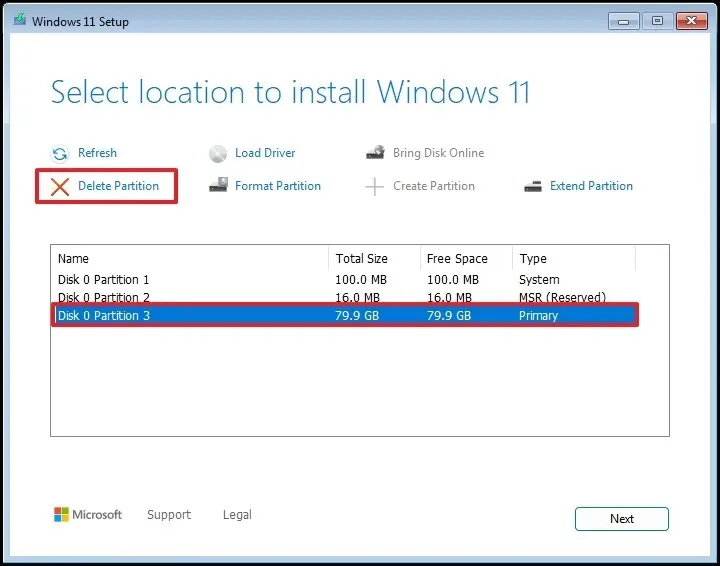
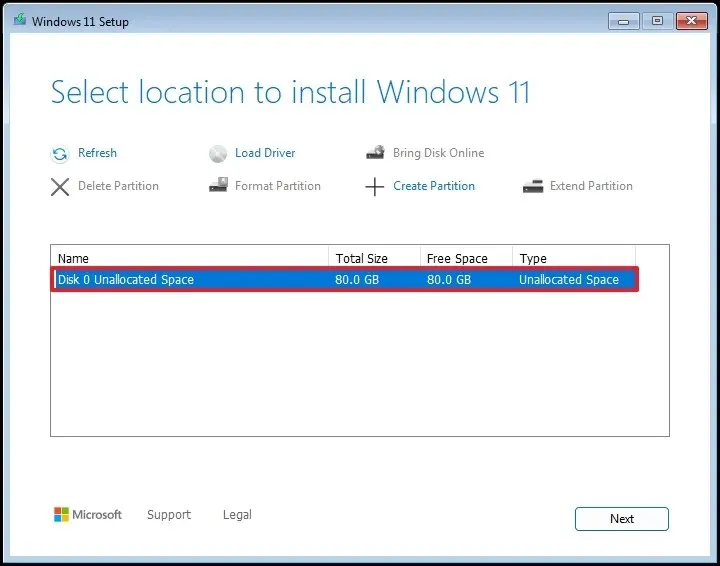
Choose each partition on the hard drive for the Windows 11 24H2 installation and click Delete. (Generally, “Drive 0” is where installation files reside.)
-
Select the unallocated space on the hard drive (Drive 0) for the operating system installation.
-
Hit Next.
-
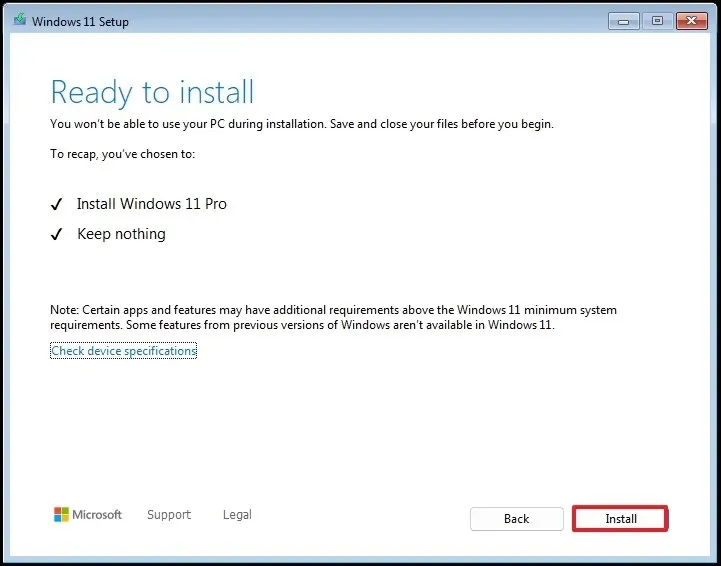
Click the Install button.
-
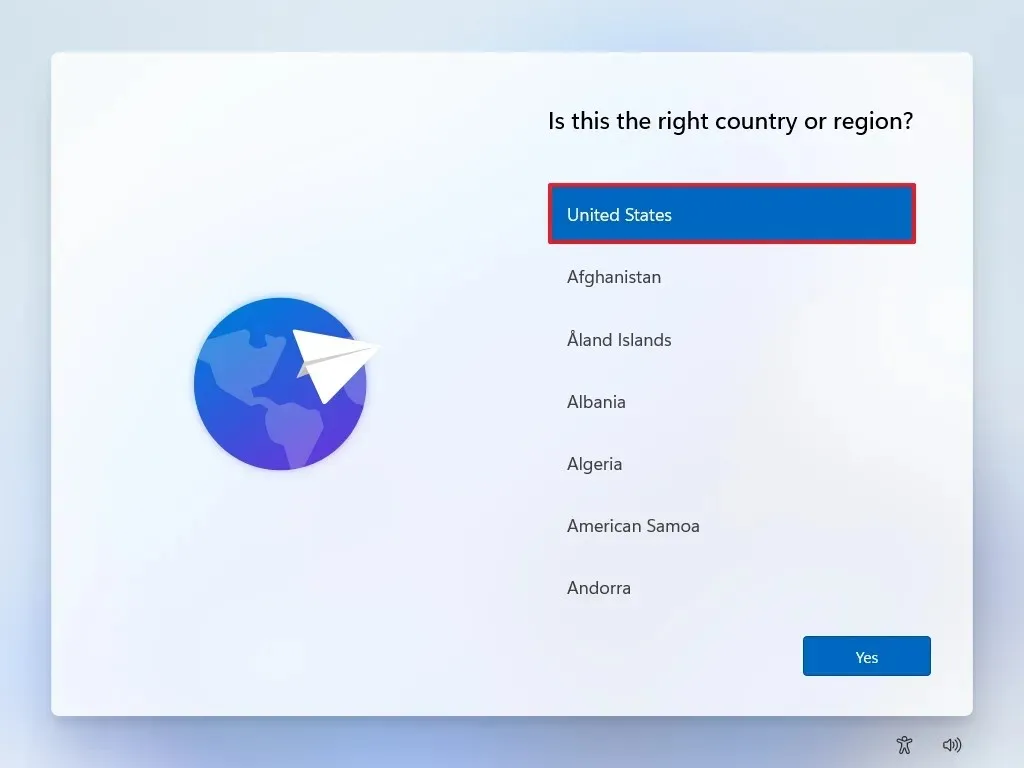
Set your region in the first page of the out-of-the-box experience (OOBE) following installation.
-
Click Yes.
-
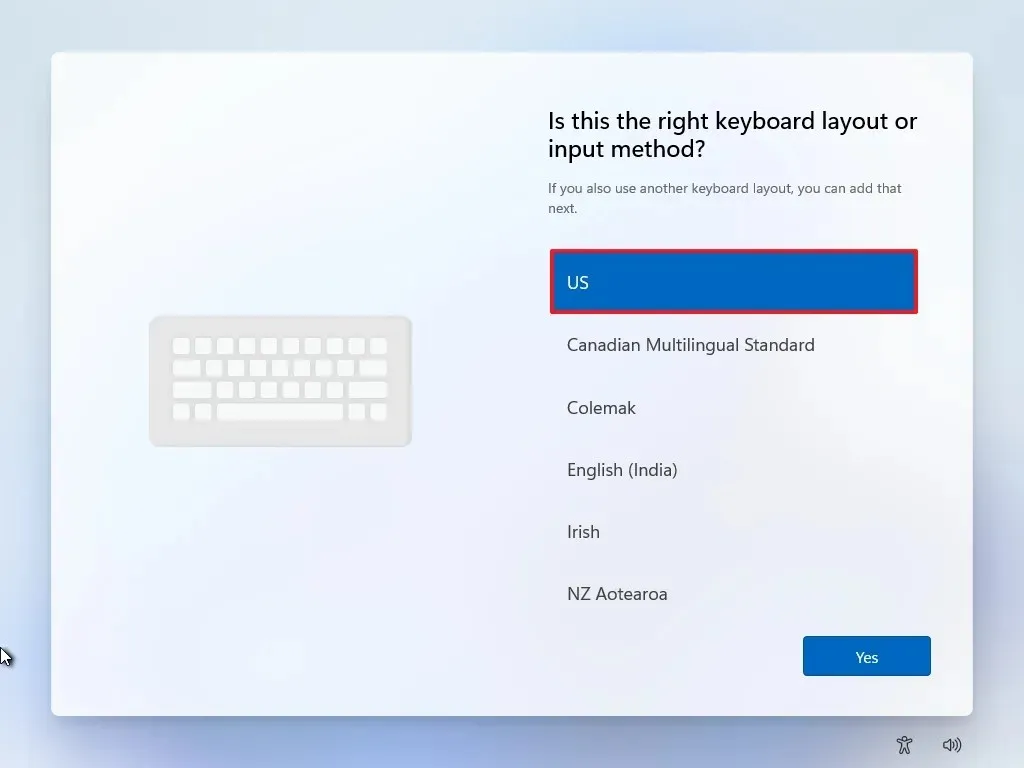
Select your keyboard layout.
-
Hit Yes.
-
Click the Skip button if a second layout is unnecessary.
-
Your computer will connect to the network via Ethernet. Wireless connections must be manually set up (security key may be needed).
-
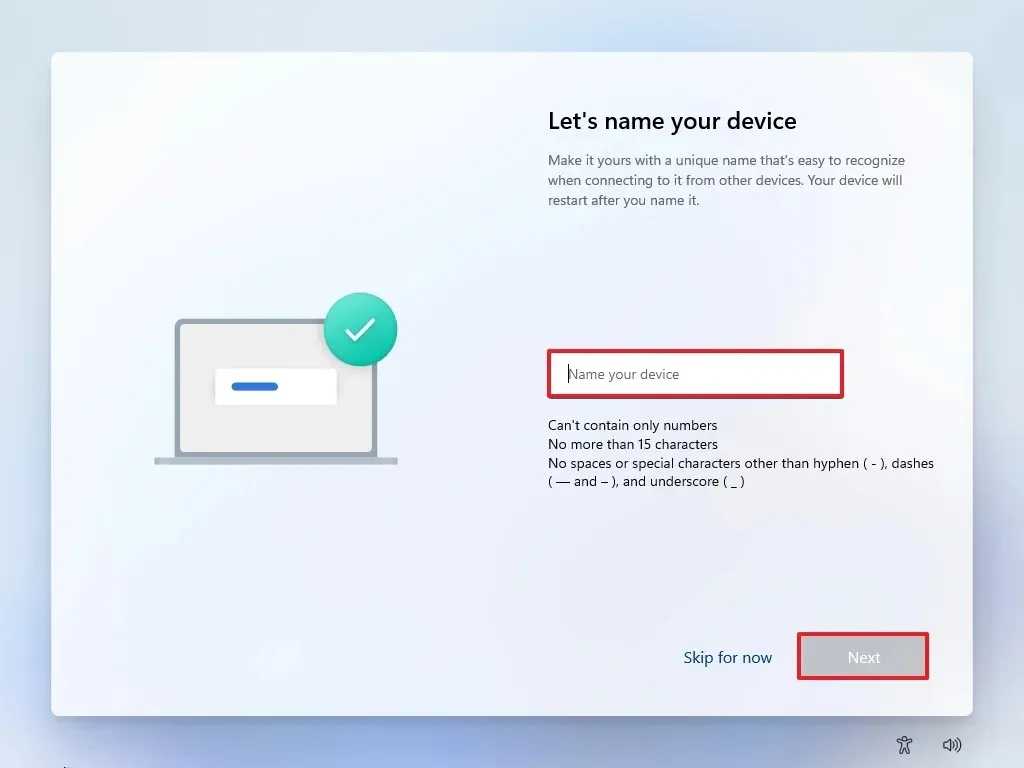
(Optional) Provide a name for your computer.
-
Hit Next. (The device will restart to apply the new settings.)
-
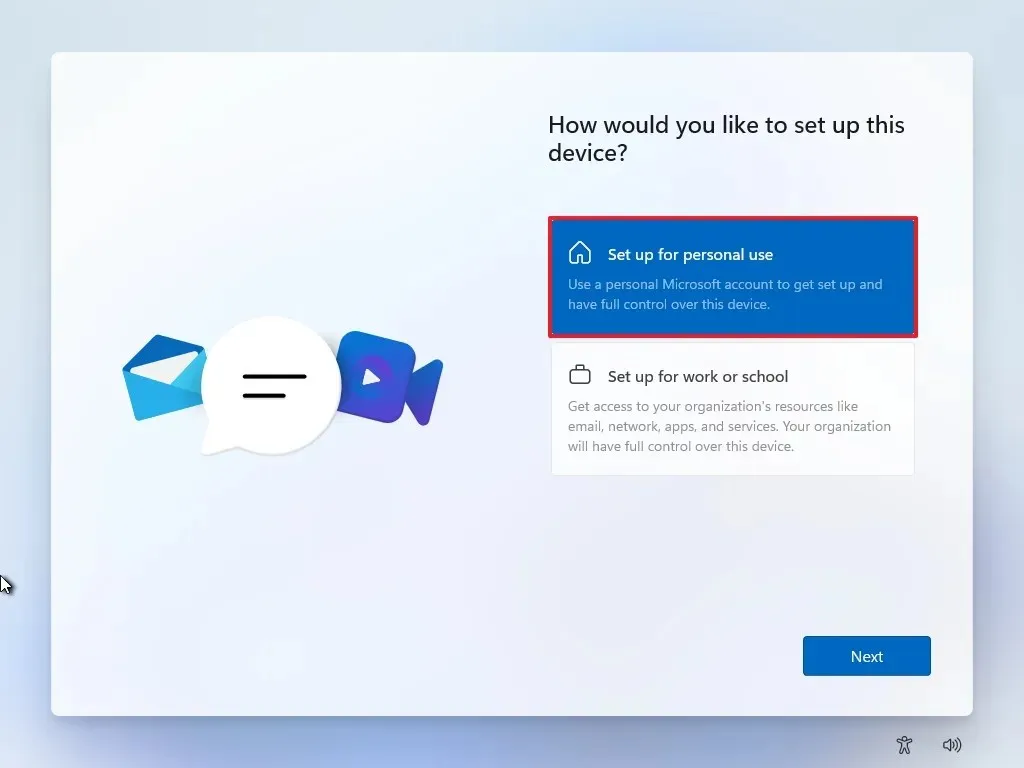
For Windows 11 Pro, choose the “Set up for personal use” selection. This option isn’t present for the “Home” edition.
-
Click Next .
-
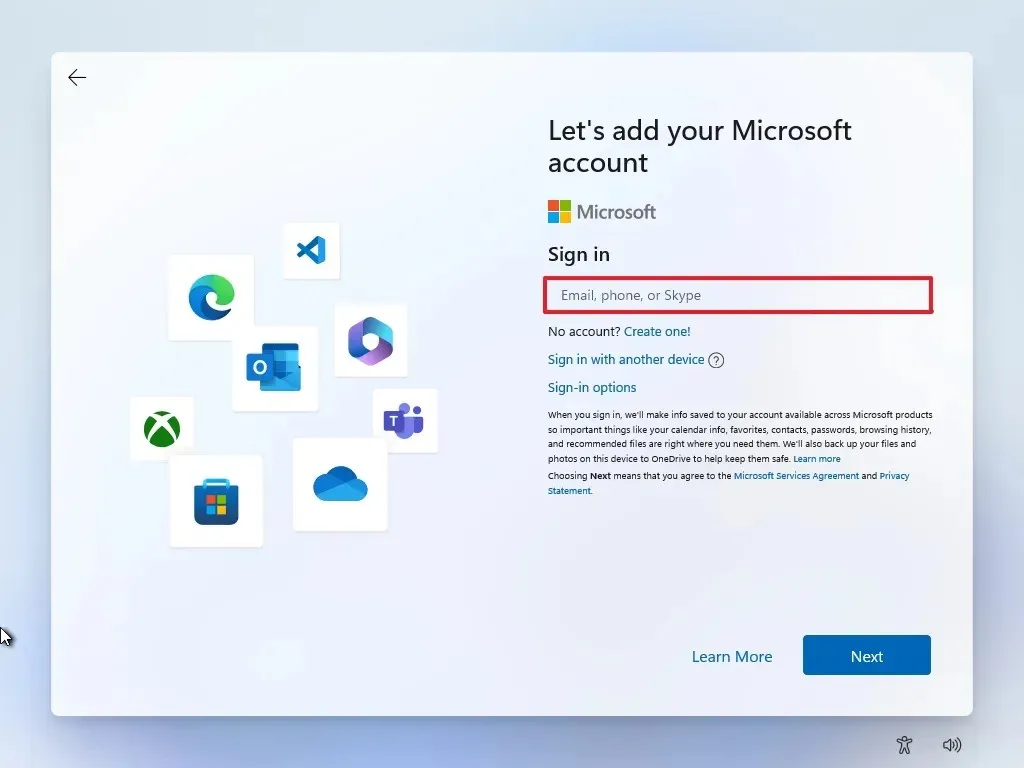
Proceed by clicking the Sign in button.
Quick note: Should you skip the internet and opt for a local account, this part of the setup will be omitted. -
Verify your email for the Microsoft account to continue with account creation.
-
Hit the Next button.
-
Confirm your Microsoft account password.
-
Press Next.
-
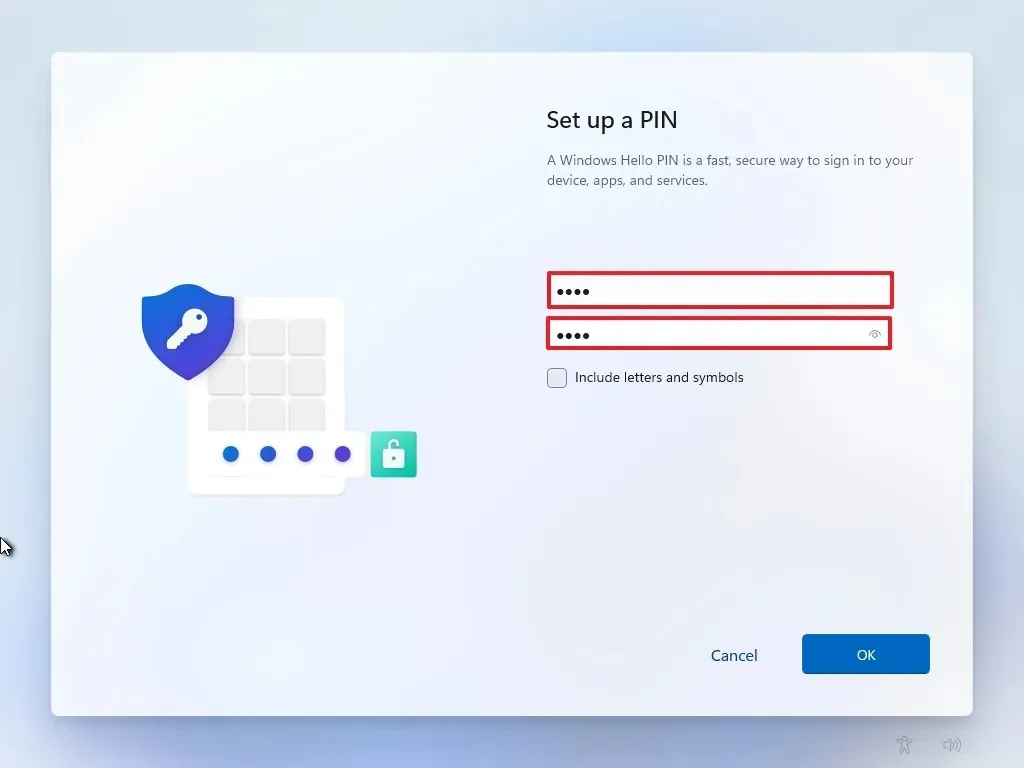
Click the Create PIN button.
-
Create a new four-digit PIN.
-
Hit the OK button.
-
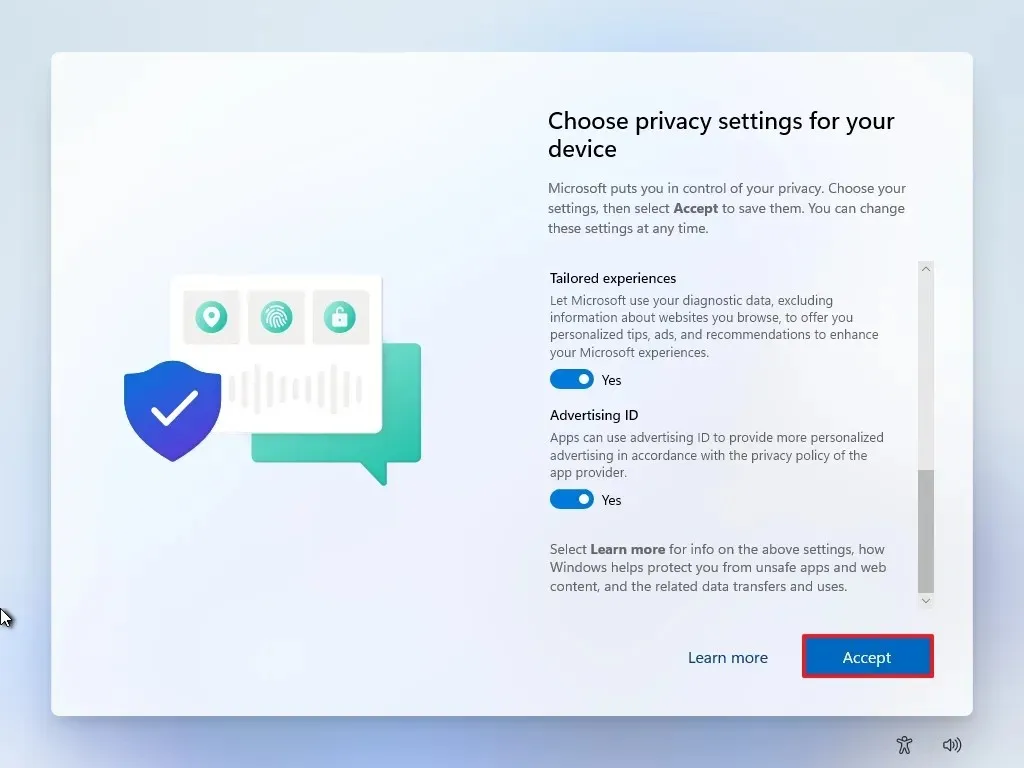
Adjust privacy settings according to your preferences by toggling the switches for each option.
-
Click the Next button.
-
Press Next once more.
-
Click the Accept button.
-
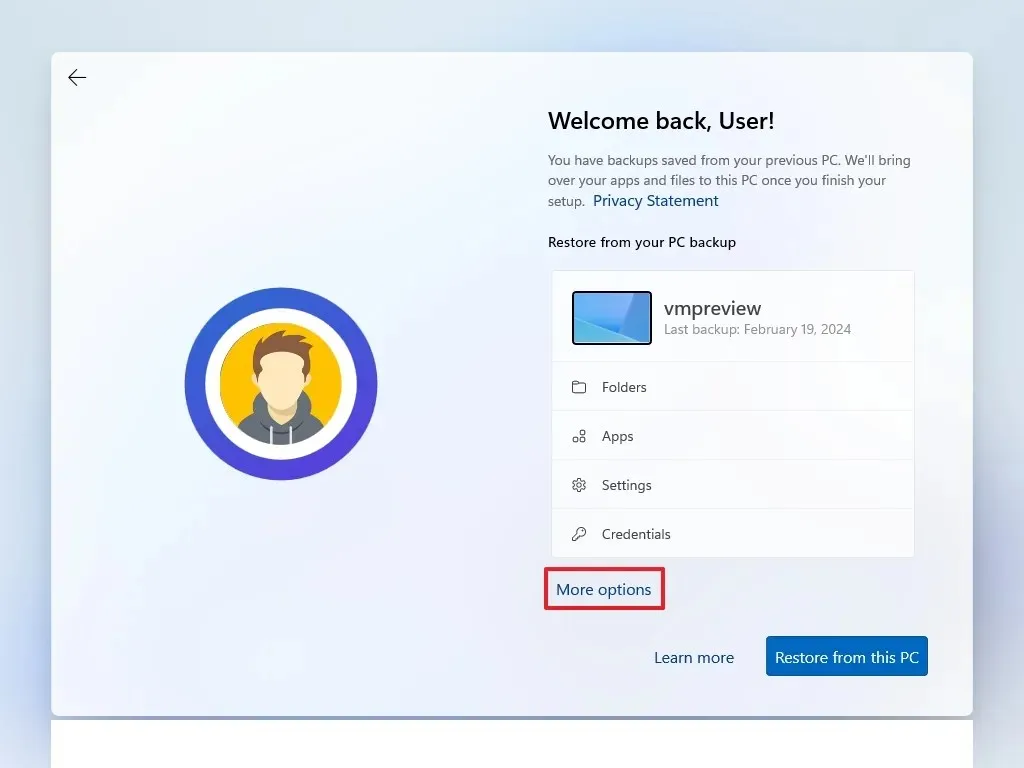
Select More options settings.
-
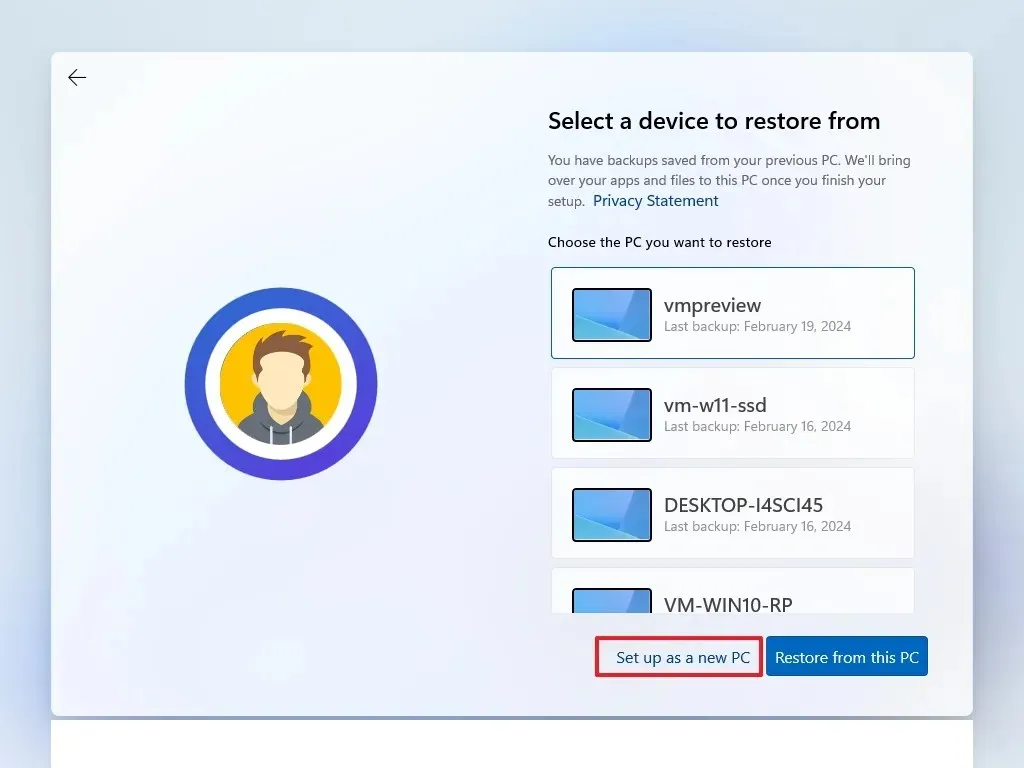
Click the “Set up as a new PC” option.
-
Choose the “Set up as a new PC” option again (if applicable).
-
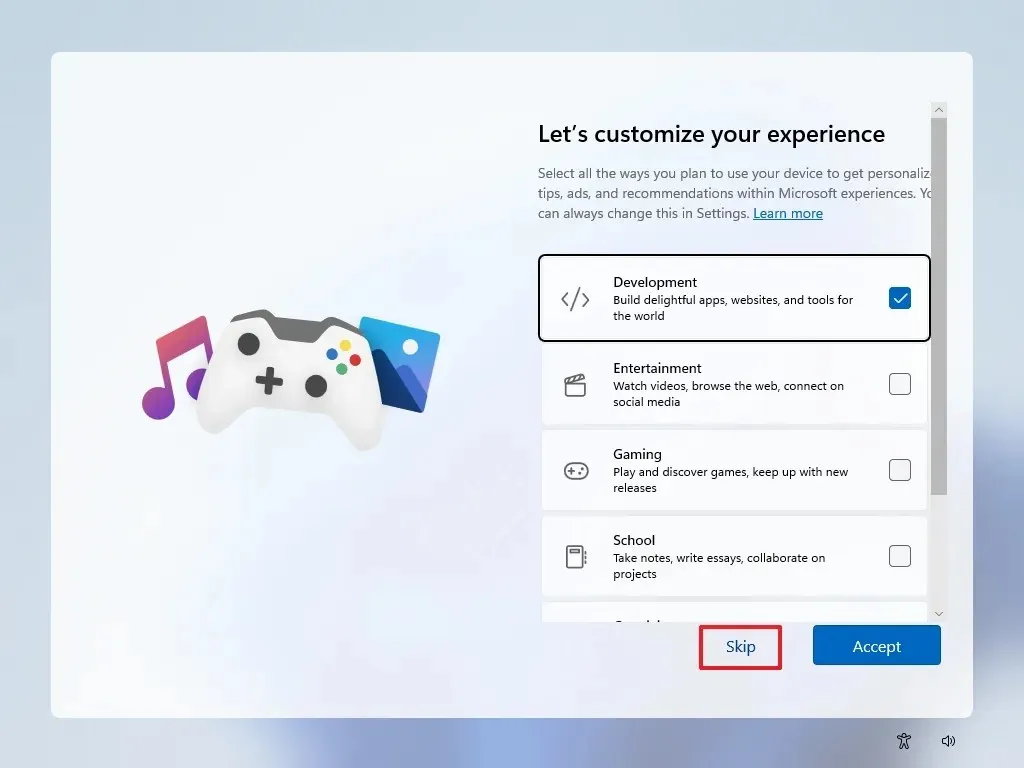
(Optional) At “Let’s customize your experience,” select options that correspond to how you intend to use the device for tailored suggestions during setup.
-
Click the Accept button to proceed or Skip to bypass this part.
-
(Optional) Use a code to connect your Android device or opt to Skip.
-
Press the Next button.
-
If you’re using a browser other than Microsoft Edge, select the “Not now” option (if applicable).
-
Choose the “Skip for now” option to bypass the PC Game Pass offer (if applicable).
-
Click “No, thanks” to skip Microsoft 365 setup (if applicable).
After performing these steps, you will have successfully installed the 24H2 version of Windows 11 on your unsupported hardware.
For more visual guidance, consider checking out my video tutorial on this process.
Using Ventoy for clean installation
Follow these steps to execute a clean installation of Windows 11 24H2 utilizing Ventoy.
1. Create Windows 11 24H2 USB with Ventoy
-
Download the ventoy-x.x.xx-windows.zip file from the “Assets” section to your PC.
 Quick note: Certain browsers might flag the file as unsafe; if so, you may need to authorize the download.
 -
Access File Explorer.
-
Navigate to the Zip’s location.
-
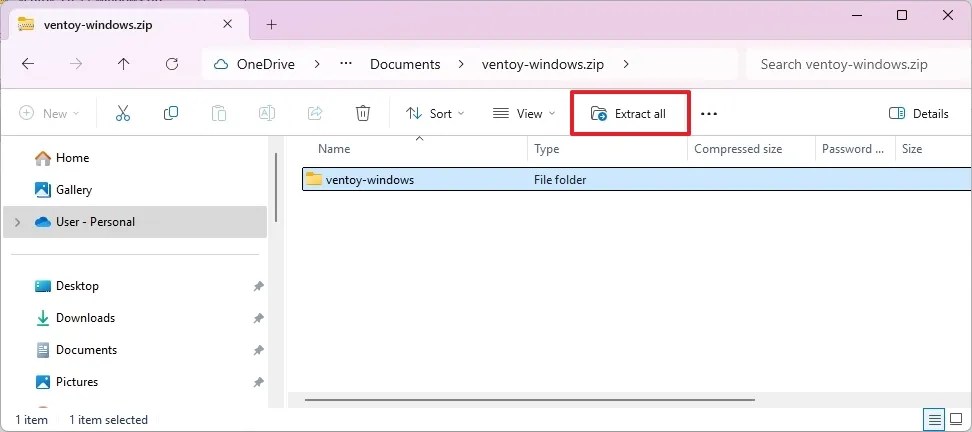
Double-click the ventoy-x.x.xx-windows.zip file.
-
Click the Extract all button from the command bar.
-
Hit the Browse button.
-
Choose a location for extraction.
-
Press the Select Folder button.
-
Click the Extract button.
-
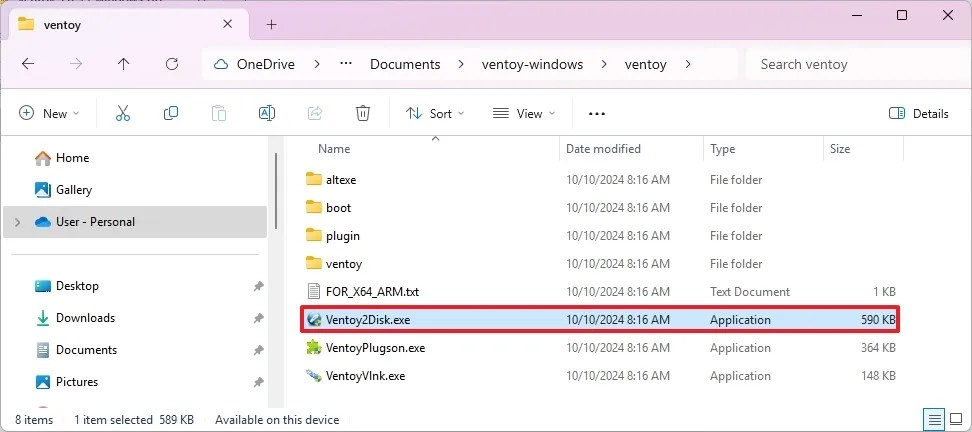
Open the ventoy-x.x.xx folder.
-
Double-click the Ventoy2Disk.exe file to initiate the installer.
-
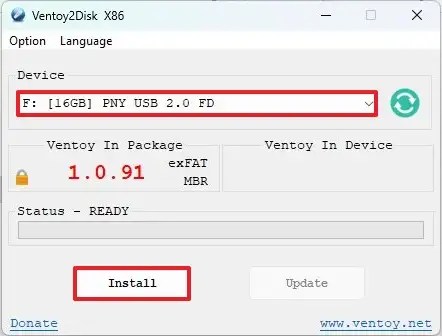
Select your USB flash drive from the “Device” setting.
-
Click the Install button.
-
Hit the OK button.
-
Open This PC in File Explorer.
-
Navigate to the Ventoy drive.
-
Copy the Windows 11 24H2 ISO files to make them bootable.
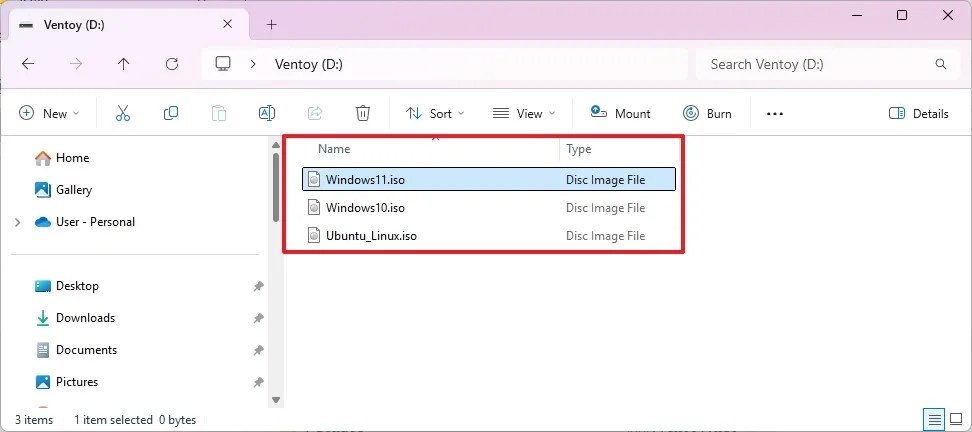
Your USB flash drive should now be ready to initiate the Windows 11 24H2 installation with the Ventoy tool.
2. Windows 11 24H2 unsupported PC clean installation process
To install Windows 11 24H2 using Ventoy on unsupported hardware, follow these sequences:
-
Boot the PC with the Ventoy USB flash drive.
-
Choose the Windows 11 24H2 ISO file from the Ventoy menu and press Enter.
-
Hit any key to advance.
-
Select your installation language and format.

-
Click Next.
-
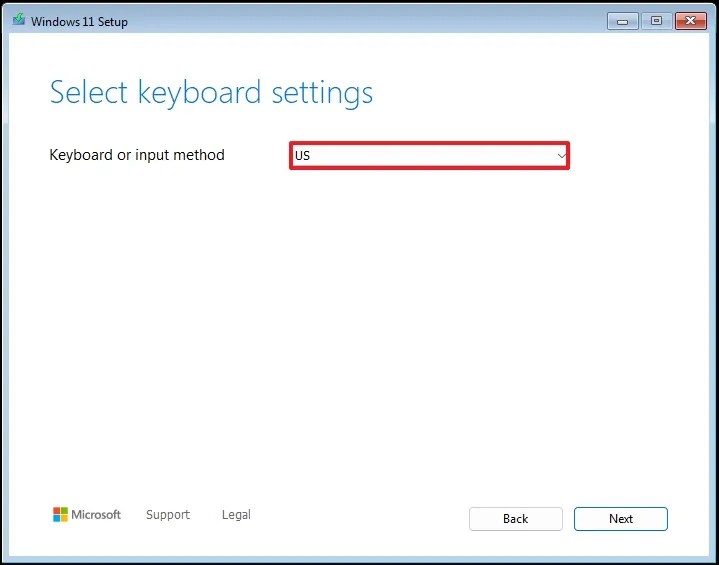
Choose your keyboard and input method.
-
Click Next.
-
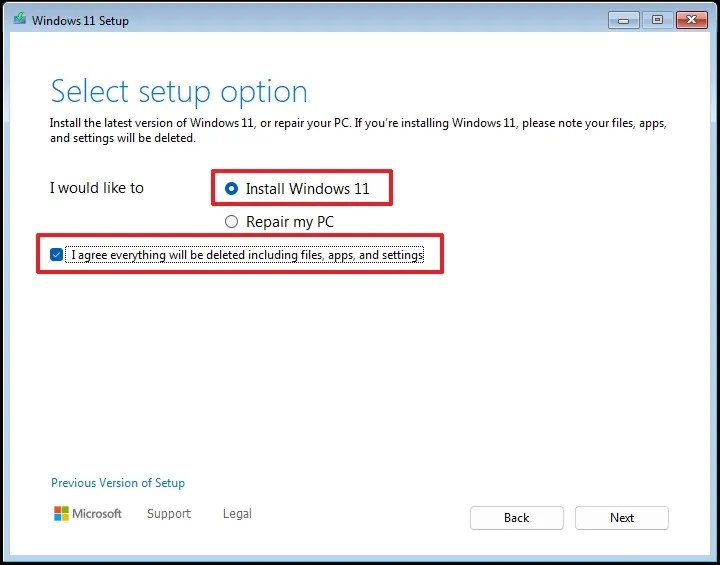
Select “Install Windows 11” .
-
Check “I agree to everything” to validate that all data will be deleted from the computer.
-
Select “I don’t have a product key” .
 Quick note: The machine will auto-activate if reinstalling. An entirely new device that never included Windows will require a product key.
 -
Choose the Windows edition linked to your license key (if required).

-
Press Next.
-
Hit Accept to agree to the terms.
-
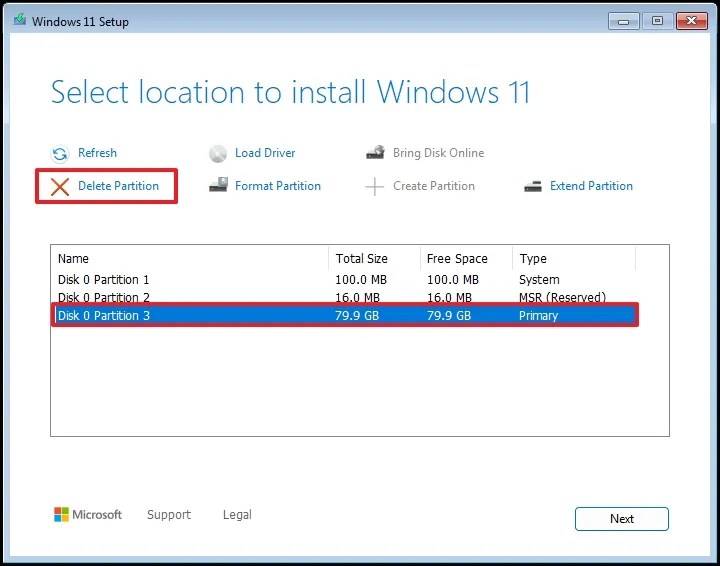
Select each partition on the hard drive designated for the Windows 11 installation and click Delete. (Typically, “Drive 0” contains the installation files.)
-
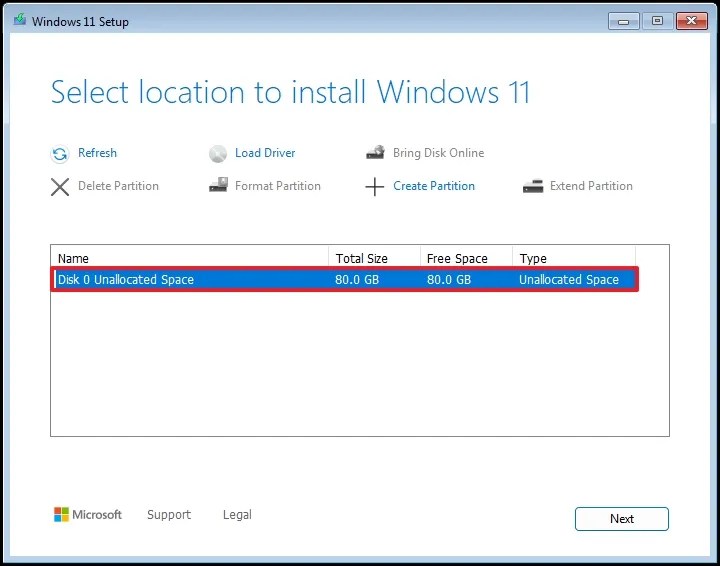
Select the unallocated space on the hard drive (Drive 0) where Windows 11 will be installed.
-
Press Next.
-
Click Install.

-
Set your region during the out-of-the-box experience (OOBE) post-installation.

-
Confirm by clicking Yes.
-
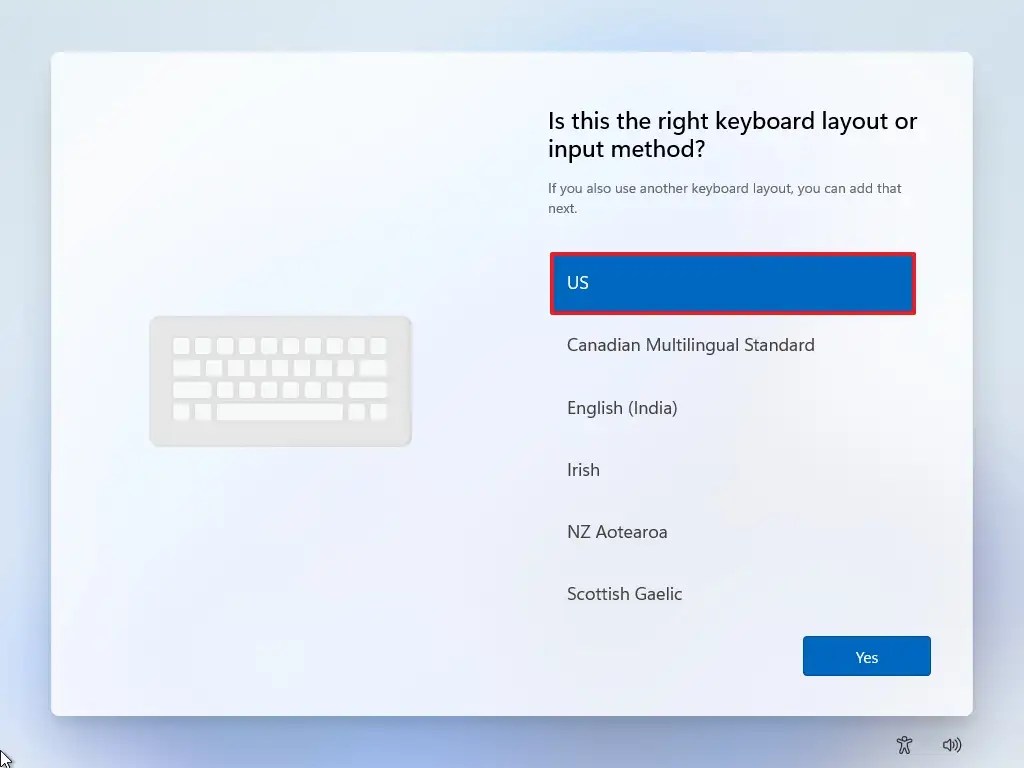
Select your keyboard layout.
-
Hit Yes.
-
If a second layout is unnecessary, click the Skip button.
-
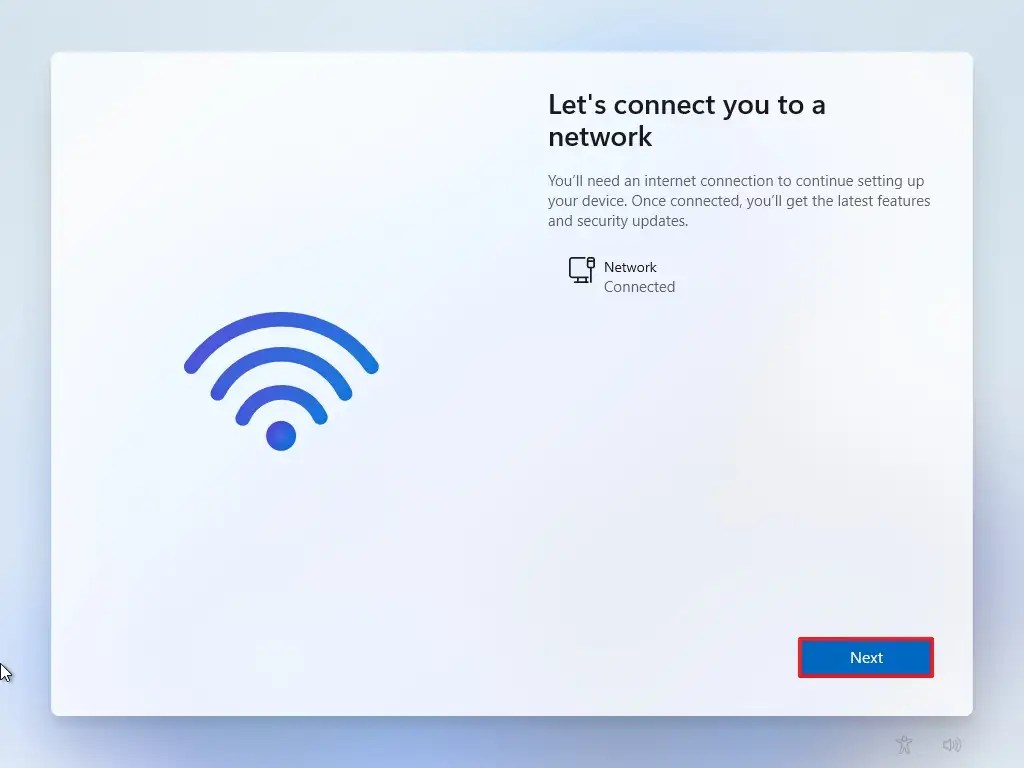
Your computer will automatically connect via Ethernet. For wireless connections, setup will require manual intervention (security key needed) before clicking Next.
-
(Optional) Set a name for your computer.
 Quick note: This is an optional step, but setting a name is advisable to easily identify the device on the network, in your Microsoft account, or when restoring from backup. The setup will restart to apply the name but will continue exactly from where you left off.
 -
Hit Next. (The device will reboot automatically.)
-
Select the “Set up for personal use” option if you are using Windows 11 Pro. This option doesn’t exist for the “Home” edition.
-
Press Next .
-
Click the Sign in button.

-
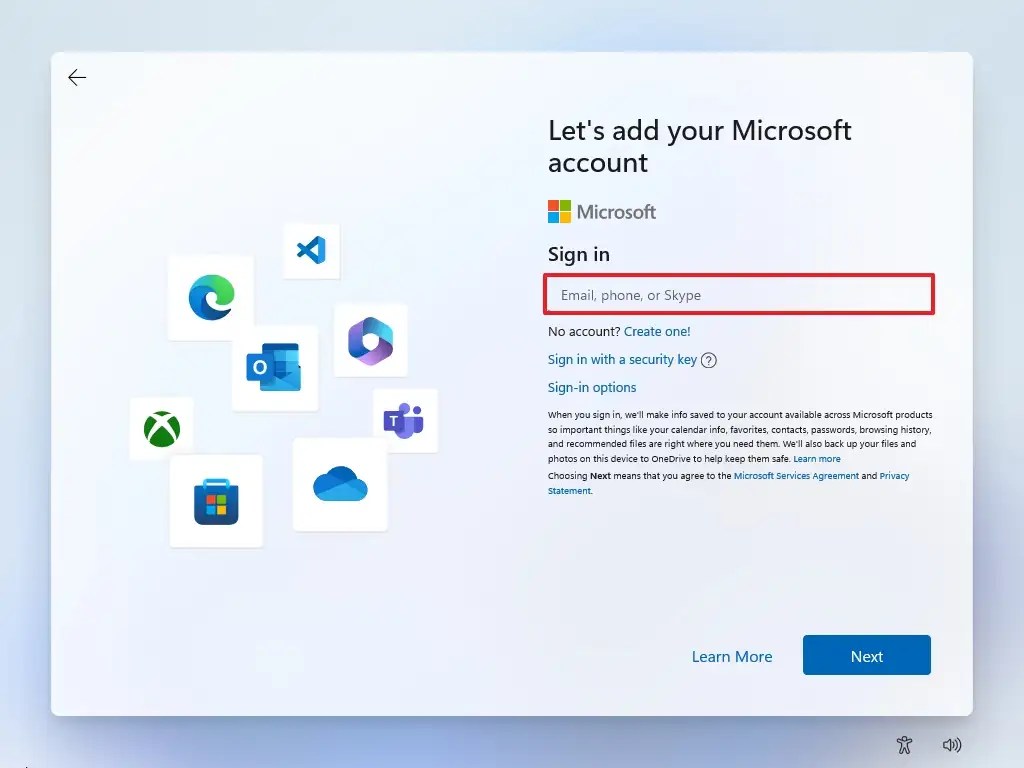
Confirm your email or phone number for the Microsoft account that you intend to utilize.
-
Click Next .
-
Enter your Microsoft account password.
-
Hit Next.
-
Choose the More options.
-
Click “Set up a new device” to proceed or select the option to restore.

-
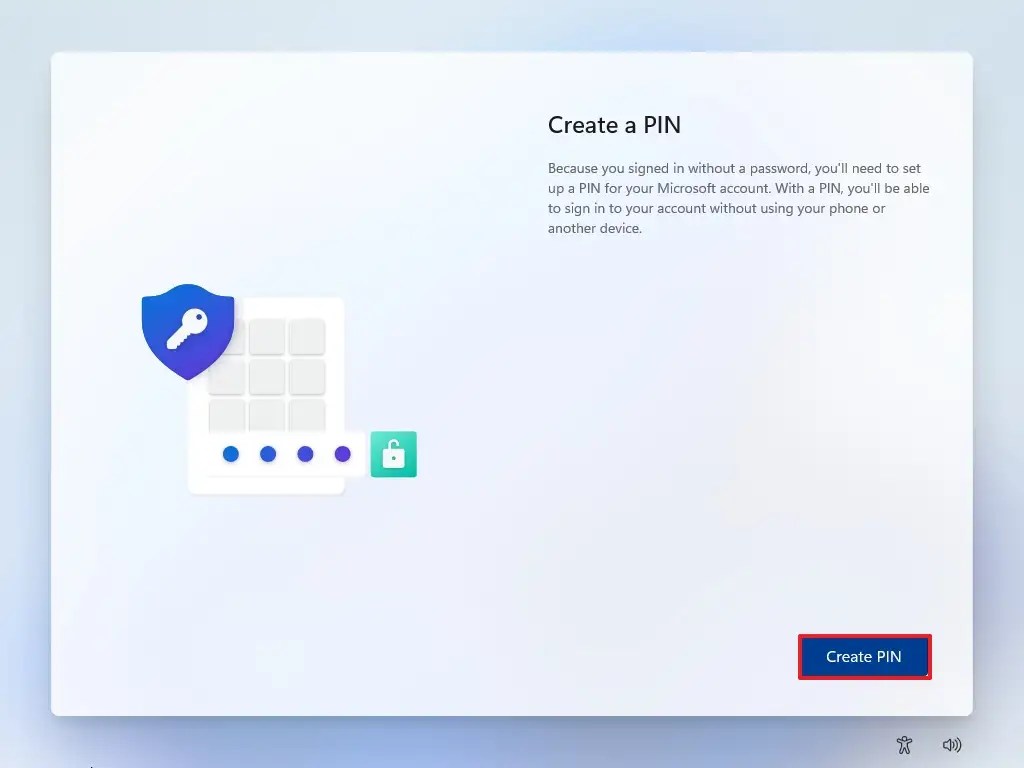
Click the Create PIN button.
-
Establish a new four-digit PIN.

-
Click the OK button.
-
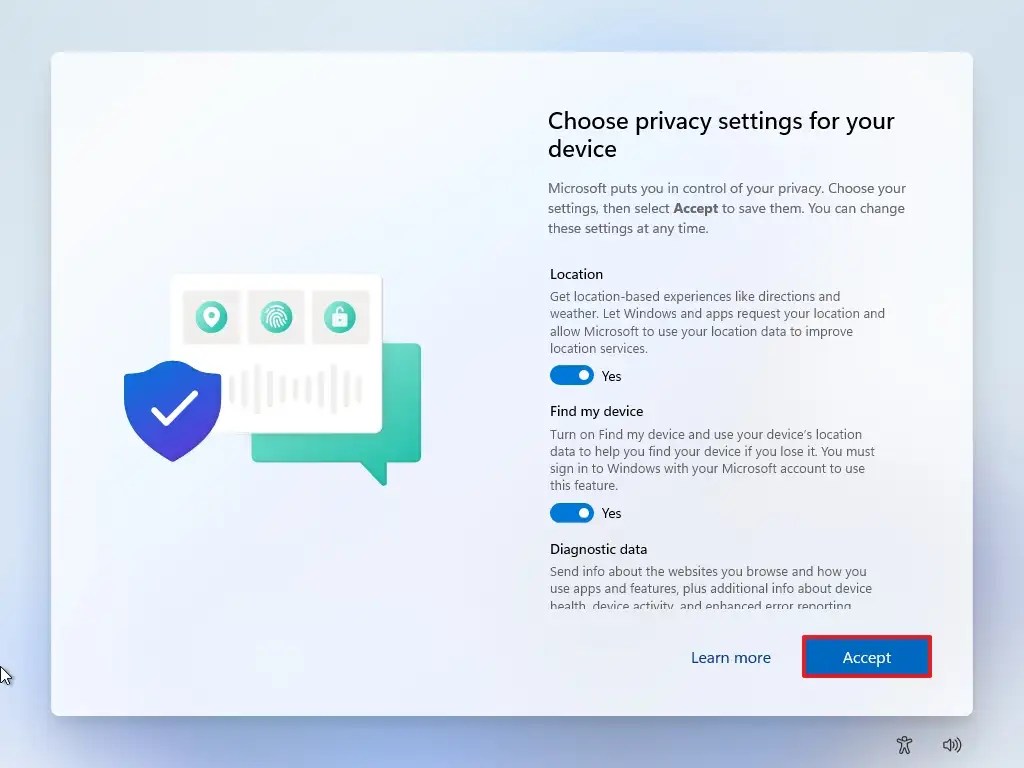
Adjust privacy settings according to your preferences by toggling switches for each setting.
-
Hit Accept.
-
(Optional) On the “Let’s customize your experience” page, identify whether you want suggestions during the setup process.

-
To continue, validate by clicking Accept. Alternatively, you may bypass this step by clicking Skip.
-
Choose the Skip button for linking your Android device.
-
Opt for “Continue without” to skip the Microsoft 365 setup.
-
Declare your choice to decline the OneDrive offer.
-
Use the Skip for now option for the Game Pass promotion.
Once you have finished these steps, Windows 11 will be installed on your incompatible hardware.
If you choose to upgrade, simply connect the USB containing the bootable media to the unsupported device, run “Setup.exe,” and follow the on-screen prompts as you would for a typical upgrade.
Update October 17, 2024: This guide has been revised to ensure comprehensive accuracy and reflect updates to the procedure.


Leave a Reply