How to create a 3D pop-out effect in Photoshop
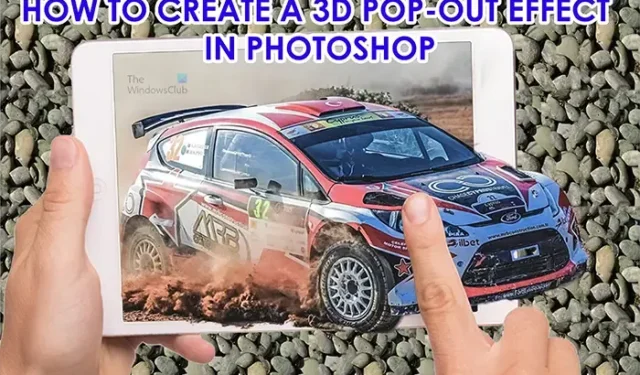
Photoshop can be used to create some awesome art and the article today will show how you to make a flat image look 3D. Learning how to create a 3D pop-out effect in Photoshop is a great way to create an advertisement for electronic devices, etc.
The 3D pop-out effect is where you make the image look like it is popping out of another image. For example, you may be advertising an HD flat-screen TV. You can say that the TV shows images so clearly it is like they are popping out. You could then have a car or other items or scenery popping out of the TV.
How to make a 3D pop-out effect in Photoshop
You can make one image pop out of another, or you can create a frame for the image to pop out of. Both use the same basic steps. Follow this article to learn how to create a 3D pop-out effect in Photoshop.
- Place images in Photoshop
- Resize the subject image into the container image
- Create a selection of the subject
- Toggle Quick mask to check that all the image is selected
- Copy selection onto a new layer
- Create a copy of the screen
- Create a selection of the copy of the tablet screen
- Use the selection to make a layer mask
- Copy the Layer mask to the car layer
- Use the Pencil tool to reveal hidden parts of the image
- Add a shadow under the subject
- Add a gradient to the shadow
1] Place images in Photoshop
The first step to making this 3D pop-out effect in Photoshop is to place the image or images in Photoshop. This article will use two images for the effect, however, depending on the effect that you want to create, one image can be used.
To place the images into Photoshop, find the image that you want to be the base/secondary image. you would then right-click on the image and from the menu choose Open with then Adobe Photoshop (version). The image will be placed in Photoshop as a background. It is now time to place the image that will be popping out in Photoshop. Find the image and right-click on it and choose Open with then Adobe Photoshop (Version). This image will open in Photoshop as a layer above the first image. you want the pop-out image above the other image which will act as the container/background. If they are not in that order you can always click in the layers panel and drag them to the correct order.
2] Resize the subject image into the container image
Now that the images are in Photoshop, it is time to resize and position them. Depending on the size of the container image, you may or may not have to resize it. The pop-out image should be positioned on the container image. To make it easier to do, turn down the opacity of the pop-out image by selecting its layer and then adjusting the opacity on the layers panel. Lowering the opacity will allow you to see when the images are lined up properly. With the opacity lowered, position the subject image (the image that will pop out) so that its background fills the container image. Position it so that a part of it is hanging out of the container image.

If you need to resize the images, click on the image to be resized and press Ctrl + T then hold the handles and resize the image. For earlier versions of Photoshop, you may need to hold Shift + Alt while you resize if you need to make the image resize from all angles at once. When the alignment is completed, you then return the opacity of the subject image to 100 %.
3] Create a selection of the subject
Note that the subject is the image that will be popping out. In this step, you will make a selection of the part of the subject image that you want to pop out of the other image. this will help in cases where you do not want all of the subject image to show. For example, the subject image may have a background. This step will help you to isolate the subject from the image.
Use the Quick selection tool

To select the subject, the Quick selection tool will be used. The Quick selection tool is located on the left tools panel. It has one other tool in the same group, the Magic want tool. Both the Quick selection tool and the Magic wand tool are used to select parts or all things in Photoshop.

With the Quick select tool active, click and drag along the parts of the image that you want to select.
Correcting Quick selections
The Quick select tool may go out and capture other parts that you do not want, or it may miss out parts that you want. To correct the selection, use Alt. Holding Alt while you click or drag will move in the part of the selection that you are dragging. You will see the Quick selection cursor have a Minus – sign instead of the Plus +.
4] Toggle Quick mask to check that all the image is selected
While selecting the image you may want to check that you have selected all of the parts that you want. To check the selection, you would toggle Quick mask on and off.

To toggle the Quick mask, press Q on the keyboard. You will see the selected part of the image brighter and the parts outside of the selected area a dull red color. You then press Q again to turn off the Quick mask and make corrections to the selection if you need to.
5] Copy selection onto a new layer
When you are satisfied that you have selected all the areas of the image that you want, it is time to copy the selection onto a new layer. To copy the selection onto a new layer, right-click on the selection, and from the menu choose Layer via copy or press Ctrl + J. You will then see the selected part of the image go onto a new layer above the image.
6] Create a copy of the screen
For this container image, you will need to make a copy of the screen so that you can bypass the finger, the hand, and the background of the image. The 3D pop-out will be coming from the screen of the tablet so a copy of the screen needs to be on a separate layer.
To create a copy of the screen, go to the left tool panel and click the Quick selection tool then click on the screen of the tablet. When all of the tablet’s screen is selected, right-click on the selected area and choose Layer via copy or press Ctrl + J to create a copy of the screen.
7] Create a selection of the copy of the tablet screen
In this step, you want an outline of the container image. This is important because you want to create a layer mask so that the areas that you want from the top image will be shown and everything else will be hidden. The container image will be the image that is below the pop-out image. In this case, the container image is the tablet with the hands, or more specifically the screen of the tablet. Note that your project will have different requirements to get it satisfactory.
To create the selection of the screen, go to the layers panel and select the full car image. You then hold Ctrl while clicking the thumbnail of the tablet screen layer.

You will see an outline appear that is the size of the tablet screen that was created. The outline will be dotted lines that will be in the shape of the tablet screen. You will then need to create the Layer mask.
8] Use the selection to make a Layer mask
Now that you have the selection, it is time to use it to create the Layer mask. To make the layer mask, go to the bottom of the layers panel and click on the Add Layer mask icon. The Add Layer mask icon is square with a hole in it. There will be a shape of the tablet screen beside the subject image in the layers panel, that is the Layer mask. The Layer mask is used to hide anything outside the mask.

This is the image with the layer mask created. You can see the 3D pop-out effect showing. You will notice that the finger in the image is slightly hidden, by a part of the subject. This may not be an issue with your image, however, if this happens with your image, keep reading and you will see it fixed.
9] Copy the Layer mask to the car layer
With the Layer mask created and at the cut-out of the screen, you will want that same Layer mask to be around the cut-out of the pop-out image. this will allow you to have sections of the original image behind the 3D pop-out. To copy the vector to that layer, hold Alt then click on the Layer mask and drag it up to the cut-out layer. You will see a copy of the Layer mask appear beside that layer’s icon.

This is a copy of what your layers panel should look like when you do that. The white rectangles beside the icon of the layers are the Layer masks. You will notice that my layers have descriptive names beside them. You should give your layers descriptive names. While this is optional, it will help you to identify your layers much easier.
You will notice that when you added the layer mask to the cut-out of the subject image, the Layer mask hid a part of the image. this will be addressed in the next step.
10] Use the Pencil tool to reveal hidden parts of the image
When the Layer mask was added to the cut-out image’s layer, it hid a part of the image that you wanted to show. The part of the image that was hidden is the part that should be popping out of the screen. This can be fixed by using the Pencil Tool to reveal the hidden part of the image.
In the left layers panel select the Pencil tool. Ensure that the foreground and background icons have white as the foreground and black as the background.
Choose a hard point for the pencil and make the opacity and the Hardness 100%. Click on the Layer mask icon of the copied Layer mask. That is the Layer mask that is beside the cut-out of the subject. When you click on the Layer mask you make it active. With this Layer mask active, use the Pencil tool to rub over the parts of the image that you want to be shown. In this case, you want all of the parts of the image that will be popping out of the tablet’s screen to show. Be sure that you leave the finger in place over the image.

This is what the image should look like.
11] Add a shadow under the subject
This step is optional because some of the images you use will not require a shadow. This step will however be done so that persons who may have an image that requires a shadow will know how to do it. Shadows add a realistic element to your artwork, especially in cases where light is obvious. Follow the steps below to create the shadow if you need to.
Make a selection of the cut-out image layer
This is the first step, you will need to create a selection around the cut-out of the subject image. to create the selection click on the layer to select it. You then hold Ctrl and then click on the thumbnail of that image layer. You will see a selection around the image.
Create a new layer below the subject.
To create the layer below the subject layer, hold Ctrl then press the Create a new layer icon at the bottom of the layers panel. You will see the new layer appear below the currently selected layer. If you had pressed the Create a new layer icon without holding Ctrl, the new layer would have been created above the currently selected layer.
Place selection onto new layer that was created
In this step you want to place the selection onto the new layer. However, you want the selection to be filled with black. To fill the selection with black, ensure that the foreground color is black and the background color is white for the foreground color icon on the left tools panel. You would then press Alt + Delete (note that you should select the new layer before pressing Alt + Delete). You should see the shadow appear on the new layer in the layers panel.
Remove the selection from around the image
To remove the selection from around the image, press Ctrl + D.
Adjust the shadow
The shadow will be behind the image and it will need to be adjusted. To adjust the shadow, ensure that the new layer is selected then press Ctrl + T to bring up the transform box around the shadow. With the transform box there. Hover the mouse at the middle handle at the top until you see a vertical double-headed arrow appear. you then click and hold the middle handle and drag it down below the image. Drag the shadow down to where you are comfortable. Press enter to accept the transformation and remove the transform box.
Depending on the direction that the light source is coming from, you will need to adjust the shadow accordingly. To distort the shadow hold Ctrl then grab any of the handles to drag. The shadow will be distorted in the direction that you drag.

This is the shadow adjusted. It may require different adjustments and angles based on your images.
Make shadow into a Smart object
This step requires that you make the shadow into a Smart object. Making the shadow a smart object will make it possible to edit it non-destructively. To make the shadow a smart object, right-click on its layer, and then from the menu choose Convert to smart object.
Blue the shadow
This step is where you will use the blur effect to make the shadow more realistic.

To do this go to the top menu bar and click Filter then Blur then Gaussian blur.

The Gaussian blur options window will appear, adjust the Radius to make the image blurred. The higher the value the more blurred the image will get and the lower the value the less blurred the image will get.

Choose a blur value that is satisfactory to you. When you are finished press Ok to accept.
If you need to edit the Gaussian blur, go to the layers panel and click Gaussian blur under the image’s layer.
Place a copy of the layer mask beside the shadow
This step is where you will place a copy of the Layer mask beside the shadow in the layers panel. You just need to hold Alt then click and drag the Layer mask icon up to the shadow layer.

You notice that parts of the shadow is now missing. To reveal the missing parts of the shadow, follow the steps in item 11.

This is where you use the pencil tool to reveal the missing parts that you want to show. Note that as you reveal the shadow, you will want to make sure that the finger is visible.

If you want the shadow to be on the finger, you can do so, however, you would have to make the shadow on the finger a bit lighter. This would allow the finger to be visible under the shadow. To do this, turn down the opacity of the pencil then paint over the finger where you want the shadow to be visible.
12] Add a gradient to the shadow
This step is where you add a gradient to the shadow. The gradient will make the shadow look even more realistic as you make the shadow get paler as it moves away from the image.
Click on the layer mask thumbnail beside the shadow layer then go to the left tools panel and select the Gradient tool or press G. with the Gradient tool selected, go to the Gradient picker on the top menu bar, and click the White to transparent thumbnail. Make sure that the Linear gradient option is selected.

Click the gradient bar to get to the Gradient editor. Double-click the lower left color stop to bring up the gradient editor’s color picker. In the color, picker, change the brightness value from 100 to 20. When you are finished, press Ok on both windows to close them.
You now hold Shift and drag the Gradient tool from right to left on the shadow. The direction will depend on where your image is located and where the light source is. Remember that the parts of the shadow closest to the image would be darker. In the case of this image, the gradient tool would be dragged right to left, so that the right (furthest part would be brighter while the left would be darker. Holding Shift as you drag ensures that the line is kept horizontal as you drag.

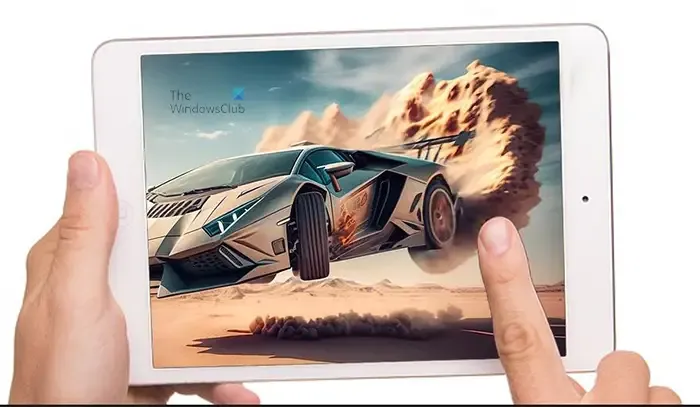
This is the final image with the shadow added. Note that the original image already had a shadow, however, this shadow was added to help others create a shadow if they do not have a shadow in their image. creating the 3d pop-out image effect is very easy to follow and do in Photoshop. You can experiment with it and create other cool artwork.
What is the Pop art filter in Photoshop?
If you want to create Pop art in Photoshop, the Threshold filter is the one to use. Place the image in Photoshop then go to the top menu bar and select Image then Adjustments then Threshold. The threshold filter options window will appear. Here you can adjust the image. Enable preview so that you can see live changes to the image. When you have adjusted the image to your preference, click Ok to keep the changes. You will see the image look like a black-and-white pop art image.
How can you do a 3D effect in Photoshop?
A 3D effect is making artwork so that looks like you are looking at a true 3D but without the 3D glasses. You can easily create this 3D effect without much work and within just a few minutes. Follow the steps below to create a 3D effect in Photoshop.
- Open the image in Photoshop
- Duplicate the layer
- Open the layer style dialogue box for the top image
- Turn off the Green and Blue channels
- With the top layer still selected hold Shift then tap the left arrow 5 to 10 times or click and drag it to the left
- Crop the images to eliminate any overlaps that may be showing
- Save.
All the best!

Leave a Reply