Guide to Easily Copying Tables with Snipping Tool

Microsoft has launched a notable update for the Snipping Tool aimed at Windows Insiders utilizing the Canary and Dev Channels. This update introduces the innovative “Copy as Table” functionality, which enables you to easily extract formatted table data from screenshots for seamless pasting into software like Microsoft Excel, Word, emails, and more. This addition reflects Microsoft’s commitment to enhancing Windows tools to be more intelligent and adaptable, particularly for users engaged in data-intensive tasks. This new feature could revolutionize your data handling process, enabling a more streamlined workflow and improved productivity.
Prerequisites
- Snipping Tool version 11.2409.22.0 or later
- Available from (as of October 14, 2024):
- Windows Insider Dev build 26120.2122
- Windows Insider Dev build 27723
- Available from (as of October 14, 2024):
This feature is expected to be accessible to the public/stable version of Windows 11 in the forthcoming months.
Video Tutorial: Utilizing the Snipping Tool’s “Copy as Table” Feature
Before diving into a detailed step-by-step guide with images below, take a moment to view how this feature operates via the video below.
Text Tutorial: Using the Snipping Tool’s “Copy as Table” Feature
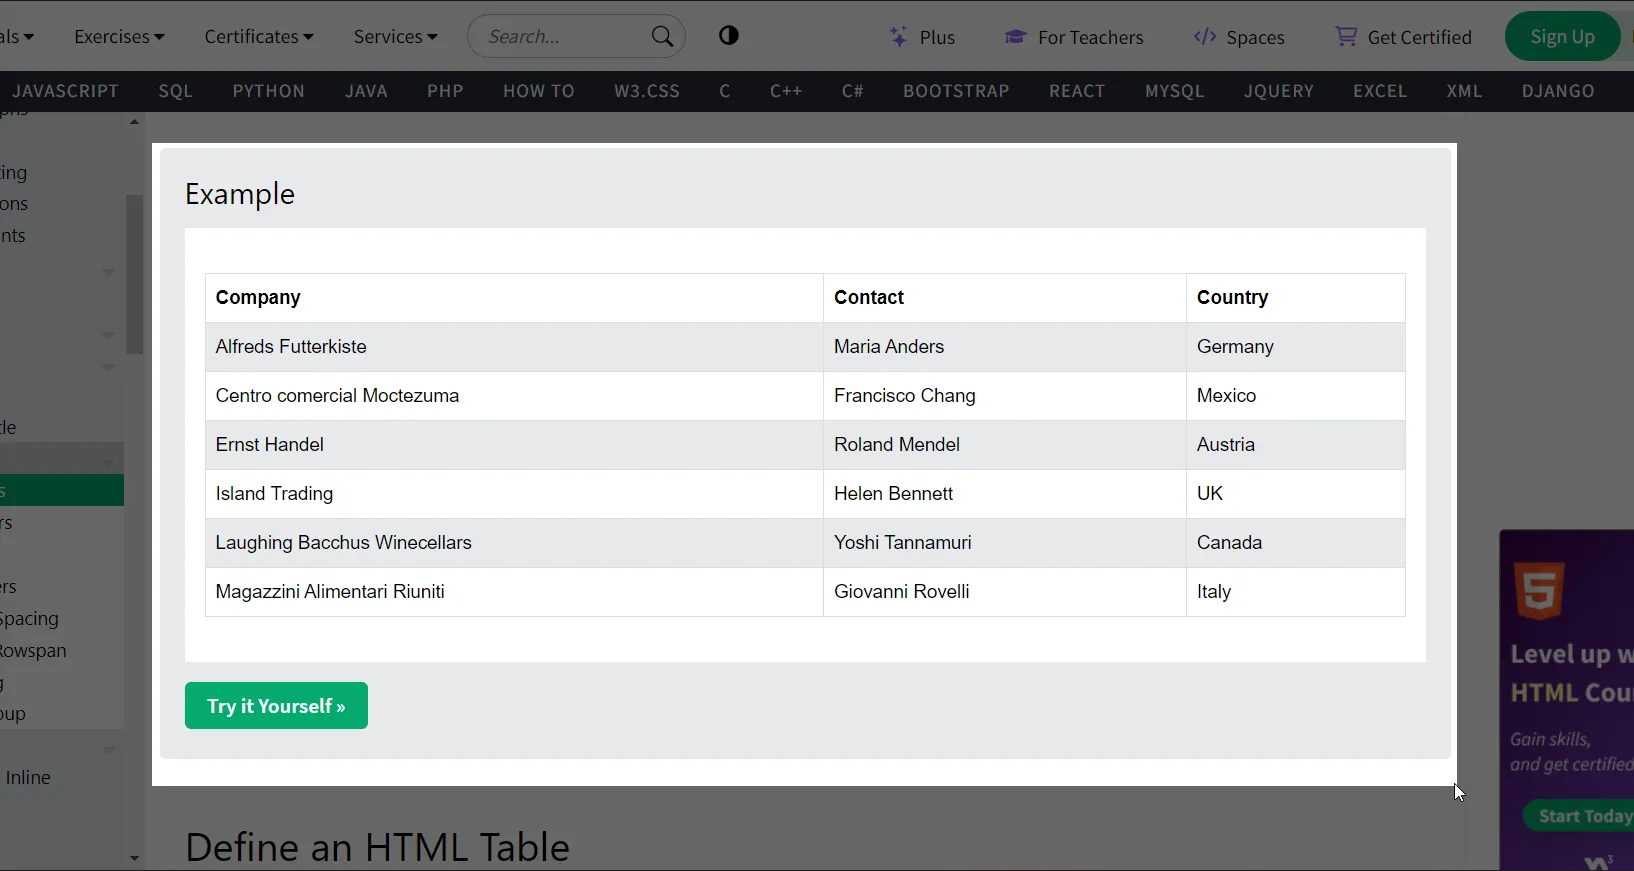
Step 1: Begin by launching the Snipping Tool through the Start menu search or by pressing the Windows + Shift + S keyboard shortcut. Choose the area of the screen that contains the table you wish to capture. The screenshot will open directly in Snipping Tool once it’s taken.
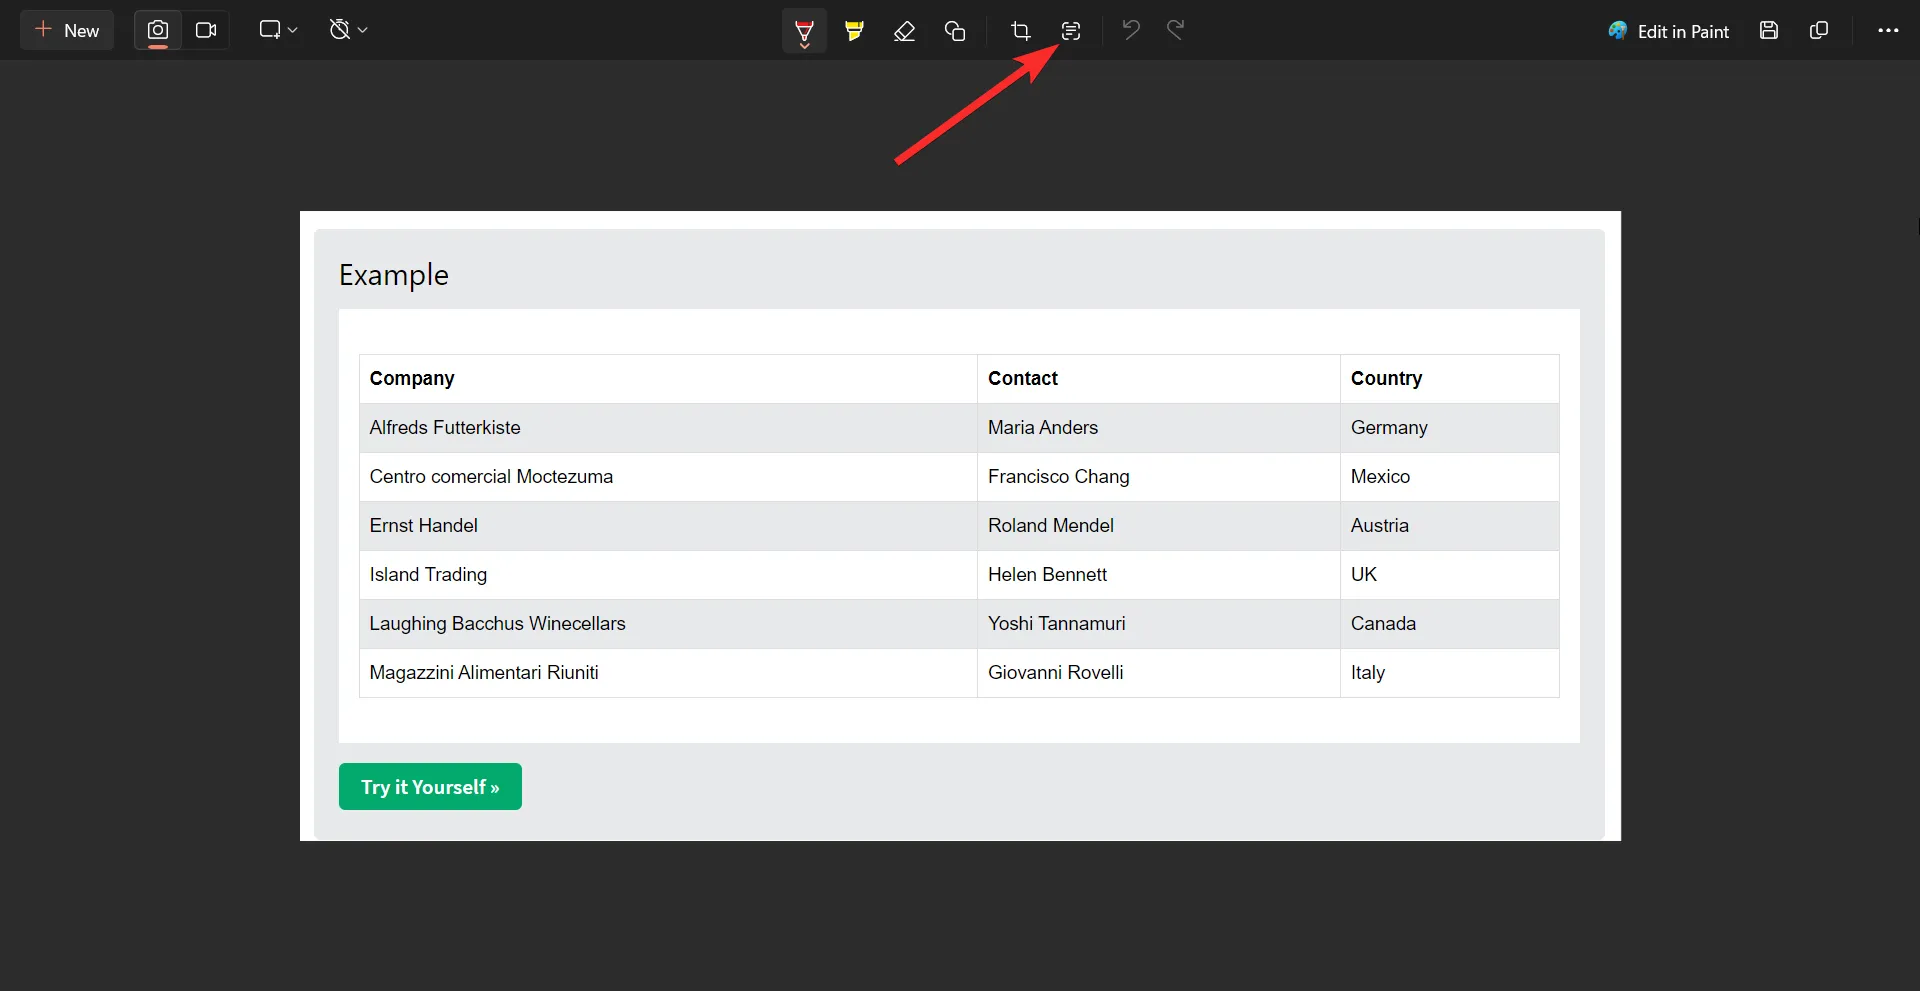
Step 2: When your screenshot is open, look for the “Text actions” button on the toolbar at the top of the Snipping Tool window. This feature enables the tool to identify and interact with any text present in the image, including tabular data.
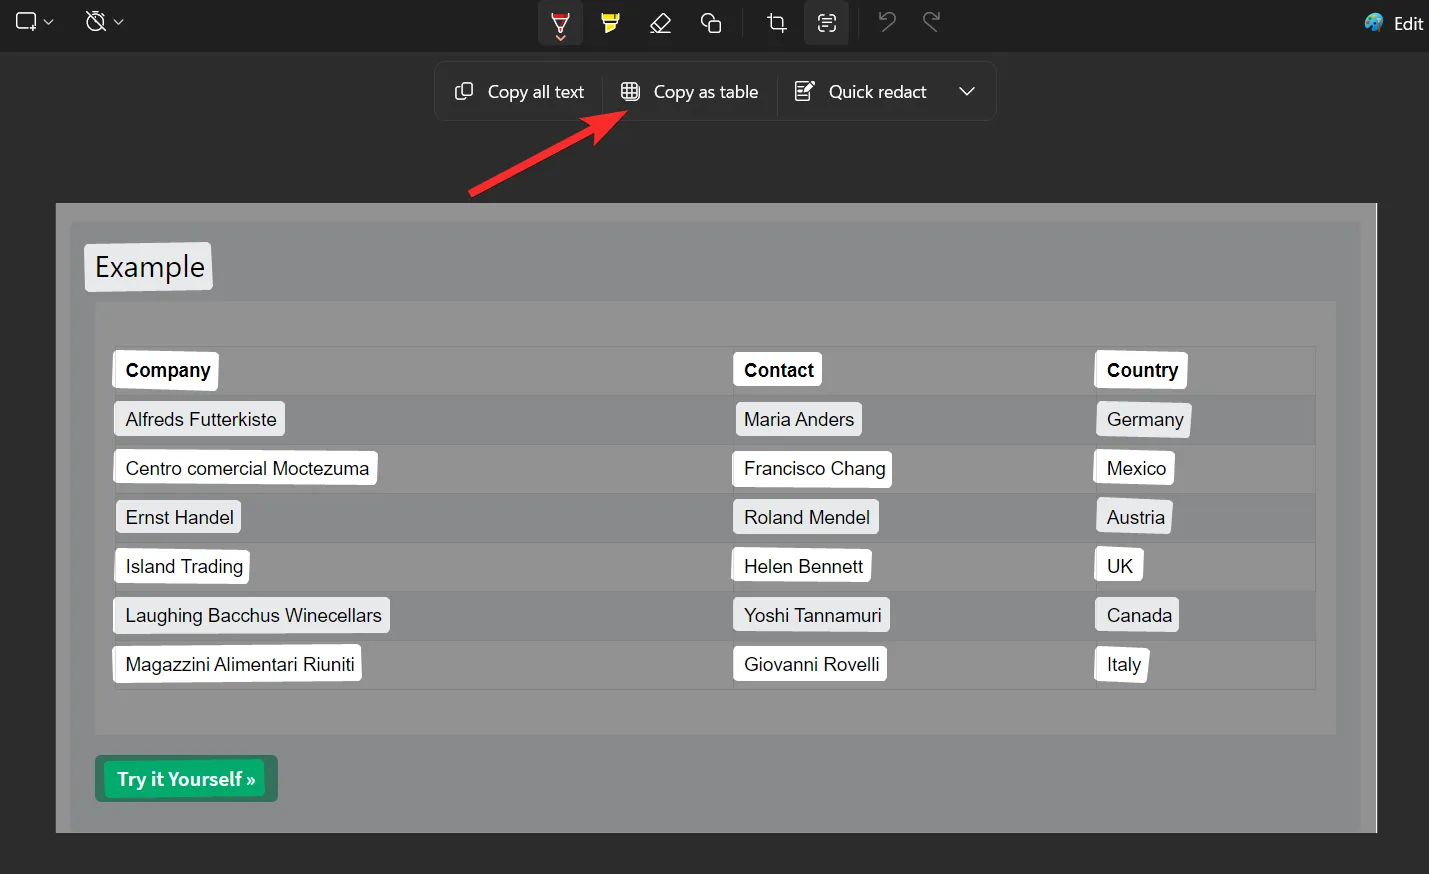
Step 3: From the Text actions dropdown menu, choose the new “Copy as Table” option. The tool will analyze your screenshot and automatically detect the table’s structure, organized into rows and columns.
Step 4: After copying the table data, navigate to the application where you would like to paste it. You can paste the data using right-click and selecting Paste or pressing Ctrl + V. The formatted table will be inserted into the target application while retaining its structure for easy editing. Options include:
Microsoft Excel for data manipulation and analysis.

Google Sheets for collaborative work in the cloud.

Understanding the “Copy as Table” Feature
The “Copy as Table” functionality in the Snipping Tool enables users to seamlessly extract structured table data from screenshots, making it convenient to copy and paste into various formats such as spreadsheets, documents, or emails. Distinct from conventional screenshot methods, this feature recognizes rows and columns within images, transforming static visuals into dynamic, editable data. Whether you’re working with online data, tables from PDFs, or any visual format containing rows and columns, this tool allows you to convert images into usable data effortlessly.
How the “Copy as Table” Function Operates
This enhanced Snipping Tool builds upon its existing Text actions by incorporating the “Copy as Table” feature, which specifically focuses on structured data in tabular formats. It performs exceptionally well when the image comprises a single table, promoting easy data copying and manipulation without manual input. This addition complements the tool’s capability to extract text from images while allowing users to redact sensitive details, making it a flexible option for handling various data types.
Benefits of the “Copy as Table” Feature
The “Copy as Table” functionality alleviates the burden of manual data entry by converting table images into editable formats in an instant. This tool simplifies the process of data extraction from websites, reports, or PDFs—simply capture a screenshot, and it takes care of the rest.
You gain the advantage of precise data extraction as it smartly identifies rows and columns, minimizing human errors which can occur when managing financial information or databases. This capability enhances your workflow, integrating smoothly with applications such as Excel and Google Sheets, ultimately allowing for faster and more efficient data analysis.
Furthermore, its usefulness is not limited to spreadsheets; whether you are crafting presentations or collaborating on team projects, extracting tables from visual content becomes a breeze, significantly enhancing your productivity.
Final Thoughts
The introduction of the “Copy as Table” feature in the Snipping Tool represents a remarkable advancement in how Windows users can manage data. By enabling the extraction of structured table data from screenshots, Microsoft has streamlined the transition of information between applications, particularly for individuals who frequently work with spreadsheets, documents, and emails.
Currently available to users participating in the Windows Insider program within the Canary and Dev Channels, this feature provides a glimpse into what future Windows updates may bring. With its potential to optimize workflows and save valuable time, this enhancement is poised to be popular among users engaged in data-centric tasks.


Leave a Reply