How to Install and Configure a Failover Cluster in Windows Server
A Windows Server Failover Cluster (WSFC) consists of multiple independent servers that work together to improve the availability and dependability of applications and services. Whether you’re an experienced IT administrator or just starting, it’s essential to understand how to set it up. In this article, we will guide you through the process of installing and configuring a Failover Cluster in Windows Server.
Steps to Install and Configure Failover Cluster in Windows Server
Setting up a Failover Cluster is critical in any production environment. When WSFC is properly configured, if one node fails, another node can seamlessly take over the workload. For instance, in a small setup with multiple nodes, if Node 1 becomes unavailable, the failover cluster will recognize this and change Node 2’s status from passive to active.
To get started with installing and configuring the Failover Cluster in Windows Server, follow the steps outlined below:
- Install the Failover Cluster Feature
- Set up File and Storage Services on the Storage Server
- Enable the iSCSI Initiator
- Configure the Storage Server
- Establish the Failover Cluster
Let’s take a closer look at each of these steps.
1] Installing the Failover Cluster Feature

To begin, the Failover Cluster feature needs to be installed on every node connected to your domain controller. Though automating this process can be beneficial in larger networks, manually installing it won’t take long for smaller setups. Here’s how you can do it:
- Launch the Server Manager.
- Select Add roles and features.
- Proceed by clicking Next, ensuring that you choose the Role-based or feature-based installation option, then click Next again.
- Continue to click Next until you arrive at the Features tab. Look for Failover Cluster and check the box next to it.
- A prompt will pop up asking you to add features; click Add, and follow the on-screen instructions to finish the installation.
Remember, this feature must be installed on all nodes intended for the failover cluster configuration.
2] Installing File and Storage Services on the Storage Server
The next step involves setting up the storage shared by the servers. This storage server doesn’t necessarily need to be part of the domain since it operates on an IP basis. To install File and Storage Services, follow these instructions:
- Open the Server Manager.
- Select Add roles and features.
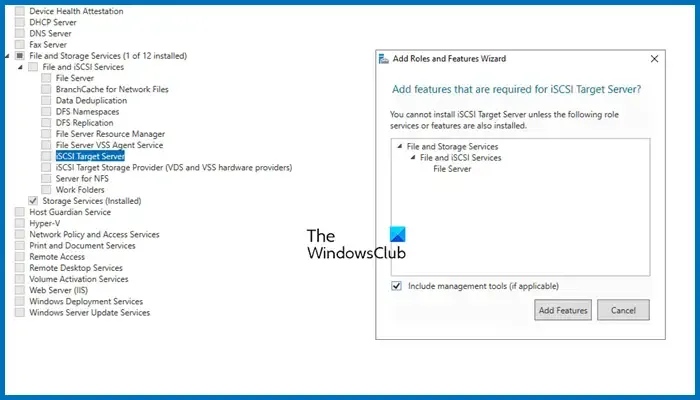
- Click through until you reach the Server Roles tab. Expand File and Storage Services, select iSCSI Target Server, and install it.
Please wait for the installation to complete. As there will only be one storage server, ensure it’s only installed on a single computer.
3] Enabling the iSCSI Initiator
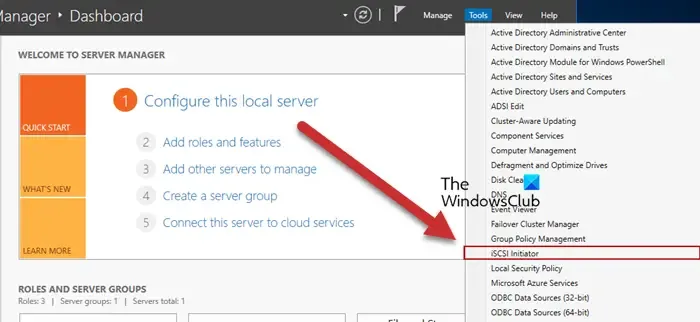
Now, return to the Failover Cluster nodes and enable the iSCSI Initiator. To do this, navigate to Tools > iSCSI Initiator on the node server and confirm by clicking Yes when prompted. Repeat this process for all attached servers.
4] Configuring the Storage Server
With the iSCSI Initiator enabled on the nodes, we can now connect them to the Storage Server. Here’s how to add the nodes:
- Go to Server Manager > File and Storage Services.
- Click on the iSCSI tab.
- Select Tasks > New iSCSI Virtual Disk.
- You can choose a hard drive or specify a folder in the server by clicking on Type a custom path, followed by Browse, to select or create a new folder.
- Click Next, provide a name for the virtual disk, and proceed by clicking Next.
- Choose the disk size; Fixed size is quicker, while Dynamic size offers flexibility for future adjustments.
- Click Next, assign a target name, and move to the next step.
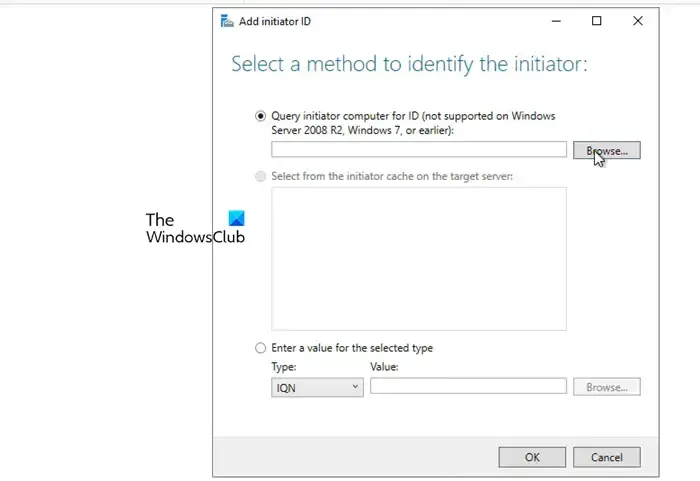
- On the Access Server tab, click Add.
- Ensure the Query initiator computer for ID box is checked, and click Browse.
- Input the names of the node computers, clicking Check Names as you add each one.
- Click Next.
- If you want to implement authentication between devices, enable CHAP.
- Finalize the connection creation.
This step effectively sets up a storage environment consisting of the two nodes.
5] Connecting Nodes from Initiator to Target
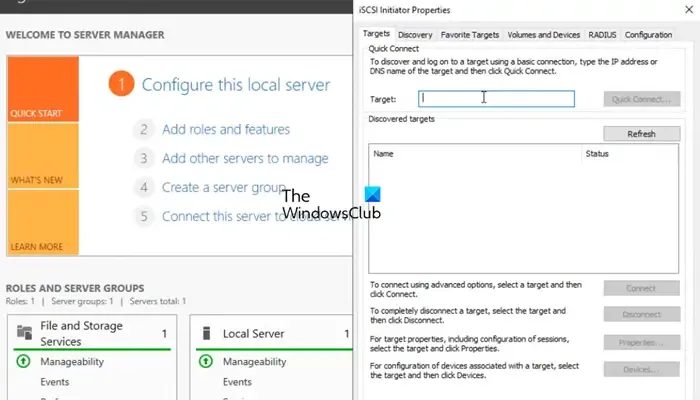
Next, configure the target for the initiator. Follow these instructions to accomplish this:
- Open Server Manager on the node computer.
- Navigate to Tools > iSCSI Initiator.
- In the Target field, input the iSCSI Target’s IP address.
- Click on Quick connect > Ok.
To verify the connection, you can check the Discover tab, then navigate to Volumes and Devices to see if the volume appears. If it does not show, simply click Auto Configure.
6] Configuring the Failover Cluster

With the storage all set, it’s time to create the cluster and incorporate the two nodes. Here is how to do it:
- Open the Server Manager.
- Go to Tools > Failover Cluster Manager.
- Once the Failover Cluster Manager is open, right-click on the Failover Cluster Manager tab and select Create Cluster.
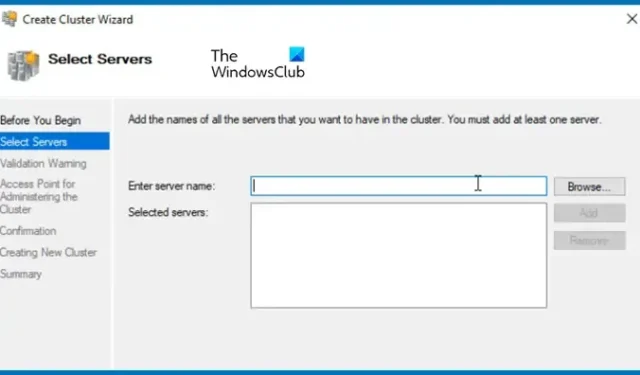
- In the Create Cluster Wizard, click Next.
- When you get to the Select Server tab, enter the name of the server and click Add. Browsing for the server is also an option.
- Run the validation test, and once completed, click Next.
- Assign a name and an unused IP address for the cluster, then click Next.
- Click Next once more and wait for the cluster to be established.
After finishing, you will see the new cluster appear on the upper left-hand side. Simply click on it to access, and you can begin adding roles, storage, and any necessary configurations.
That’s it!
How to Install the Failover Cluster in Windows?
To install the failover cluster feature in Windows Server, utilize Server Manager. Navigate to Add roles and features, then install the Failover Cluster from the Features tab. For more detailed instructions, refer to the guide above.
How to Configure the Failover Cluster in Windows Server?
To configure the failover cluster in Windows Server, you need first to install the Failover Cluster feature, set up the storage, create a cluster, and add the servers. For further guidance, please refer to the instructions outlined in this article.


Leave a Reply