Step-by-Step Guide to Uploading Videos to Instagram from Your Computer


When using Instagram on a desktop, you may find the platform less versatile compared to its mobile version. Until recently, uploading videos directly from a computer was not an option. For those looking to understand how to post videos on Instagram directly from a PC, this guide provides all necessary information.
Uploading Videos on Instagram Using a PC
Instagram now allows video uploads from PCs, regardless of whether you have a business account or not. Any video uploaded through this method will automatically be classified as a Reel and will be accessible on your Instagram profile under both the Posts section and the Reels section.
Before getting started, it is essential to ensure your videos meet Instagram’s Reels specifications. The aspect ratio must range between 1.91:1 and 9:16, while the clips should have a minimum frame rate of 30fps and a resolution of at least 720p.
To upload your first video, simply open Instagram in your web browser and log into your account.
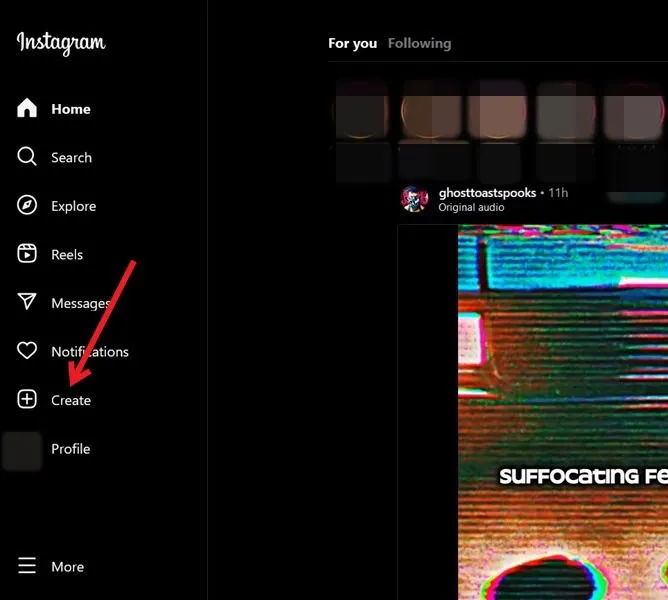
Click the + Create button located on the left side of the screen.
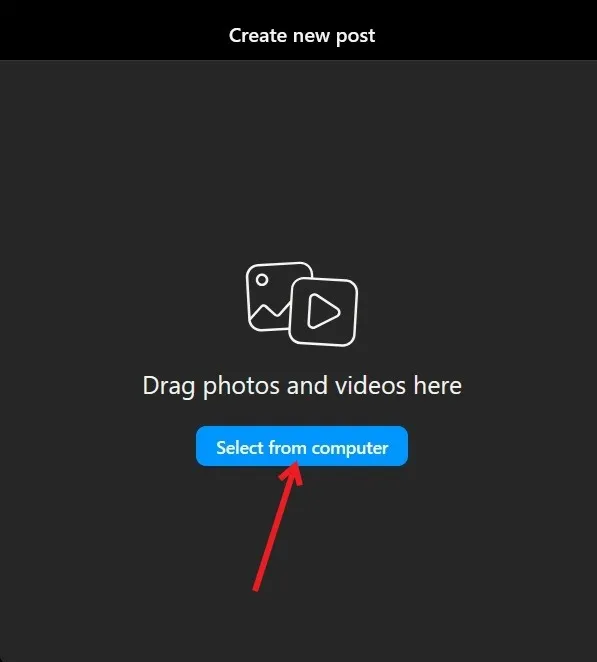
Select the Select from computer option, or drag and drop your video(s) directly into the pop-up window.
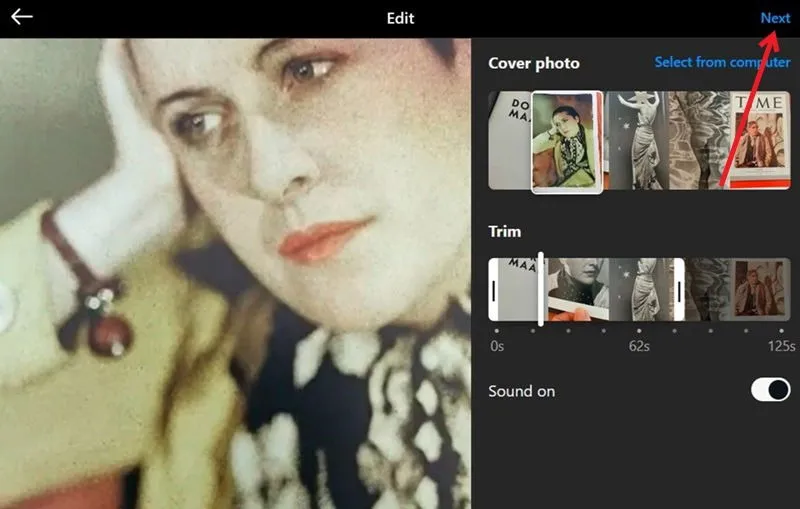
If desired, crop your video before clicking Next.

Choose a cover image for your video, and make any necessary trims. When finished, click Next.
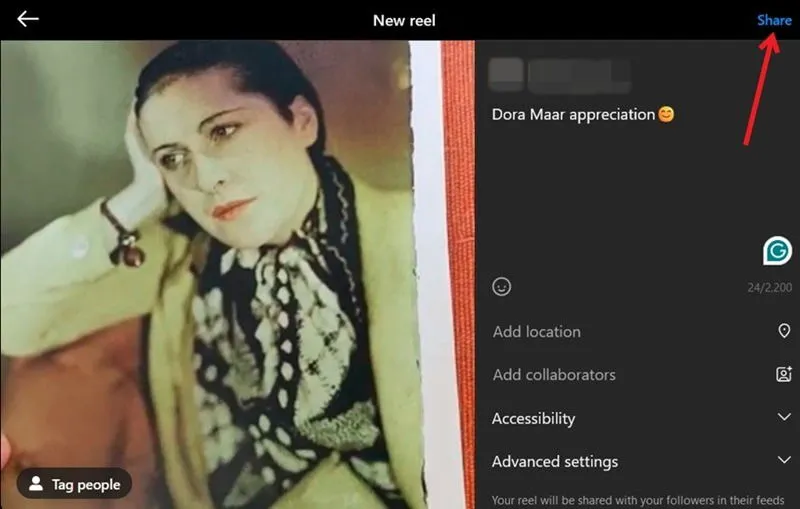
Add an optional caption and location, as well as the possibility to include collaborators on your post. Finally, hit the Share button to publish your video.
While you may find that not all editing features available in the app are accessible when uploading from a PC, you can still prepare your content using your favorite video editing software, such as VITA, before uploading.
If you prefer to upload your Reel from a mobile device, check out ways to transfer files between your PC and Android phone.
Uploading Videos to Instagram via Meta Business Suite
For those with an Instagram business account, the Meta Business Suite provides an effective method to create Reels, offering additional functionalities such as post scheduling and editing options.
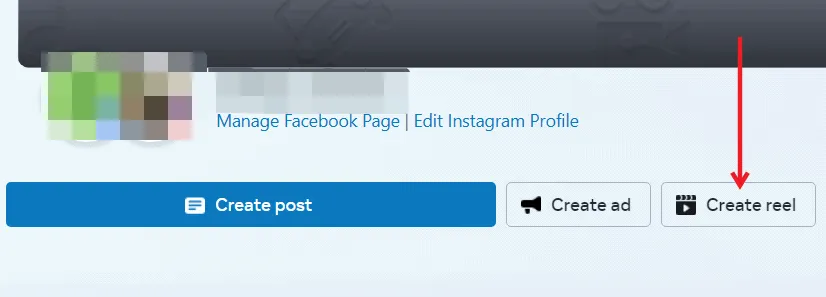
To begin, open a new browser tab and log into your business account. Next, navigate to the Meta Business Suite and click on the Create reel button.
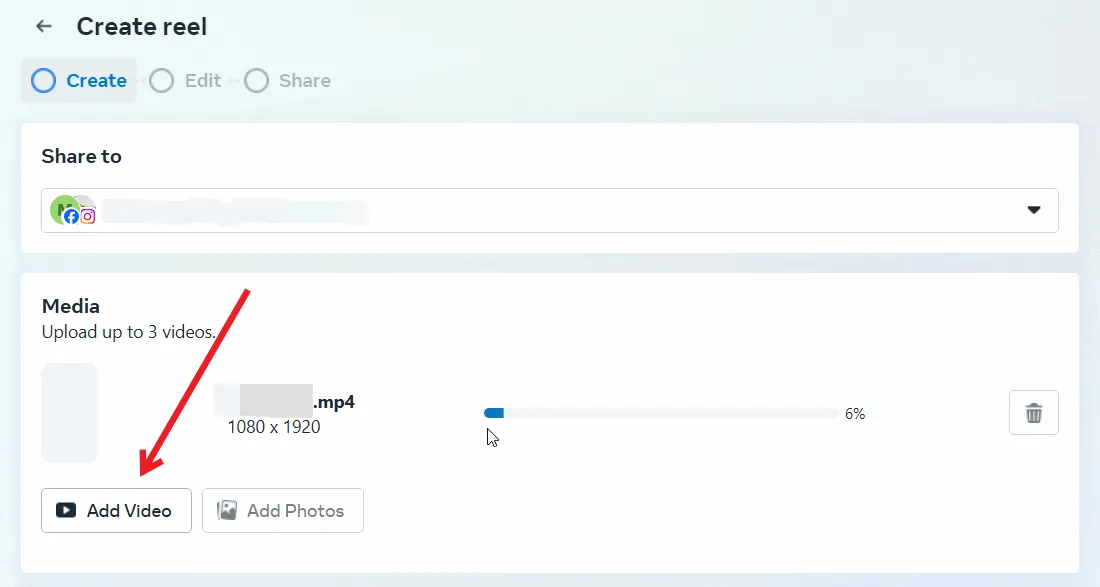
On the following page, under the Media section, click Add Video to upload your footage. You can also scroll to set a cover image for your Reel or upload one from your computer.
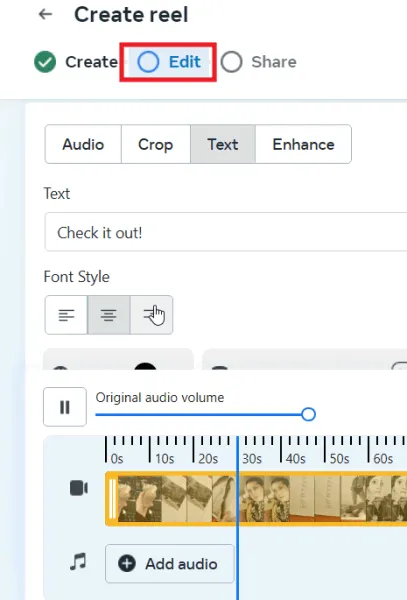
Switch to the Edit tab at the top for further enhancement of your Reel. The Meta Business Suite lets you incorporate background music and text into your video. However, for stickers or filters, you’ll have to use the mobile app to upload your video.
After completing your edits, you can choose to share your Reel immediately or schedule it for a later date and time.
To ensure your Reels captivate your audience, consider exploring trending audio from Instagram Reels for your content, or check out Instagram Reels templates on the mobile app to simplify the process.
Image credit: Freepik. All screenshots by Alexandra Arici.


Leave a Reply