Step-by-Step Guide to Install and Configure DirectAccess on Windows Server
This article will guide you on how to install and configure DirectAccess on Windows Server. DirectAccess enables users to effortlessly access internal network resources whenever they connect to the Internet, without requiring user intervention or credentials. This functionality offers a convenient and secure method for remote access to company resources.
What is DirectAccess in Windows Server?
DirectAccess is a feature within Windows Server that allows remote users to connect to an organization’s network without initiating a conventional Virtual Private Network (VPN) connection. Unlike traditional VPNs, DirectAccess ensures always-on connectivity, so that once the client connects to the Internet, it automatically accesses the organization’s network. This feature enhances Remote Management capabilities and offers superior security.
How to Install and Configure DirectAccess on Windows Server
To successfully install and configure DirectAccess on Windows Server, follow these steps:
- Install the Remote Access Management Role
- Configure a Static IP Address
- Create a new security group, assign permissions, and enroll for certificates
- Create a DirectAccess-NLS A Record
- Enable DirectAccess
1. Install the Remote Access Management Role

Begin by installing the Remote Access Management role to access the necessary tools for using DirectAccess.
- Open Server Manager.
- Select Add roles and features from the Configure the local server section.
- The Add Roles and Features wizard will appear; click on Next.
- Choose Role-based or feature-based installation and click Next.
- Select a server from the server pool, choose the server, and click Next.
- Skip the Server Roles section by clicking on Next.
- Install Remote Access Management Tools along with all associated checkboxes.
After installing the features, close the wizard.
2. Configure a Static IP Address

A static IP address is essential for a server intended for DirectAccess. To set a static IP address, follow these steps:
- In Server Manager, navigate to Local Server and click the hyperlink next to Ethernet.
- Right-click on your network adapter and go to Properties.
- Select Internet Protocol Version 4 (TCP/IPv4), then click Properties.
- Choose Use the following IP address and Use the following DNS server addresses.
- Input the server’s IP address in the Preferred DNS server section.
- Click OK.
With the static IP configured, proceed to the next step.
3. Create a New Security Group, Grant Permissions, and Enroll for Certificates

Next, you will need to create a security group for DirectAccess client computers. Follow these steps:
- Open Server Manager.
- Navigate to Tools > Active Directory Users and Computers.
- Expand your server name, go to Users, right-click, and choose New > Group.
- Name the group, maintain default settings, and click OK.
This creates a new group, but you need to grant full permissions for authenticated users for the web server certificate template.

To grant permissions, follow these steps:
- Open Server Manager.
- Navigate to Tools > Certification Authority.
- Right-click on Certificate Templates and choose Manage.
- Locate the Web Server template, right-click, and select Properties.
- Select the necessary users, check the Full Control box, and click OK.
- Open PowerShell as an administrator and execute Restart-Service certsvc.
Now, let’s enroll for the NLS server certification by creating an alias for the certificate that is not resolvable from the external network.

Follow these steps to enroll:
- Search and open “Manage user certificates.”
- Expand Personal, right-click on Certificates, and choose All Tasks > Request New Certificate.
- Click Next twice.
- Select Web Server and click on More information is required to enroll for the certificate. Click here to configure settings.
- In the Type section, set it to Common name, enter “DirectAccess-NLS.domain.local” in the Value field, and click on Add.
- Click OK, then click on Enroll on the Certificate Enrollment screen.
- Click Finish.
This process will install a new certificate.
4. Create DirectAccess-NLS A Record
To set up a host A record for the Network Location Server:
- In Server Manager, go to Tools > DNS Manager.
- Right-click your local domain and choose New Host (A or AAAA).
- Set the name to “DirectAccess-NLS”and enter your server’s IP address.
- Click Add Host.
You will receive a confirmation prompt; click OK.
5. Enable DirectAccess

You can enable DirectAccess through the Remote Access Management utility by following these steps:
- In Server Manager, go to Tools > Remote Access Management.
- Ignore any errors, and navigate to the Configuration tab.
- Select Enable DirectAccess.
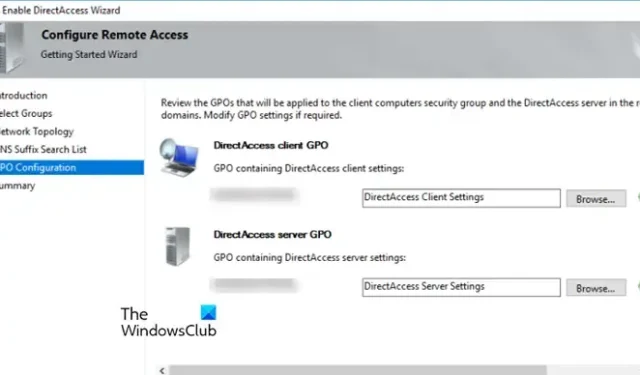
- The Enable DirectAccess Wizard will open; click Next.
- Click Add > Advanced > Find Now.
- Select the Direct Access Computers group and click OK.
- Click OK again.
- Select Enable DirectAccess for mobile computers only and click Next.
- Choose Behind an edge device (with a single network adapter) and click Next.
- Follow the on-screen prompts until you reach Finish.
Finally, check the Dashboard to monitor the Configuration Status. It might take some time to activate. Refresh the page and review the statuses again. Eventually, all indicators should show green, except for one, which can be disregarded.
How to Install and Configure Active Directory on Windows Server?
To utilize Active Directory on Windows Server, install the Active Directory Domain Service on your server. Open Server Manager, navigate to Tools > Add Roles and Features, and install the service mentioned earlier from the Server Roles section.


Leave a Reply