How to Fix Windows Domain Name Resolution Issues
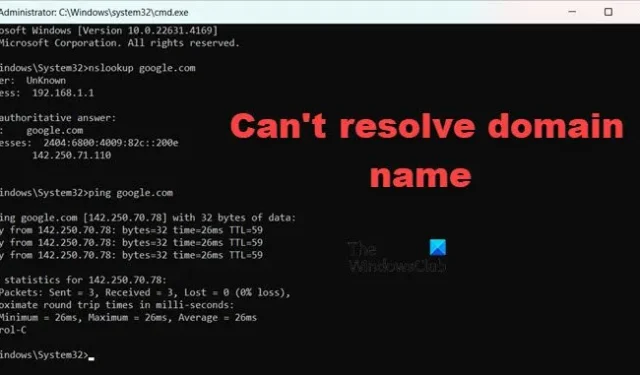
We have observed that occasionally, Windows struggles to resolve domain names when attempting to ping or execute nslookup. Users may find that on some occasions the nslookup command works, but pinging the equivalent hostname fails. In this article, we will explore this issue and discuss what to do when Windows can’t resolve domain names. Additionally, we will cover this problem in the context of WSL.

Why is my domain not resolving?
Your system might fail to resolve a domain if there is no appropriate DNS A record pointing to a valid origin IP address. Additionally, it could occur if a CNAME record in the Cloudflare DNS is directed to an unresolvable external domain. First, I recommend verifying that the correct records are properly configured. If not, proceed with the solutions outlined below.
How to fix Windows inability to resolve domain names
If Windows can’t resolve the domain name, the initial step should be to reboot the server, as the issue may stem from a temporary glitch. However, if you are unable to restart due to it being a production server or a reboot does not rectify the issue, please follow the solutions listed below.
- Manually register DNS
- Examine the IP configuration
- Allow outgoing DNS requests in the server firewall
- Rectify corrupted GPO files
- Reset Network Protocols
Let’s delve into the details of each solution.
1] Manually register DNS
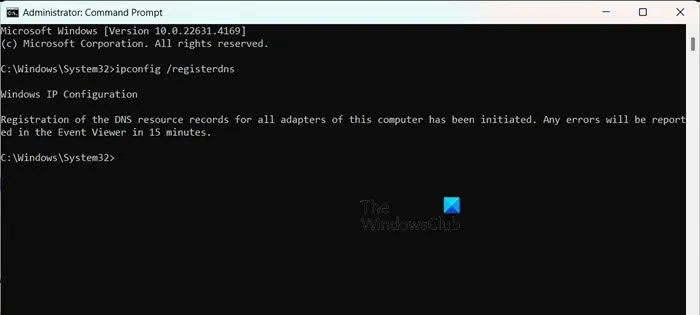
Occasionally, a device may become unregistered and subsequently re-registered automatically due to various activities or patching. In such scenarios, users might need to manually register the device on their computer. To do this, open Command Prompt as an administrator and execute the following command:
ipconfig /registerdns
Afterwards, restart your computer to check if the problem persists.
2] Examine the IP configuration
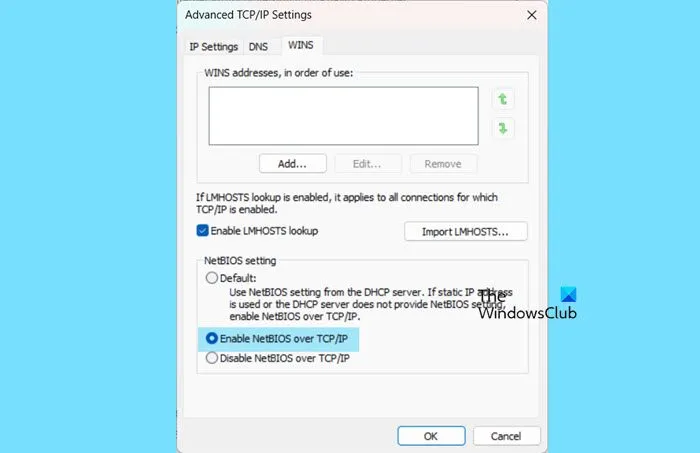
It is also crucial to verify your computer’s IPv4 configuration and ensure that your NetBIOS setting aligns with your DNS configuration. You can do this by following these steps:
- Open Server Manager.
- Navigate to Local Server and click on the hyperlink next to your Ethernet (or WiFi if you’re connected via wireless).
- Right-click on your network and select Properties.
- Click on Properties again.
- Locate Internet Protocol Version 4 (TCP/IPv4), select it, and click on Properties.
- Click on Advanced and navigate to the WINS tab.
- In the NetBIOS setting section, the default selection allows the use of the NetBIOS setting provided by the DHCP server. If you are using a static IP address or if the DHCP server does not provide a NetBIOS setting, you can enable NetBIOS over TCP/IP for optimal functionality by selecting Enable NetBIOS over TCP/IP.
- Click Ok.
Lastly, check if the issue has been resolved.
3] Allow outgoing DNS requests in the server firewall
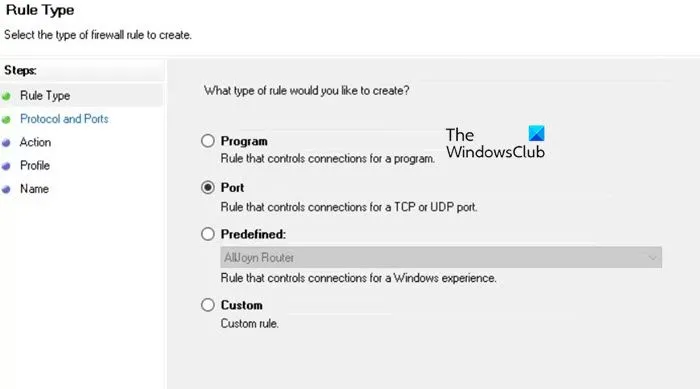
The next step is to configure the firewall to permit outgoing DNS requests. This task should be performed by the server administrator or someone with access to the Server Manager. Follow these steps:
- Open the Server Manager.
- Navigate to Tools > Windows Defender Firewall with Advanced Security.
- From the left side of the window, click on Outbound Rules > New Rule.
- Set the Rule Type to Port and click Next.
- In the Protocol and Ports section, select UDP and specify 53 as the port number.
- Click Next.
- Choose Allow the connection > Next.
- Select the profile where you want this rule applied and click Next.
- Name the rule as “Outgoing DNS Requests” or any name you prefer, then click on Finish.
You can verify that the rule is enabled and appears under Outbound Rules.
4] Rectify corrupted Local GPO files
This issue could arise if local GPO files are corrupted, preventing Windows from applying the DNS policy and resulting in the error mentioned. To resolve this, we will delete those corrupted files and re-implement the GPO changes. Follow these steps:
- First, open File Explorer and rename or delete the file located at C:\Windows\System32\GroupPolicy\Machine\Registry.pol on the client computer.
- Next, open Command Prompt as an administrator.
- Execute
gpupdate /force.
This will reapply the Group Policy enforced by the server administrator. Now check if the issue has been resolved.
5] Reset Network Protocols
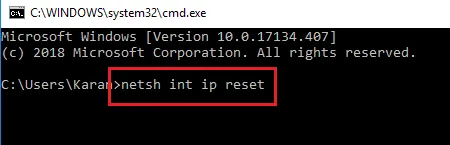
If the problem continues even after forcing a GPO update, proceed to reset the client’s network protocols. To do this, open Command Prompt as an administrator and run the following commands:
Reset TCP/IP
netsh int ip reset
Reset Winsock
netsh winsock reset
Flush DNS
ipconfig /flushdns ipconfig /registerdns
Finally, check if the issue has been resolved.
Why is my domain name not working?
Ensure that your domain name is active and registered with a trustworthy domain registrar. Verify your DNS settings to confirm they are accurate, and make sure your domain name is accurately pointed to the intended server or IP address.


Leave a Reply