Guide to Configure or Modify EAP Method for WiFi in Windows 11
Wi-Fi networks provide a convenient way to connect to the Internet, but maintaining security is crucial for privacy and data protection. EAP, which stands for Extensible Authentication Protocol, significantly enhances the security of Wi-Fi networks. This guide outlines how to set up and modify EAP Methods when configuring a Wi-Fi connection in Windows 11/10.
What is Extensible Authentication Protocol (EAP)?
Extensible Authentication Protocol (EAP) is an authentication framework consisting of a set of rules that securely verify the identity of devices connecting to a network. Besides the built-in authentication methods provided under EAP, network service providers can develop and implement additional methods. The standard authentication methods are known as inner methods, while the new methods established by providers are referred to as outer methods.
How to Set Up or Change the EAP Method for Wi-Fi in Windows 11
Setting Up a Wi-Fi EAP Profile
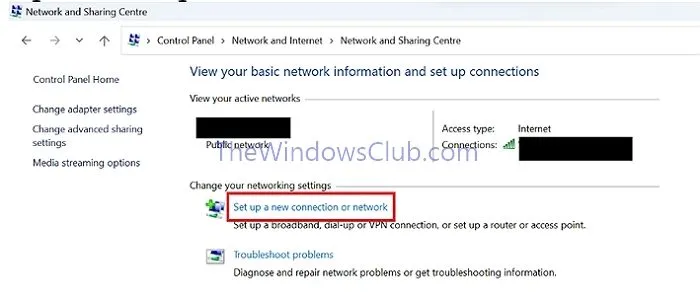
- Open the Settings app, then navigate to Network and Internet > Network and Sharing Center.
- In the Network and Sharing Center, click on Set up a new connection or network.
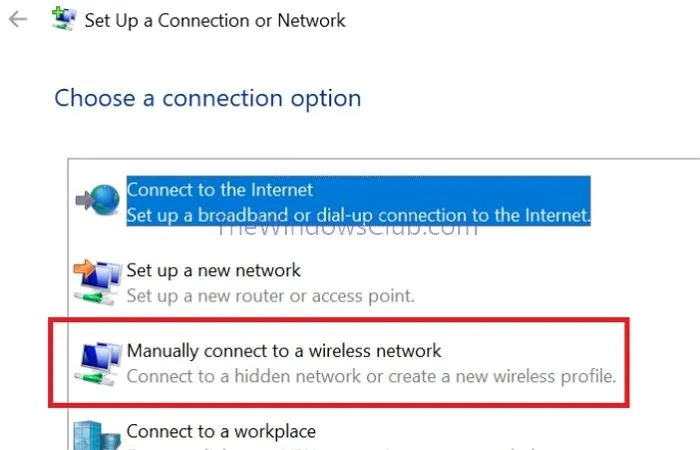
- In the Choose a connection option window, select Manually connect to a wireless network.
- Provide the Network name and set the Security Type to WPA2 – Enterprise.
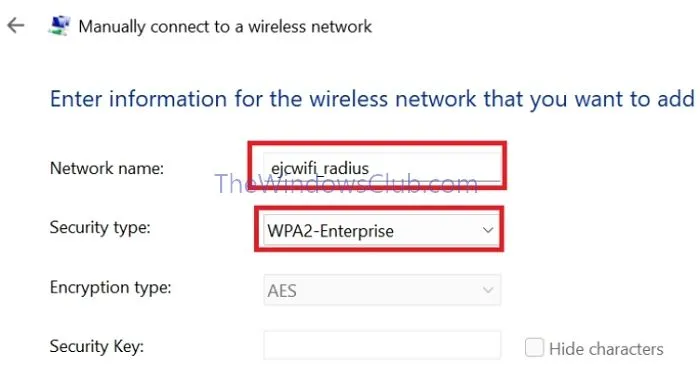
- Check the box for Start this connection automatically, if desired, then click Next to add the new configuration.
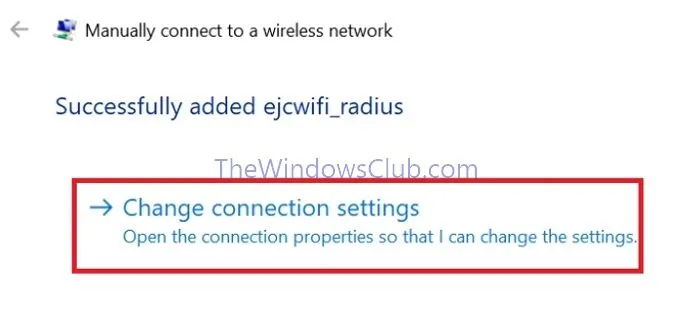
- On the following screen, select Change connection settings to modify the connection details.
Change or Modify the Wi-Fi EAP Profile
After adding the network, you cannot edit the EAP settings through the User Interface. Therefore, click on Change connection settings and follow these steps to modify the network settings:
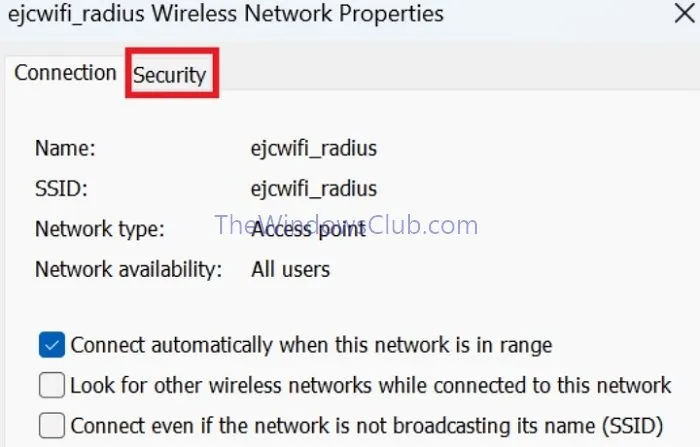
- Select the Security Tab and click on Settings.
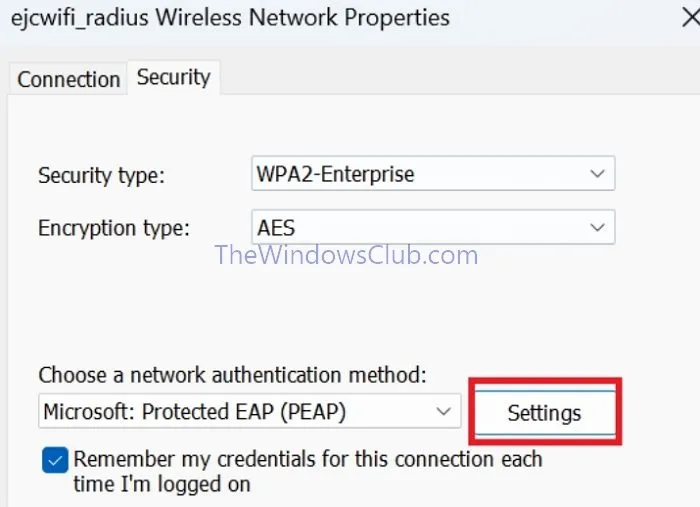
- Use the drop-down menu to change the Network Authentication Method (if necessary) and click on Settings to configure it.
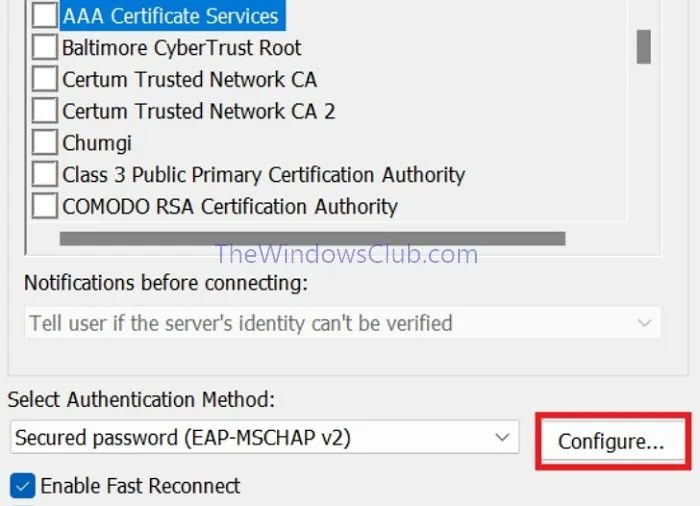
- On the next screen, under Select Authentication Method, choose Secured Password (EAP-MSCHAP v2) and click Configure.
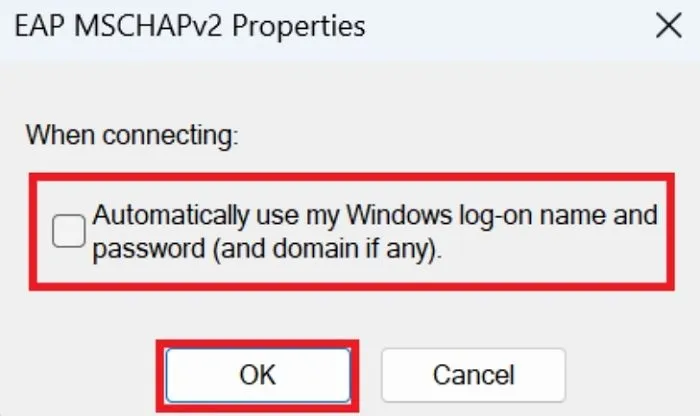
- If you want to use your Windows domain credentials, check the box labeled Automatically use my Windows log-on name and password (and domain if any), then click OK.
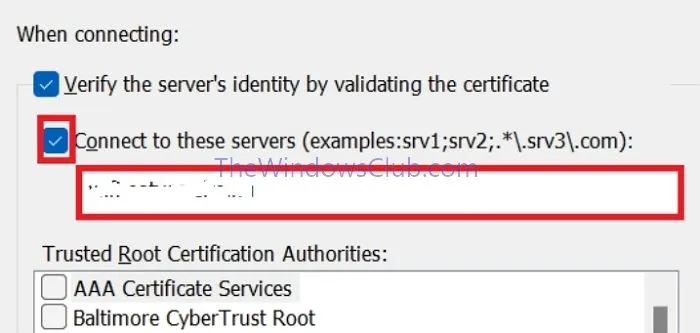
- To verify the server’s identity, select Verify the Server’s Identity by validating the certificate. Additionally, tick Connect to these servers and input the server name(s) below. If entering multiple server names, separate them with a comma. Click OK to return to the Connection Properties window.
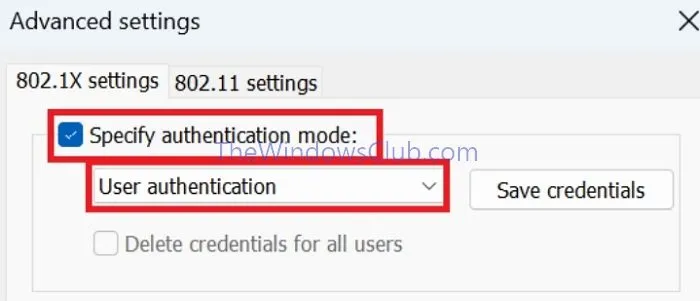
- In the next window, click on Advanced Settings, choose Specify Authentication Mode, select User Authentication from the drop-down, and then click OK.
- If you want the system to remember your login credentials, select Remember my credentials for this connection each time I’m logged on, then click OK.
- Click on Close to save the newly configured settings.
- Also close the Settings app to return to your Desktop.
When you are within range of the configured Wi-Fi network, click the Network Connection icon in the system tray to view it. Select the network and enter your username and password to connect successfully.
What Do Inner Authentication Methods Include?
- EAP-TLS: EAP-Transport Layer Security uses digital certificates, such as Smart Cards or other certificates, to securely verify users’ or devices’ identities on the network. It is favored for its strong encryption and mutual authentication methods that prevent unauthorized access.
- EAP-MSCHAP v2: Defined by Microsoft, EAP-Microsoft Challenge Handshake Authentication Protocol v2 implements a combination of usernames and passwords along with additional security measures for network access. It functions similarly to a unique key for authentication.
- Protected EAP: Acts as a security guard for the network, allowing only authorized users access. It introduces an additional layer of protection using a special key over an already secured network.
- EAP-SIM, EAP AKA/Prime AKA: EAP SIM (Subscriber Identity Module) authenticates using SIM cards, while AKA/Prime AKA (Authentication and Key Agreement) employs advanced cryptographic methods for secure network access.
- TEAP: Tunnel EAP, as suggested by its name, creates a secure communication tunnel for the device to transmit data encrypted over the network.


Leave a Reply