Understanding Heatsinks: Do You Need One for Your Computer?

While you may be familiar with the CPU and motherboard in a PC, have you considered the role of a heatsink? Many individuals are unsure about what heatsinks are, especially since they are not typically purchased separately like RAM, GPUs, or power supplies. Nevertheless, heatsinks are vital for optimizing your PC’s performance.
What is a Heatsink?
As your computer operates, its hardware generates significant heat, particularly from the CPU and GPU. If these components overheat, it can lead to slowdowns, malfunctions, or irreversible damage. A heatsink combats this issue by effectively transferring heat away from these components, helping maintain optimal temperatures.

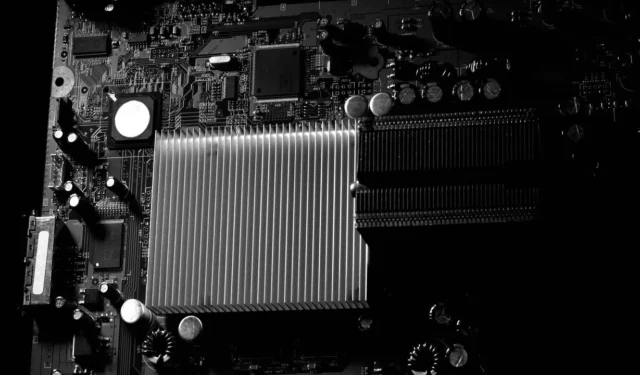
Typically constructed from high thermal conductivity materials such as aluminum or copper, a heatsink features a flat base that connects to the heat-producing component. Its design usually includes numerous pins or fins that maximize surface area for efficient heat dissipation.
How Heatsinks Work
Heatsinks operate using thermal conduction and convection principles to absorb and disperse heat. The flat surface of the heatsink makes direct contact with the heat-emitting component, allowing heat to transfer from the hotter CPU or GPU to the cooler heatsink.
This heat is then transported to the heatsink fins, where thermal convection releases it into the surrounding air. Many heatsinks incorporate fans to further enhance their heat dissipation capabilities.
Types of Heatsinks
In computing, various heatsink designs cater to different cooling requirements. The primary distinction among them lies in their heat dissipation methodologies, which can be grouped into three categories: passive, active, and hybrid heatsinks. The selection of a specific type depends on factors such as PC performance, energy efficiency, and noise levels.
Passive Heatsinks
Passive heatsinks operate without any active fans for heat dissipation. Their extensive fins are arranged to optimize natural airflow, relying mainly on passive convection for cooling. These are particularly advantageous in energy-efficient devices like laptops, where minimizing noise and power consumption is essential.
Although not very common, passive heatsinks are frequently found in low-power laptops, including Ultrabooks and Chromebooks, as well as in mini PCs and home theater setups that are primarily used for web browsing and media playback.

As ARM processors gain traction due to their energy efficiency and lower heat production compared to traditional x86 processors, the prevalence of passive heatsinks may increase.
Active Heatsinks
Active heatsinks are more widely utilized for CPU and GPU cooling. These typically include one or more fans to boost airflow and optimize heat dissipation rates. They are particularly effective in cooling components and are commonly seen in both workstations and high-performance gaming desktops and laptops.
In comparison to passive heatsinks, active models are generally smaller, with cooling efficiency strongly influenced by fan power, quantity, and positioning. Typical work PCs might use 1-2 fans, while gaming systems can incorporate 5 or more fans.

However, the inclusion of active fans requires additional power and can contribute to noise levels. Despite these drawbacks, active heatsinks remain the preferred solution for most PCs due to their reliability and affordability.
Hybrid Heatsinks
Some systems may utilize hybrid heatsinks, although they are less common. These designs feature both a substantial heatsink and fans that activate only when temperatures reach a certain threshold. This approach ensures quiet performance during light workloads while ramping up cooling when the system encounters heavier tasks, such as gaming.
Does My Computer Need a Heatsink?
Absolutely! A properly functioning heatsink is essential for any computer to operate efficiently.
Modern CPUs and GPUs are highly powerful but also generate considerable heat. If a heatsink is removed from a system and you attempt to boot it, the computer will likely run for mere seconds to a minute before shutting down due to excessive heat levels. If you’re fortunate, your processor may have an in-built safety feature to prevent permanent damage. If not, you may end up with a non-functional processor.
This highlights the importance of checking heatsink functionality when facing overheating issues. Common troubleshooting steps involve inspecting the fan operation and ensuring the heatsink is securely seated and free of dust. Additionally, factors like old thermal paste or fan failure may also contribute to overheating.
How to Install a Heatsink on Your CPU
Installing a heatsink is a straightforward process that many can handle without professional assistance. Here’s a step-by-step guide to installing a heatsink:
Prerequisites
Correct heatsink: Most CPUs come with an included heatsink. If you are upgrading or need to purchase a separate one, ensure compatibility with your CPU socket type, such as LGA1700, AM4, or FM2+.
Thermal paste: If your heatsink does not come pre-applied with thermal paste, ensure you have a tube on hand.
Screwdriver: A Phillips-head screwdriver is typically needed to secure heatsinks with screws. Some designs may utilize clamps that do not require tools.
Rubbing alcohol and lint-free cloth (optional): If your CPU or heatsink has leftover thermal paste, cleaning is essential.
1. For replacing or reinstalling a heatsink, clean off any old thermal paste residue using rubbing alcohol and a lint-free cloth to ensure a spotless surface.

2. Apply a small amount of thermal paste to the center of the CPU, avoiding excess that could hinder conduction. Some prefer an X-pattern for better spreading.

3. Carefully align the heatsink over the CPU, ensuring it matches the mounting brackets or screw holes. After placing it on the CPU, press down gently to spread the thermal paste evenly.
4. Secure the heatsink by closing clamps or tightening screws. For screws, tighten them in a diagonal sequence to apply even pressure.

5. If your heatsink includes a fan, locate the CPU_FAN label on the motherboard and connect the fan cable to the CPU fan header.
Your heatsink is now successfully installed, and your PC is ready for use. Remember, the connection between the CPU and heatsink is purely physical, so ensure the heatsink sits directly and evenly on top of the CPU.
Now that you’re informed about heatsinks, you might also be curious about which components in your PC require them. Besides the CPU and GPU, M.2 NVMe SSDs can also benefit from heatsinks. It’s also essential to consider your PC case’s exhaust fans and airflow, as they work in concert with the heatsink to expel heat effectively from the system.
Image credit: Vecteezy.


Leave a Reply