Guide to Using Credential Manager on Windows 10
On Windows 10, the Credential Manager serves as the secure storage for your sign-in details for websites (using Microsoft Edge), applications, and network resources (like mapped drives or shared folders) when you opt to save your credentials for future access.
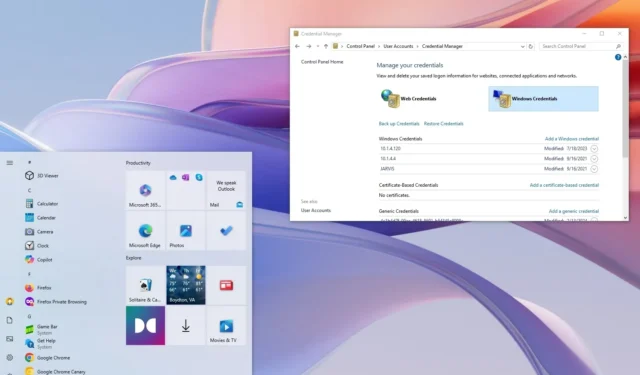
This feature, Credential Manager, has existed for a considerable time. It allows users to securely manage and store their login details, alleviating the need to frequently remember and input their usernames and passwords. Typically, the system auto-saves your credentials upon selecting the option to remember your login details, but you can also manually view, delete, add, backup, and restore credentials through the manager app.
When accessing a website or app for which you’ve saved credentials, Credential Manager efficiently autofills your login details, saving you both time and effort. Additionally, this feature encrypts your information using robust encryption algorithms, making unauthorized access exceedingly challenging.
In this comprehensive guide, I’ll walk you through utilizing Credential Manager on Windows 10 to effectively manage all your sign-in information.
- View Sign-in Passwords in Credential Manager
- Edit Sign-in Information in Credential Manager
- Delete Sign-in Information in Credential Manager
- Add New Sign-in Information in Credential Manager
- Backup Sign-in Information in Credential Manager
- Restore Sign-in Information in Credential Manager
View Sign-in Passwords in Credential Manager
To view your passwords in Credential Manager, follow these steps:
-
Open Control Panel on your Windows 10 device.
-
Select User Accounts.
-
Click on Credential Manager.
-
Navigate to the Web Credentials tab.
-
Click on the desired login information.
-
Select the Show option.

-
Authenticate your identity.
-
Input the password for the credential.
After you finish these steps, Credential Manager will display the password for your selected web login. Note: You can view passwords specifically for web credentials; viewing Windows passwords is not supported.
Edit Sign-in Information in Credential Manager
To update any existing password or username stored in Windows 10, adhere to these steps:
-
Open Control Panel.
-
Click on User Accounts.
-
Select Credential Manager.
-
Choose the Windows Credentials tab (or Web Credentials).
-
Select the relevant account.
-
Click the Edit button.

-
Update the username and password as needed.
-
Click the Save button.

Once you have successfully completed these steps, the new credentials will be saved, preventing any further login prompts should you have initially saved incorrect credentials or modified your sign-in details.
Delete Sign-in Information in Credential Manager
To delete stored account credentials in Windows 10, follow these steps:
-
Open Control Panel.
-
Click on User Accounts.
-
Select Credential Manager.
-
Navigate to the Windows Credentials tab (or Web Credentials).
-
Choose the relevant account.
-
Click the Remove button.

-
Select the Yes option to confirm.
Following these steps will erase the account credentials, necessitating manual entry of usernames and passwords for future logins.
Add New Sign-in Information in Credential Manager
To add credentials for an app or network in Windows 10, execute these steps:
-
Open Control Panel.
-
Click on User Accounts.
-
Select Credential Manager.
-
Navigate to the Windows Credentials tab.
-
Click the “Add a Windows credential” (or “Add a certificate-based credential” ) option.

-
Input the network or internet address pertaining to the app or network resource.
-
Enter the username and password for authentication.

-
Press the OK button.
After completing these steps, the new account details will be recorded, enabling automatic sign-in the next time you access the apps or shared network resources. If a certificate is required for authentication, select the “Add a Certificate-Based Credential” option where you can provide the needed address and upload the certificate.
Additionally, Credential Manager allows saving generic credentials via the “Windows Credentials” page, giving users a convenient method to store login information for various account types that are not categorized under standard “Web Credentials” or “Windows Credentials.”
Backup Sign-in Information in Credential Manager
To export and back up all your credentials for applications and networks, proceed with the following steps:
-
Open Control Panel.
-
Click on User Accounts.
-
Select Credential Manager.
-
Navigate to the Windows Credentials tab.
-
Click the Back up Credentials option.

-
Click the Browse button to designate a backup destination.

-
Specify a name for the .crd backup file.
-
Click the Save button.
-
Proceed by clicking the Next button.
-
Use the “Ctrl + Alt + Delete” command to continue.
-
Create a password to secure the Credential Manager file on Windows 10.

-
Click the Next button.
-
Finalize the process by clicking the Finish button.
Once completed, you will have a “.crd” file containing all your Windows 10 and web credentials that you can transfer to another device or use to restore after a clean installation.
Note that Credential Manager functionality allows backing up only “Windows Credentials.” Web credentials cannot be exported through this method; however, you can utilize the password manager integrated into Microsoft Edge for that purpose.
Restore Sign-in Information in Credential Manager
To restore your sign-in details from a backup in Windows 10, follow these steps:
-
Open Control Panel.
-
Click on User Accounts.
-
Select Credential Manager.
-
Navigate to the Windows Credentials tab.
-
Select the Restore Credentials option.

-
Click the Browse button.

-
Select the “.crd” files containing your backup information.
-
Hit the Open button.
-
Click the Next button.
-
Use the “Ctrl + Alt + Delete” sequence to proceed.
-
Enter the password to access the Credential Manager backup.
-
Hit the Next button.
-
Finalize with the Finish button.
After following these steps, your device will restore credentials for websites, applications, and networks.
This detailed guide is tailored for Windows 10, although its steps are applicable to older versions such as Windows 8.1 and Windows 7.
Update September 18, 2024: This guide has been revised to enhance accuracy and reflect any process changes.


Leave a Reply