How to Deploy Office 2016 Using SCCM [Quickest Steps]
![How to Deploy Office 2016 Using SCCM [Quickest Steps]](https://cdn.thewindowsclub.blog/wp-content/uploads/2023/05/how-to-deploy-office-2016-using-sccm-640x375.webp)
SCCM is basically a part of the Microsoft System Center management suite. Admins use this tool to deploy software patches, software distribution, and end-point protection. The main goal of the SCCM tool is to bring physical and virtual clients under one umbrella.
How can I deploy Office 2016 using the SCCM application?
Here, we will divide the process of deploying MS Office 2016 using the SCCM application into four steps. The main four steps involve:
- Preparing the MS Office installation.
- Creating the SCCM application.
- Selecting the deployment type and deploying.
Let us go through each step in detail and understand how you can deploy Office 2016 using the SCCM application.
1. Prepare the installation
- Download the Office Deployment Tool.

- Run the deployment tool on your PC.
- Agree to the terms and conditions and click Continue.

- Extract the files to a location on your PC.
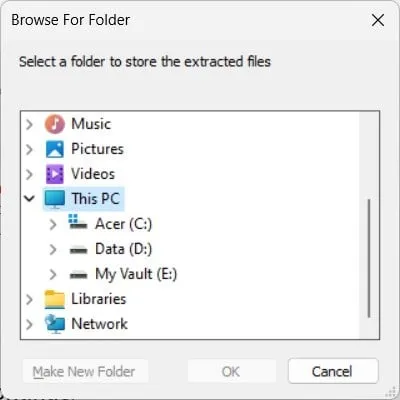
- Go to the location where you have extracted the contents.
- Right-click on the blank space.
- Select New and then Notepad.
- Paste the below content in the Notepad.
<Configuration>(You can change the destination and the office edition in the above content as desired)
<Add SourcePath=”C:\Office 2016″ OfficeClientEdition=”32″ >
<Product ID=”O365ProPlusRetail”>
<Language ID=”en-us” />
<Language ID=”fr-fr” />
</Product>
</Add>
<Configuration> - Save the file as Download.xml and in the same directory as setup.exe (mentioned in step 5).
- Open the Configuration.xml file and modify its content as shown below.
<Configuration>
<Add OfficeClientEdition=”32″ >
<Product ID=”O365ProPlusRetail”>
<Language ID=”en-us” />
<Language ID=”fr-fr” />
</Product>
</Add>
<Display Level=”None” AcceptEULA=”TRUE” />
<Configuration> - In the folder where you have saved the Download.xml file, tap on the address bar and type cmd.
- Type the below command and press Enter to being the download process.
Setup.exe /download Download.xml
2. Create the SCCM application
- Open the SCCM console.
- Click on Software Library.
- Select Application Management.
- Click on Applications.
- Right-click on Applications and select Create Application.
- In the General tab, select Manually specify the application information and click on Next.
- Select General Information from the left.
- Enter a name for the application.
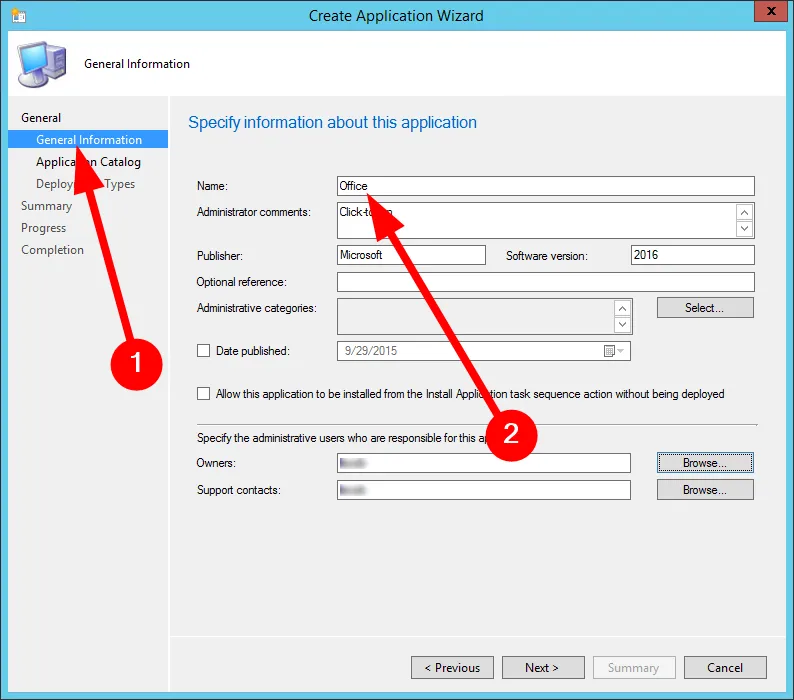
- Select Application Catalog from the left pane and provide the information asked.

- In the Deployment Types and Summary tabs, select Next.
- Select Close on completing the wizard.
3. Select the deployment type
- Open the SCCM console.
- Click on Software Library.
- Select Application Management.
- Click on Applications.
- Right-click on Office 2016 and select Create Deployment Type.
- In the General tab, select Script Installer and choose Next.
- On the General Information tab, enter the name of the deployment type or any other information and choose Next.
- On the Content tab:
- In the Content-Location box, enter the network share where you have your Office Deployment Tool, the Configuration.xml file, and the Office 365 ProPlus installation files downloaded from the internet.
- On the Installation program box, type Setup.exe /configure Configuration.xml.
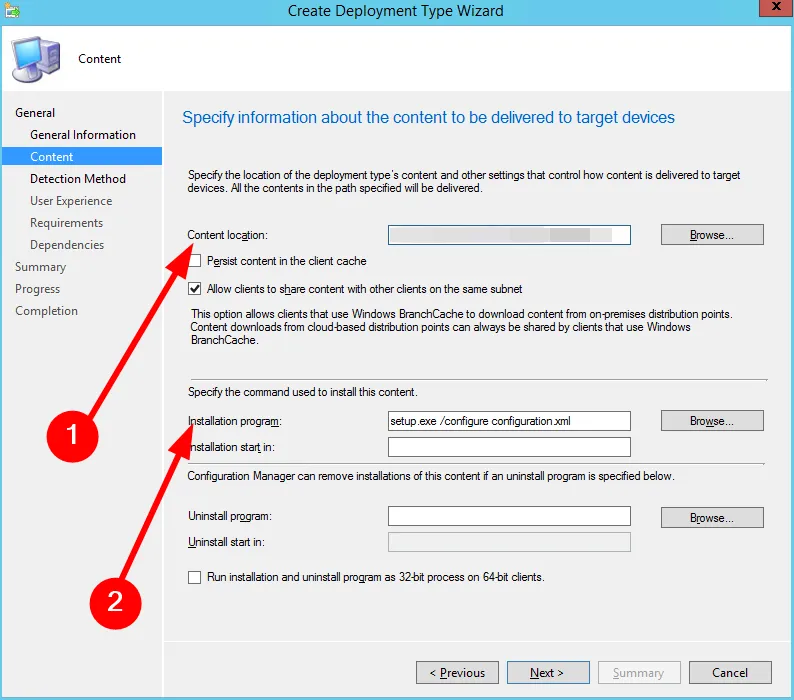
- Click Next.
- Select Add Clause in the Detection Method tab.
- In the Detection Rule dialogue box,
- Select Windows Installer in the Settings Type list.
- In the Product Code box, enter (90160000-008F-0000-1000-0000000FF1CE)
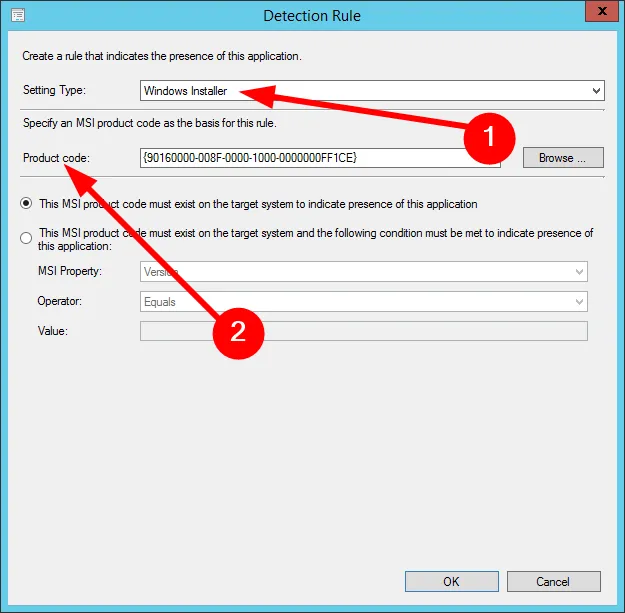
- Press OK.
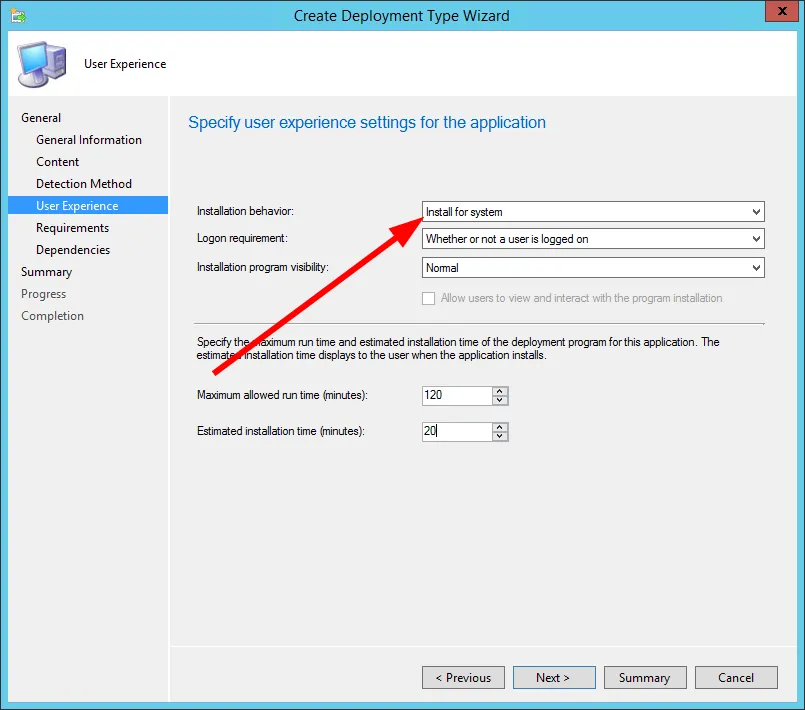
- On the User Experience page, select Install for system option in the Installation behavior drop-down.
- Choose Next for the Requirements and Dependencies tabs.
- Select Close.


Leave a Reply