Install Windows on a New SSD Without USB [3 Ways]
![Install Windows on a New SSD Without USB [3 Ways]](https://cdn.thewindowsclub.blog/wp-content/uploads/2023/05/windows-on-new-ssd-without-usb-640x375.webp)
Can I install Windows on SSD without USB?
Yes, you can install Windows on SSD without USB, or for that matter, even an HDD (Hard Disk Drive). This helps reduce the boot time in addition to helping load programs faster than ever. And that’s the main reason most users go for it!
The process is not as simple as you would imagine, and for seamless execution, using one or more third-party tools, both free and paid, is often the best option. But there are built-in methods for it. Let’s find out!
How do I install Windows on a new SSD without USB?
1. Install Windows using an ISO file
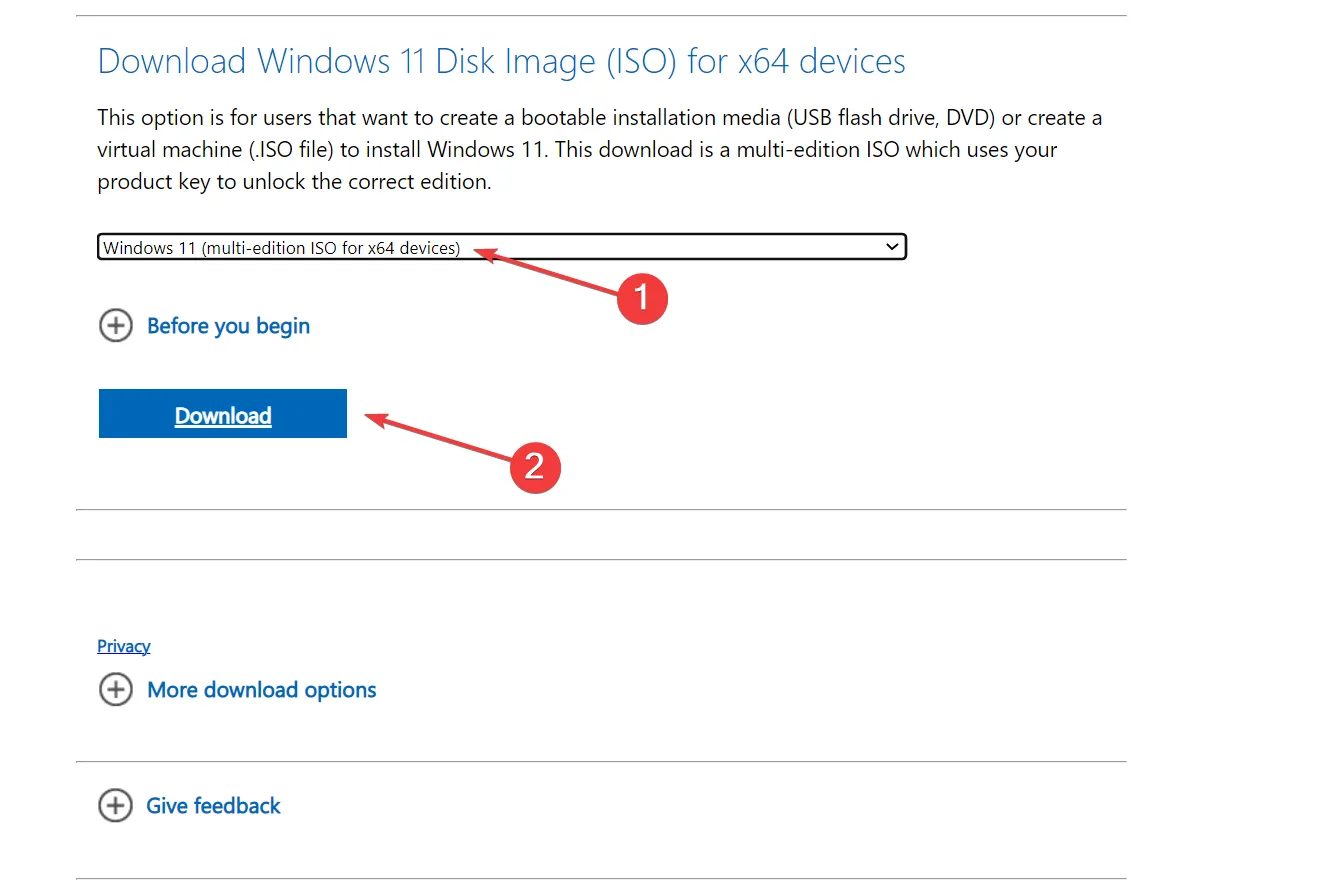
- Go to Microsft’s official website, choose the required edition of the OS, and click on Download to get the Windows 11 ISO.
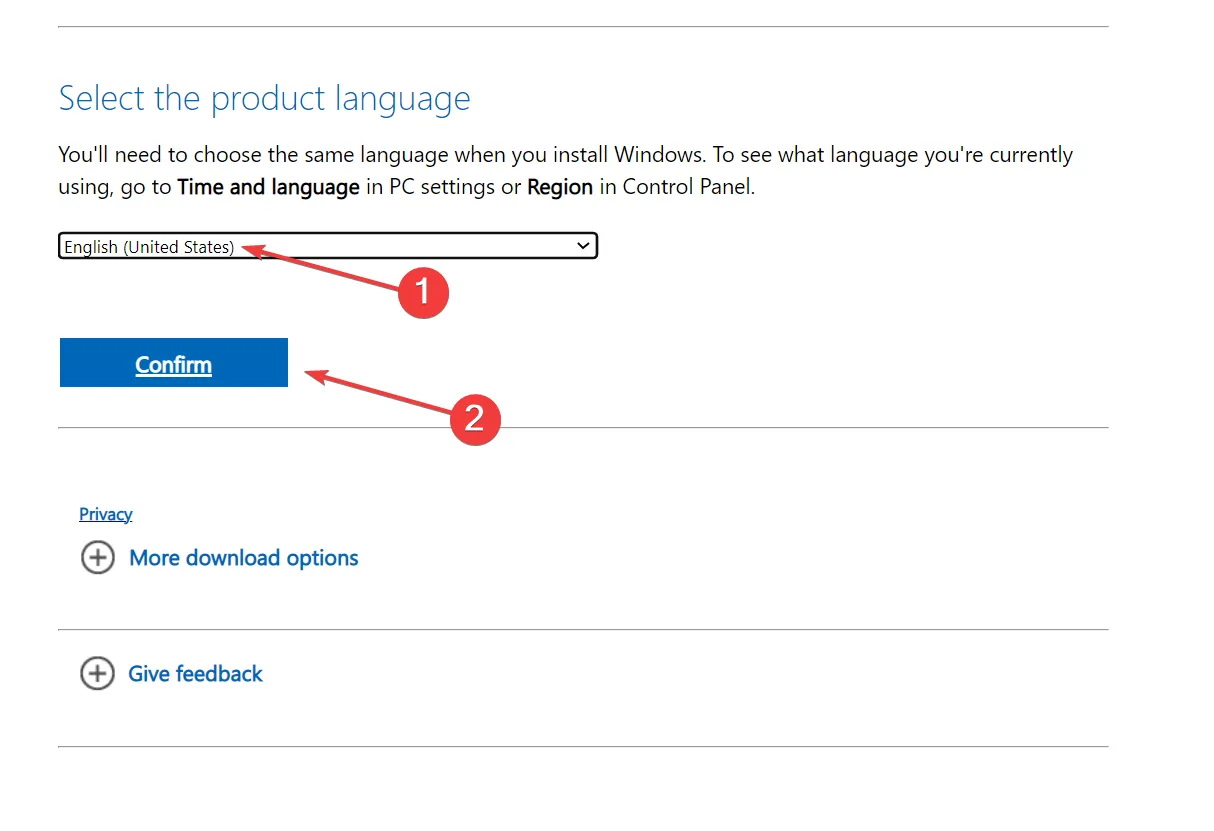
- Choose the product language from the dropdown menu, and click Confirm.
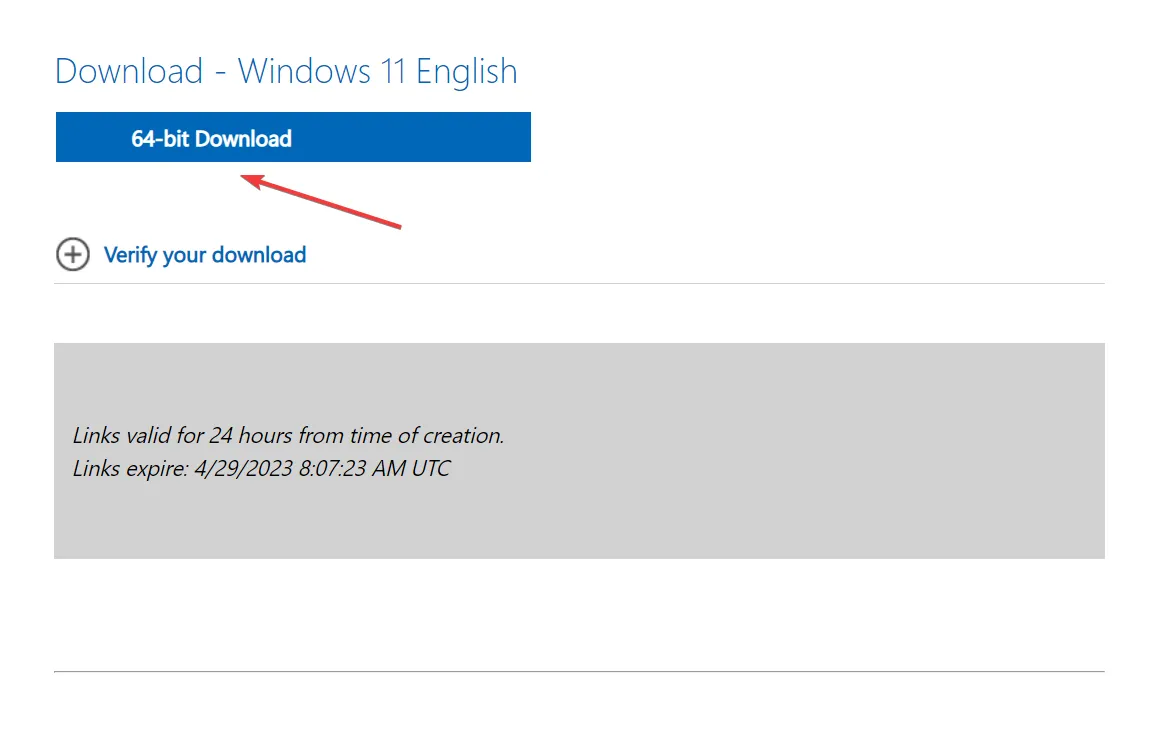
- Click on the provided link to start the download.
- Now, right-click on the ISO file, and select Open with.
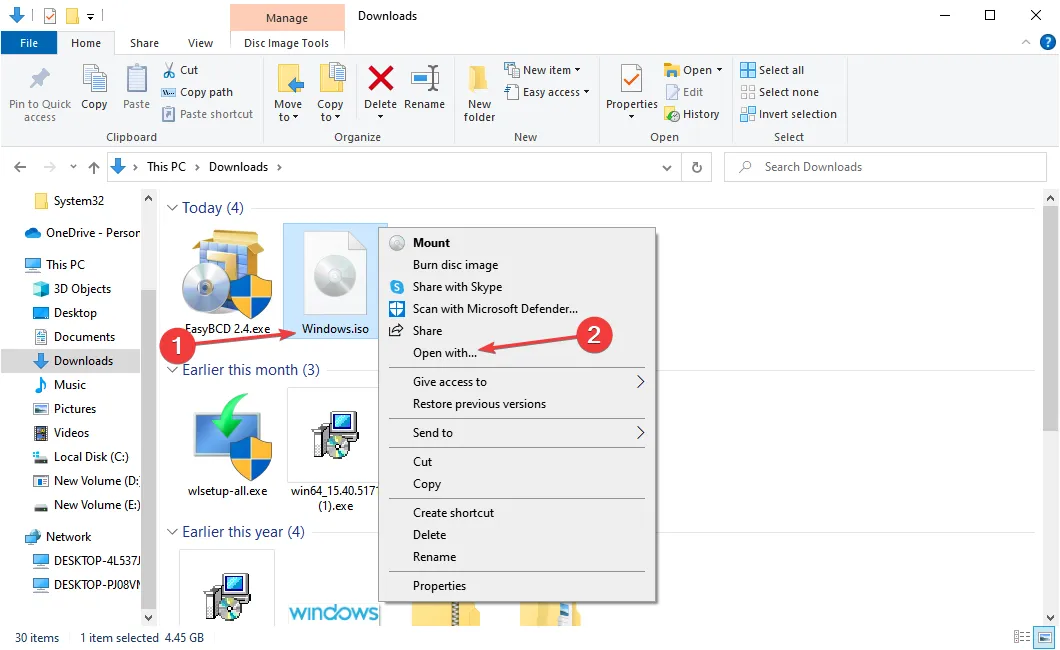
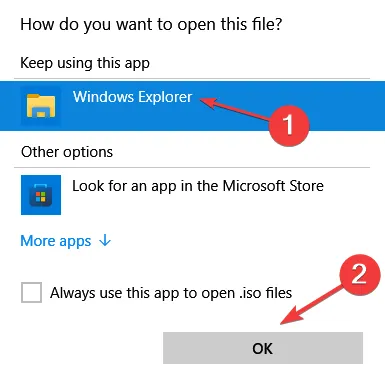
- Choose Windows Explorer, and click OK.
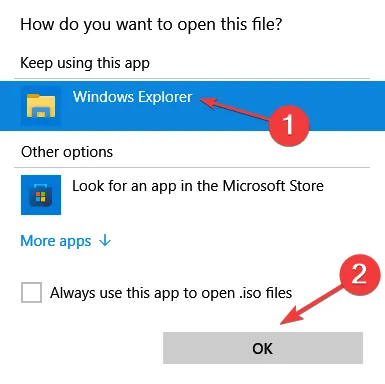
- Click Open in the confirmation prompt.
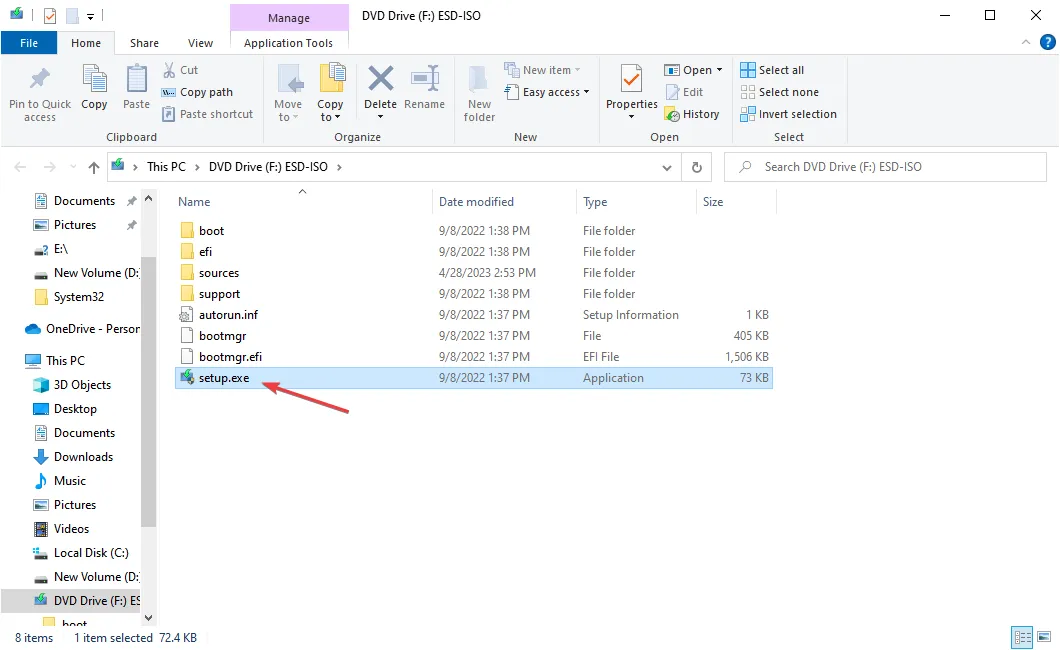
- Run the setup.exe file.
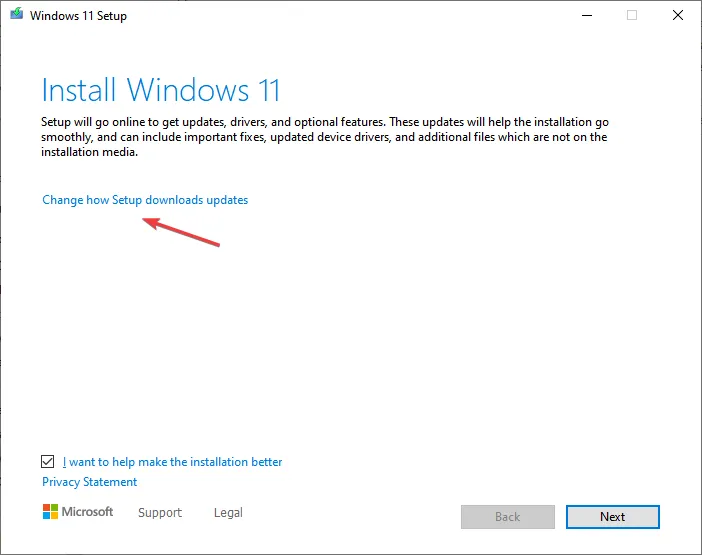
- Click on Change how Setup downloads updates. We are choosing the option for a quicker installation, though you could install the updates alongside.
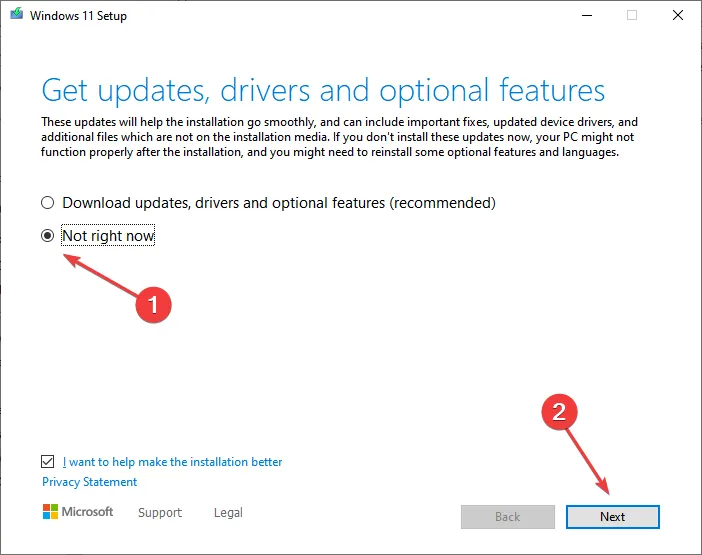
- Click on Not right now and then on Next.
- Follow the on-screen instructions to install Windows.
This is the quickest way to install Windows on a new SSD without USB. The ISO file contains all the relevant information and files pertaining to the installation and will allow you to install Windows 10 on SSD without removing HDD.
Remember, this method works as an upgrade when installing a Windows iteration over a previously existing one, especially in cases where the SSD comes with Windows pre-installed. In case SSD doesn’t yet have the OS, go with the next solution.
2. Create a bootable partition on the hard disk
2.1 Creating a partition
- Get the ISO file for Windows, as detailed earlier.
- Connect the new SSD to the computer.
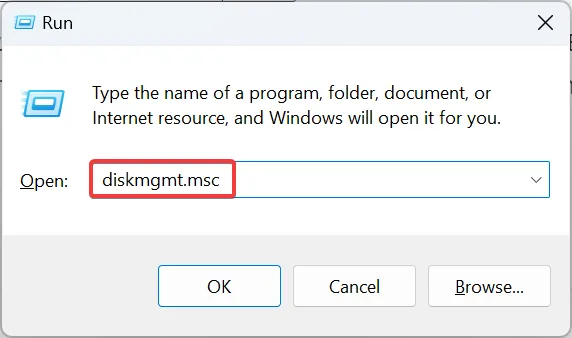
- Press Windows + R to open Run, type diskmgmt.msc in the text field, and hit Enter .
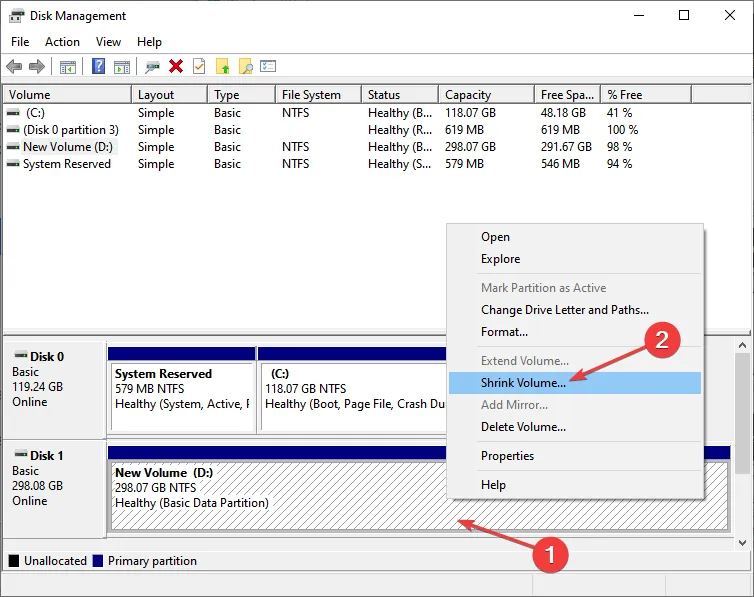
- Right-click on the SSD, and choose Shrink Volume on a partition with sufficient storage.
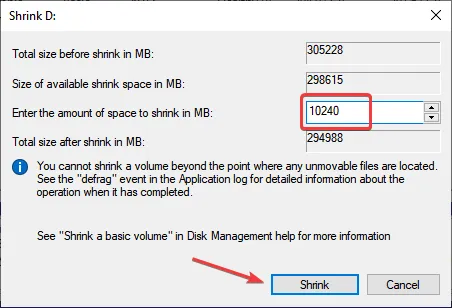
- Now, enter 10240 (10 GB) in the text field, and click Shrink to proceed.
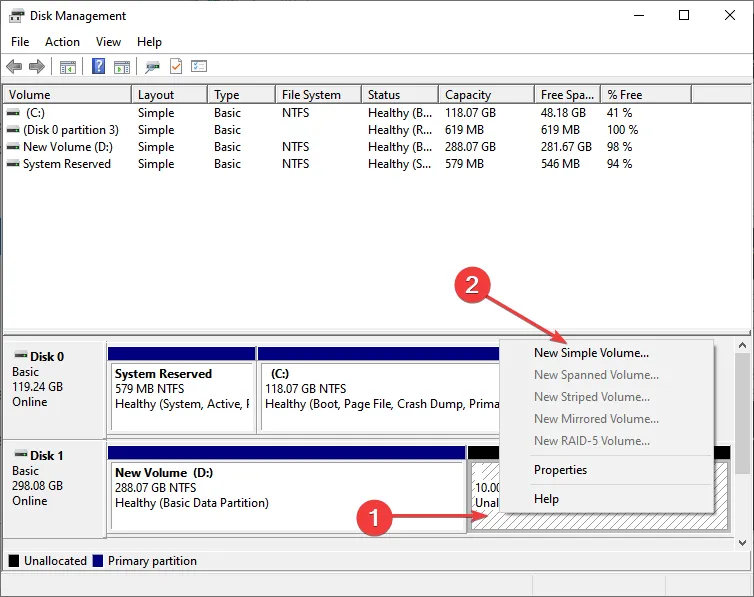
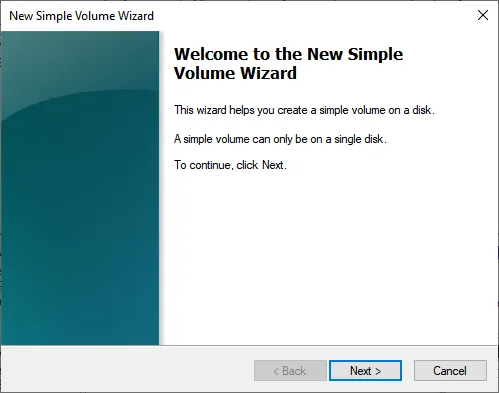
- Next, right-click on the newly created partition and select New Simple Volume.
- Follow the on-screen instructions to get the partition ready for storing files. Make sure to go with the default options.
2.2 Installing the dedicated tool
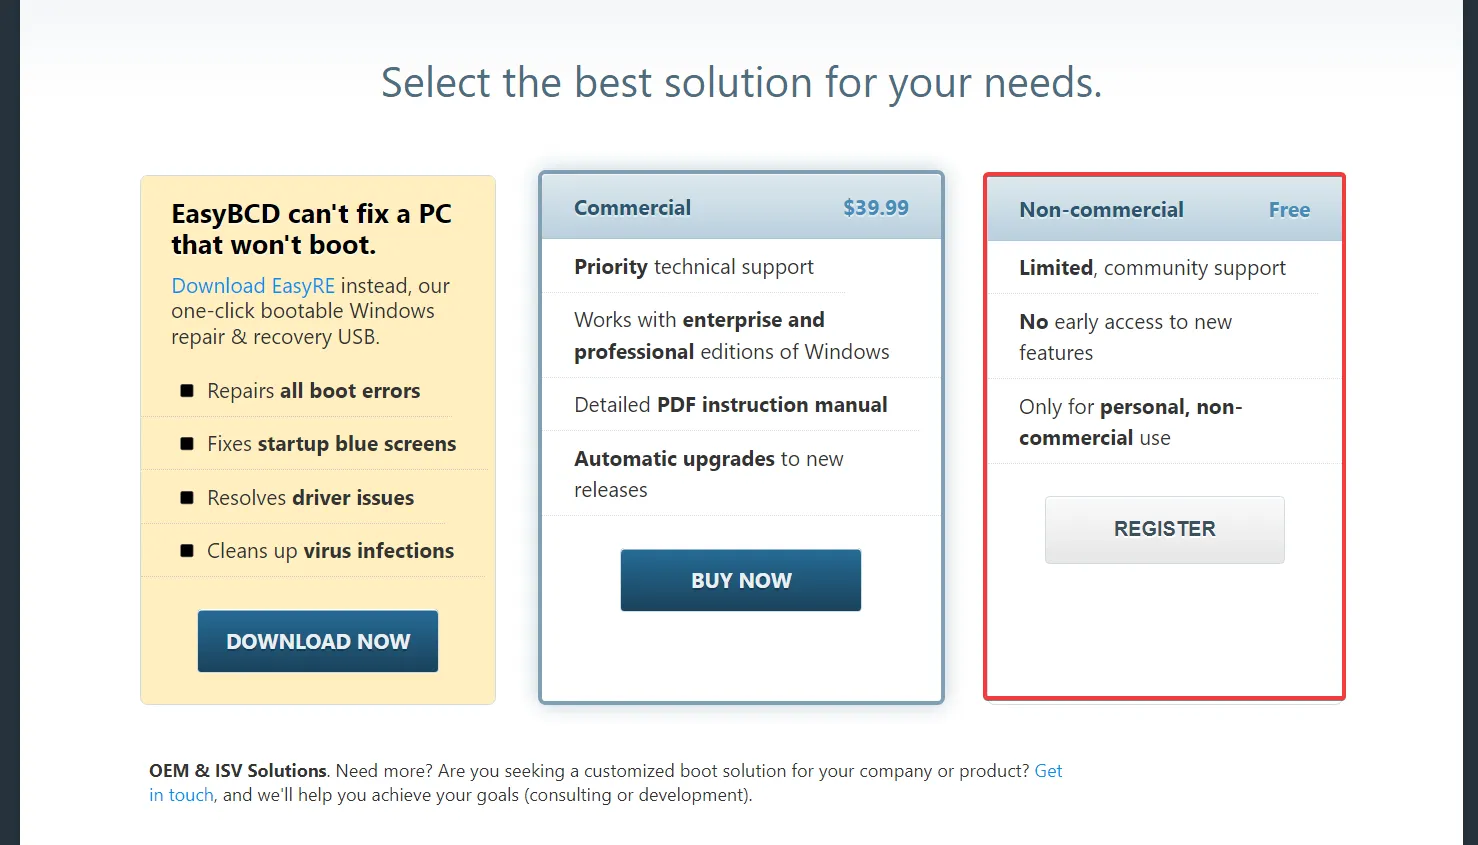
- Once done, download the EasyBCD tool. The free version works fine, so go for it.
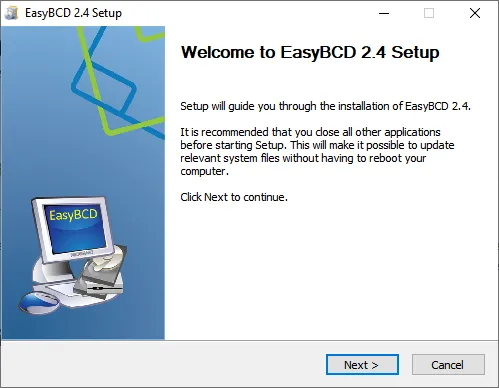
- Launch the setup and follow the on-screen instructions to complete the installation.
2.3 Moving the installation files
- Now, right-click on the ISO and select Open with.
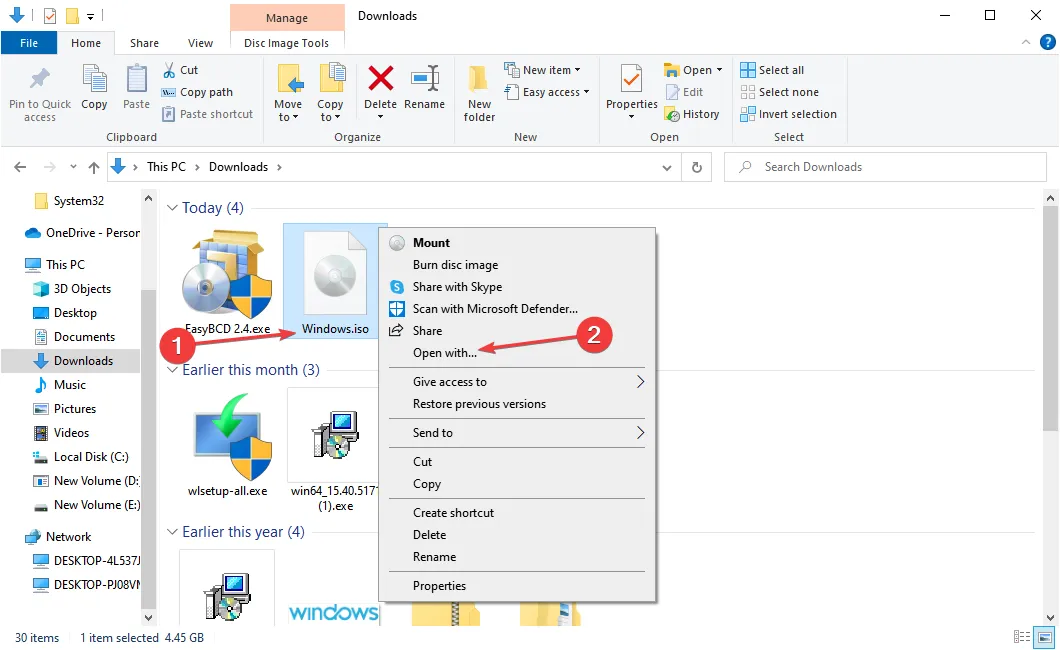
- Choose Windows Explorer, and click OK.
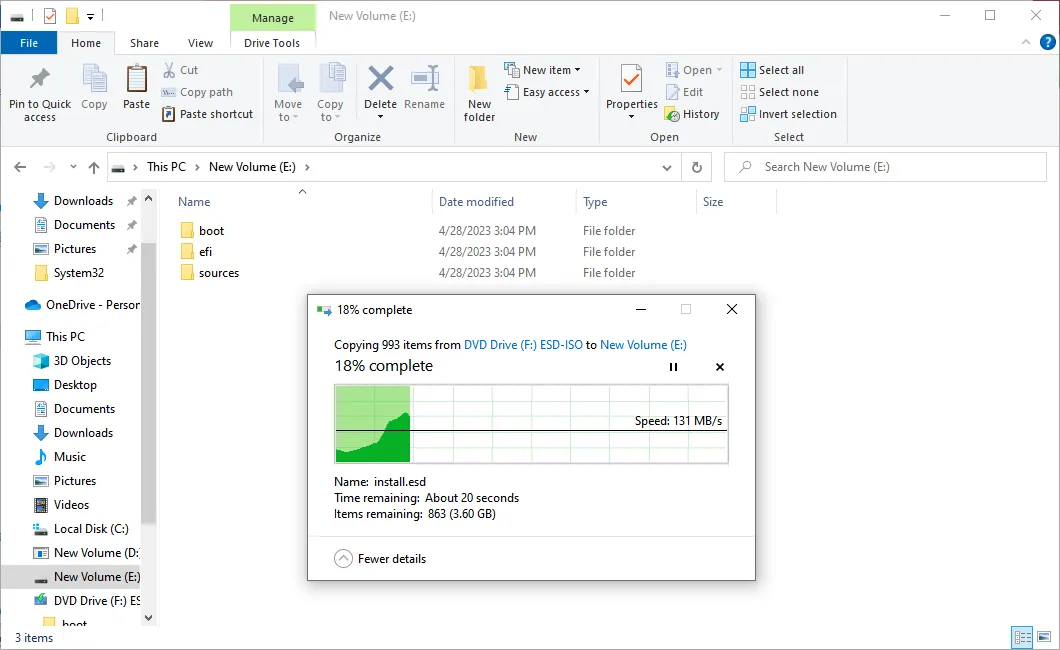
- Now, copy all the files from here to the partition we created earlier.
2.4 Installing Windows
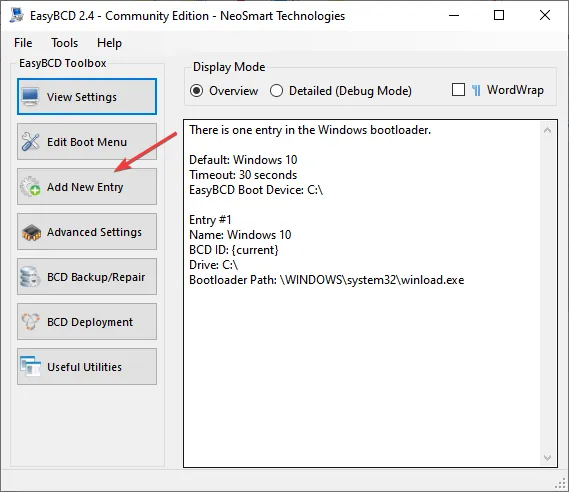
- Launch the EasyBCD tool, and click on Add New Entry.
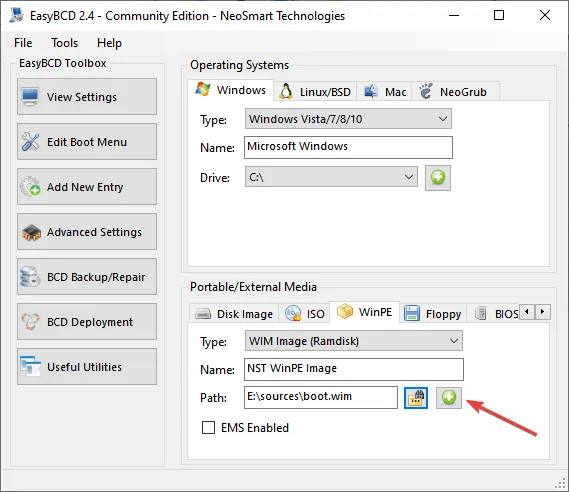
- Go to the WinPE tab and click the Browse icon.
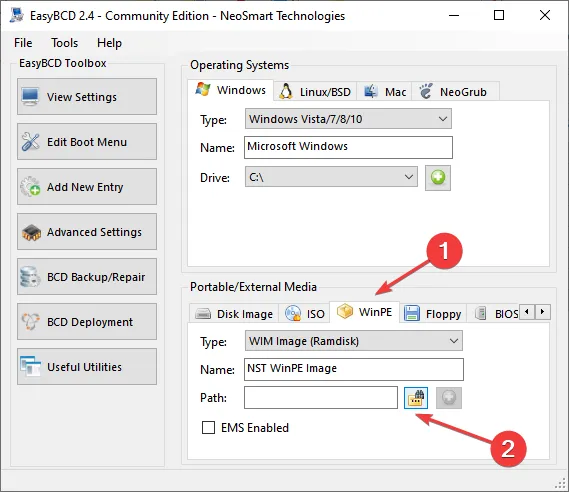
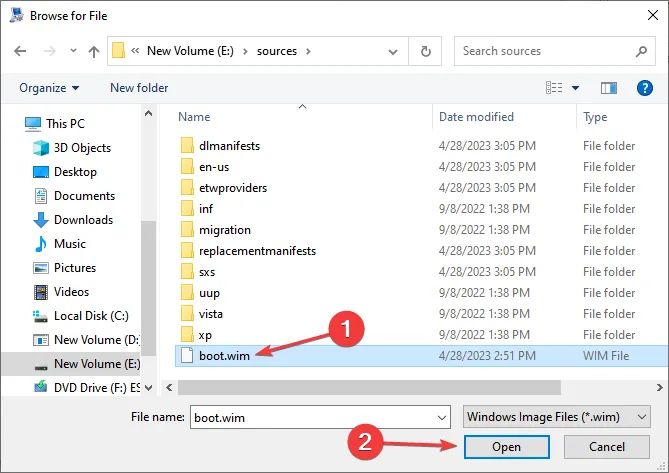
- Head to the folder where Windows installation files are stored, open the sources folder, then select the boot.wim file, and click Open.
- Once done, click on the Add icon.
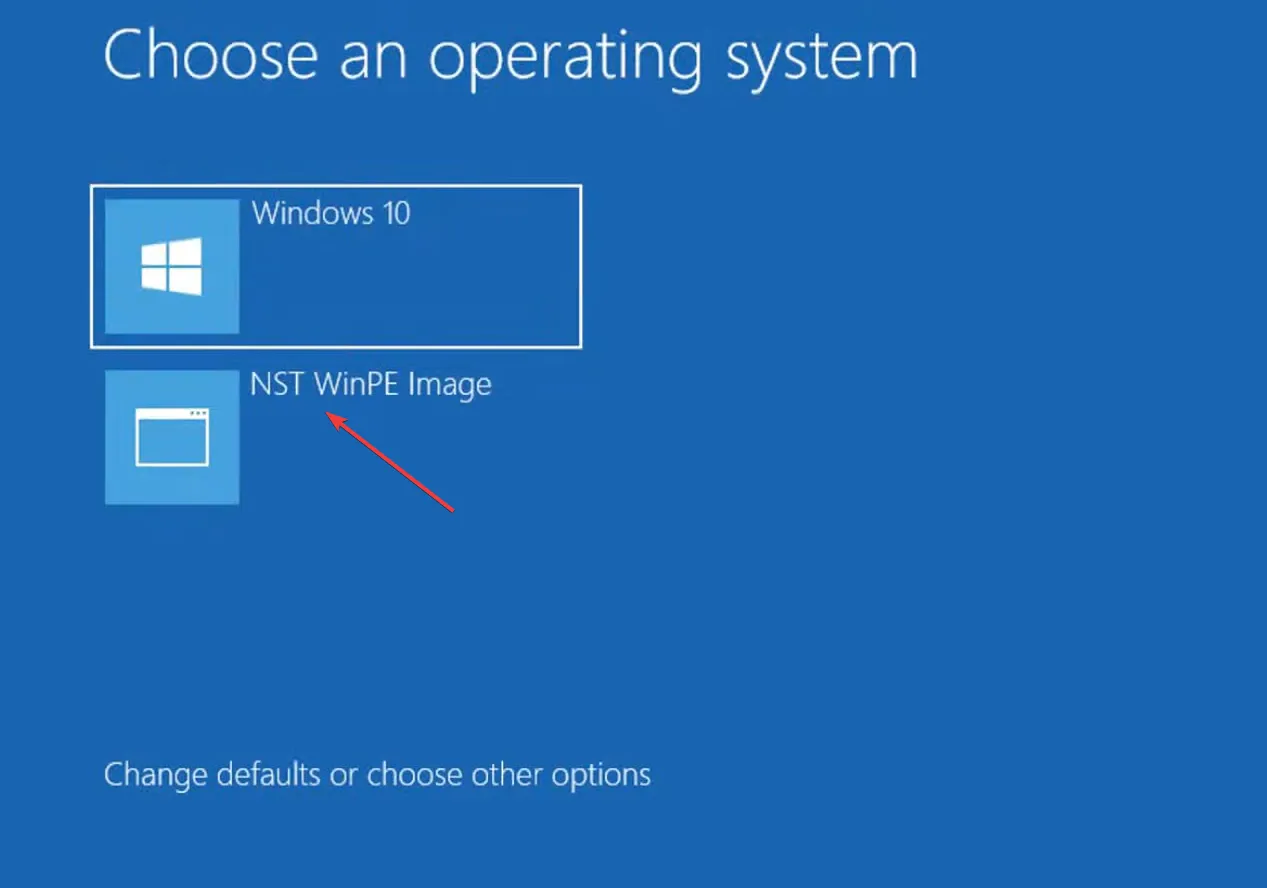
- Now, restart the computer, and choose the NST WinPE Image option. Make sure to select it quickly, as the option lasts only a few seconds.
- The Windows setup will now appear. Follow the on-screen instructions to proceed.
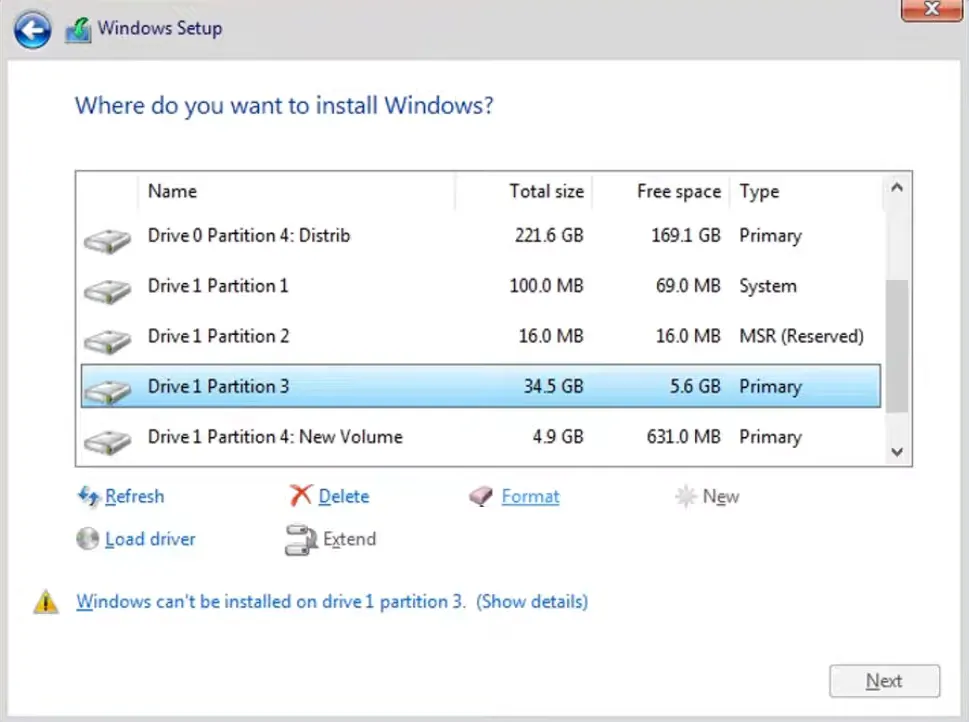
- When asked to choose a partition to install Windows, select the SSD, and then click Next.
- Wait for the installation to complete.
2.5 Reverting the changes
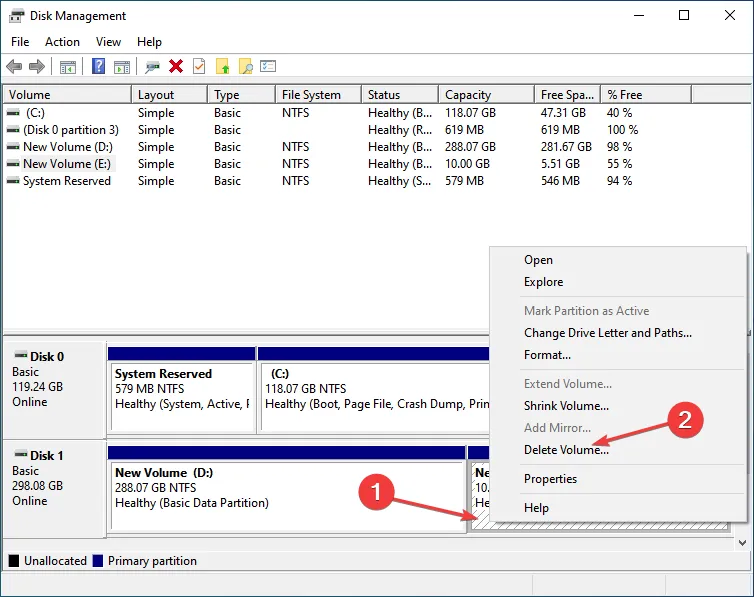
- Turn on the computer, open up Disk Management, right-click on the partition you created earlier, and choose Delete Volume.
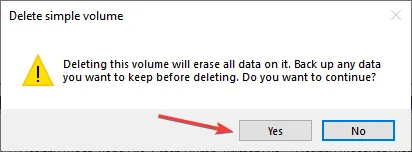
- Click Yes in the confirmation prompt.
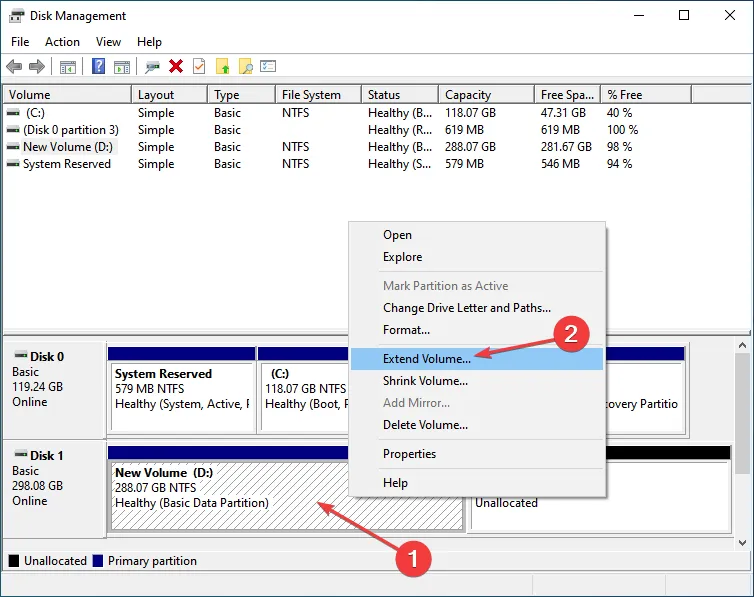
- Right-click on the partition beside it and select Extend Volume.
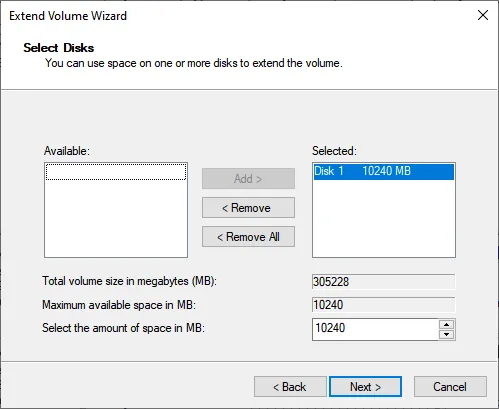
- Enter the space for the volume you just deleted (10240 in our case), and complete the process.
- Now, launch EasyBCD, go to Edit Boot Menu, select the entry you created earlier, and click Delete.
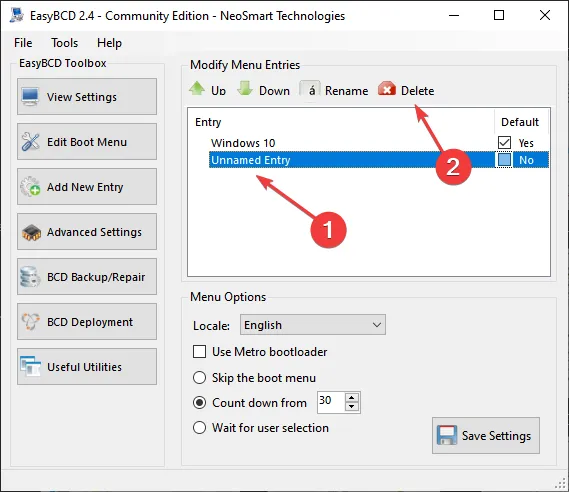
- Click Yes in the prompt.
That’s it! Once done, you now have your computer in the previous state with the exception that Windows is now installed. This method is helpful to users wanting to install Windows to an SSD already connected to the PC when it has no data stored.
So if you were wondering how to install Windows on a new hard drive without a disk or USB, using a third-party tool like EasyBCD and creating another partition should do the job.
3. Clone the disk
If you don’t want to go with either of these methods, another option is to clone the disk. Here, the files available on the HDD or another disk with Windows installed will be transferred to the SSD in the same form. As a result, the SSD can now be used as the system drive.
You now know how to install Windows on a second SSD, both new and old. The process is simple and shouldn’t take more than a few hours.
For any queries or to share how you installed Windows on the SSD, drop a comment below.


Leave a Reply