iaStorAC.sys BSoD Error: 6 Ways to Easily Fix It

BSoD on Windows is scary for many users. While several elements can trigger it, the iaStorAC.sys is one that readers have complained of recently.
Sometimes the crash comes with the notification DRIVER_IRQL_NOT_LESS_OR_EQUAL, Kmode_exception_not_handled. So we explored it and will show you some practical solutions.
What causes the iaStorAC.sys BSoD error?
From our interaction with readers, we gather that any of the following may trigger the BSoD:
- Corrupted system files – This is one of the primary causes for most users, and repairing the affected files comes in handy.
- Driver-related issues – We have outdated or corrupted device drivers at the top of this list. These trigger multiple issues, including iaStorAC.sys-related BSoD errors.
- Hardware issues – Hardware failure, such as a failing hard drive, may also cause this BSoD; in most cases, only a replacement will fix it.
- Memory issues – If you have faulty or insufficient RAM, there are chances that you will encounter this BSoD. We recommend using the optimal RAMs for Windows.
How do I fix the iaStorAC.sys BSoD error?
1. Run the Windows Memory Diagnostic tool
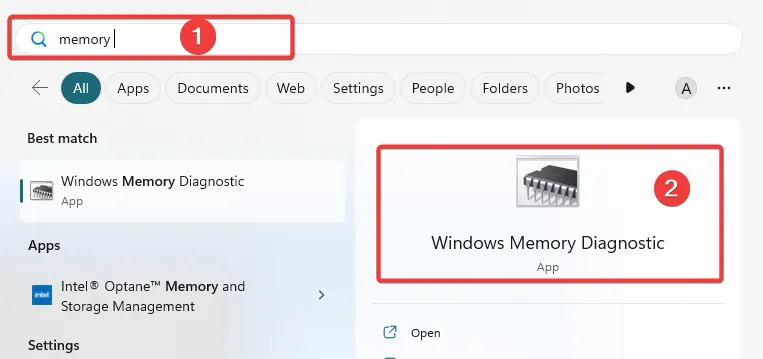
- Press the Windows key, type memory, and select the Windows Memory Diagnostic tool.
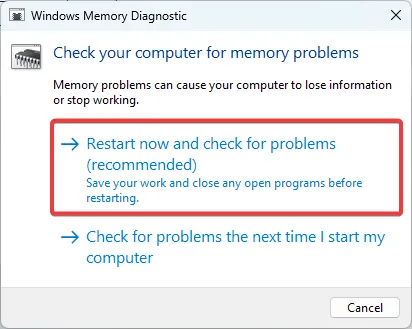
- Click on Restart now and check for problems.
- Wait for the check to be over. It may take several minutes.
2. Restore the computer
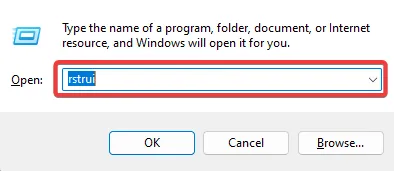
- Press Windows + R , type rstrui, and hit Enter .
- Select Choose a different restore point and click Next.
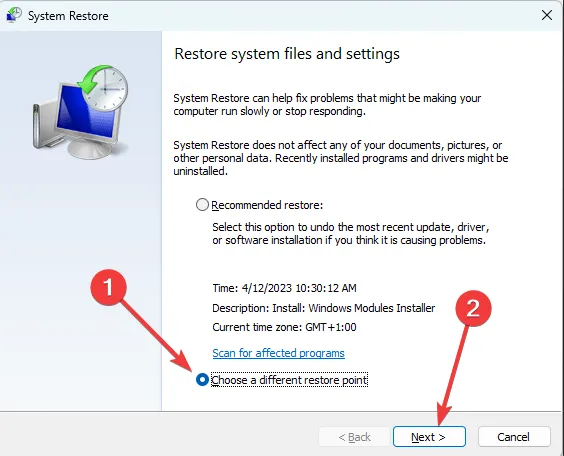
- Choose a restore point from the options, then hit Next.

- Finally, wait for the process to complete. Your computer will restart along the way.
Now you may verify if the iaStorAC.sys BSoD has successfully been resolved.
3. Run a file scan
- Press Windows + R , type cmd, and hit Ctrl + Shift + Enter .
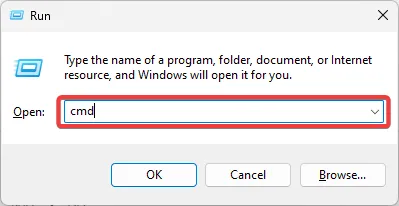
- Type the script below and hit Enter.
sfc /scannow - Wait for the scan to complete and restart the computer.
4. Uninstall the IRST drivers
- Right-click the Start menu and select Device Manager.
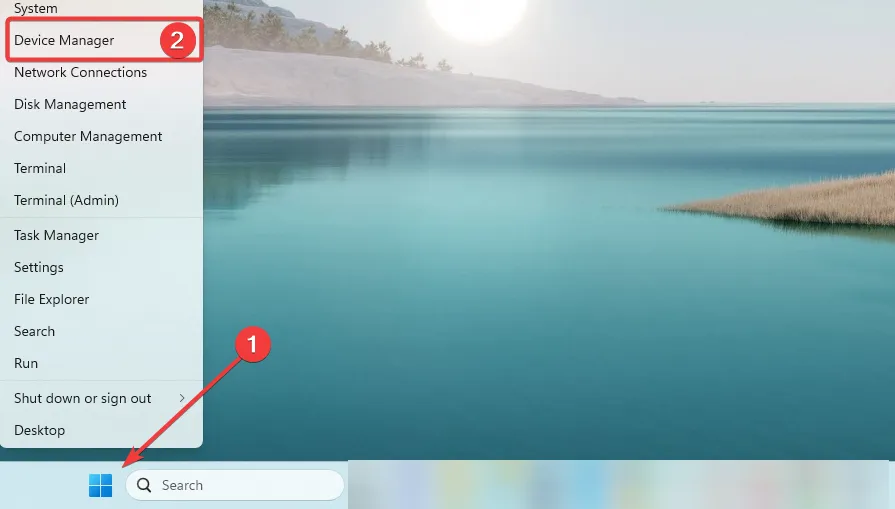
- Expand IDE ATA/ATAPI controllers, right-click the driver, and select Uninstall device.

- Confirm your choice and restart the computer.
After your computer boots, confirm if the iaStorAC.sys has been successfully fixed.
5. Update IRST drivers
- Right-click the Start menu and select Device Manager.
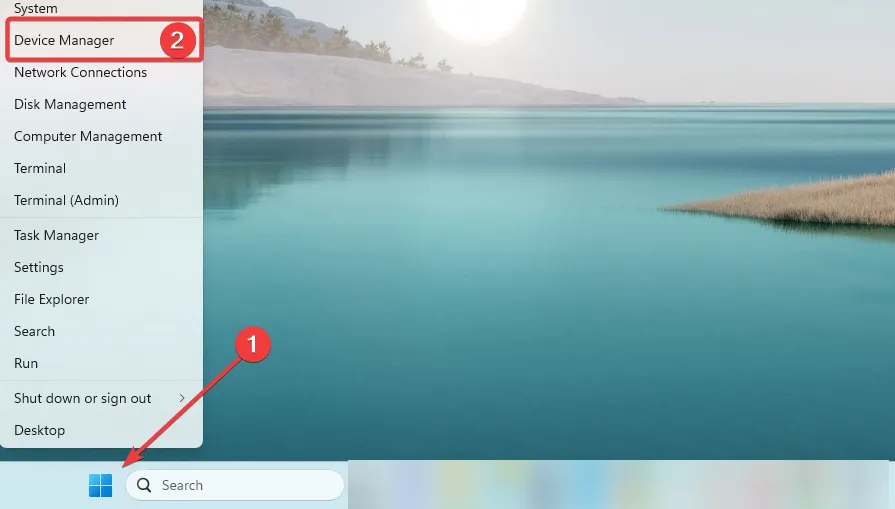
- Expand IDE ATA/ATAPI controllers, right-click the driver, and select Update driver.
- Select Search automatically for drivers.
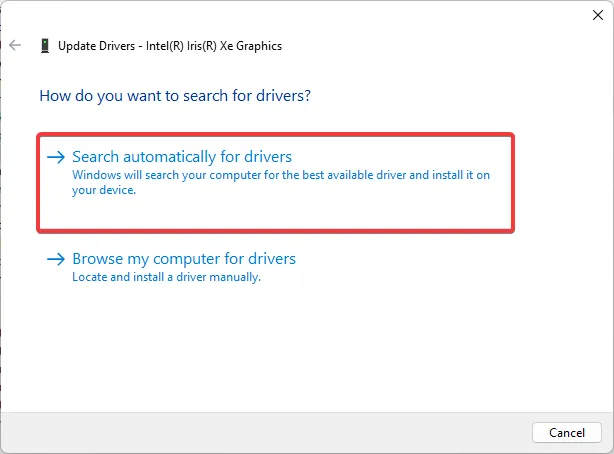
- Let the computer search for the best driver, then see if the error repeats.
6. Delete the old Windows folder
- Press Windows + R , type cmd, and hit Ctrl + Shift + Enter .
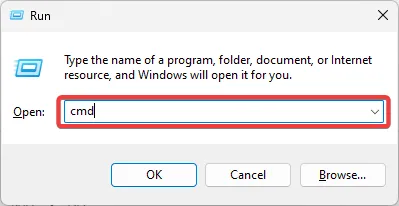
- Input the scripts below in the elevated Command Prompt and hit Enter after each to delete the Windows.old folder.
attrib -r -a -s -h C:Windows.old /S /D
RD /S /Q %SystemDrive%windows.old
- Restart your computer.
That is all there is to know. You should pick any solutions that seem the most appropriate to your situation.
In extreme cases, you may have to reinstall the operating system, but you must note that a reinstallation may make you lose important data.
Tell us if you have been able to fix the iaStorAC.sys crashes, and also mention the fixes that worked for you.


Leave a Reply