How to Use Chocolatey in Windows to Install Various Applications

Chocolatey is a highly useful package manager with an easy to learn command line based on PowerShell or CMD, as well as a full-fledged GUI. If you have so many Windows programs that keeping all of them updated seems like a bit of a chore, it may be time to start making the switch to Chocolatey. This tutorial demonstrates how to install Chocolatey in Windows and use it to install, update, and uninstall any third-party applications and packages.
Installing Chocolatey in Windows
Package managers are a little like app stores in that they allow you to manage and update all of your programs through a single interface rather than having to deal with them all individually. While Chocolatey is a free package manager, there’s also a commercial Chocolatey edition available for paid users.
Once you get Chocolatey up and running, you can always stick with the GUI alone. The developers have added extensive instructions on their website, which you may need to refer to if you don’t have administrative rights on your machine. If you want to stick with the software’s free version, install the package manager for “Individual users” using the different methods below.
1. The Easy PowerShell Method
We are using the PowerShell instructions here, as we’ve found they work more reliably than the CMD method.
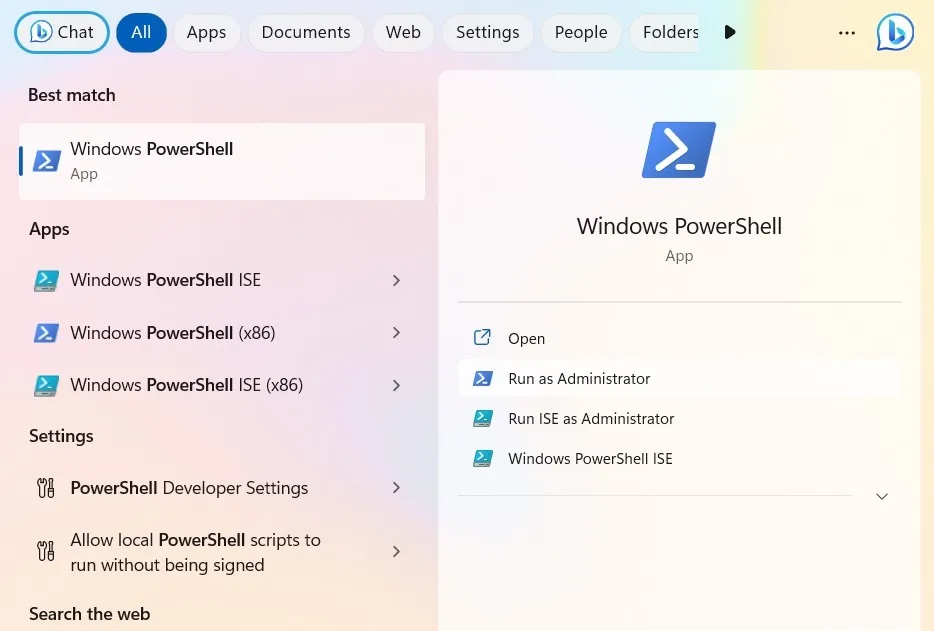
- Search for the Windows PowerShell app via Windows Search and open the program in Administrator mode.
- Paste in
Get-ExecutionPolicyand hit Enter. If it shows “Unrestricted,” skip to step #5.
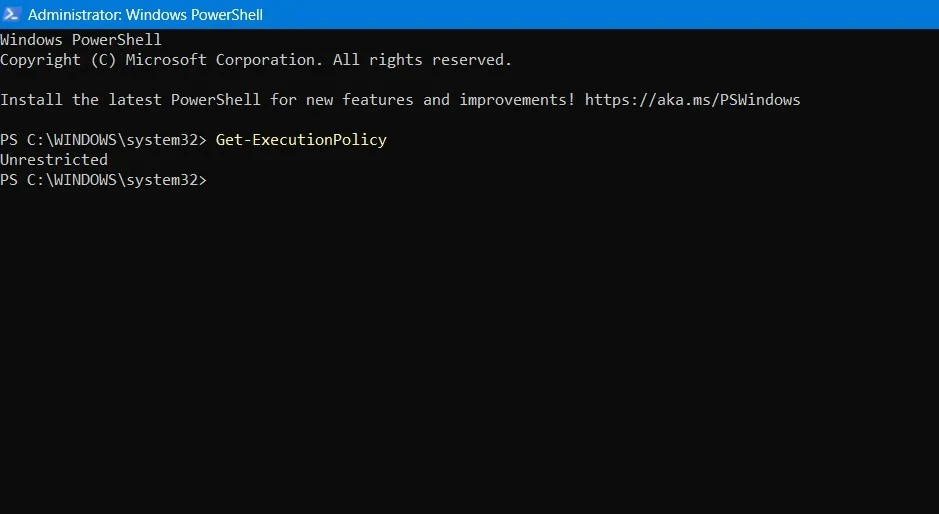
- If you see it return “Restricted,” you will have to change over to “Unrestricted.” “Restricted” means that PowerShell uses a cmdlet for execution policy to protect your PC from harmful scripts.
- To install any third-party script, you must change the execution policy to allow all scripts. This is done using
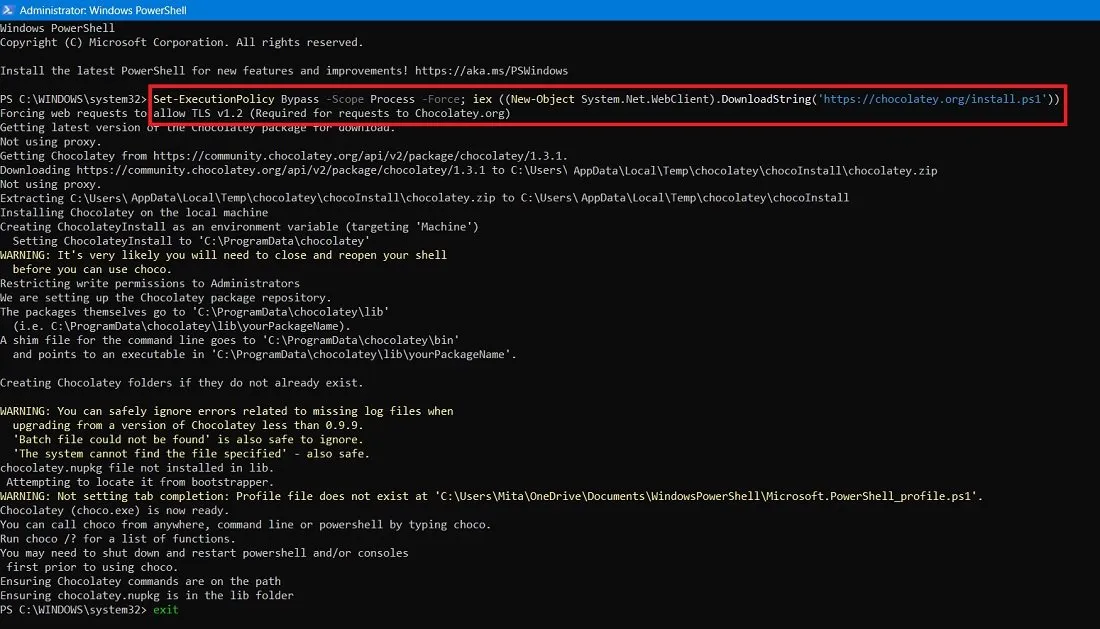
Set-ExecutionPolicy AllSignedorSet-ExecutionPolicy Bypass -Scope Process. As Chocolatey is a safe software to use, there’s nothing to worry about. - You’ll need to paste in the install command:
Set-ExecutionPolicy Bypass -Scope Process -Force; iex ((New-Object System.Net.WebClient).DownloadString('https://chocolatey.org/install.ps1'))
- You’ll see some installation text scroll by. Chocolatey will install by downloading its latest version.
- Type
exitto get out of PowerShell.
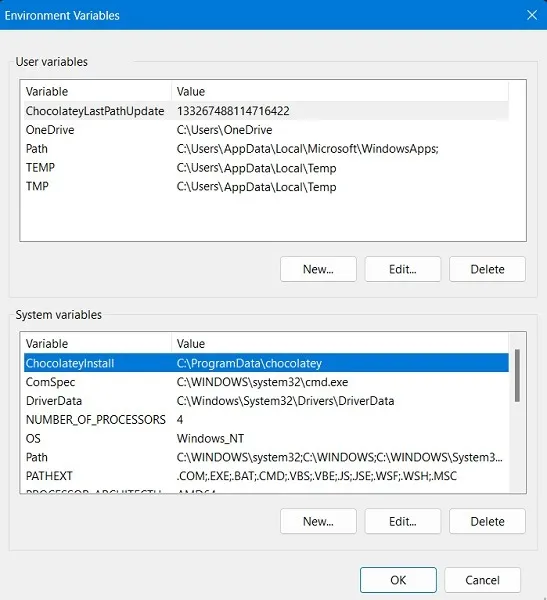
- The above installation will add
ChocolateyInstallas an environment variable.
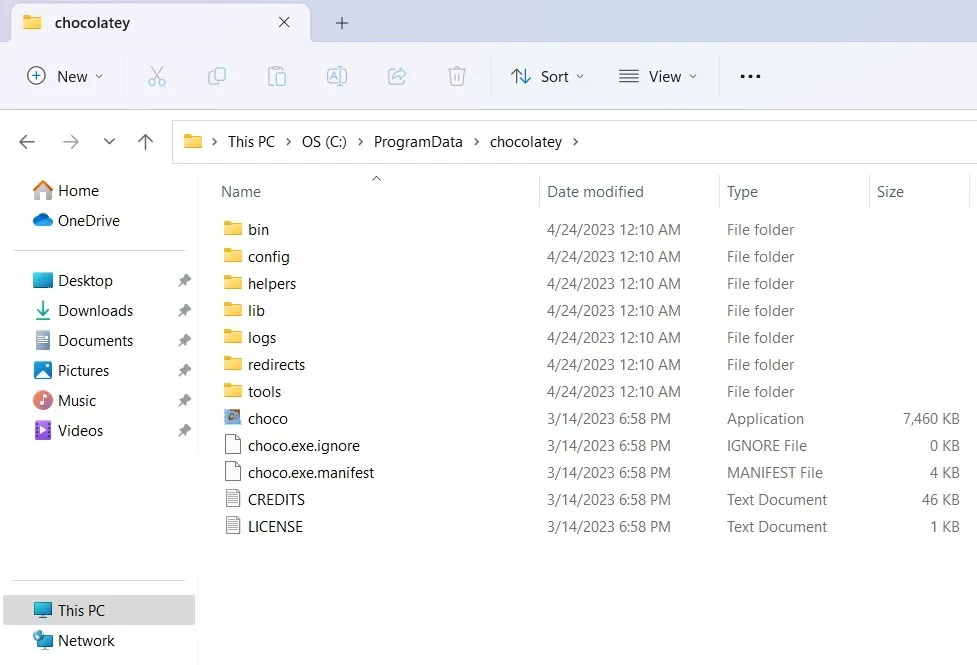
- It will also create a Chocolatey folder in your “C:\” drive (if it doesn’t already exist).
2. Additional Methods to Install Chocolatey in Windows
There are a few other methods to install Chocolatey. Refer to the official Chocolatey website for more shortcuts.
- NuGet Package Manager: if you have Visual Studio 2010+ and NuGet extension installed on your Windows device, just enter the following command to install Chocolatey:
Install-Package chocolatey Initialize-Chocolatey Uninstall-Package chocolatey
- NuGet.exe in PowerShell: in the PowerShell window, enter the following command, a NuGet command-line extension.
nuget install chocolatey
- Windows built-in compression: an environment variable method that will install Chocolatey using the two-step command below.
$env:chocolateyUseWindowsCompression = 'true'# install script
Installing Chocolatey GUI in PowerShell
For a time, Chocolatey was only available through the command line, which limited its potential audience to people who weren’t scared off by that, but its GUI has been getting steadily better, making it accessible to just about anyone.
If you want to stick with the GUl, though, you’ll still need to learn simple commands, like choco install and choco upgrade, that will allow you to manage programs in the command line (CMD or PowerShell).
- In the PowerShell admin window, type or paste in:
choco install chocolateygui
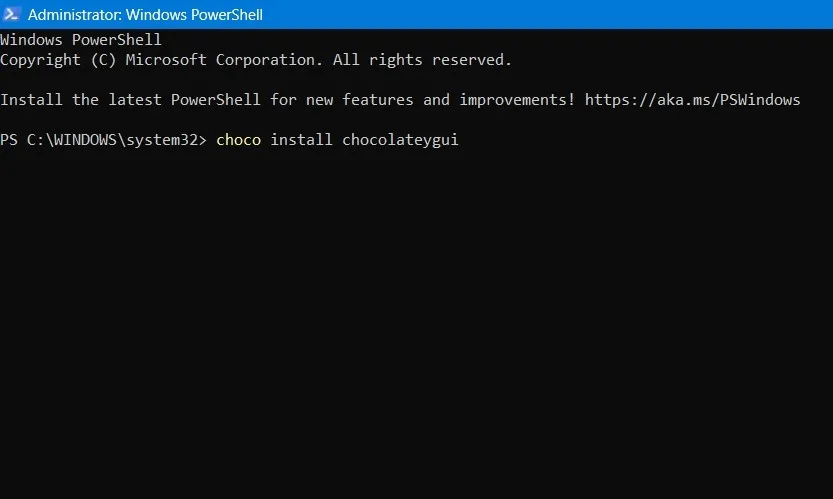
- This will start downloading and installing the GUl program you’ll need to visually manage Chocolatey.
- Select
Yto finalize the installation. If you don’t want to be bothered by this for each step, just typeA.
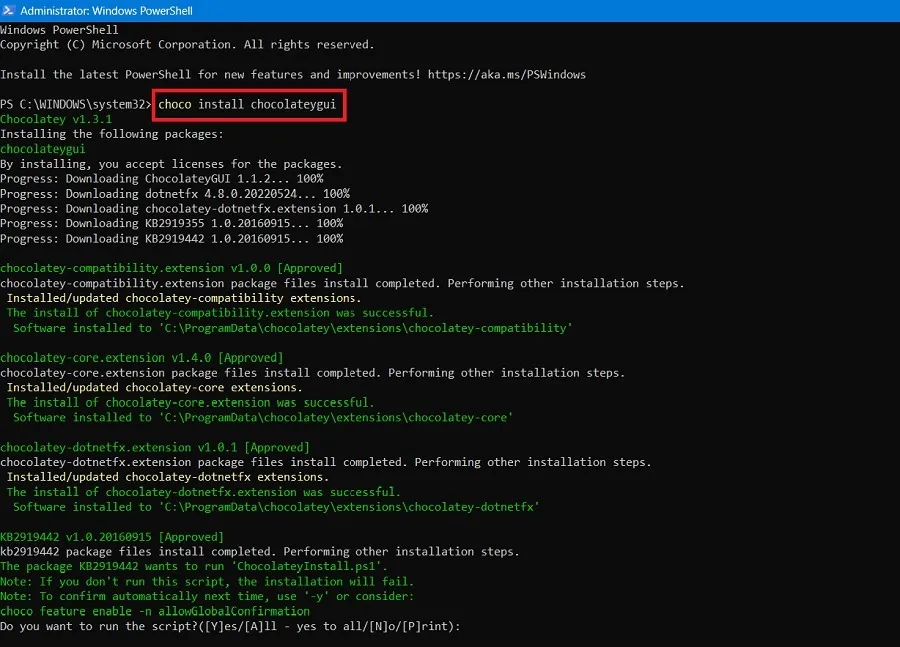
- Wait for all the Chocolatey GUI packages to be installed. Once it’s done, you will see a success status of the final installation.
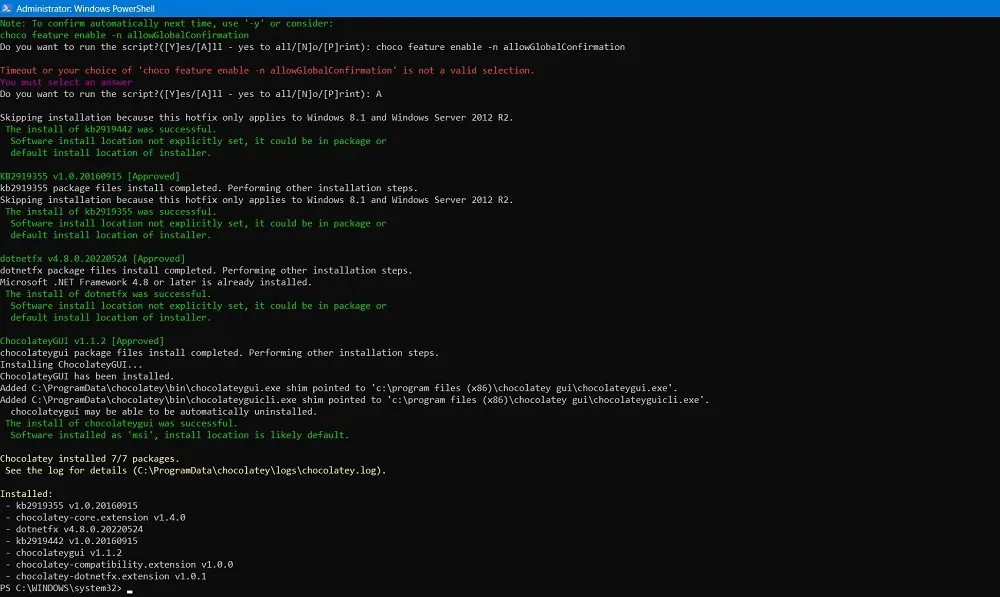
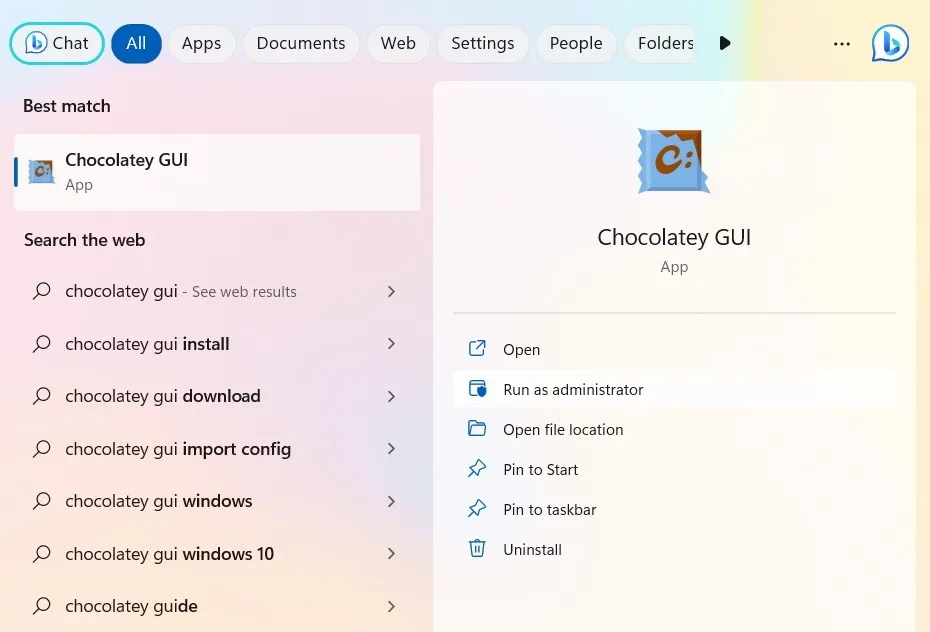
- After the installation, you can search for Chocolatey GUI in the Windows search box. It’s better to run the application as an administrator.
FYI: ever wondered what the difference is between PowerShell and Command Prompt? We outline what sets them apart in this guide.
Uninstall Chocolatey From Windows
If you want to uninstall Chocolately from your device (for maintenance and a Windows reset, perhaps) you can do it easily.
- Open the PowerShell window and type the uninstallation command for Chocolatey. Check the official site to use the latest uninstallation code. You will need to press the red “Yes” button at the bottom to reveal the scripts.
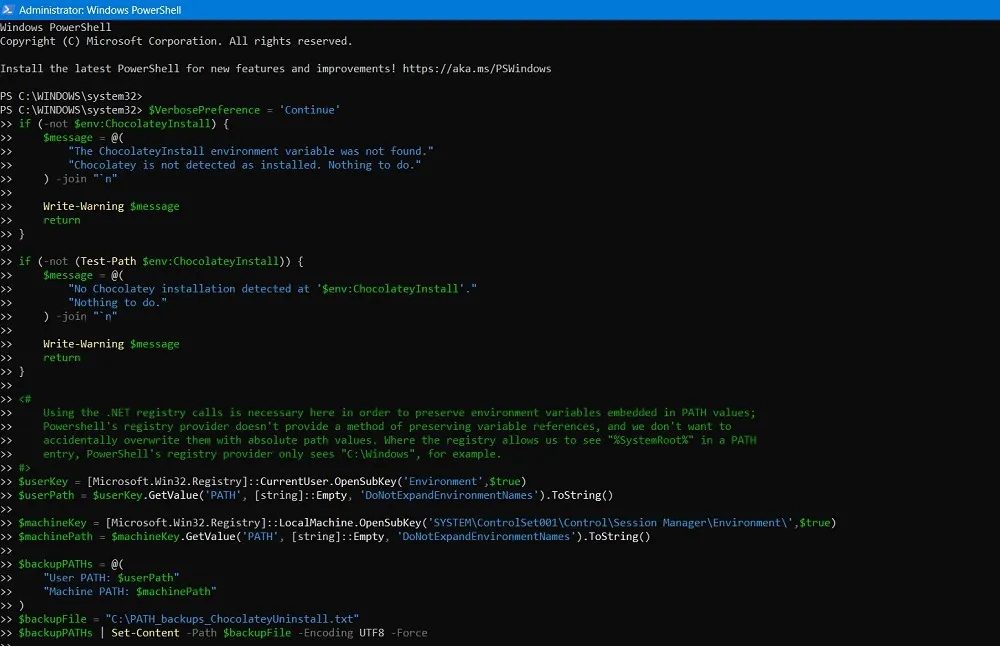
- If during uninstallation it says, “No Chocolatey installation detected” in the PowerShell window, you don’t need to do anything. Unless you have Chocolatey GUI installed on your Windows, there is no other way to tell whether the program is available on your device.
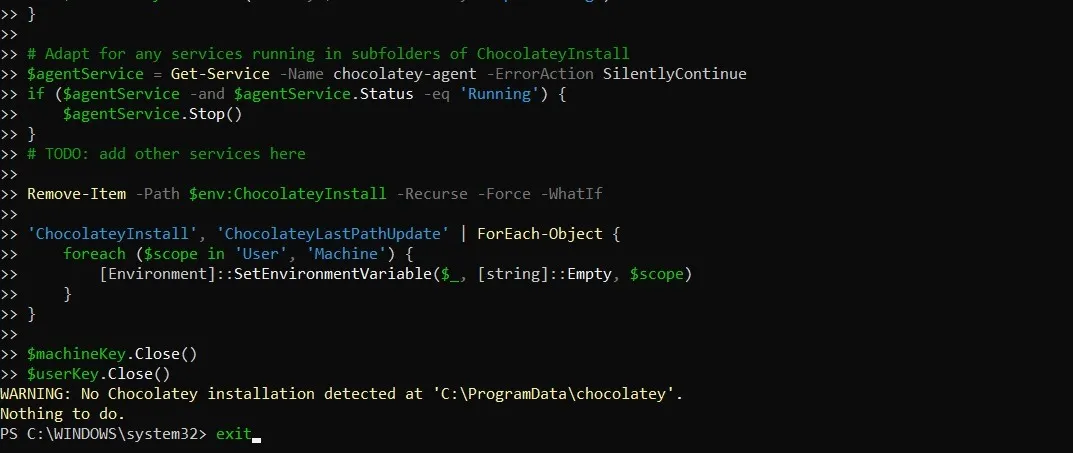
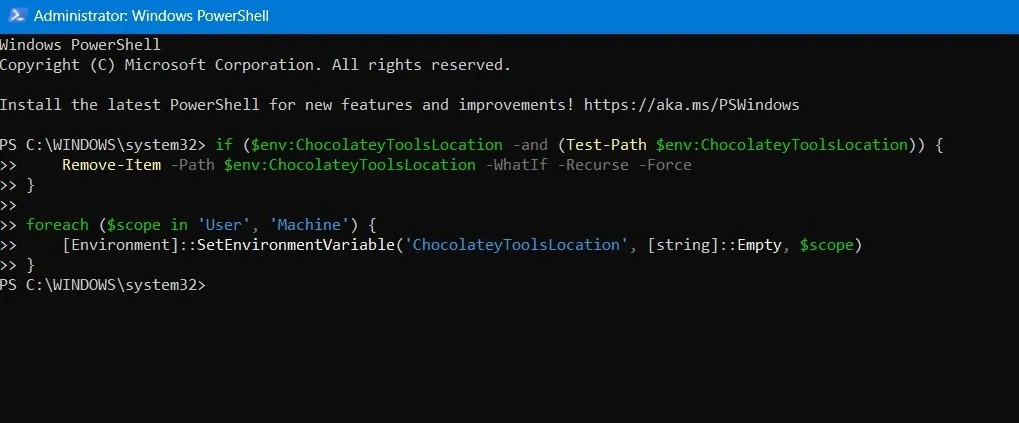
- Uninstalling Chocolatey also means removing its environment variables created during the installation process.
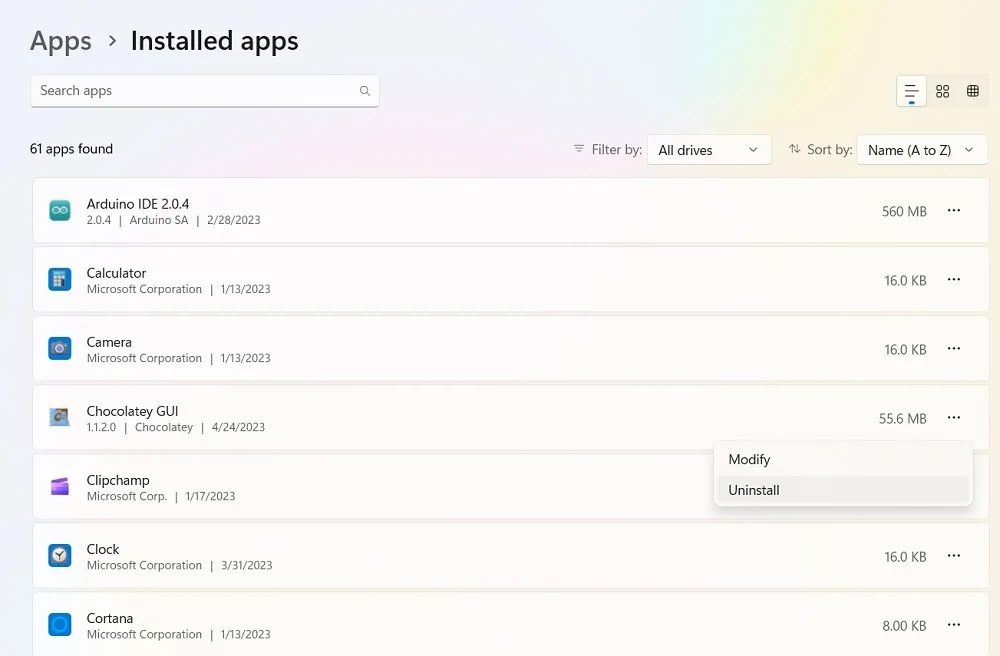
- The Chocolatey GUI program, on the other hand, can be conveniently uninstalled from the “Add or remove programs” menu in Windows.
Installing Programs With Chocolatey
You can use either the Chocolatey GUI or PowerShell to install any program with Chocolatey.
Using Chocolatey GUI
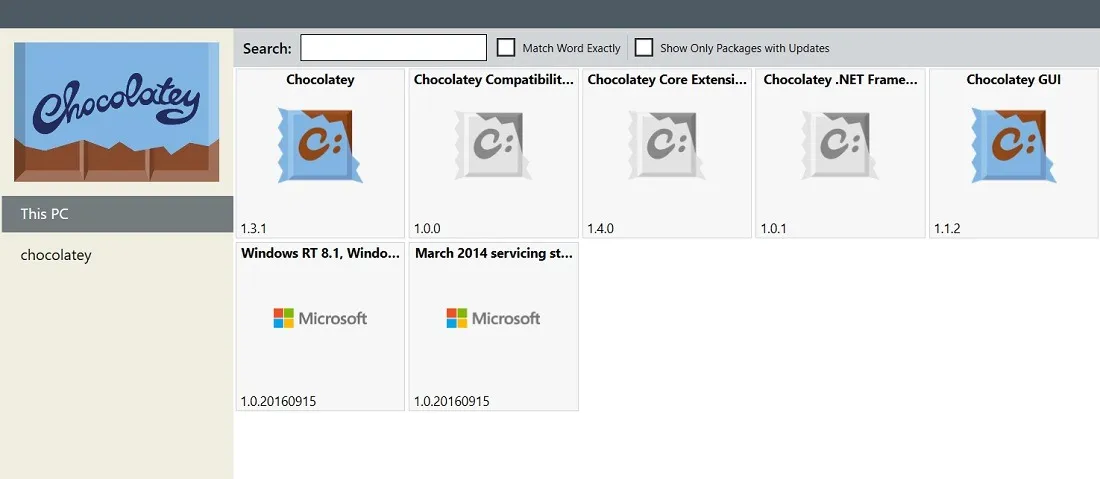
- Once you launch the utility, you’ll see two main tabs on the left: “This PC” and “chocolatey.”
- “This PC” allows you to manage the programs you’ve installed via Chocolatey, and “chocolatey” allows you to search for programs you want to install.
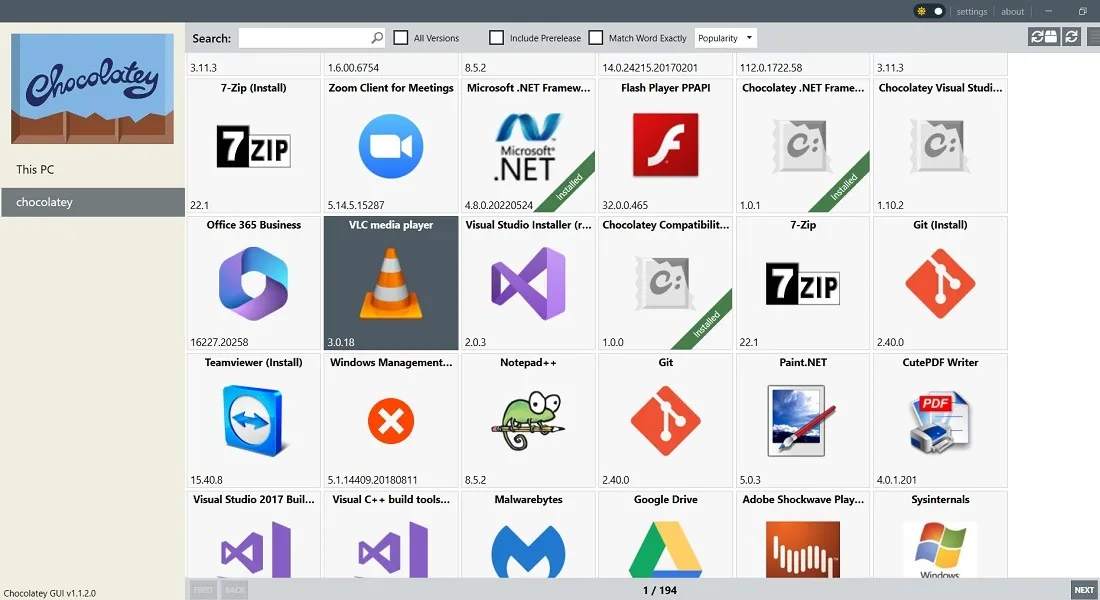
- Browse through the entire list of applications to install the ones you need on your Windows device.
- The Chocolatey program list is organized by the programs’ popularity. You can change that to a “List view” using the buttons in the top-right corner.
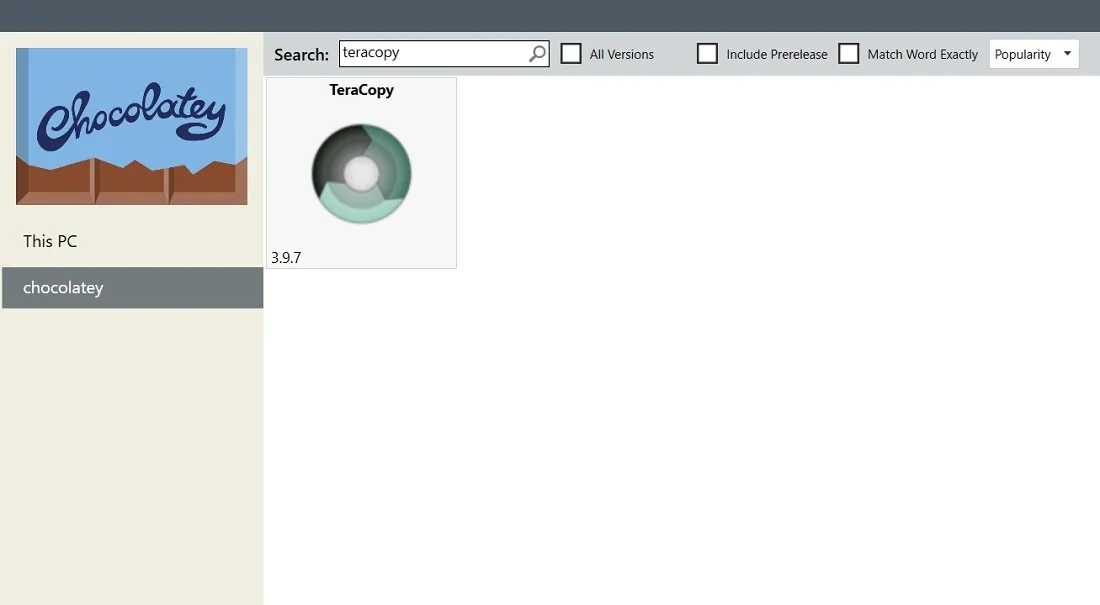
- Browsing manually may be slow, so use the search bar to hunt for specific programs.
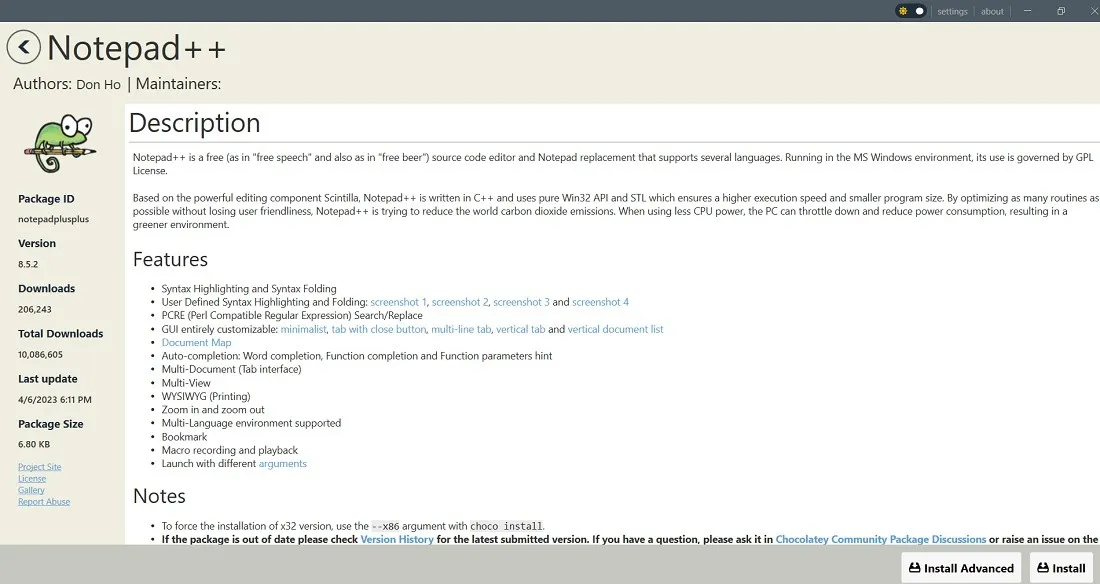
- When you find the program you want, you can either check out more details on it or go straight to installing.
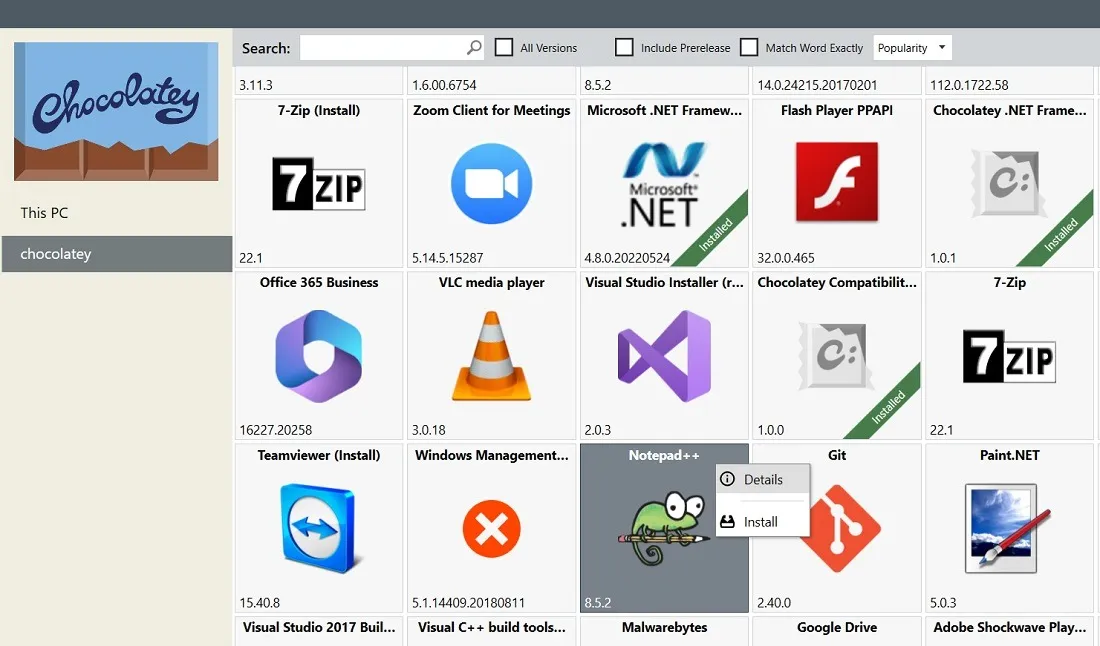
- If you click “Install,” it will install the latest package of the given program.
- Click “Install advanced” for more advanced installation options, such as a different folder path, cache locations, and checksum values.
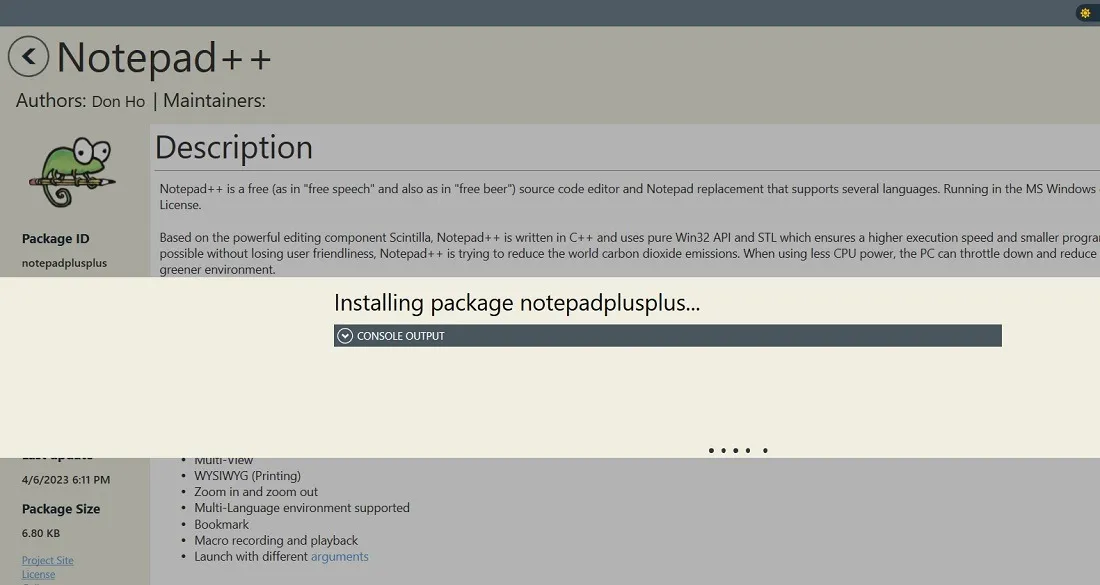
- Wait a few seconds for the desired package to install via Chocolatey GUI.
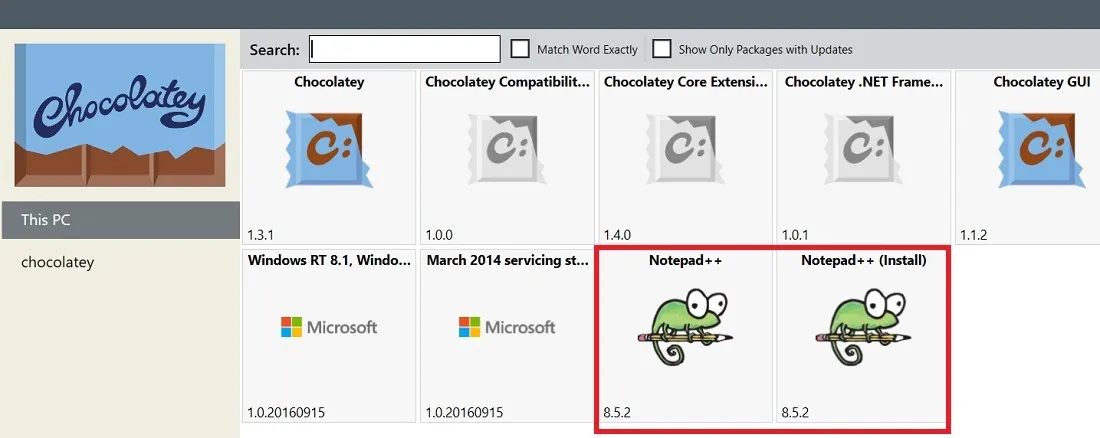
- All programs installed via Chocolatey will be visible in the “This PC” section of the main homescreen.
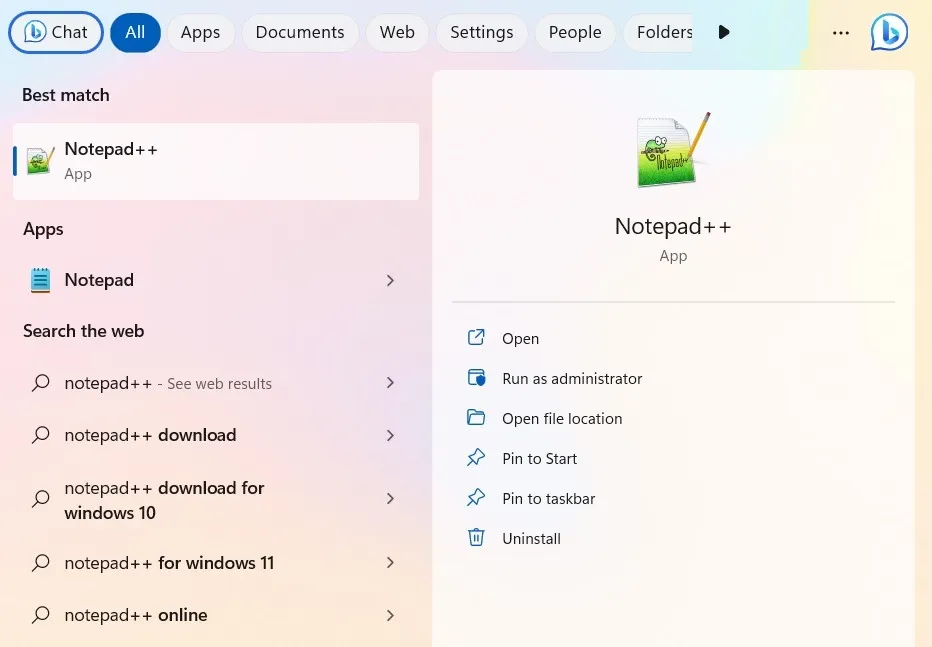
- The installed application can be opened from the Windows search box or “Apps” as a regular application.
Using PowerShell
- Once you use
choco install [program], your program should set up pretty much on its own. Head to this link to find your desired packages. It will give you the exact syntax you require. - If the program is already installed on your device, use the
--forceargument to reinstall the latest package version.
choco install [program] --force
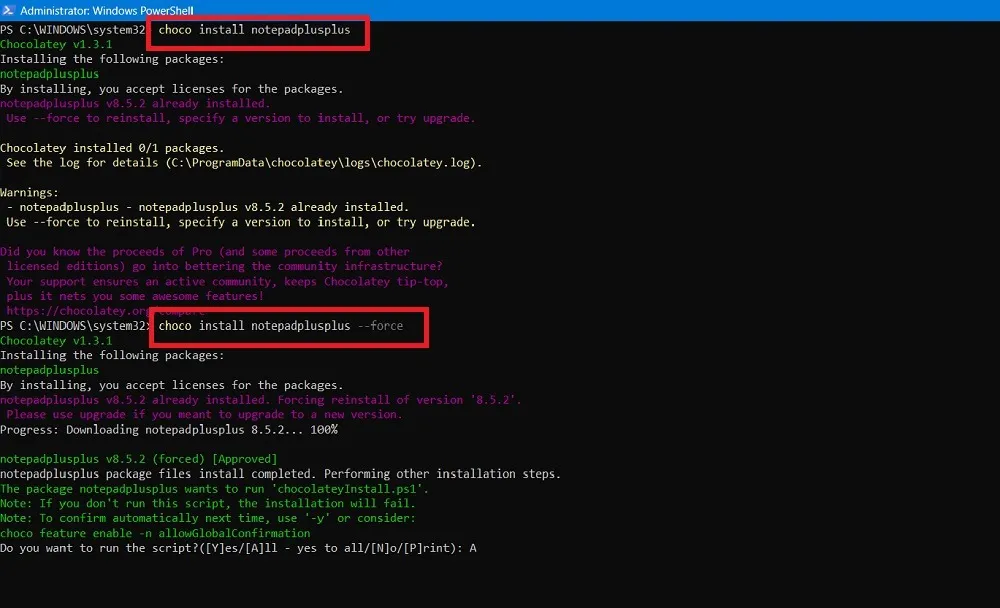
- After the dialog is finished, you’ll find your new program in your Start menu with all the others.
Updating Programs With Chocolatey
Installing programs is easier with Chocolatey, but the update feature is where it really shines. ChocolateyGUI makes it very easy to see which of your programs are out of date. Getting them all up to speed takes just a few clicks.
- To find your programs that can be updated through Chocolatey, go to “This PC” and check the box for “Show only packages with updates.” If it says, “No matching packages found,” none of the programs require an update at that time.
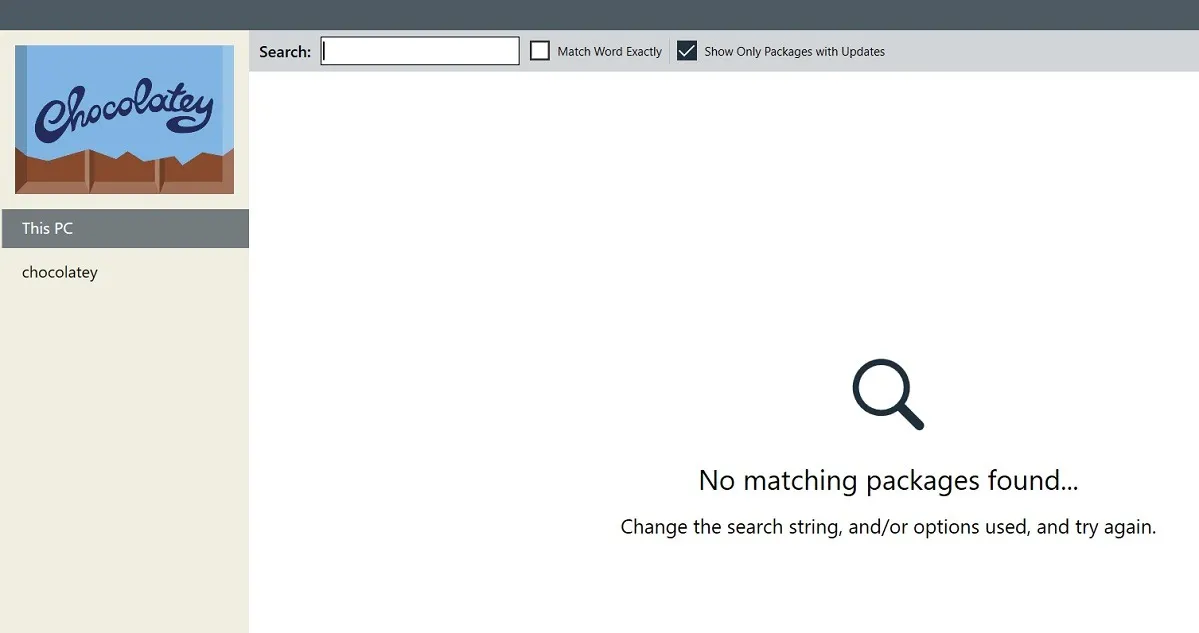
- If you just want to update one, you can right-click it and select “Update.”
- On PowerShell, type the following to update any program of your choice. The update method will also reinstall a program if it says that it is not installed at the moment.
choco upgrade [program]
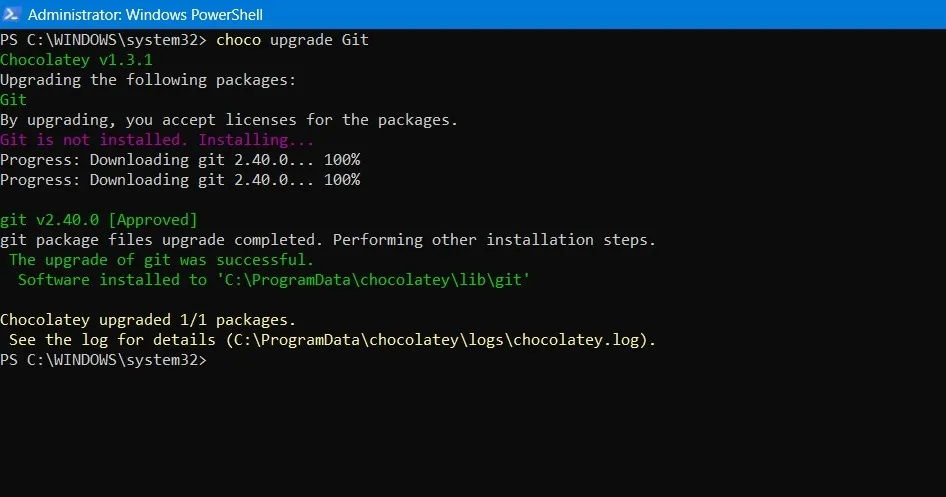
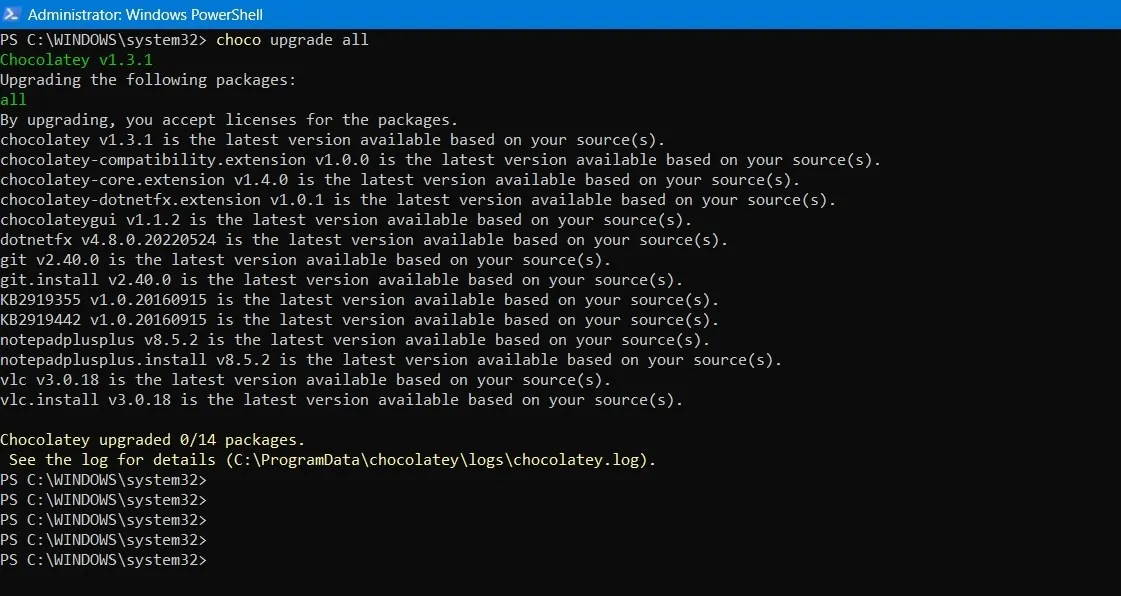
- Chocolatey can also automatically update every program in its list. For this, you can use the Chocolatey GUI or
choco upgrade allin the command line. - Updating your programs can now be a once-a-week task that just takes a few clicks.
Uninstalling Programs With Chocolatey
As with the updates, Chocolatey makes it easy to uninstall several programs from the GUI interface or PowerShell.
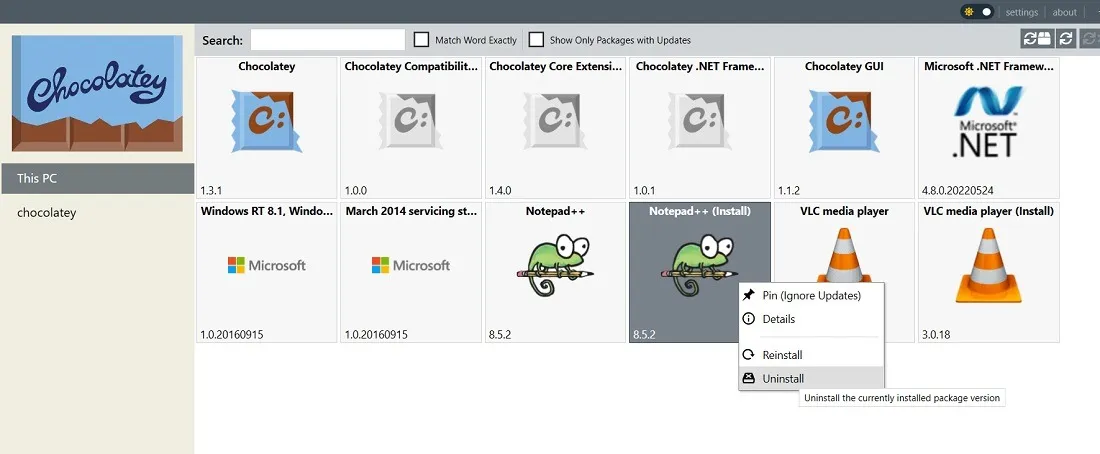
- In the GUI window, right-click on the installed program and select “Uninstall.”
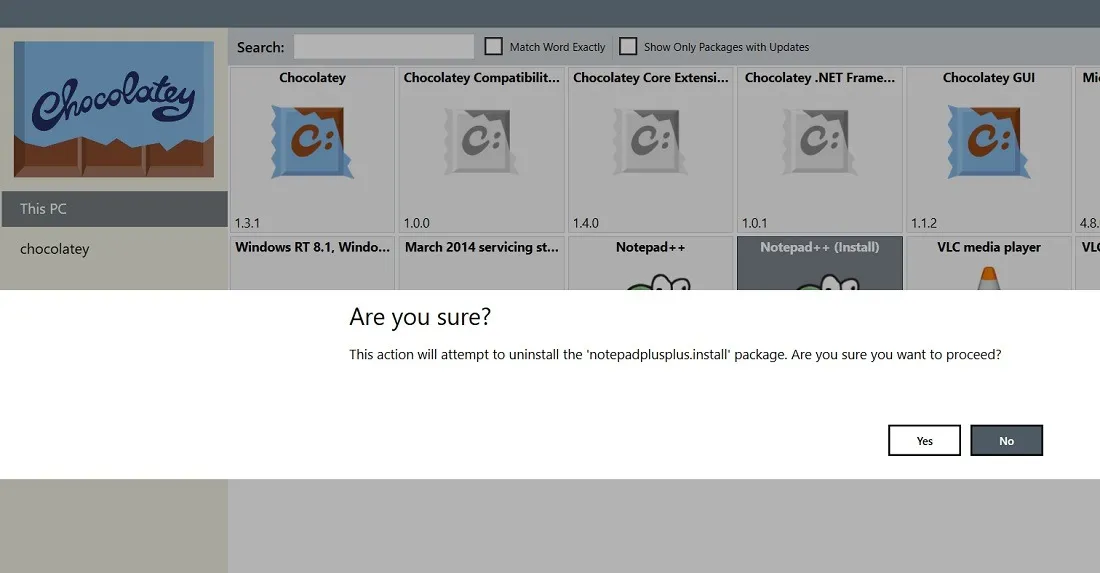
- Before uninstalling a program, you will be asked to reconfirm the action through an “Are you sure?” dialog box. Click “Yes” to proceed.
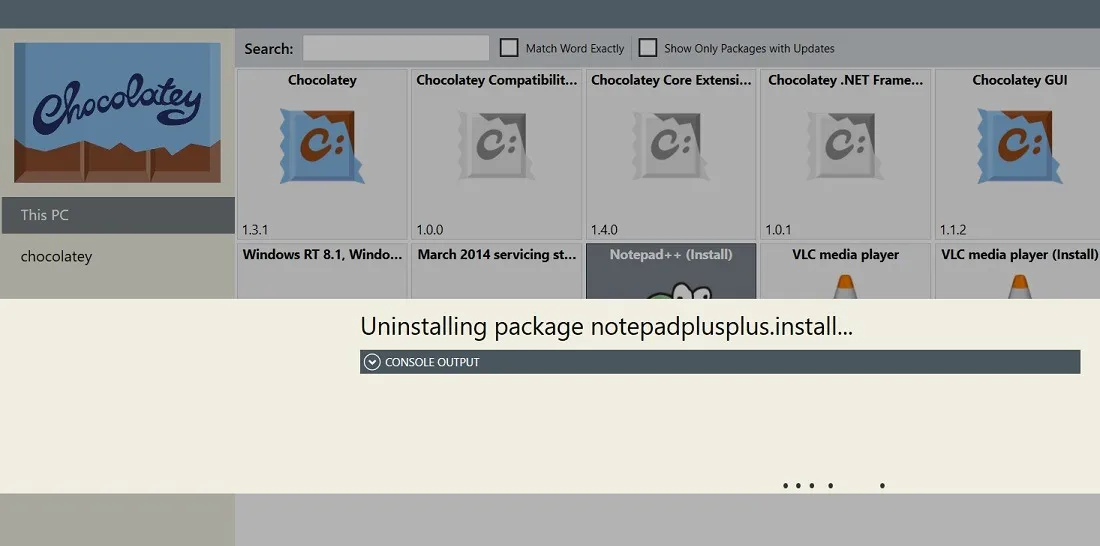
- Wait a few seconds for the package to completely uninstall from the GUI. If it shows a failure message, just remove the visible duplicate instances of your program.
- Uninstalling a program using the PowerShell window is very easy as well. Use the following syntax:
choco uninstall [program]
- If you misspelled a program name, watch for auto suggestions by Chocolatey so that you can get the syntax right. The program will automatically start uninstalling in front of you.
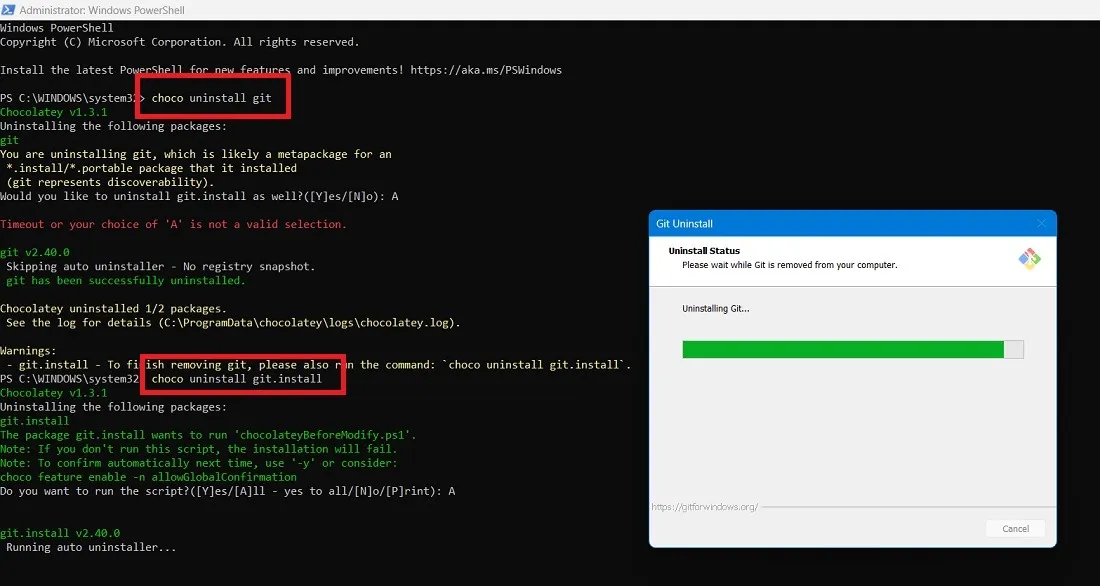
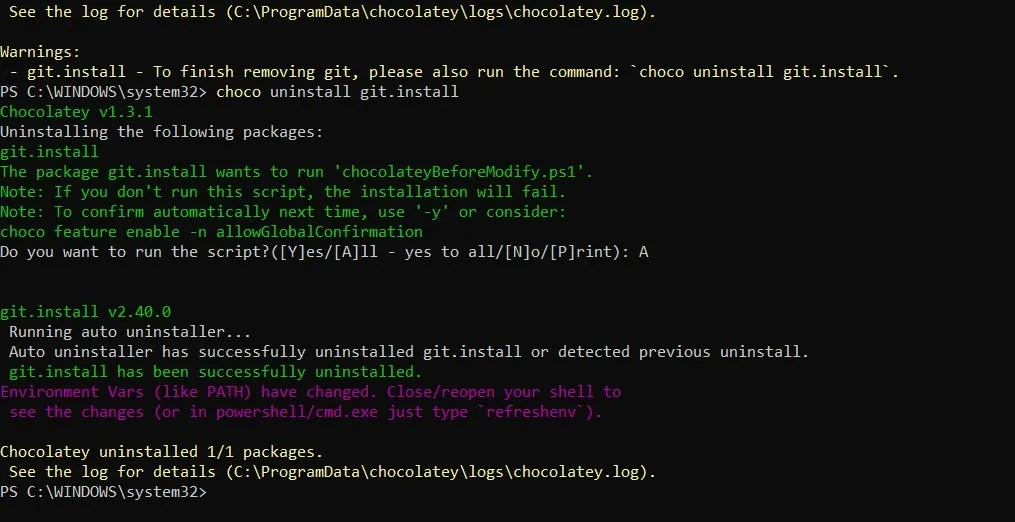
- After the program is uninstalled in the PowerShell window, you will see an uninstallation message.
Frequently Asked Questions
How do I fix error messages while trying to install Chocolatey in PowerShell?
The main reason you would see an error message in PowerShell while installing Chocolatey is that the path may not be set correctly. Go to “Edit environment variables” from “System Properties -> Advanced” and check the “Path” value under “System Variables.” It needs to have a PowerShell entry such as C:\Windows\System32\WindowsPowerShell\v1.0\. If the entry is missing, add it to the “Path” variable. Restart the PC and any PowerShell errors will disappear. If you can’t get PowerShell to open for you, try these fixes.
Are there any Chocolatey alternatives?
There are many alternate package managers that you can use in place of Chocolatey. These include NuGet, Winget, Scoop.sh, npm, and Ninite.
Image credit: Pixabay. All screenshots by Sayak Boral.


Leave a Reply