0x800f0922 on Windows 11: How to Fix This Install Error
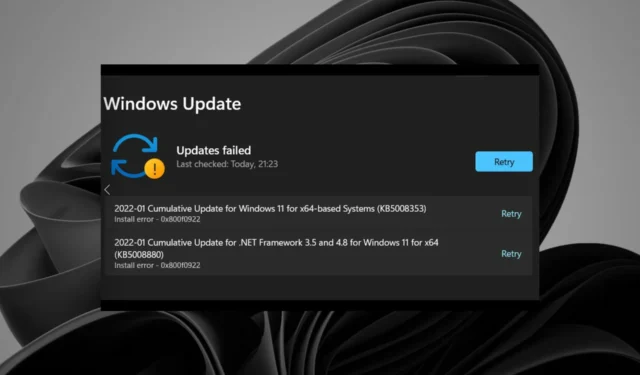
More and more users have reported the Windows 11 update error 0x800f0922 on support forums in early 2022.
When that issue occurs, the Windows Update section of Settings displays an Updates failed to install error 0x800f0922 for updates. In one MS forum post, a user said this about that error:
The latest couple of updates continually fail – it retries and they fail with the same error… Other Windows Updates seem to install OK – just these two fail:
2022-01 Cumulative Update for. NET Framework 3.5 and 4.8 for Windows 11 for x64 (KB5008880)
Install error – 0x800f0922
Consequently, Windows 11 doesn’t install patch updates the 0x800f0922 error arises for. So, do you need to fix error 0x800f0922? If so, this is how you can fix that issue within Windows 11.
What does error code 0x800f0922 mean?
Some Windows updates have downloading issues, and the error code for that update is 0x800F0922. Additionally, it indicates that there is not enough space on the System Reserved disk to load a new system or that the system cannot access Windows Update.
What causes the Windows 11 update error 0x800f0922?
There are numerous potential causes for the Windows 11 update error 0x800f0922. That error can feasibly occur because of any of the following:
- A disabled App Readiness service
- Corrupted system files
- Disabled. Net Framework components
- Incorrectly configured Windows Update components
- Corrupted cache data
How can I fix the install error – 0x800f0922 on Windows 11?
1. Run the Troubleshooter for Windows Updates
- Open Settings by pressing Windows + I.
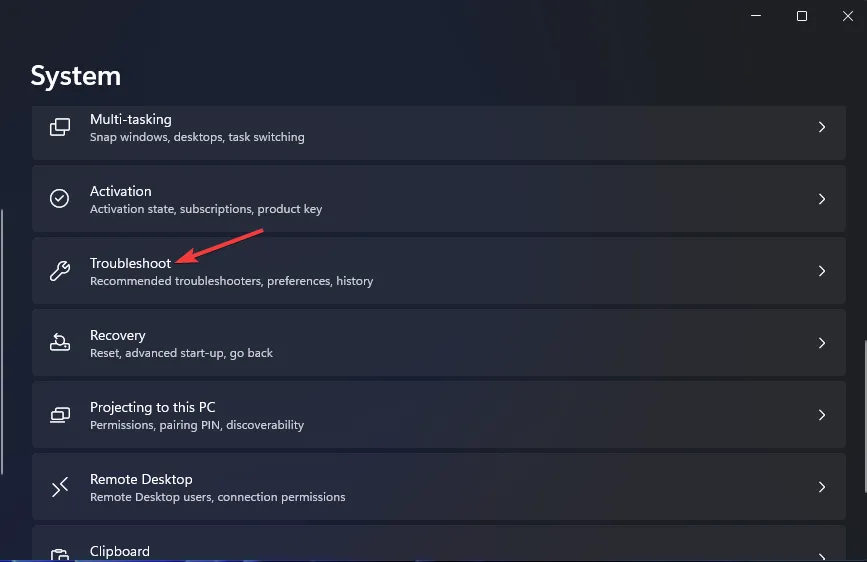
- Click Troubleshoot.
- Press the Windows Update Troubleshooter’s Run button.
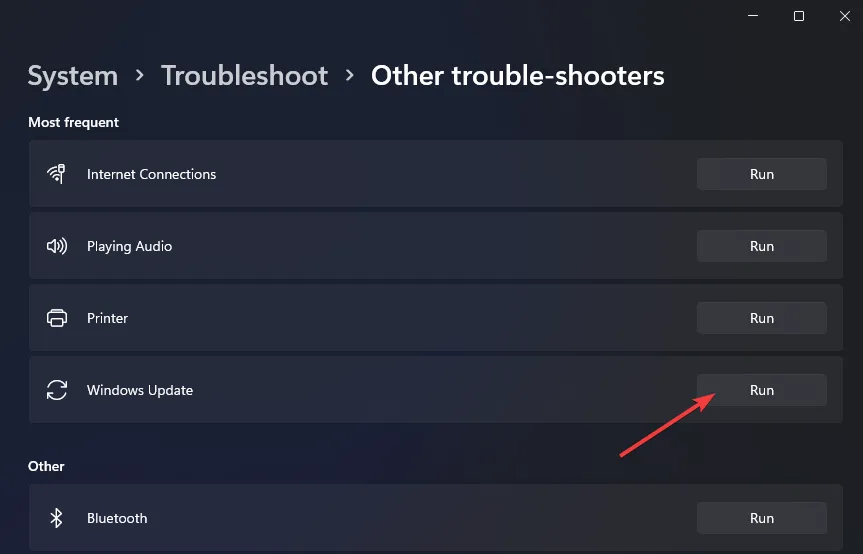
- Then wait for the troubleshooter to detect update issues. If it suggests any resolution, select the Apply the fix option.
2. Repair corrupted system files
Over time, Windows files can get damaged or corrupted by viruses, updates, or even apps that wore previously uninstalled but some associated files were left behind.
Since this error popped up right after a Windows update, it means that some files got wrongly replaced or modified, thus creating errors.
3. Enable. NET Framework 3.5 is components
- Click the Start menu’s taskbar icon with the right mouse button and select Run.
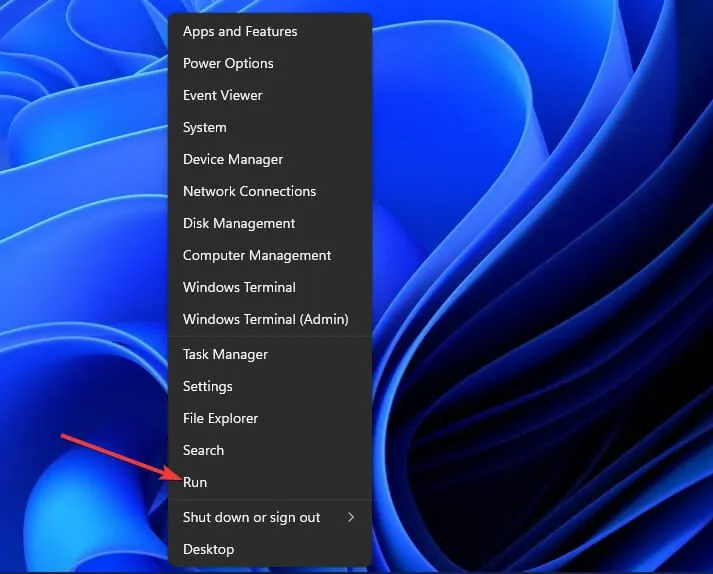
- To open Programs and Features, input this command and click OK:
appwiz.cpl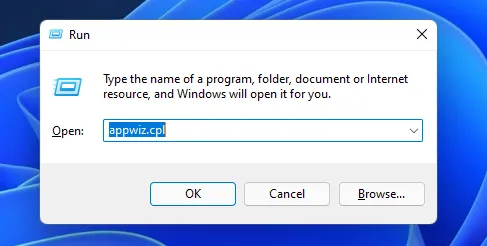
- Next, click the Turn Windows features on or off option shown directly below.
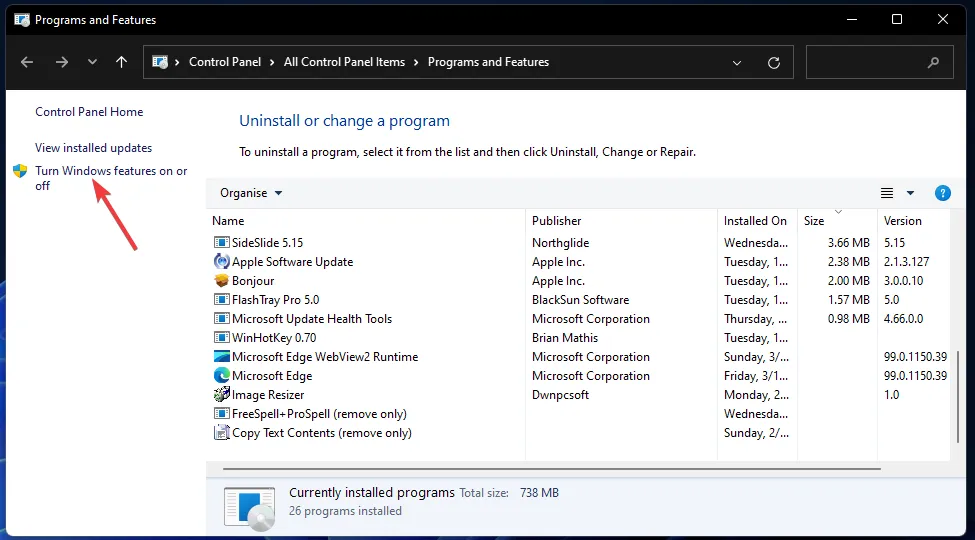
- Select the. NET Framework 3.5 (includes. NET 2.0 and 3.0) checkbox there if it isn’t selected.
- Double-click the. NET Framework 3.5 (includes. NET 2.0 and 3.0) option to expand it. Then select both the Windows Communication Foundation HTTP Activation and Windows Communication Foundation Non-HTTP Activation checkboxes.
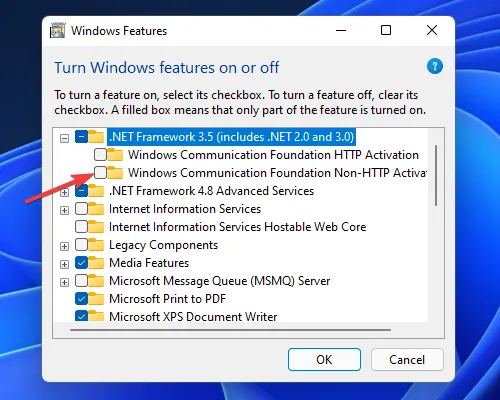
- Press the OK button.
- After that, click the Power and Restart options on the Start menu.
4. Run deployment image and system file scans
- Press the Windows + S keyboard shortcut to open the search tool.
- Type the keyword cmd in the text box.
- Right-click the Command Prompt app and select Run as administrator.
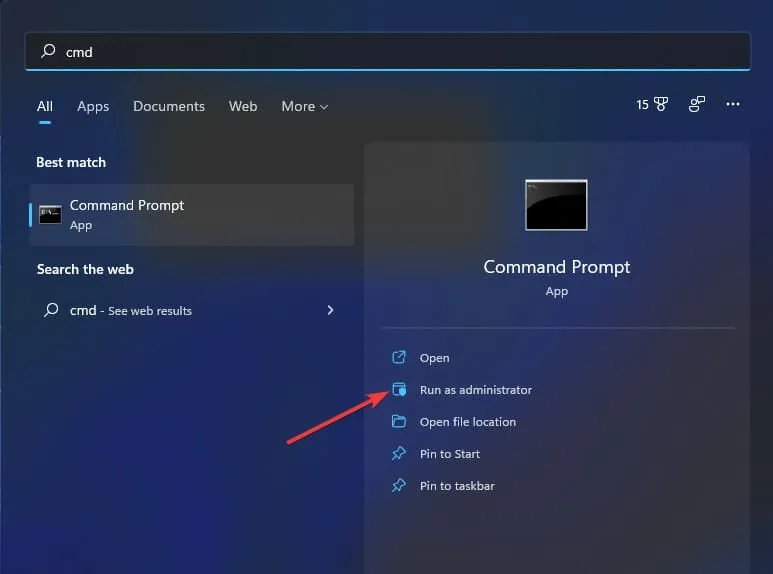
- Enter this command and press Enter :
DISM /Online /Cleanup-Image /RestoreHealth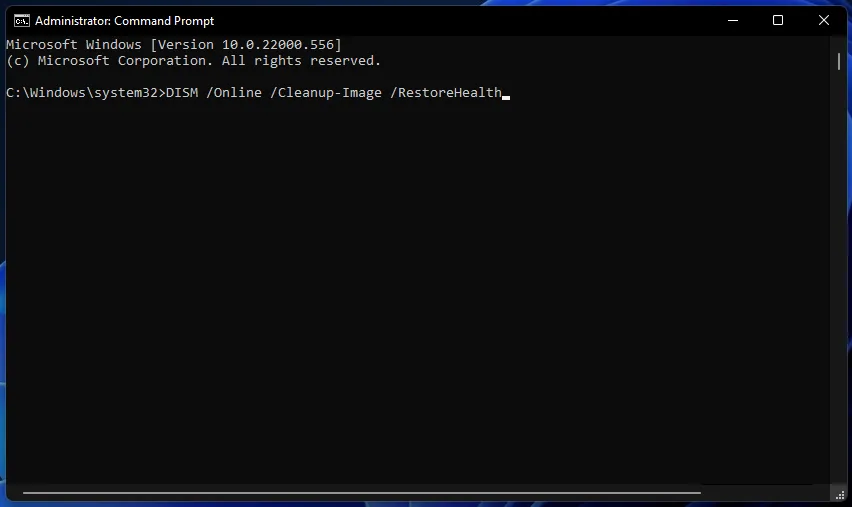
- To run an SFC scan, input the following text in the Command Prompt and press Enter :
sfc /scannow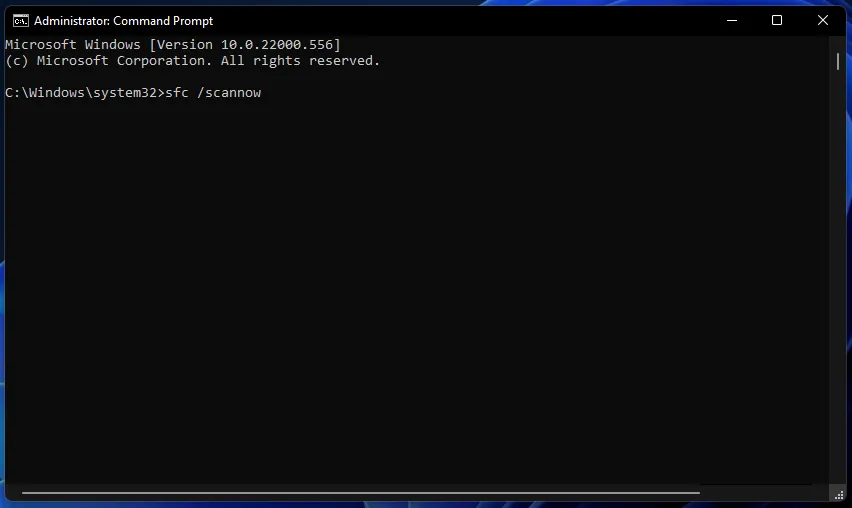
- Wait for the SFC scan to show an outcome in the Prompt’s window.
5. Run a fsutil resource command
- Open Command Prompt as covered in the previous method.
- Input the following command:
fsutil resource setautoreset true c:\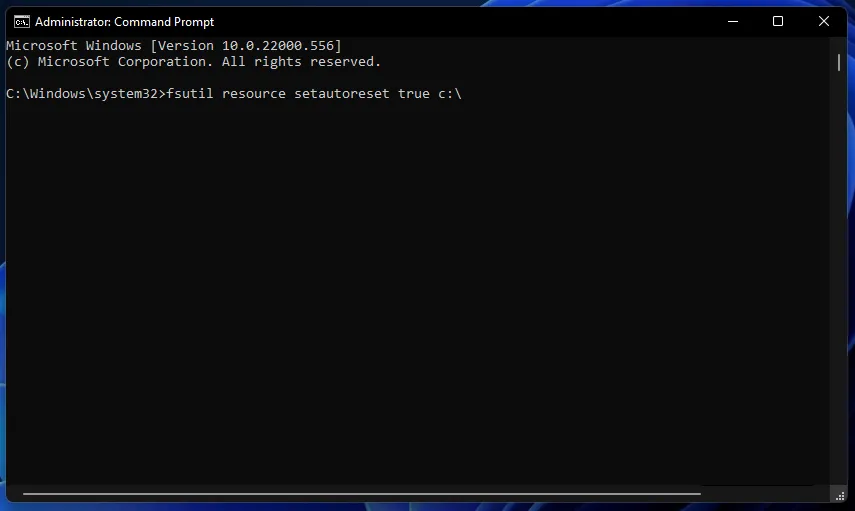
- Press the Enter key to execute the command.
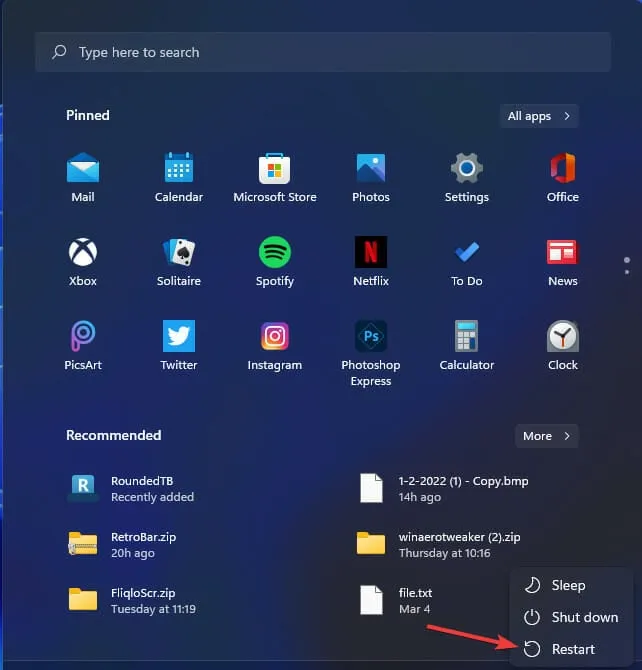
- Click Restart on the Start menu after executing the fsutil command.
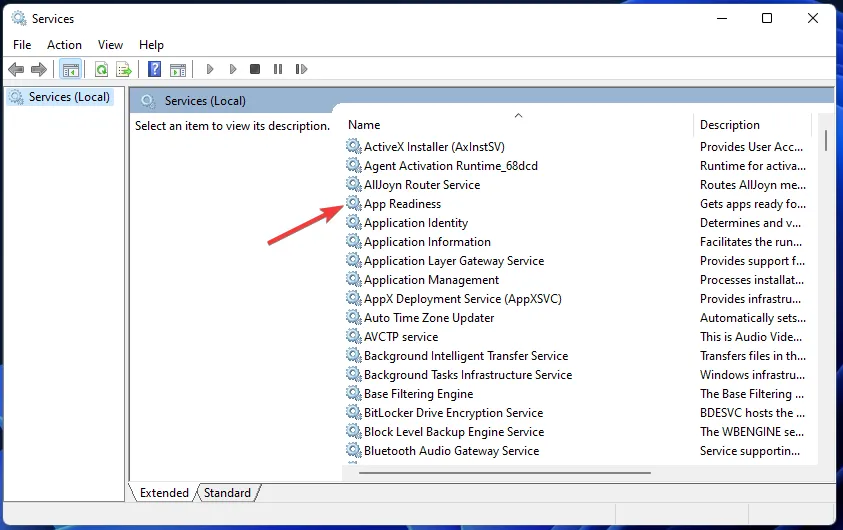
6. Enable the App Readiness service
- Bring up Run’s window.
- Open the Services window by entering this command in Run and clicking OK:
services.msc - Double-click App Readiness in the Services window.
- Change the Startup type option to Manual if it’s disabled.
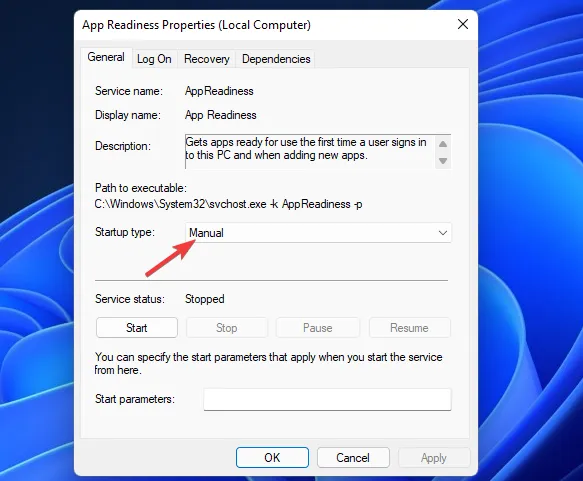
- Click the Start button on the App Readiness Properties.
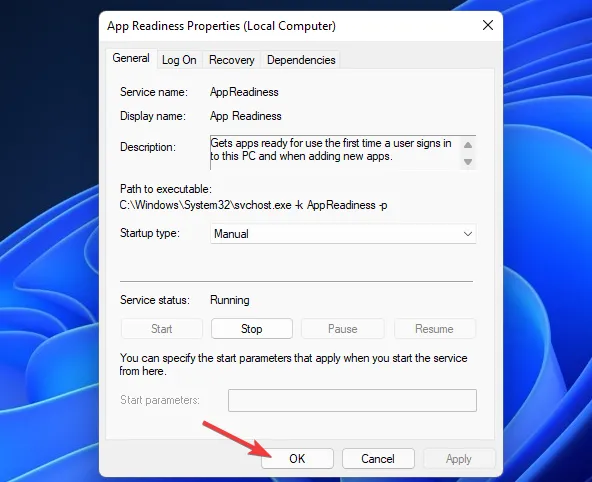
- Select Apply to save the new options for the App Readiness service.
- Then click OK on the properties window.
7. Perform antivirus scan
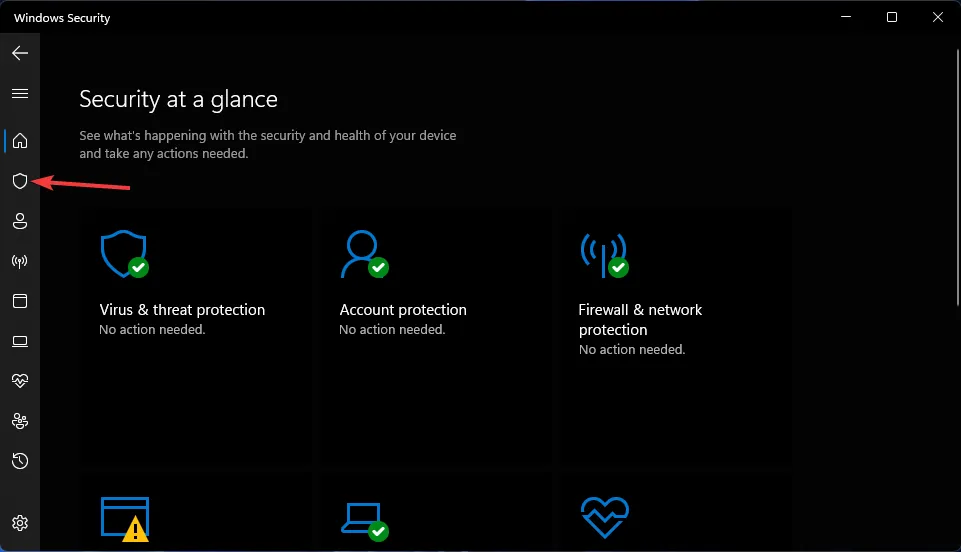
- Double-click Windows Security’s system tray icon to open that utility.
- Click the Virus & threat protection tab.
- Select Scan options to view more settings.
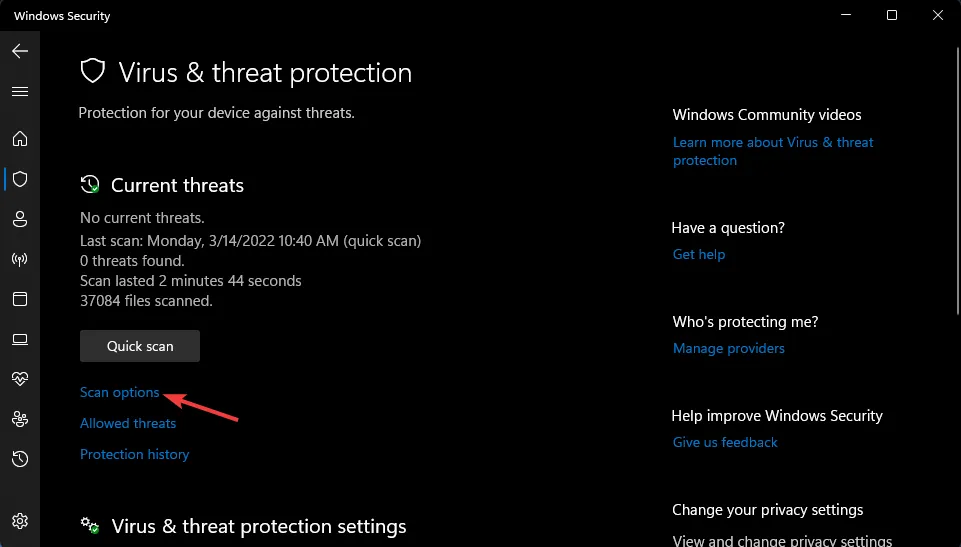
- Click the Full scan radio button.
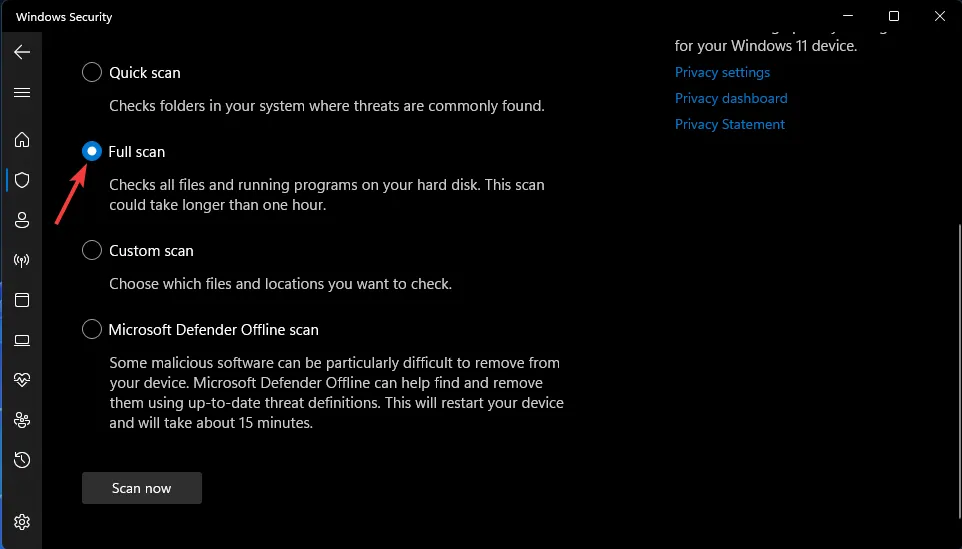
- Then press the Scan now button.
8. Reset Windows Update components
- Open Command Prompt as an administrator as specified in the fourth resolution.
- Input this flush DNS command and click OK:
ipconfig /flushdns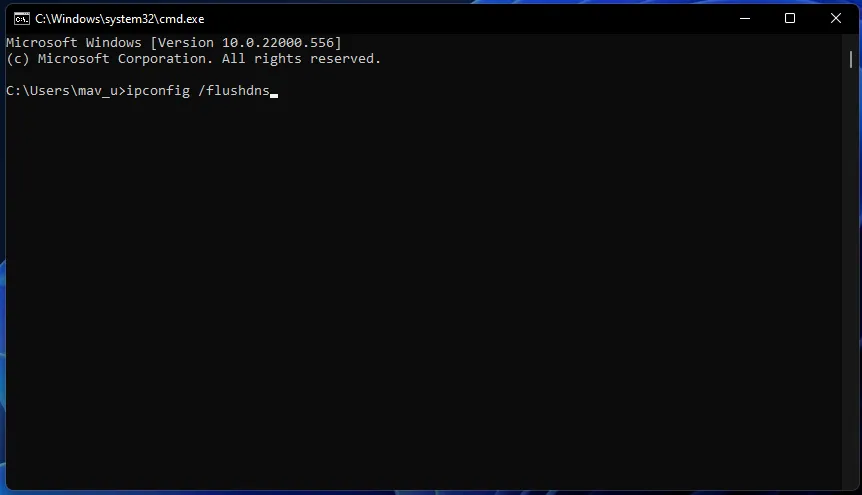
- To stop four services, input these separate commands by pressing Return after each:
net stop wuauserv
net stop cryptSvc
net stop bits
net stop msiserver - Type this command in the Prompt’s window and hit Enter :
ren C:\Windows\SoftwareDistribution SoftwareDistribution.old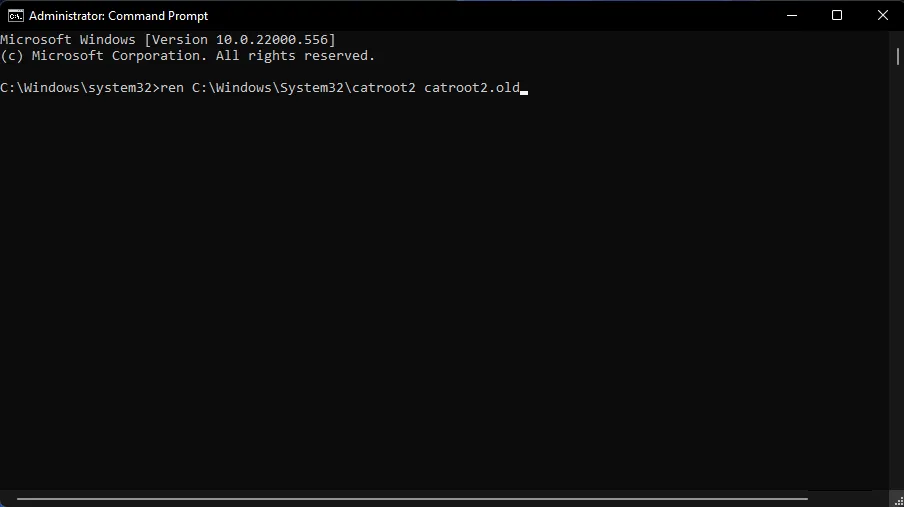
- Then input this Ren command and press Enter :
ren C:\Windows\System32\catroot2 catroot2.old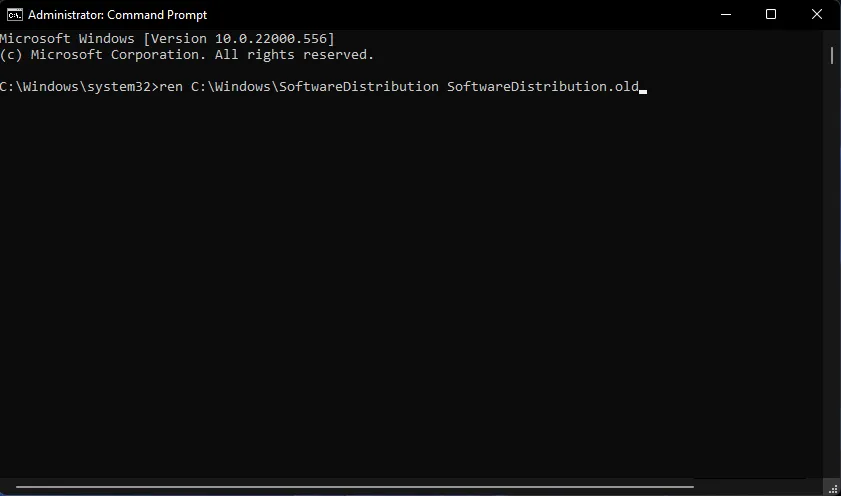
- Restart the services by entering these four separate commands:
net start wuauserv
net start cryptSvc
net start bits
net start msiserver - Then restart your PC after running all of the above commands.
How do I reset Windows Update on Windows 11?
Many users have been quoted to say we couldn’t install this update 0x800f0922 Windows 11 or have gotten the error message something didn’t go as planned in Windows 11.
We have shown you the steps that are necessary for running the program in Windows 10. However, you must know that the exact solutions apply to the new Microsoft OS if you have read through these steps.
You should choose the best solution and apply it to your Windows 11 device.
Can I manually download and install Windows 11 updates?
The Microsoft Update Catalog website provides an alternative way to download and install updates. You can try manually downloading and installing updates for which the 0x800f0922 occurs from there. This is how to download and install Windows 11 updates from the Microsoft Update Catalog.
- Open the Microsoft Update Catalog homepage.
- Type a KB code for an update in the Microsoft Update Catalog’s search box.
- Click the Search button on the Microsoft Update Catalog homepage.
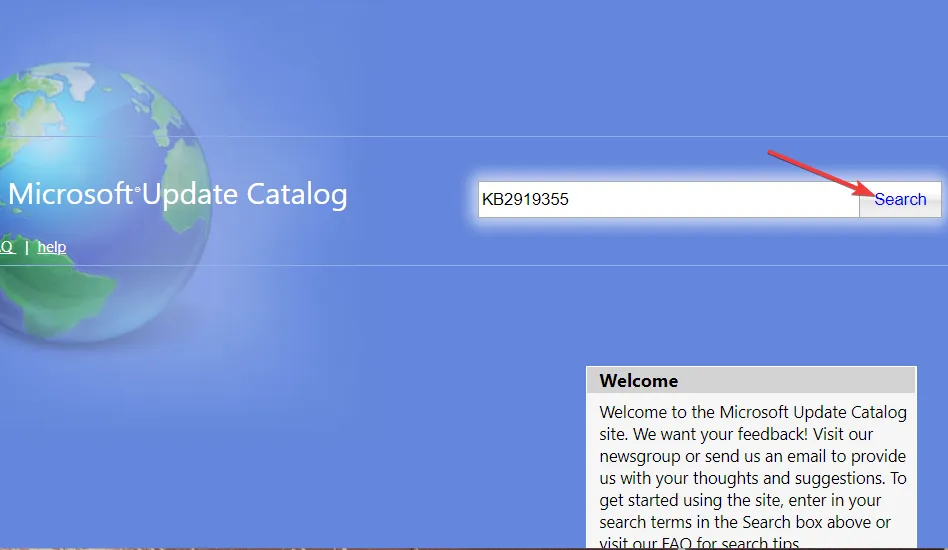
- Select a Download option for an update.
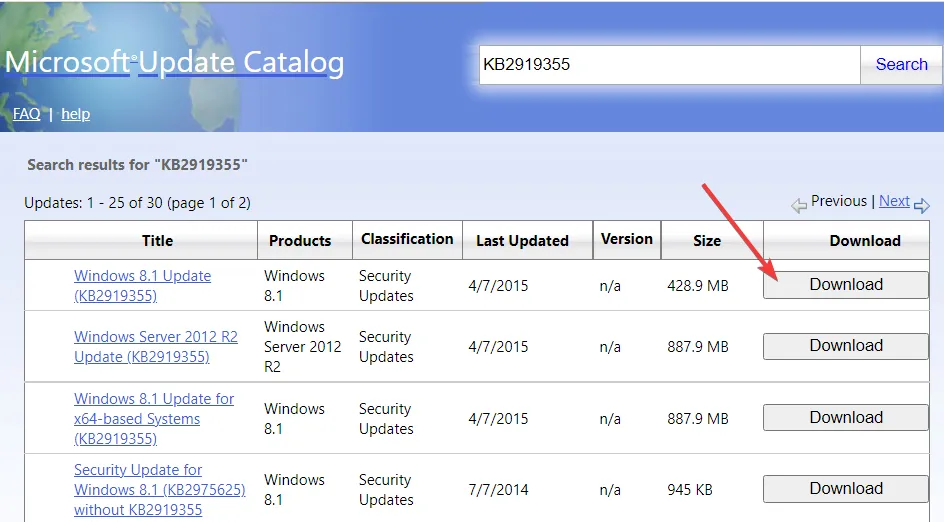
- Right-click the link on the Download window that opens to select a Save link as option.
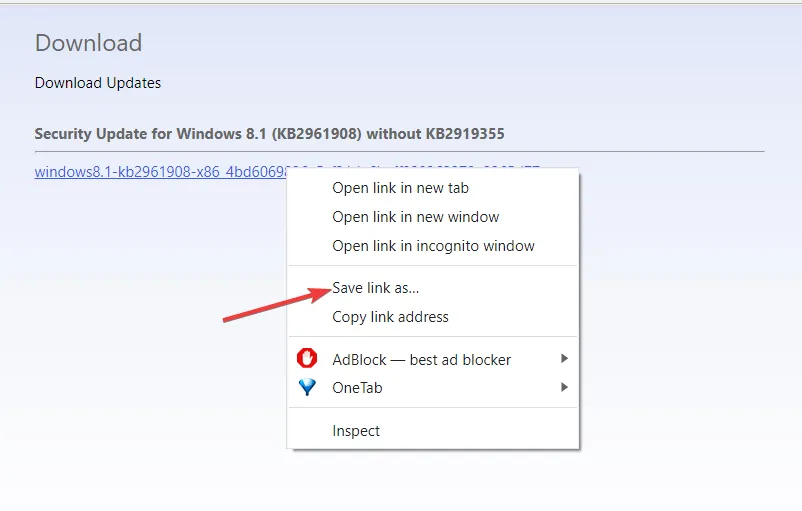
- Choose somewhere to download the update’s MSU file, and click the Save button.
- Launch the File Manager utility by clicking the taskbar button highlighted directly below.
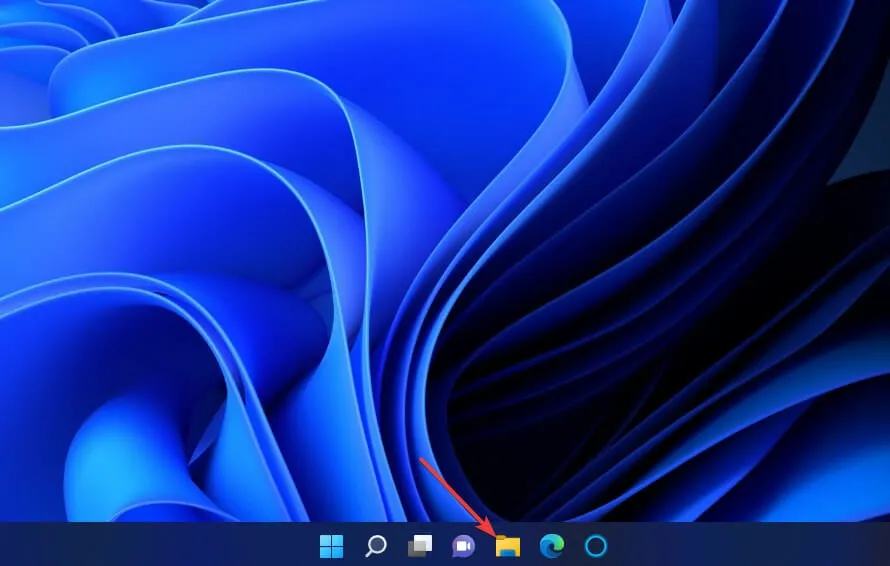
- Open the folder that includes the update’s MSU package.
- Double-click the downloaded MSU file to install the update.
It’s crucial to fix error 0x800f0922 to ensure Windows can install all updates. The potential resolutions above are some of the most widely confirmed fixes for error 0x800f0922. We still can’t promise that resolutions will fix that issue for everyone, but they’re certainly worth a try.
We also have an article on how to fix the 0x800f0922 error on Windows 10.
If those resolutions aren’t enough, consider reinstalling Windows 11 with an in-place upgrade or the Reset this PC utility. Additionally, you can perform an in-place upgrade with the Windows 11 Installation Assistant.
You’re welcome to ask questions about the Windows 11 update error 0x800f0922 in the comment box below. Also, if you’ve fixed the install error – 0x800f0922 on Windows 11 with another resolution not mentioned here, let us know below.


Leave a Reply