How to disable Sleep Mode in Windows 11/10
Sleep mode is a handy function that enables your computer to shut down its display after a period of inactivity. It saves your battery and you can resume your work from where you left off by waking up your PC. However, you may want to disable the sleep mode if you want to prevent your PC from going to sleep after a period of time. In this post, we are going to show you multiple methods to disable sleep mode on your Windows 11/10 PC.
How do I stop my laptop from going to sleep?
To stop your laptop or PC from going to sleep, you need to configure your sleep settings accordingly and disable the sleep mode. Open your Settings app and set the sleep option to Never. We have discussed the exact steps and some other methods in detail below. So, check out.
How do I turn off sleep mode in Windows 11?
There are different ways to turn off the sleep mode in Windows 11/ One of the easiest ways is to use the Settings app. You can simply tweak the Power & battery settings and disable the sleep mode. Besides that, Control Panel can also be used to turn off the sleep mode. Software like Microsoft PowerToys and Insomnia also help you prevent your computer from going to sleep after a period of inactivity.
How to disable Sleep Mode in Windows 11/10
If you want to disable sleep mode in Windows 11/10, you can use the following methods:
- Disable sleep mode using Windows Settings.
- Turn off sleep mode via Control Panel.
- Use Microsoft PowerToys to disable sleep mode.
- Download Insomnia to turn off sleep mode.
- Disable sleep mode using Don’t Sleep.
1] Disable sleep mode using Windows Settings
Windows Settings app lets you edit various configurations of your PC. It also lets you configure Sleep mode on your computer. Here are the simple steps to disable sleep mode in Windows 11:
- Open the Settings app.
- Go to System.
- Navigate to Power & battery.
- Click on Screen and sleep.
- Set sleep options to Never.
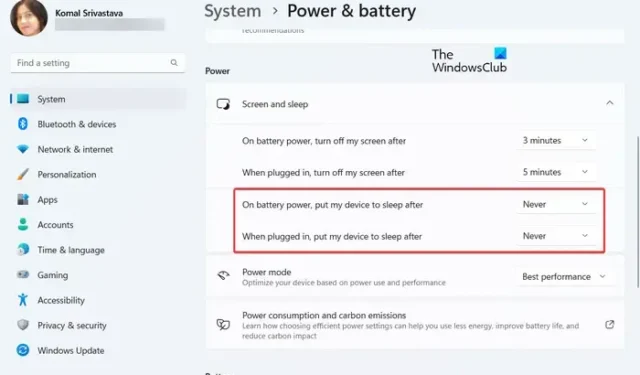
First, press Windows + I to launch the Settings app and then navigate to the System > Power & battery section.
Now, expand the Screen and sleep option by clicking on the drop arrow button.
Next, click on the drop-down button associated with the “On battery power, put my device to sleep after” option and choose the Never option. Similarly, set the “When plugged in, put my device to sleep after” option to Never.
The sleep mode will now be disabled on your Windows 11 PC.
If you are using Windows 10, here are the steps you can follow to disable the sleep mode:
- First, open the Settings app using Win+I.
- Now, click on the System category.
- Next, select the Power & sleep option from the left-side panel.
- From the right-hand side panel, under the Sleep option, click on the drop-down option present under the On battery power, PC goes to sleep after option and select Never.
- After that, select When plugged in, PC goes to sleep after drop-down option and choose Never.
2] Turn off sleep mode via Control Panel
Another method to disable sleep mode on Windows 11/10 is via Control Panel. You can follow the below steps and turn off the sleep mode on your PC using the Control Panel:
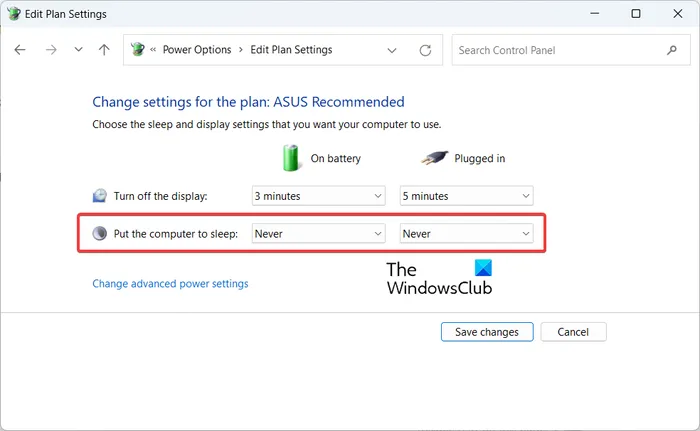
First, open the Control Panel using the Windows Search function. And then, click on the Hardware and Sound option.
Next, under the Power Options, click on the Change when the computer sleeps option.
After that, set the Put the computer to sleep option to Never for On battery and Plugged in.
3] Use Microsoft PowerToys to disable sleep mode
Microsoft PowerToys is a free and open-source project that enables Windows users to further enhance their experience. It is a set of utilities like Color Picker, File Explorer add-ons, Image Resizer, Keyboard Manager, Mouse utilities, Text Extractor, and more. One of its tools is called Awake. Using it, you can temporarily disable the sleep mode on your Windows 11/10 PC. Let us check out how.
First, you need to download and install Microsoft PowerToys on your PC.
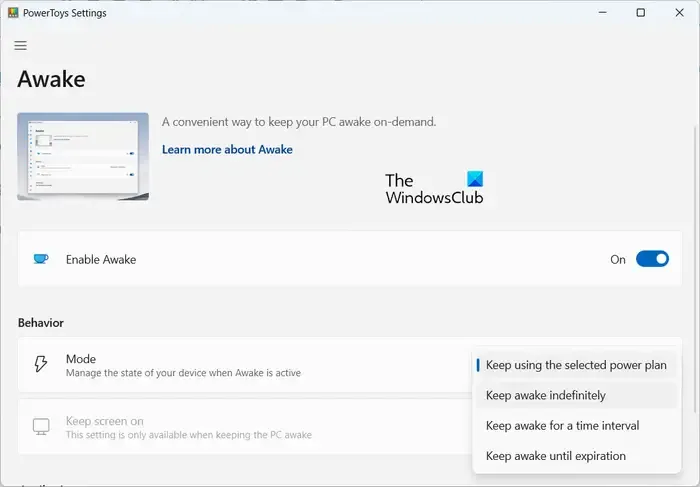
After that, launch PowerToys and click on the Awake tab from the right-side panel. In this tab, click on the Open Settings button.
Next, switch on the toggle associated with the Enable Awake option.
Now, under the Behavior section, select the Mode drop-down option and choose the Keep awake indefinitely option. Then, activate the toggle associated with the Keep screen on option.
Your PC won’t go to sleep after you set up the above configurations.
4] Download Insomnia to turn off sleep mode

You can also use a third-party application to disable the sleep mode on your Windows PC. Applications like Insomnia allow you to keep your PC awake and prevent your computer from going to sleep.
You can download Insomnia from its official download page and then extract the ZIP folder. After that, depending on your system architecture, launch the 32-bit or 64-bit app and it will prevent your computer from going to sleep until its window is opened.
5] Disable sleep mode using Don’t Sleep
The next method to disable sleep mode is to use Don’t Sleep. It is a free application that allows you to stop your system from shutting down, standby, hibernating, restarting, and sleeping. It also enables you to schedule your computer to shut down at a specific time. You also get various other features in this software like configuring a timer to prevent system standby, using the Please Sleep feature, etc.
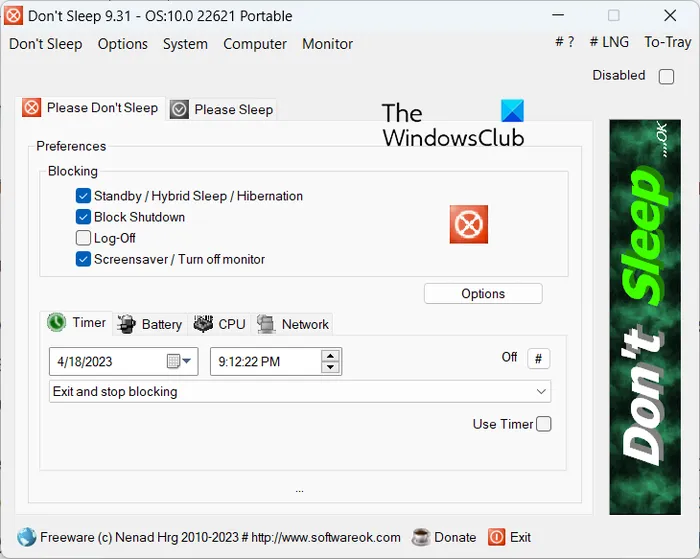
To use it, you can download and install it from the official website. Or, you can use its portable version and run it whenever required. Launch Don’t Sleep and move to the Please Don’t Sleep tab.
Now, under the Blocking > Preferences section, make sure to tick the Standby/Hybrid Sleep/ Hibernation checkbox. After that, if you want to, move to the Timer tab and you can specify the timing when you want to exit the app and stop blocking sleep and other modes. You can also set up preferences for battery options, CPU load options, and network load options.
On the other hand, inside the Please Sleep tab, you can also specify when you want your PC to enter sleep mode. Additionally, you can also specify when should the monitor go off and configure other power options.


Leave a Reply