How to Change Boot Menu Display Order in Windows

There are many users who love using their devices with a dual-boot configuration. When you dual-boot your device, your device always gets booted into the first entry unless you manually choose the other one. In this article, we have come up with a solution using which you can custom change the boot menu display order on your PC.
This is a very essential task if you use one boot entry for some days and then the second boot entry for the rest of a month. Say for example you are using both Windows as well as Linux (Ubuntu) on your PC. With the steps discussed in this blog post, you can easily switch between Windows and Ubuntu right from the startup screen on your computer.
Please enable JavaScript
When does one require changing the Boot Menu Display Order?
If you use multiple Operating systems like Windows 11, 10, Linux, or any other OS, the Windows Boot Manager stores all these operating systems as different boot entries. Whenever you try booting into your computer, the default one launches automatically unless you choose otherwise.
Setting up the boot menu display order lets you use the operating system that you use very often. By listing out different boot orders, you can force a particular OS to start automatically. The reason might vary from one person to another. Let’s learn the steps to change the operating system order in the boot manager menu on Windows or Linux PCs.
How to Fix Ubuntu Can’t Open the Terminal Issue
Changing Boot Menu Display Order in Windows
If you do want to change the boot menu display order on your Windows 11 or 10 PC, follow these easy steps –
- Press Windows + X to launch the Power Menu.
- Select Terminal (Admin) and when the UAC window prompts, hit Yes.
- Press Ctrl + Shift + 2 to launch Command Prompt in the terminal.
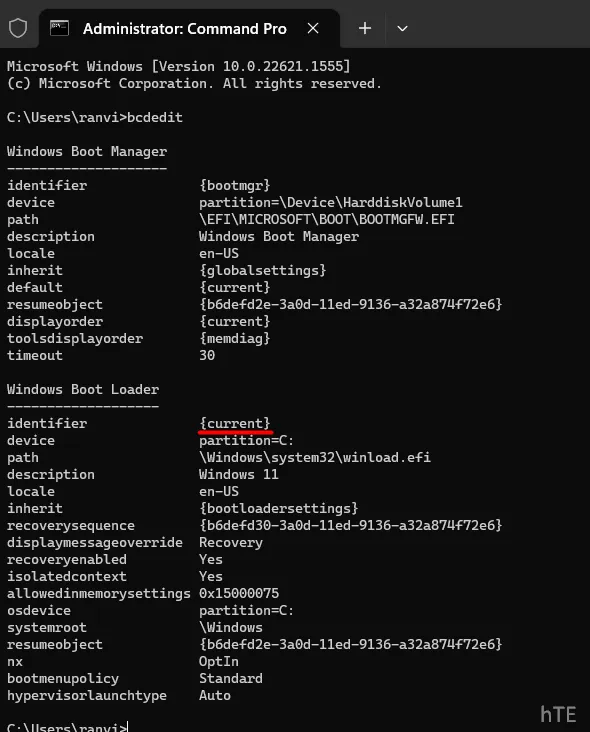
- On the elevated console, type the following, and press Enter –
bcdedit
- Scroll down to Windows Boot Loader and note down what’s written next to the identifier. See the Snapshot below.

- Keep scrolling down and note down other identifiers as well which are displayed further below.
- Now that you know each one of the identifiers available inside the Boot Menu, execute the below command to interchange the boot display order –
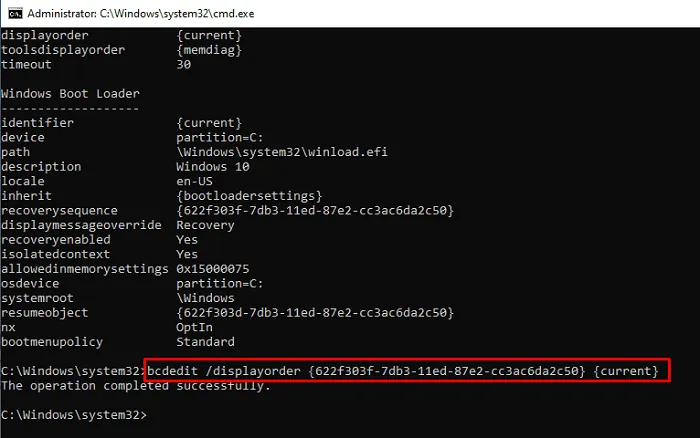
bcdedit /displayorder {IDENTIFIER-FIRST} {IDENTIFIER-SECOND}
Make sure to replace the Identifier details in the above command. An example of this is provided below –
bcdedit /displayorder {622f303d-7db3-11ed-87e2-cc3ac6da2c50} {current}

- In case you want to specify the default boot entry on your computer, copy/paste the below code and press Enter.
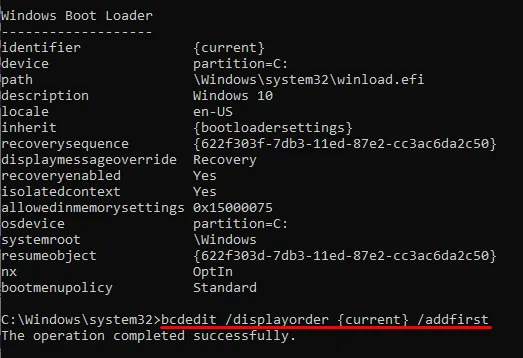
bcdedit /displayorder {IDENTIFIER} /addfirst
Make sure to replace the IDENTIFIER in brackets with your own identifier information. To better understand this, take for example you running the following code on the CMD.
bcdedit /displayorder {current} /addfirst

The above code will make the “current” identifier (the current OS installation) your default boot entry i.e. the first boot entry inside the Boot Manager.
Close the terminal and other tabs or windows running in the background, and restart your PC. When your device reboots, this will by default load into the first boot entry.
Can I run the above chain of commands on Windows PowerShell instead?
Though it is possible to change the boot display order in Windows using Windows PowerShell, we don’t suggest doing so. This is because there is a possibility of these codes running vaguely and thus might corrupt your Windows Operating system.
So, whenever you are required doing any changes with the Boot Data or Manager, ensure running the codes directly over the Command Prompt having the admin privileges.
Fix – Ubuntu freezing in Virtual Machine


Leave a Reply